
Start with FXON
This article was :
Published in 2024.05.15
Updated in 2025.09.24
At FXON, customers can submit the required verification documents using various methods, and eKYC is one of these methods.
In eKYC, use your smartphone to take photos of certification documents. After tapping the camera button, photos of certifications are automatically sent to us for verification.
Please note that corporate verification documents must be submitted through a different method. You can view the available submission methods below.
1. Log in to Client Portal
Click the link below to log in to the Client Portal. If necessary, enter your email address and password to log in.
Tap the link below to log in to the Client Portal. If necessary, enter your email address and password to log in.
If you have not yet registered with FXON, please refer to the following page and complete registration first.
2. Identity Verification page
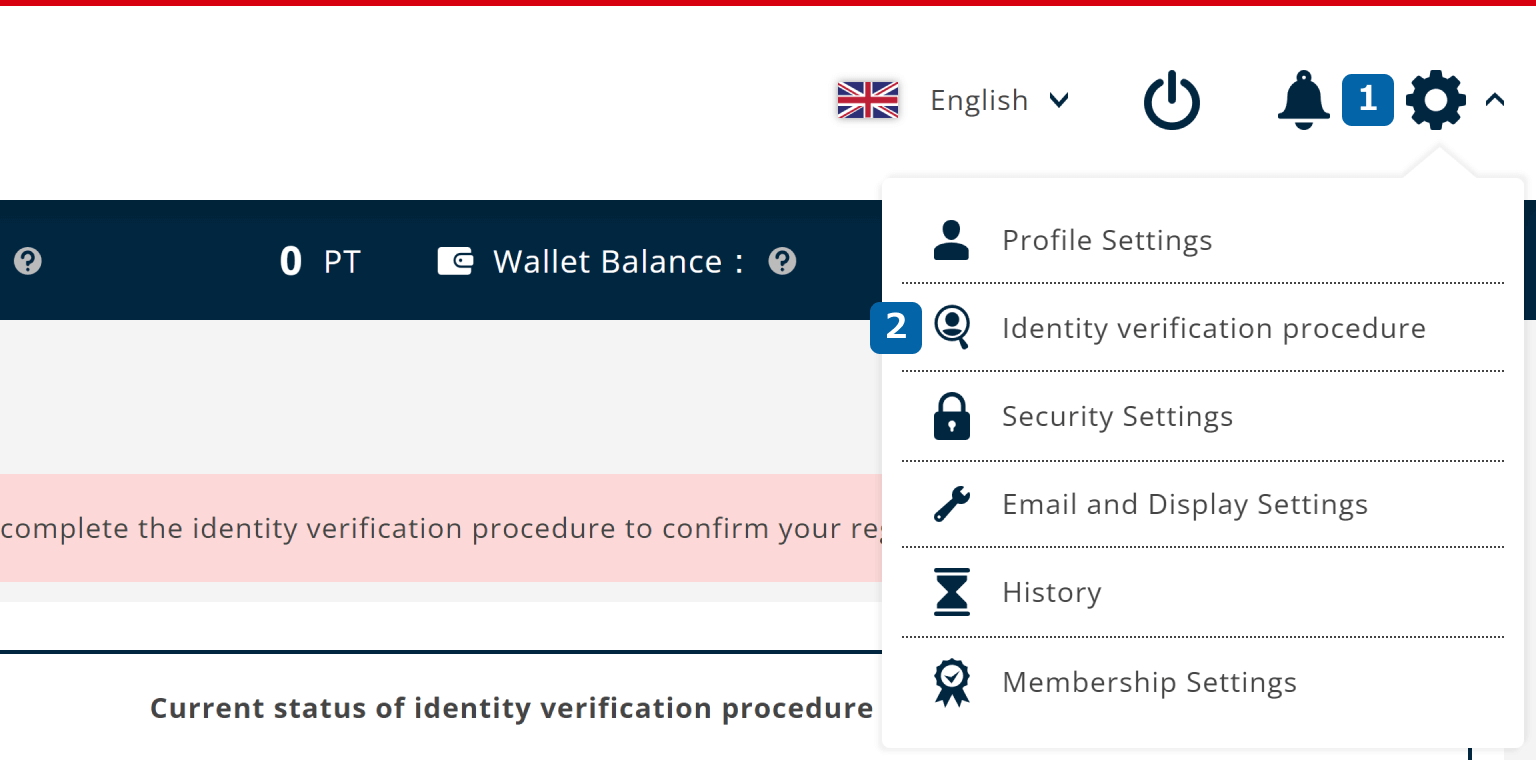
After logging in to the Client Portal, click ① Settings (cog icon) > ② Identity Verification at the top right of the page.
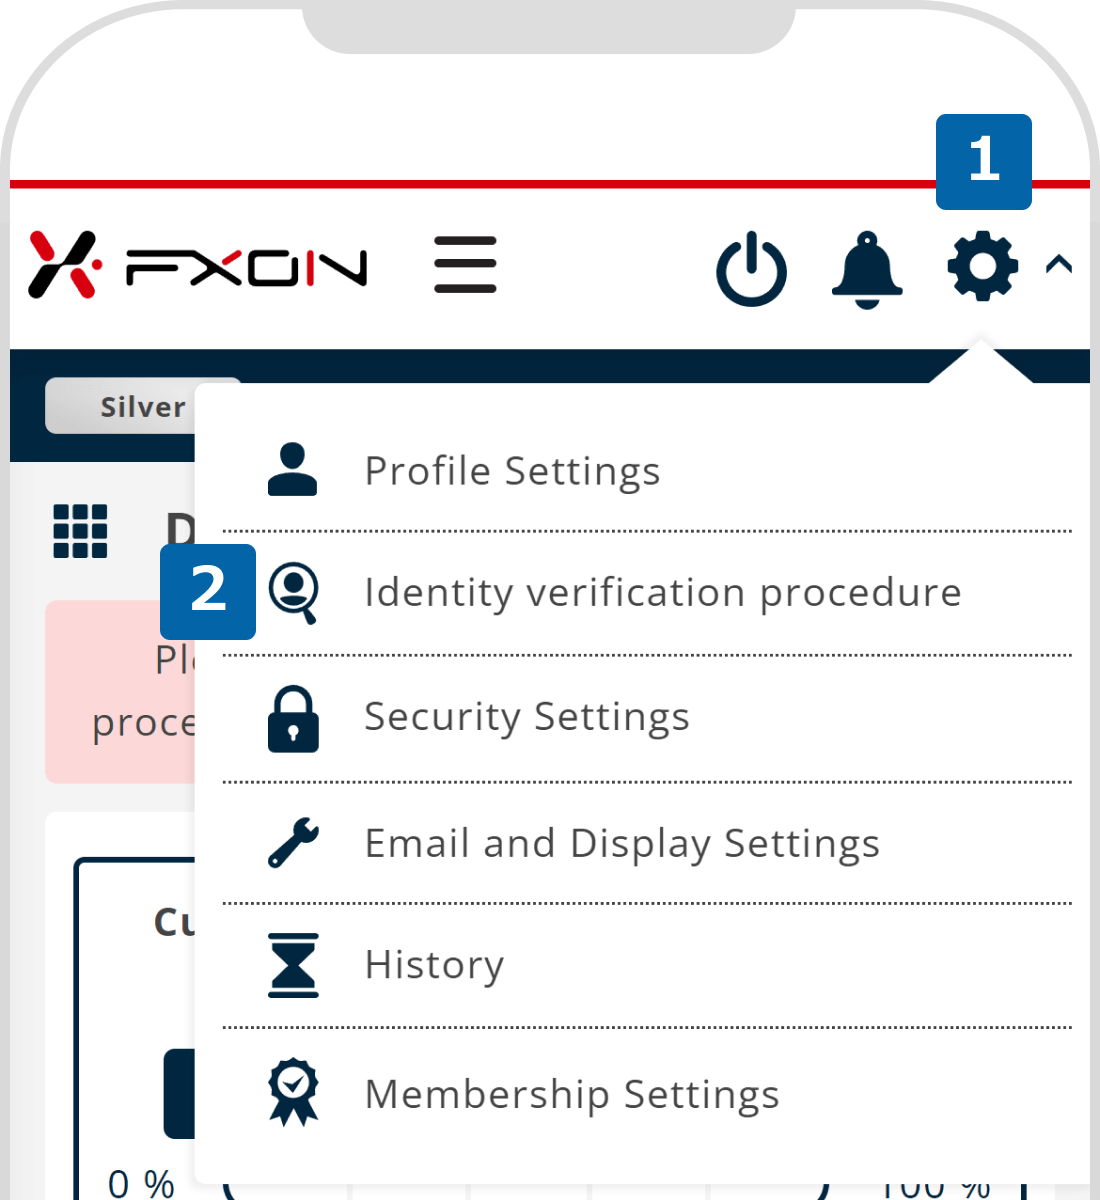
After logging in to the Client Portal, tap ① Settings (cog icon) > ② Identity Verification at the top right of the page.
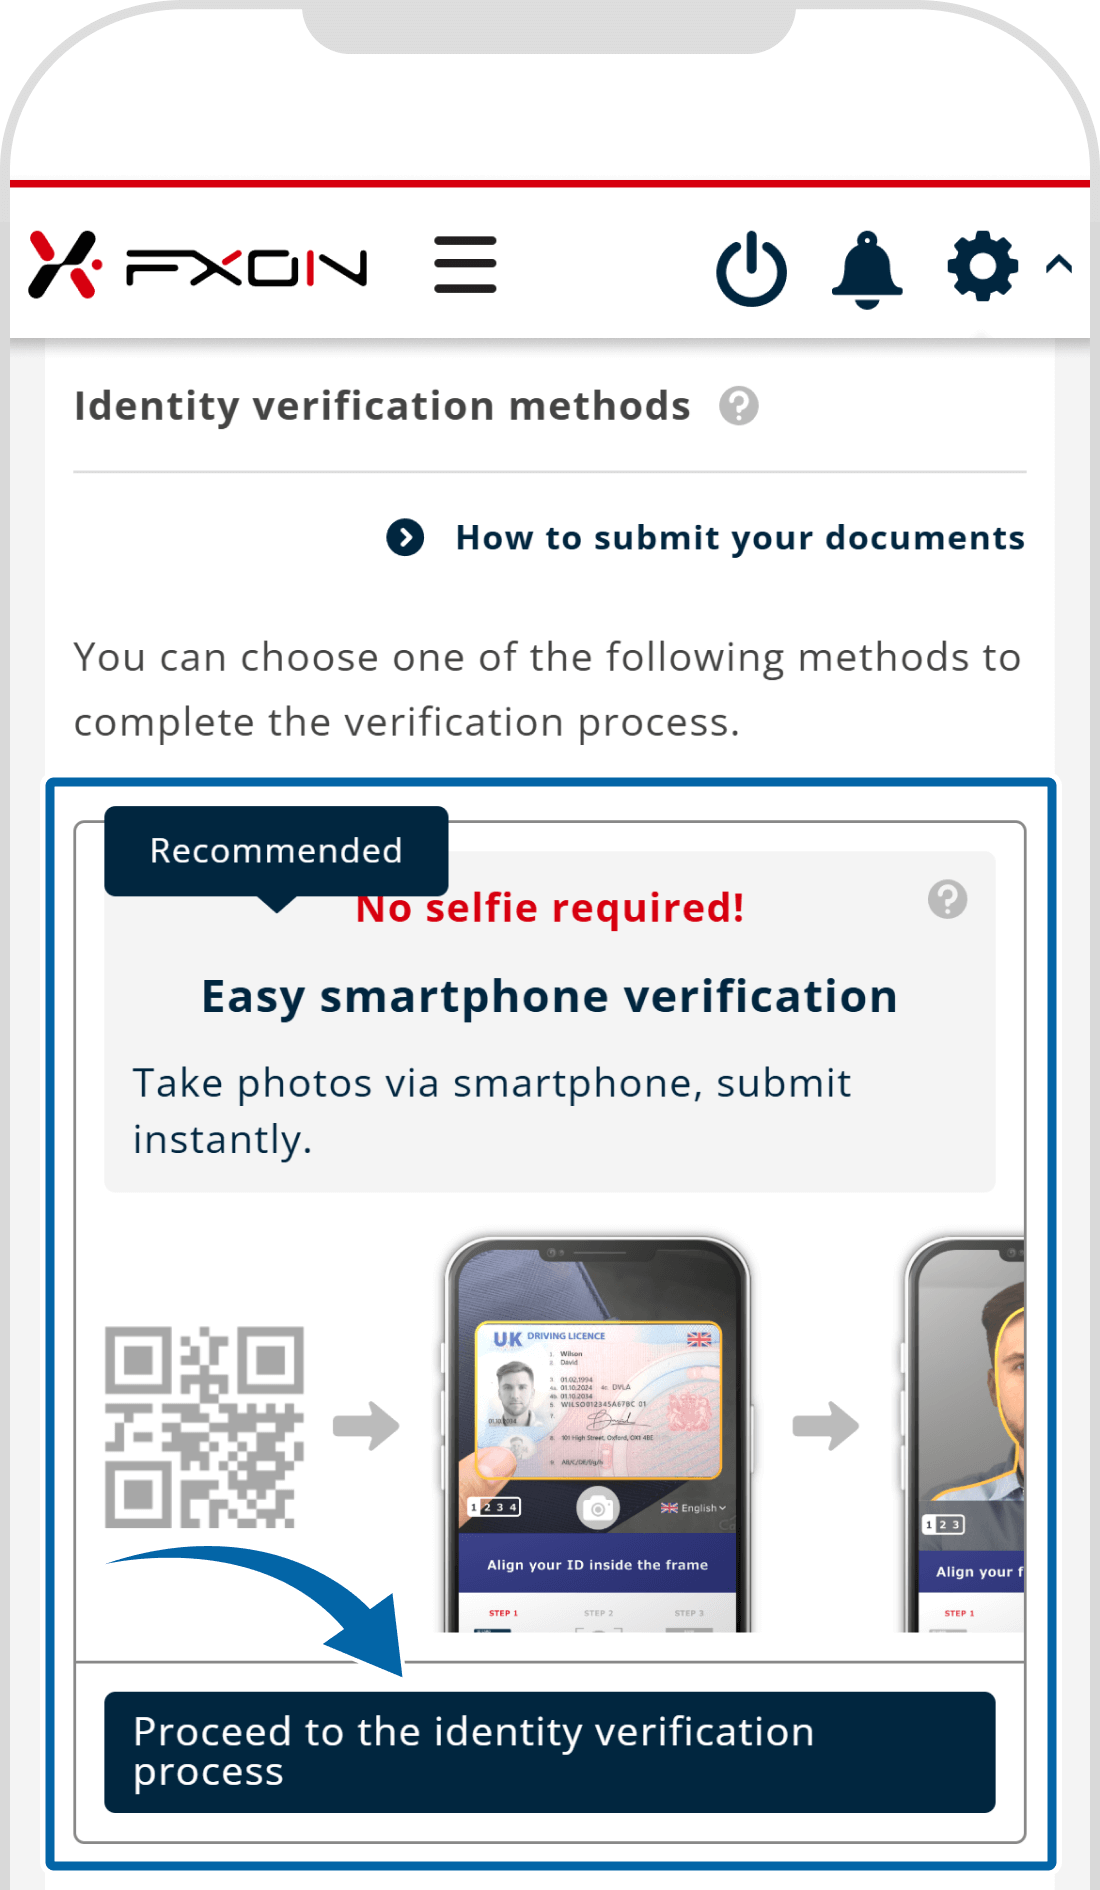
3. Select the eKYC Method
Click "Proceed to the identity verification process" within the "Easy smartphone verification" section.
Tap "Proceed to the identity verification process" within the "Easy smartphone verification" section.

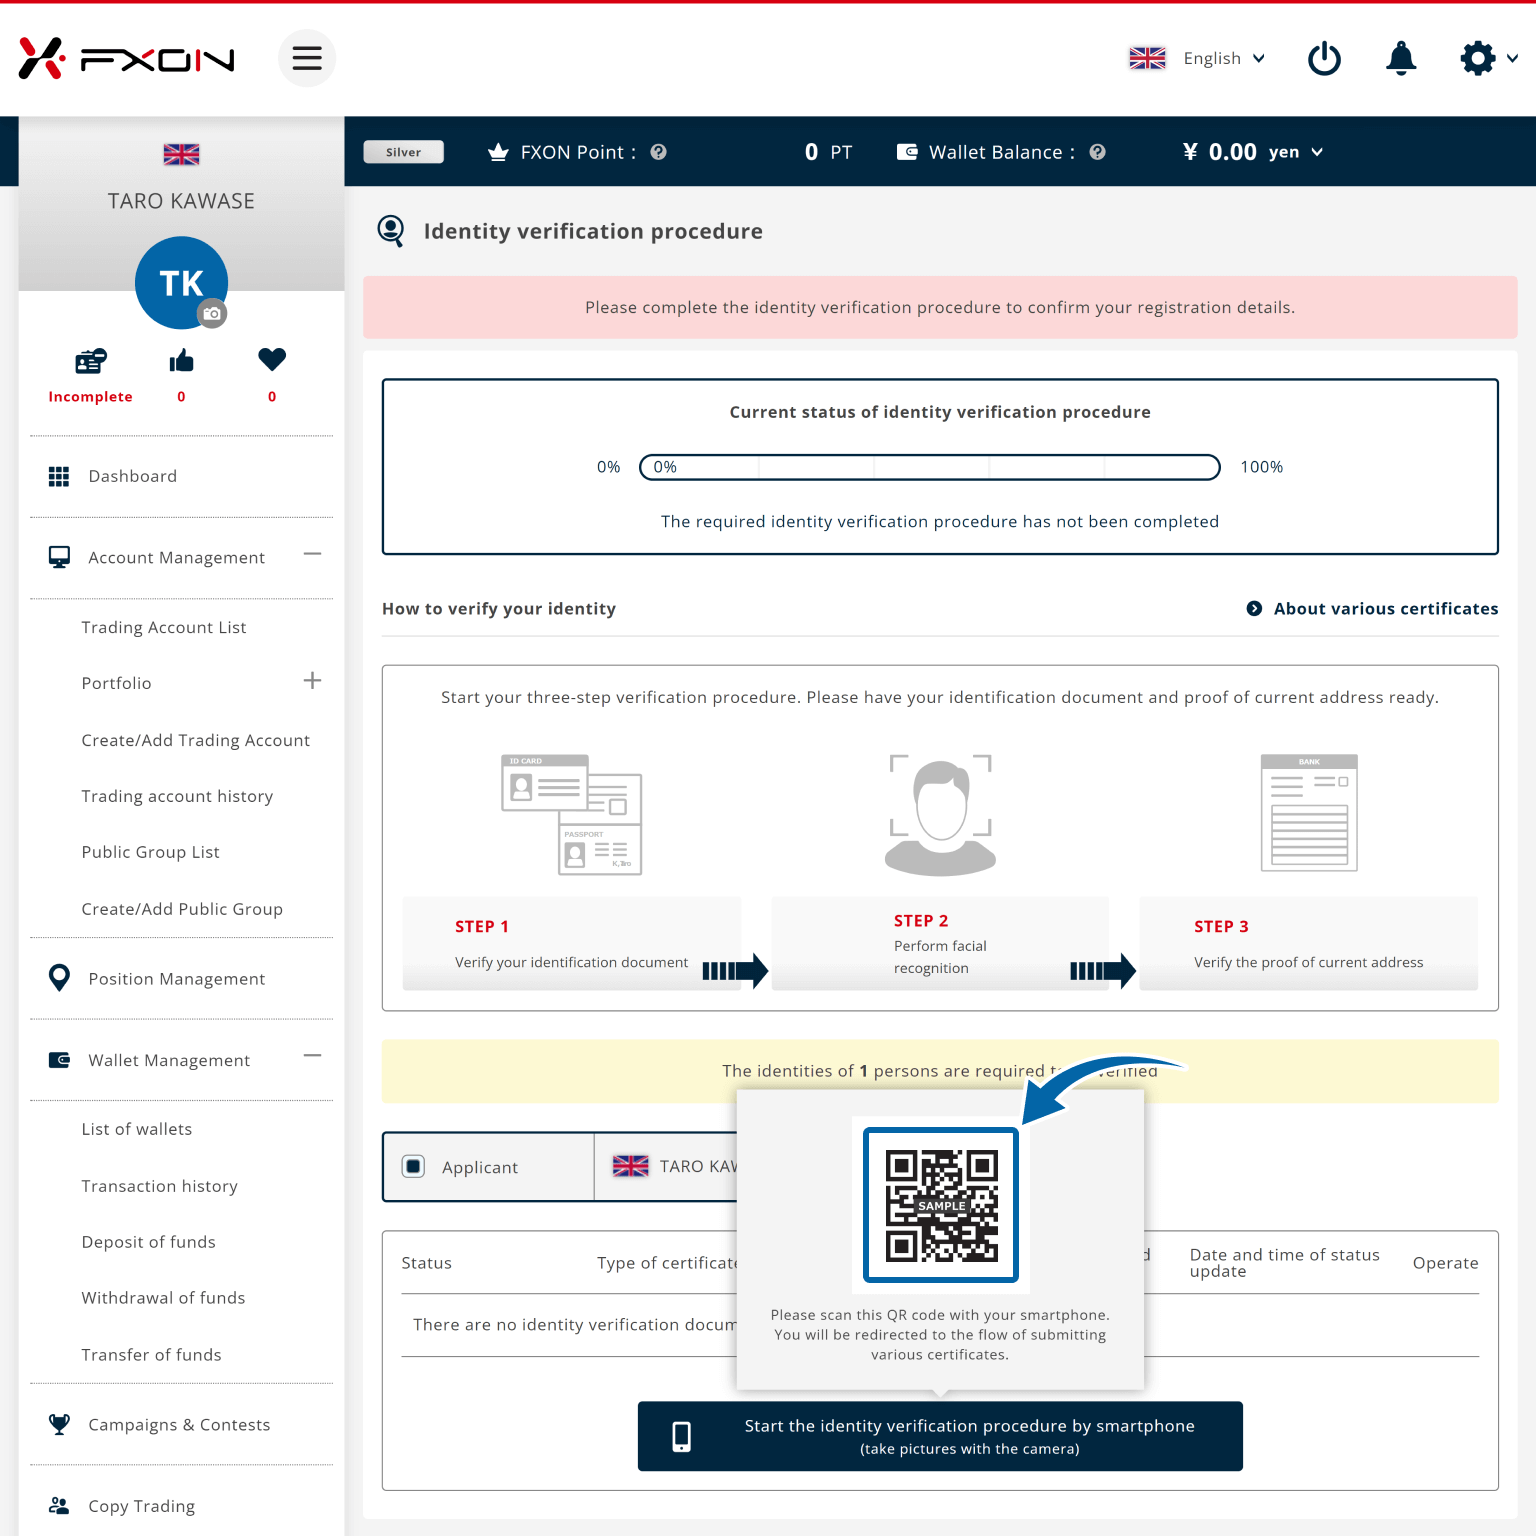
4. Begin identity verification using your smartphone.
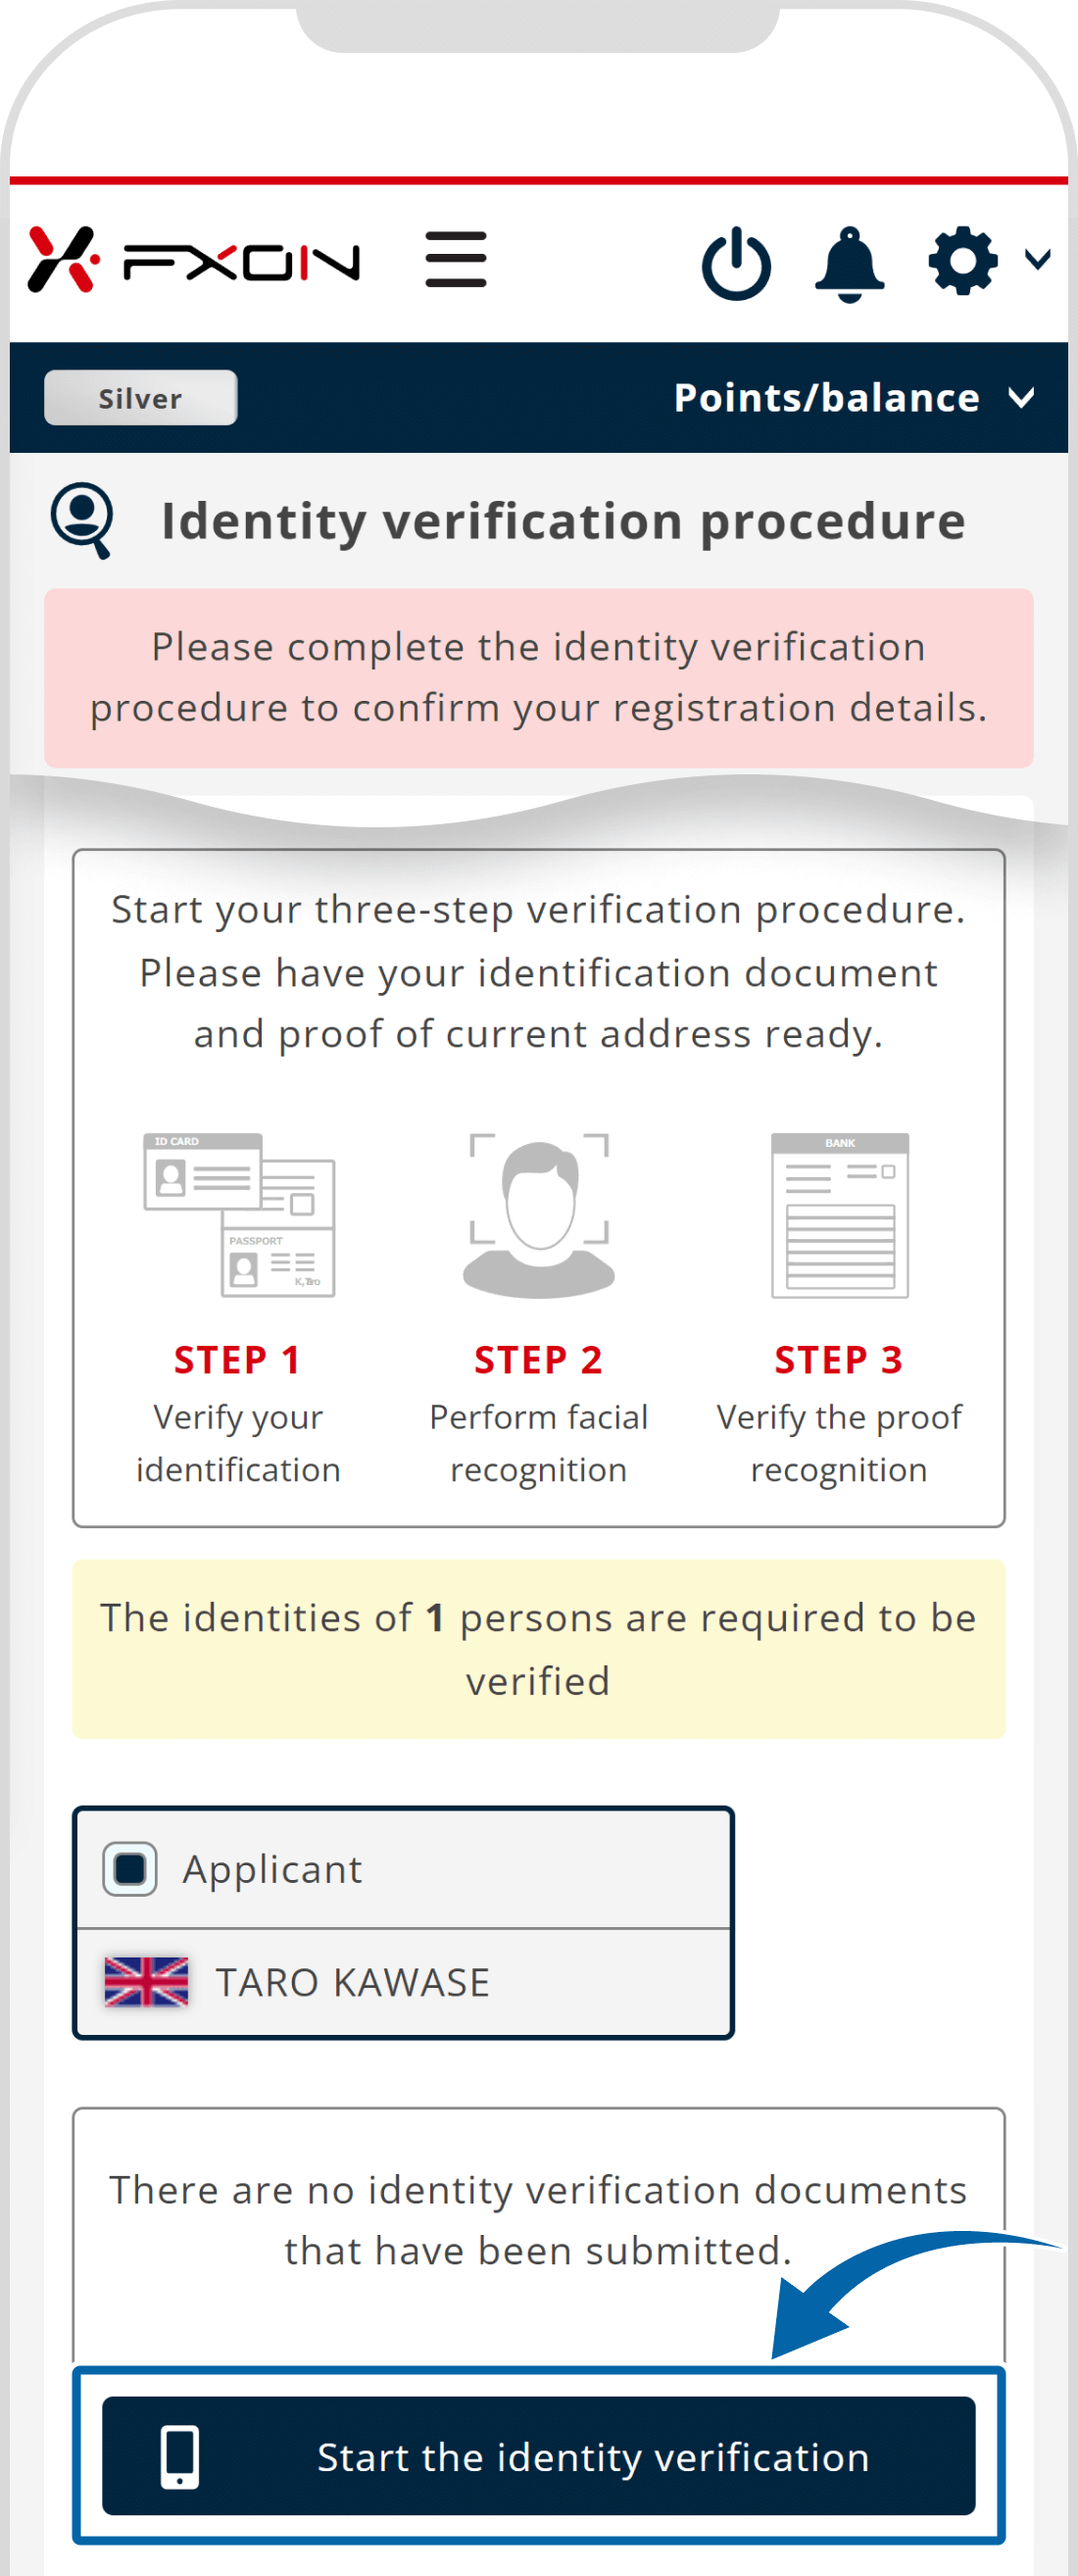
Please check the current status of your identity verification process. Have your ID and proof of address ready, then click "Start the identity verification procedure by smartphone." A QR code will be displayed — please scan it with your smartphone to proceed.
Please check the current status of your identity verification process. Have your ID and proof of address ready, then tap "tart the identity verification."
Please refer to the information below for the types of identification documents that can be used for identity verification via eKYC.
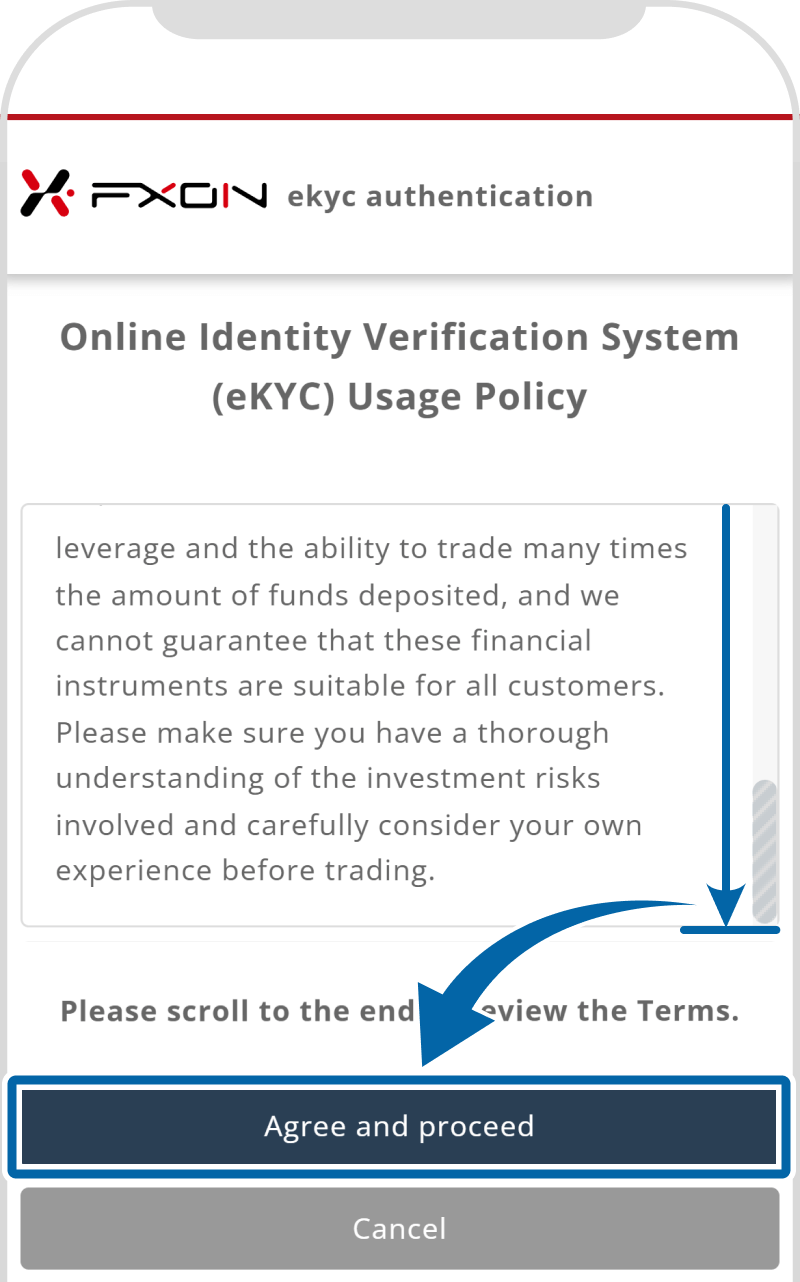
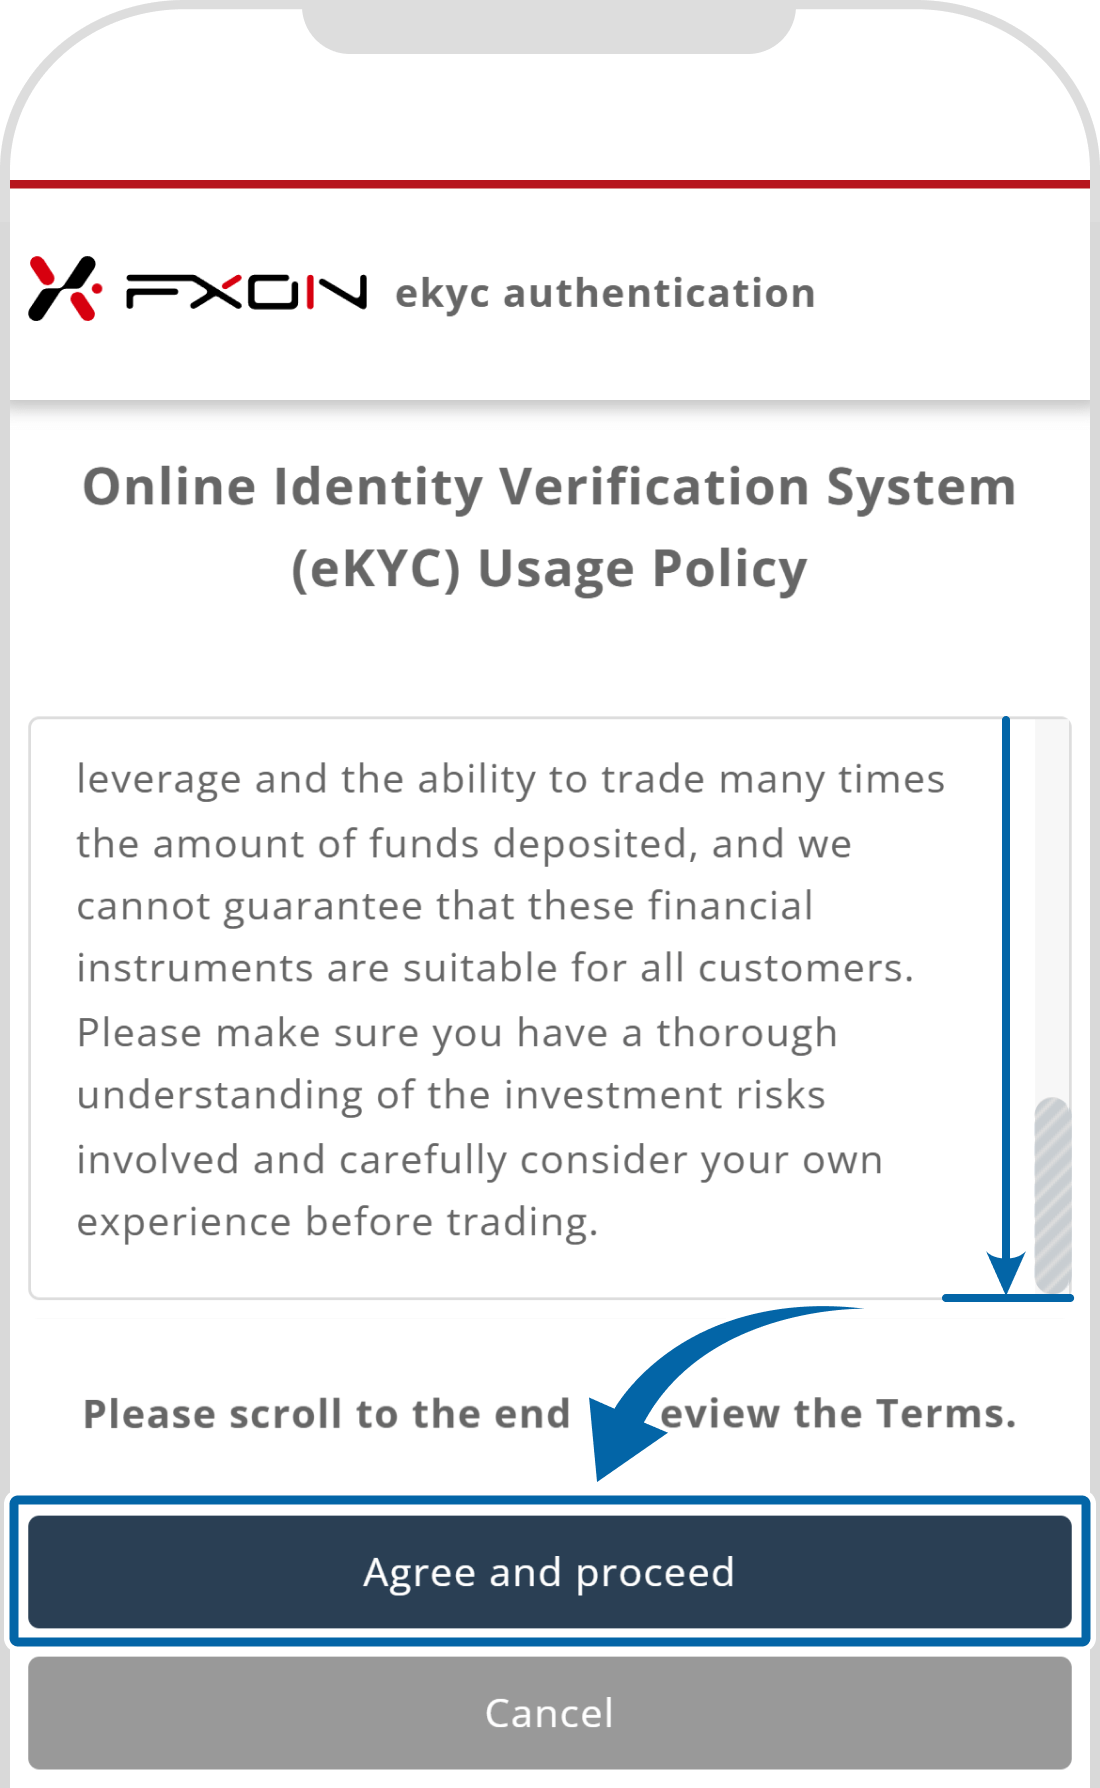
5. Review and Agree to the Terms
Review the terms, and if you agree, tap "Agree and proceed."
Please note that the "Agree and proceed" button will only become active after you scroll to the bottom of the terms.
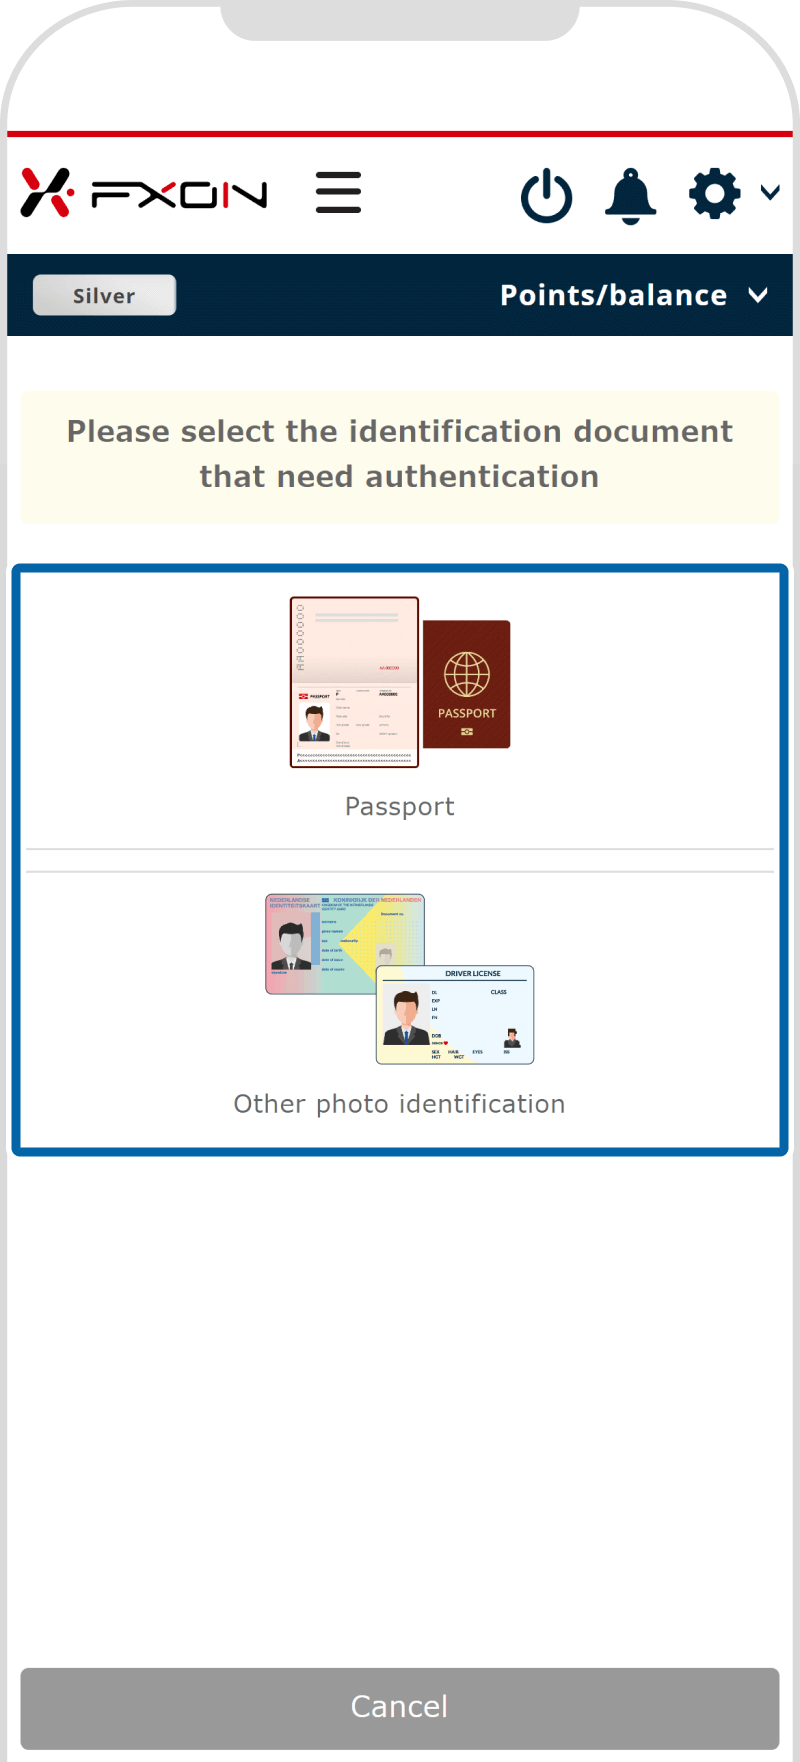
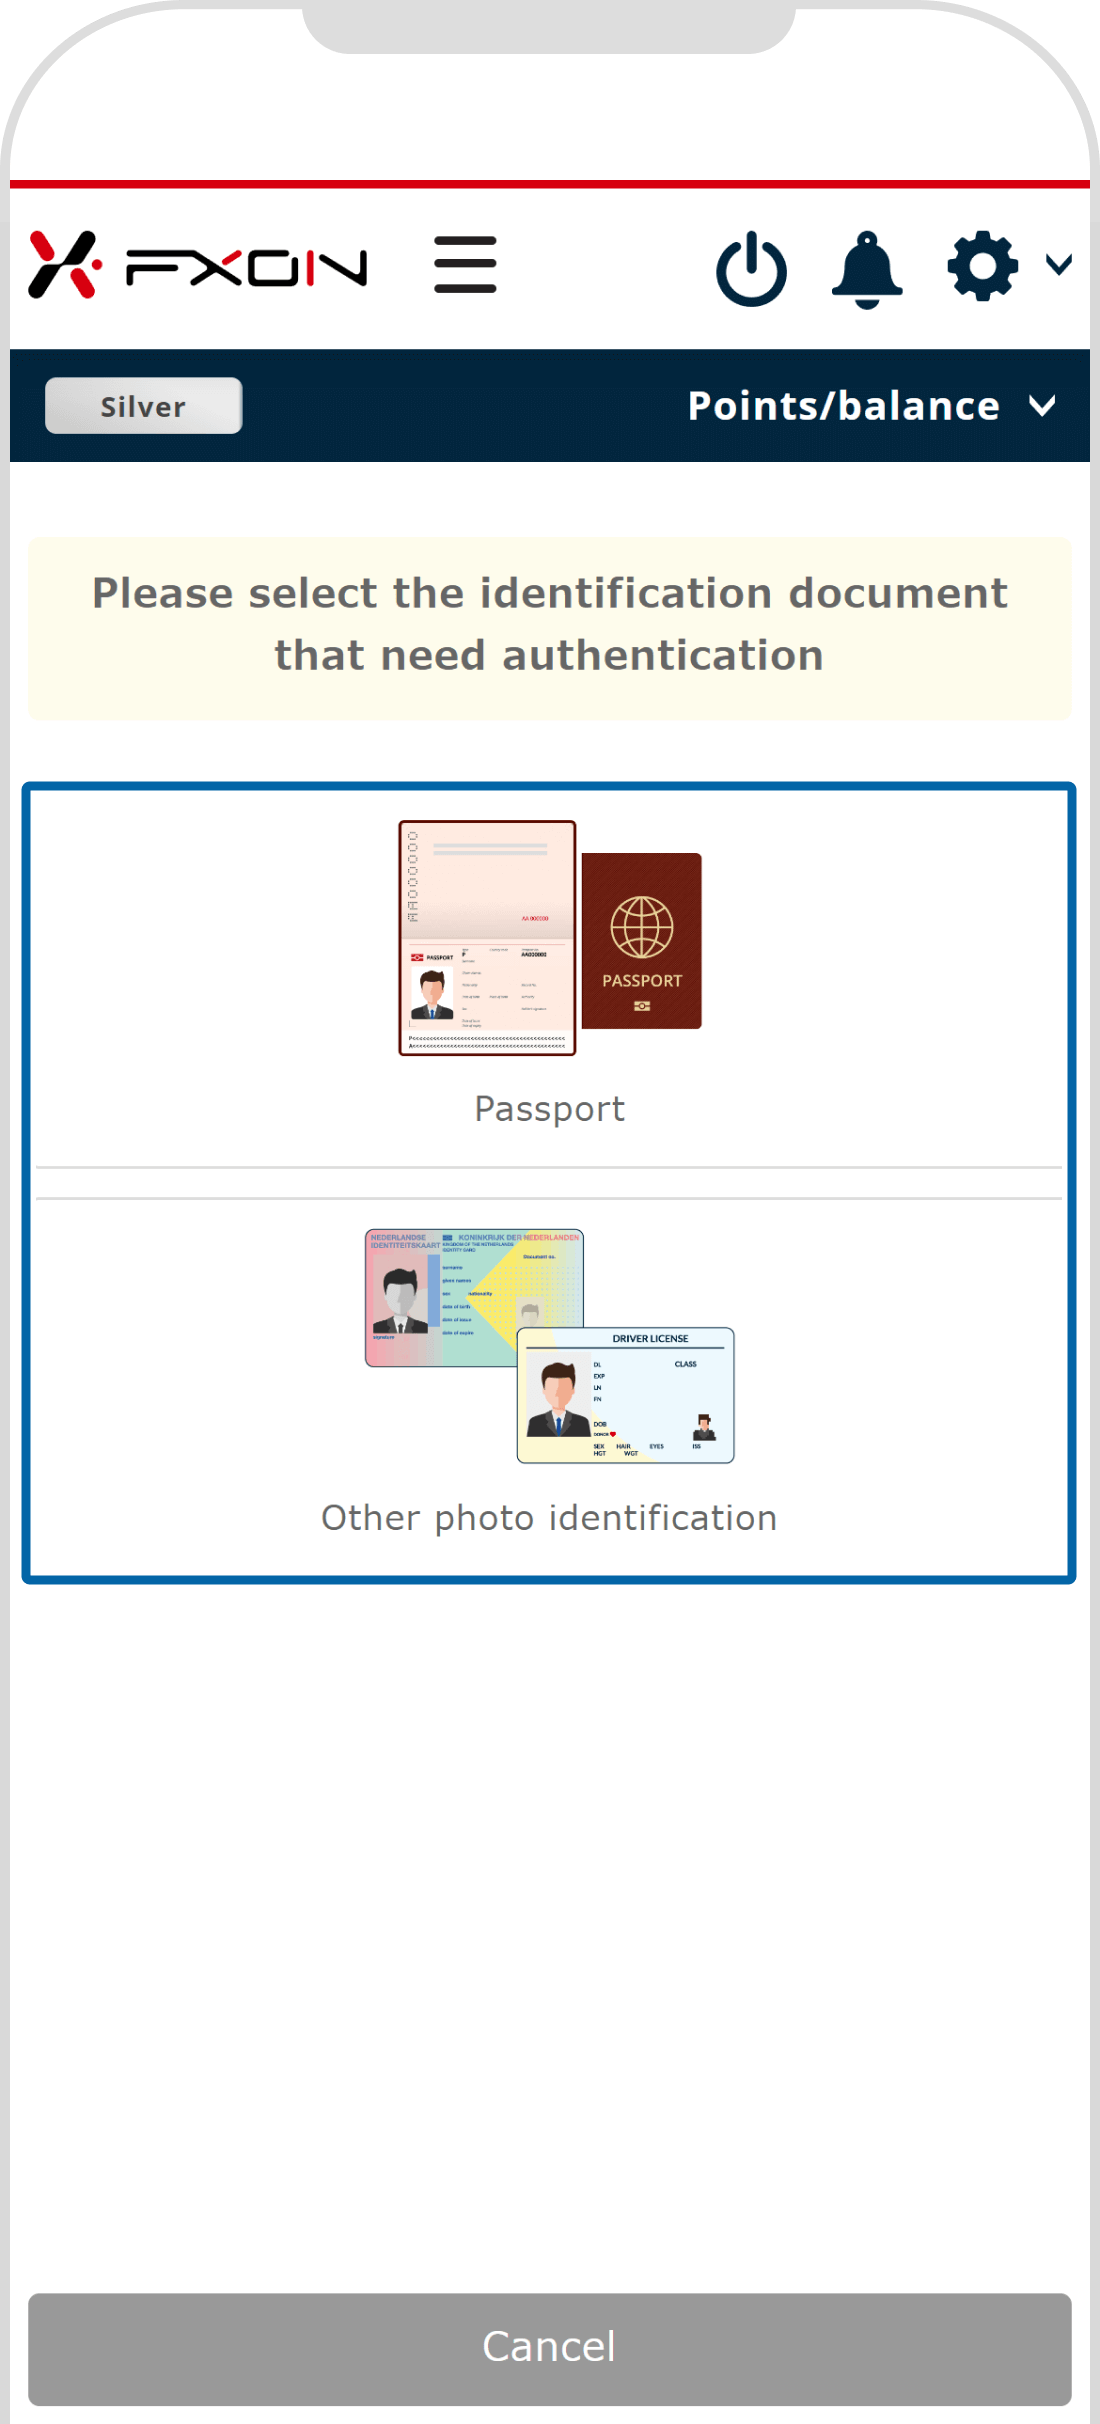
6. Choose a document
When the message "Please select the identification document that need authentication" appears on your smartphone, tap your document type.
For Japanese users

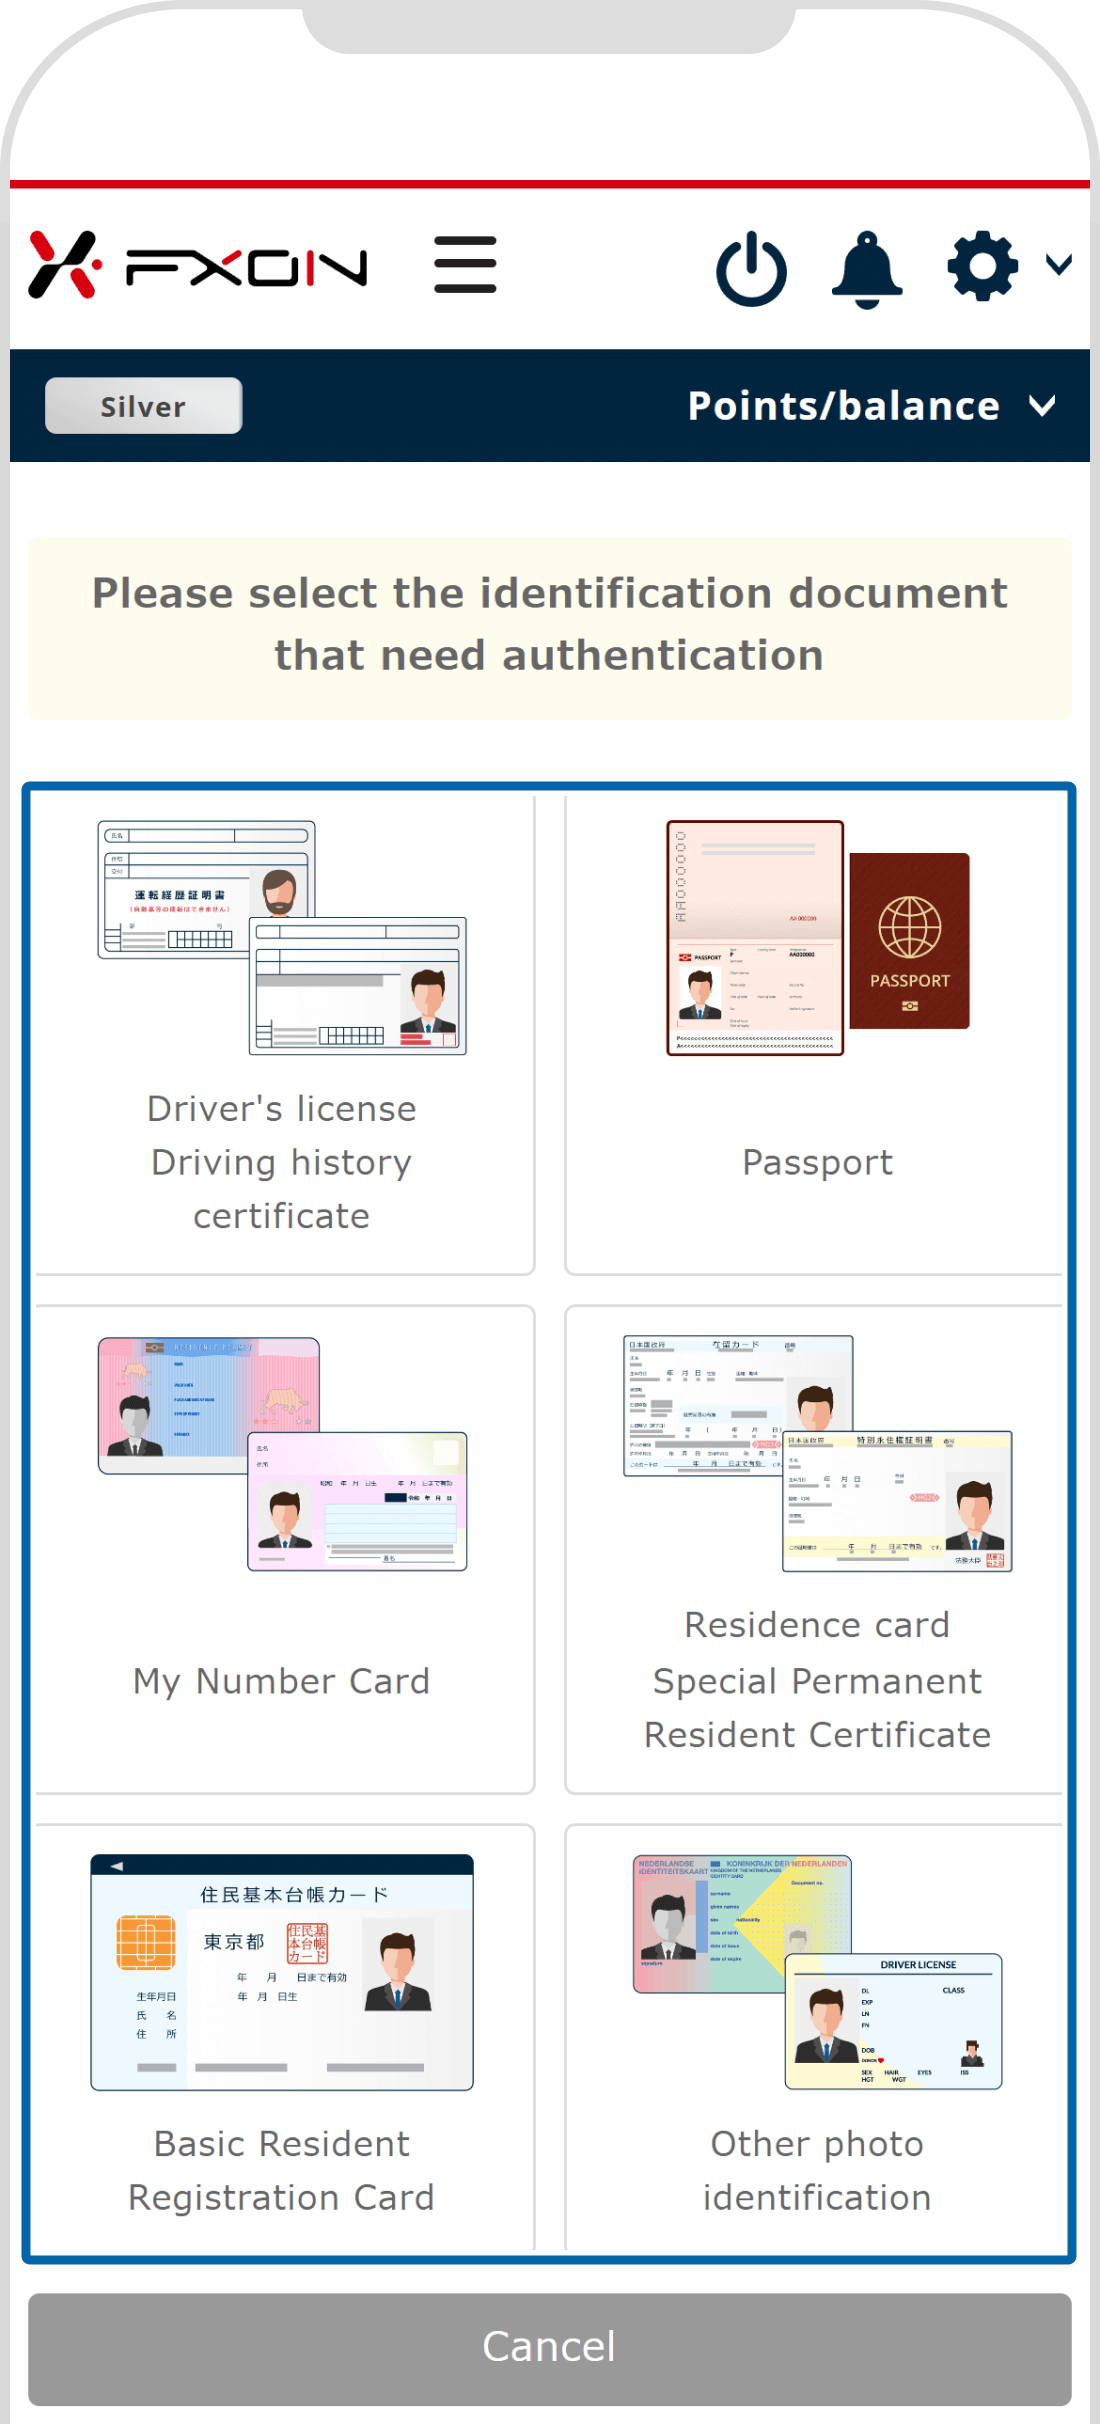
For non-Japanese users
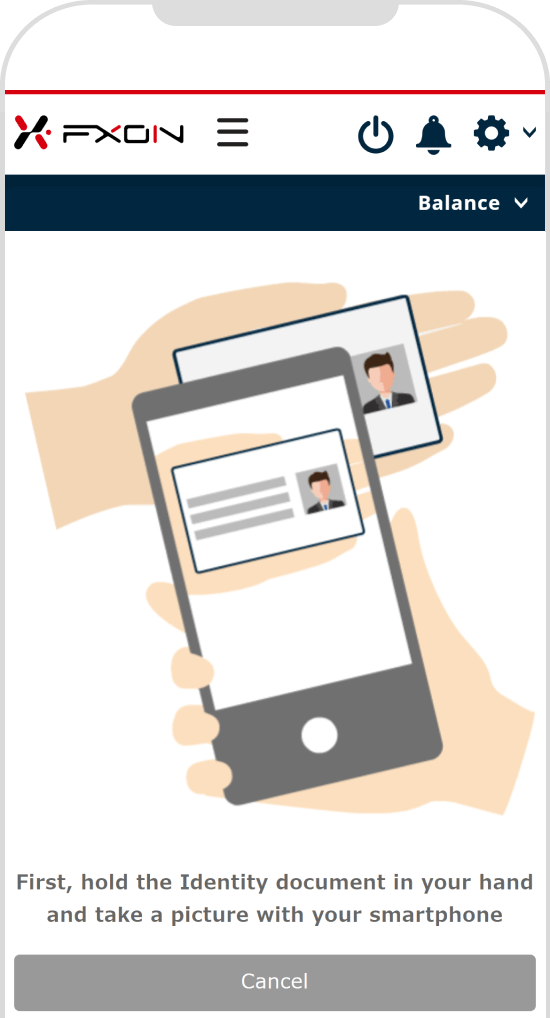
7. Document verification [Step (i)]
Hold your ID in your hand and take a photo using your smartphone. Please wait a moment while the system connects to the server and the screen transitions.

STEP 1
Taken with smartphone

STEP 2
Connecting to server

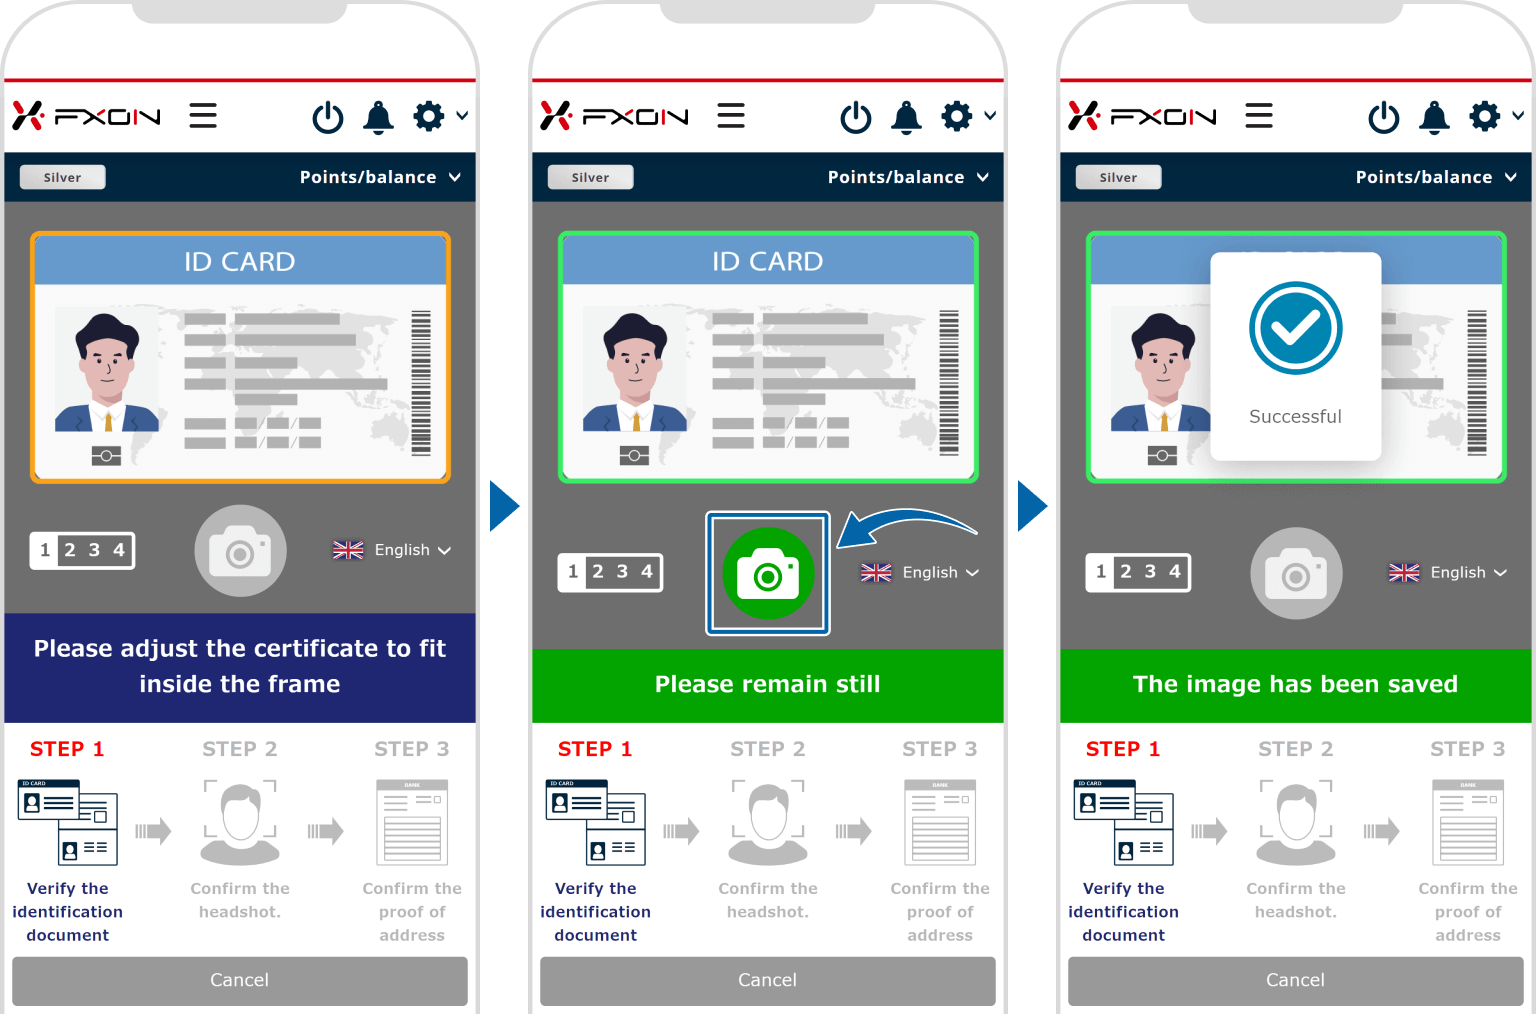
8. Document verification [Step (ii)]
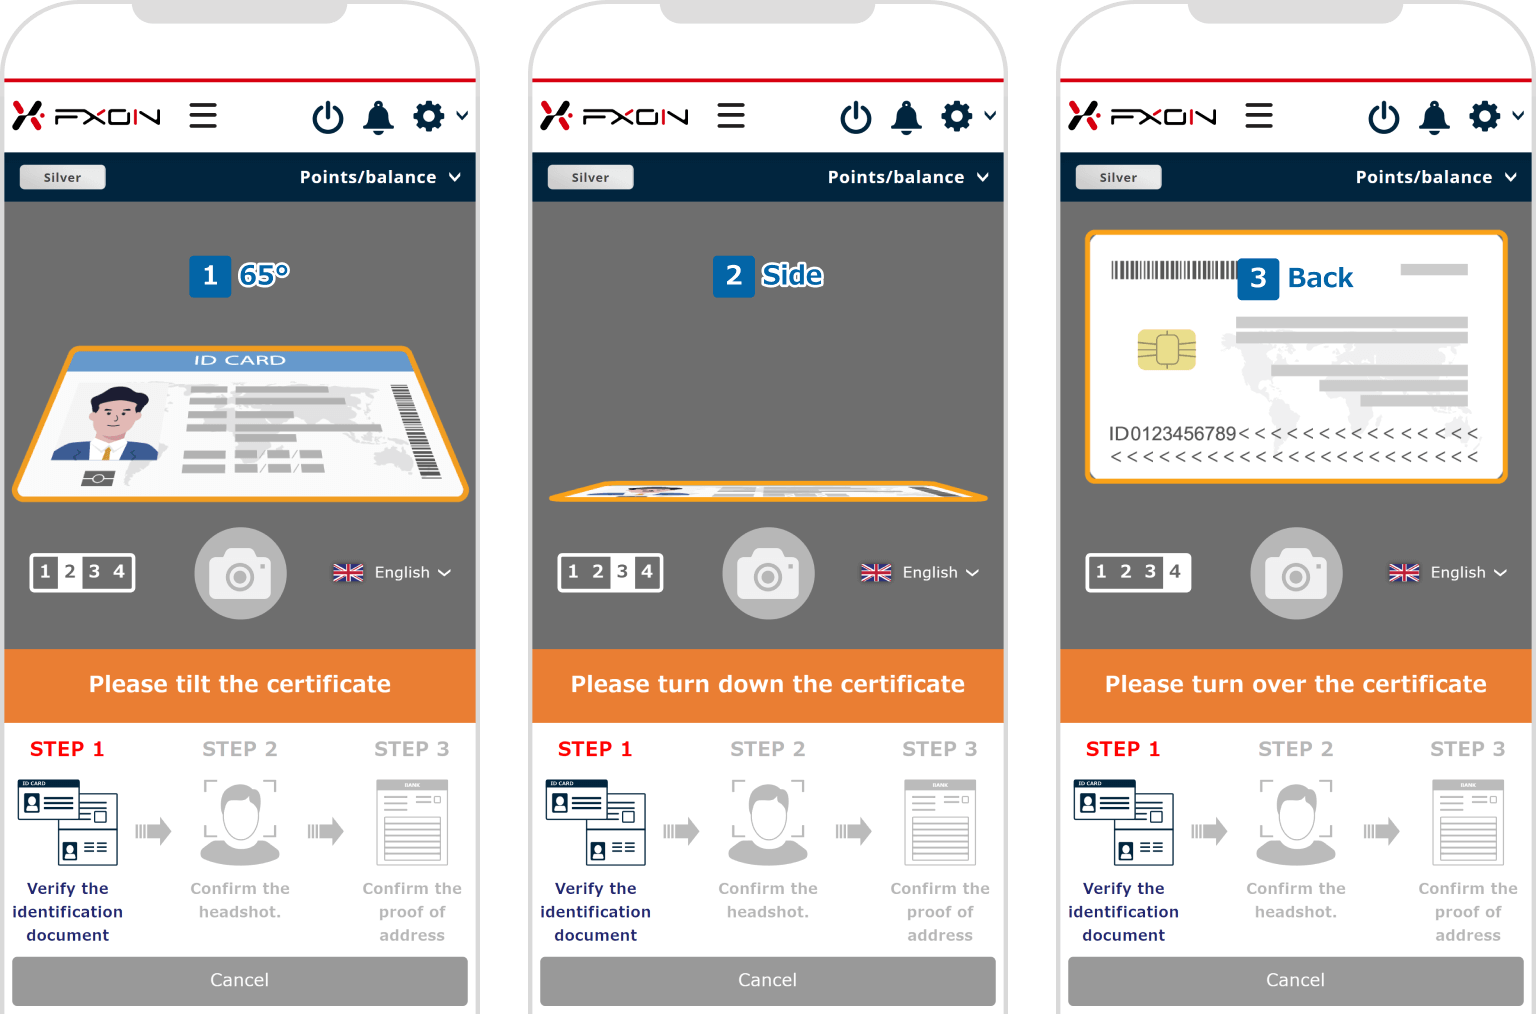
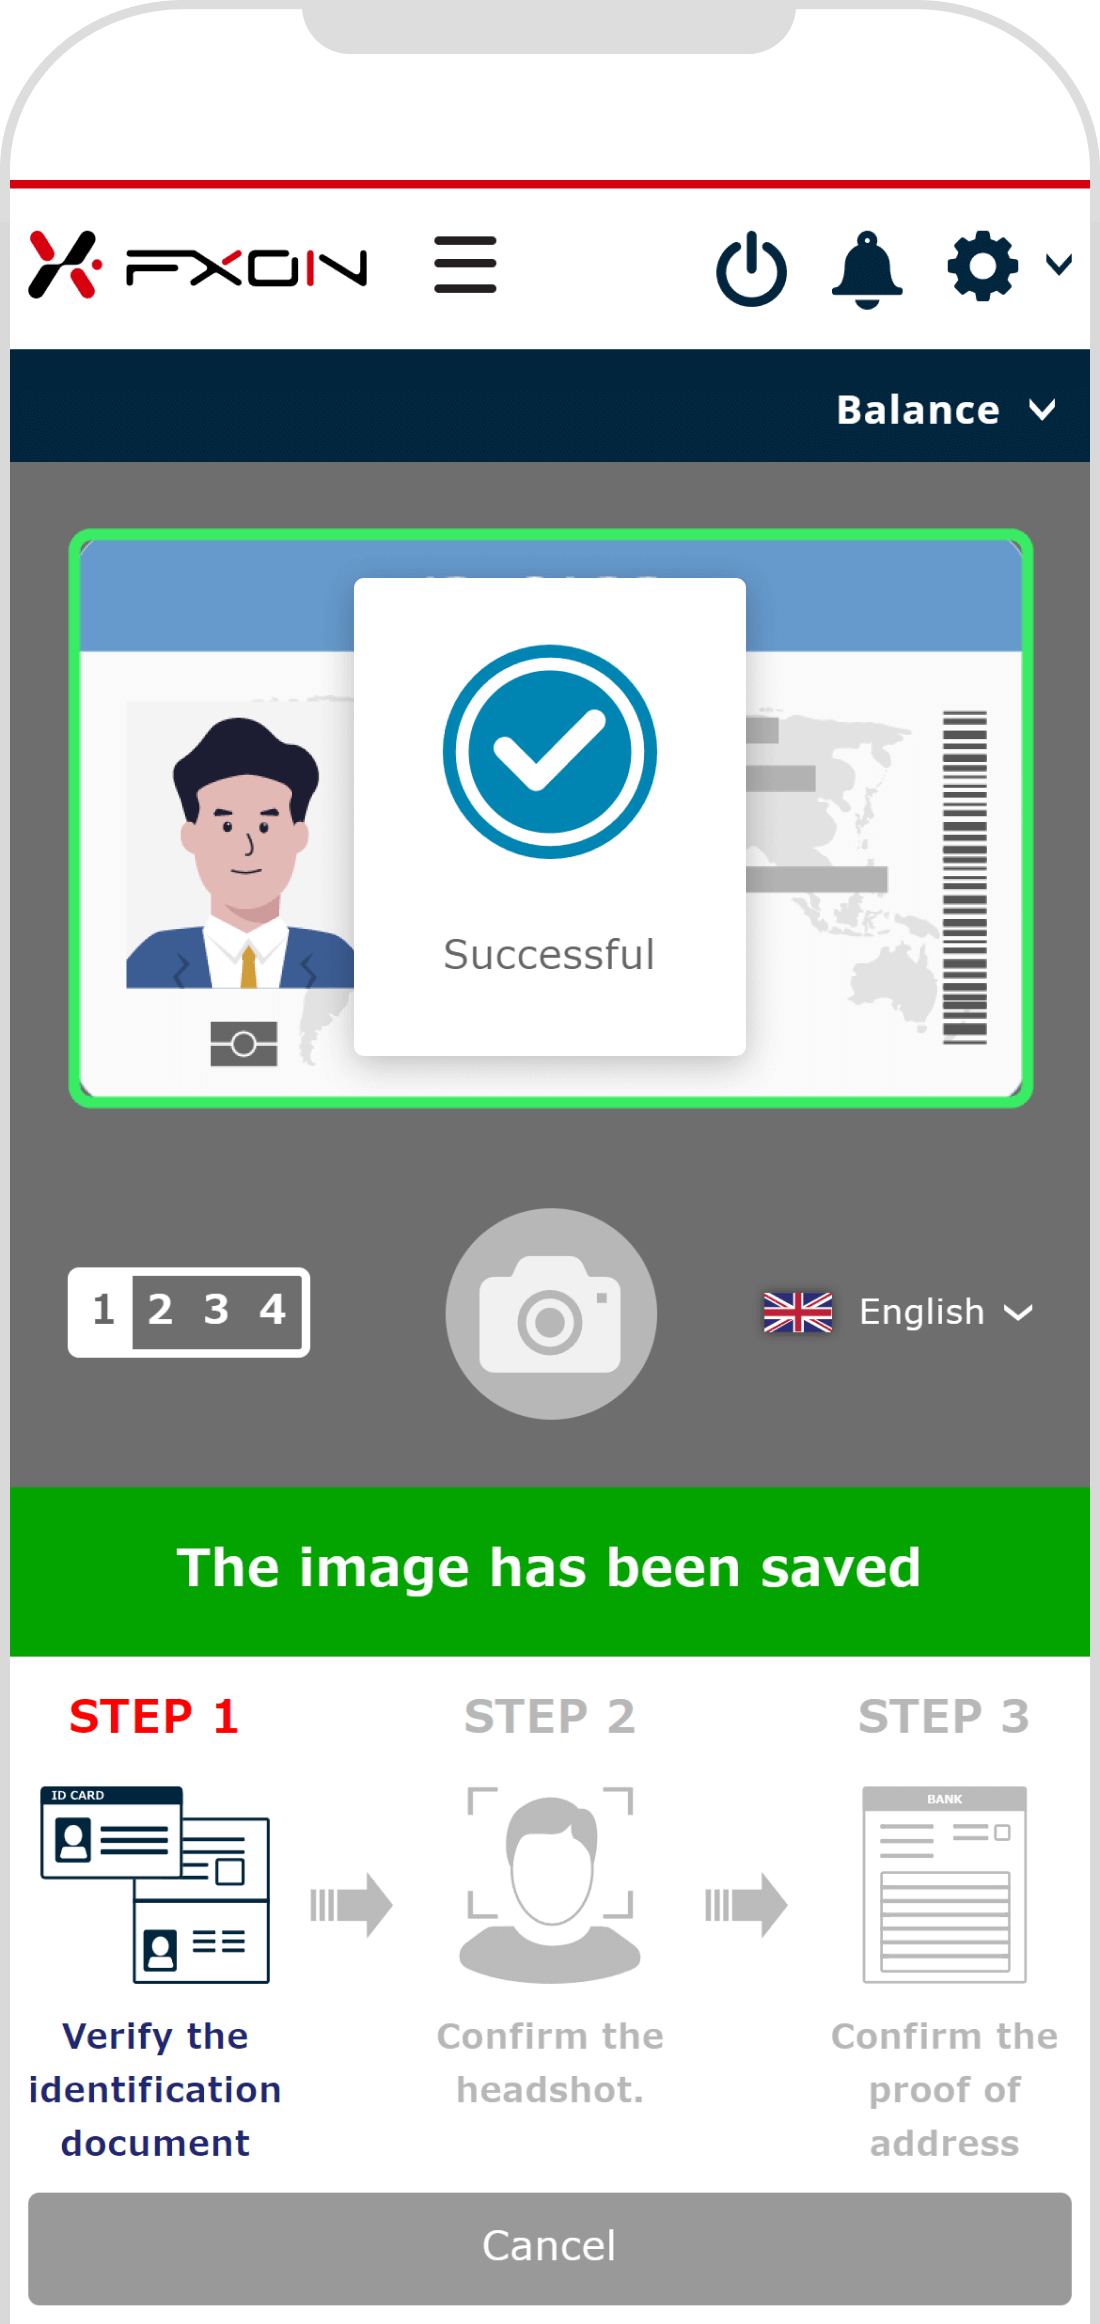
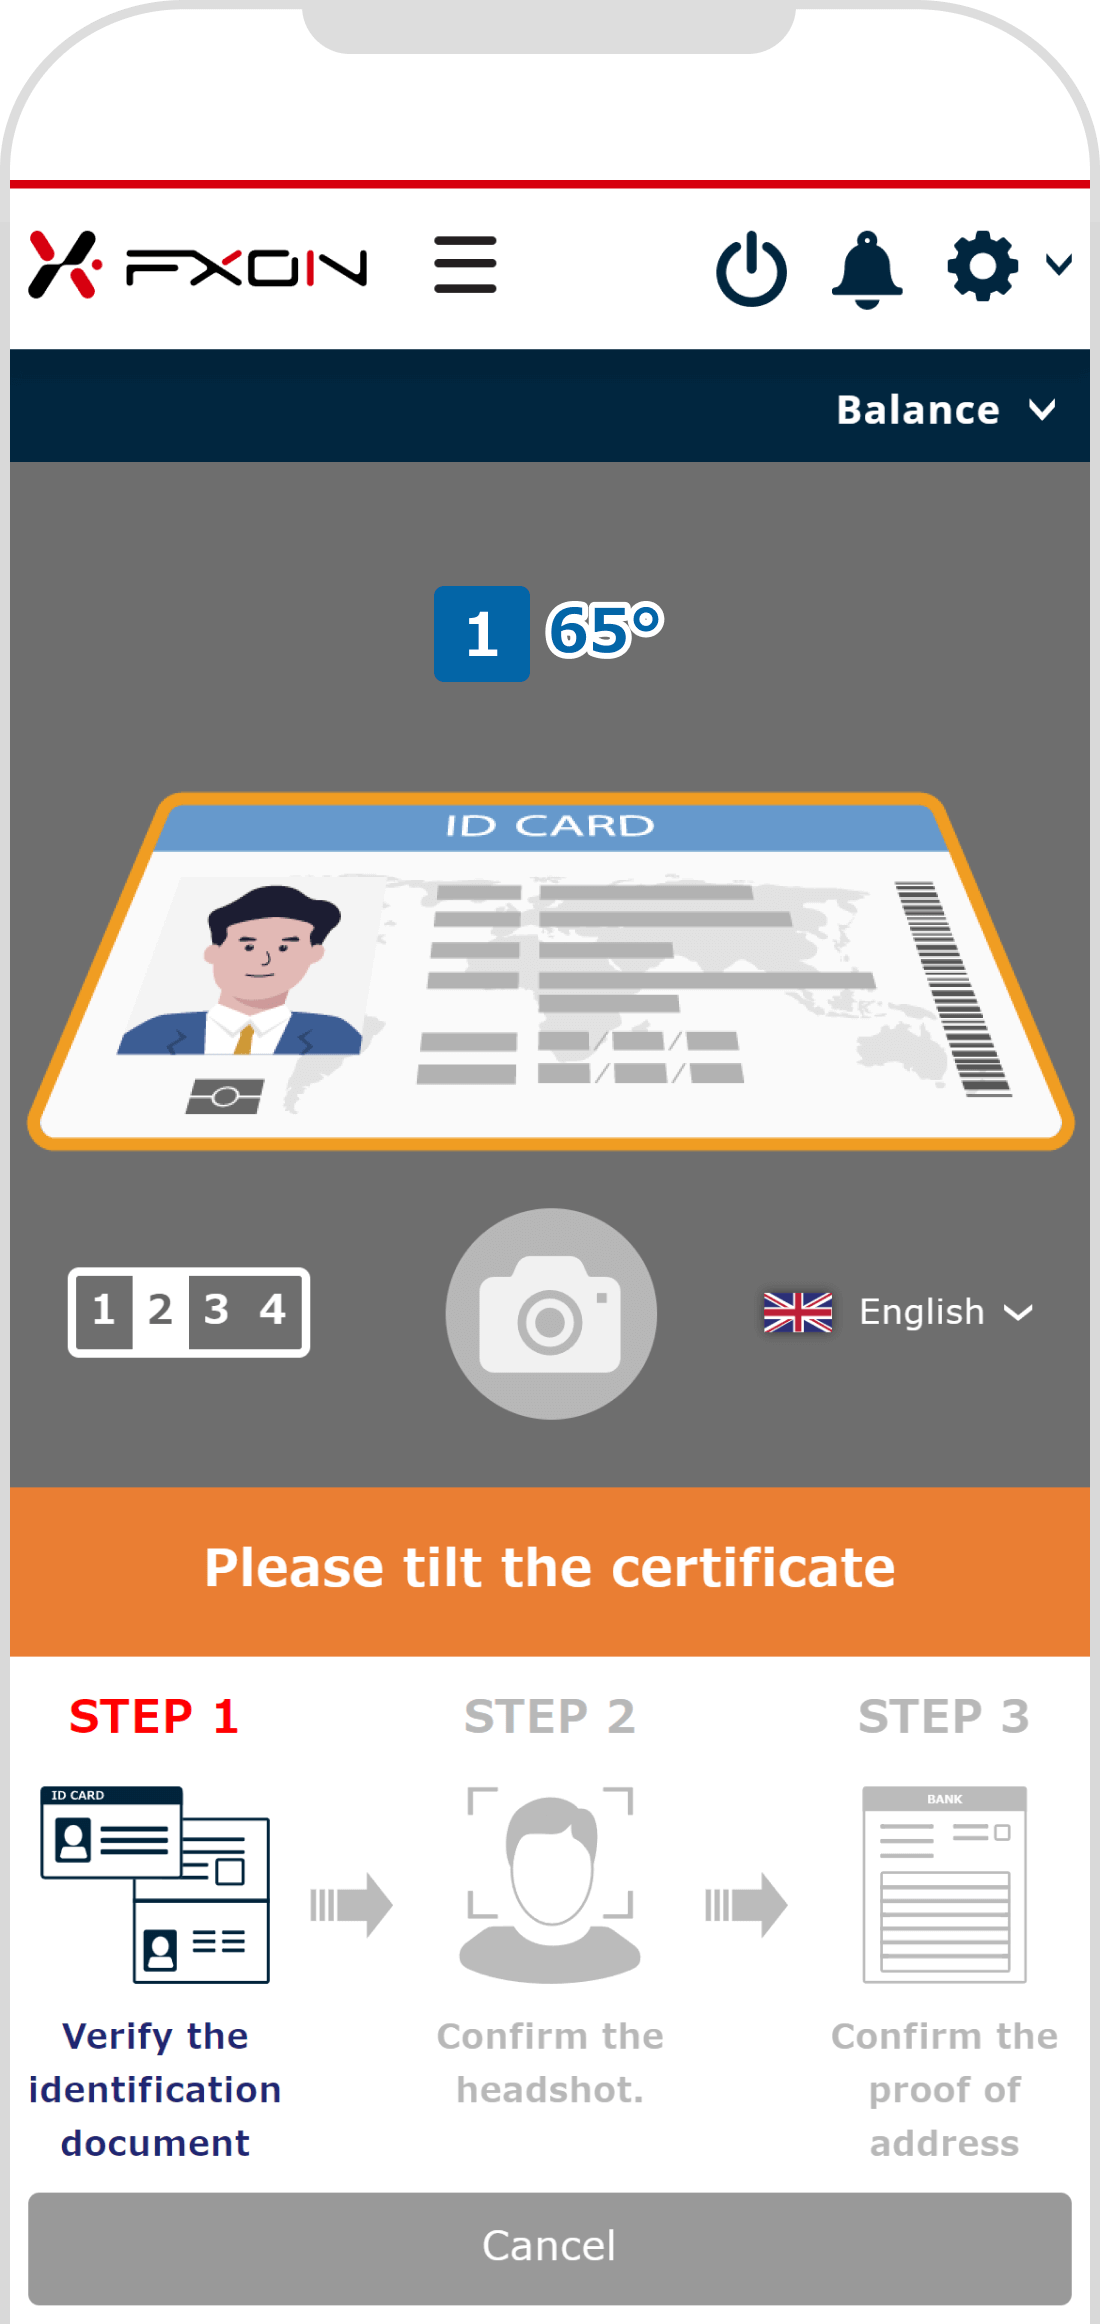
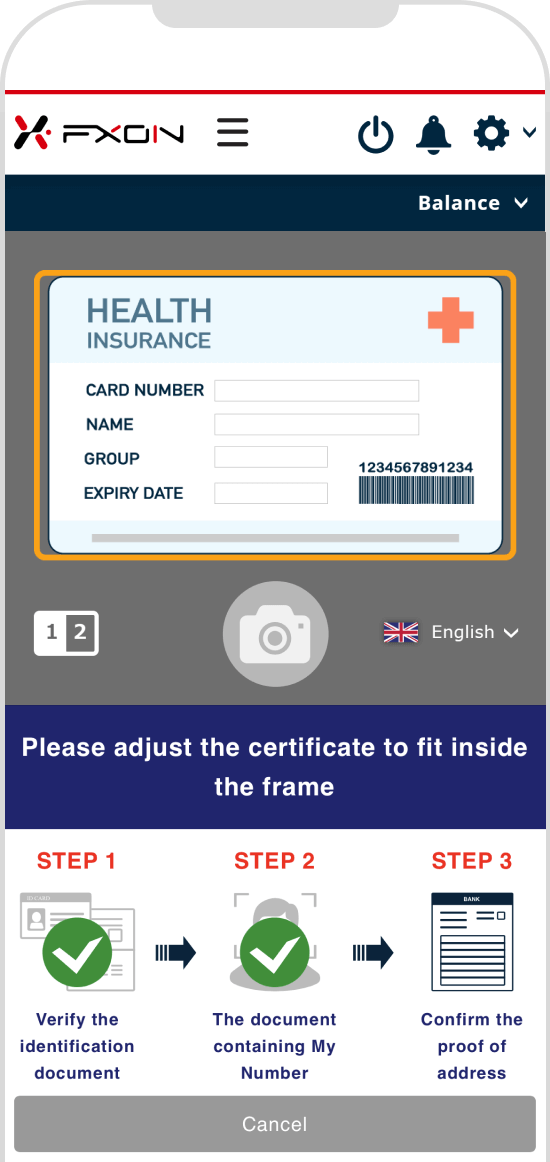
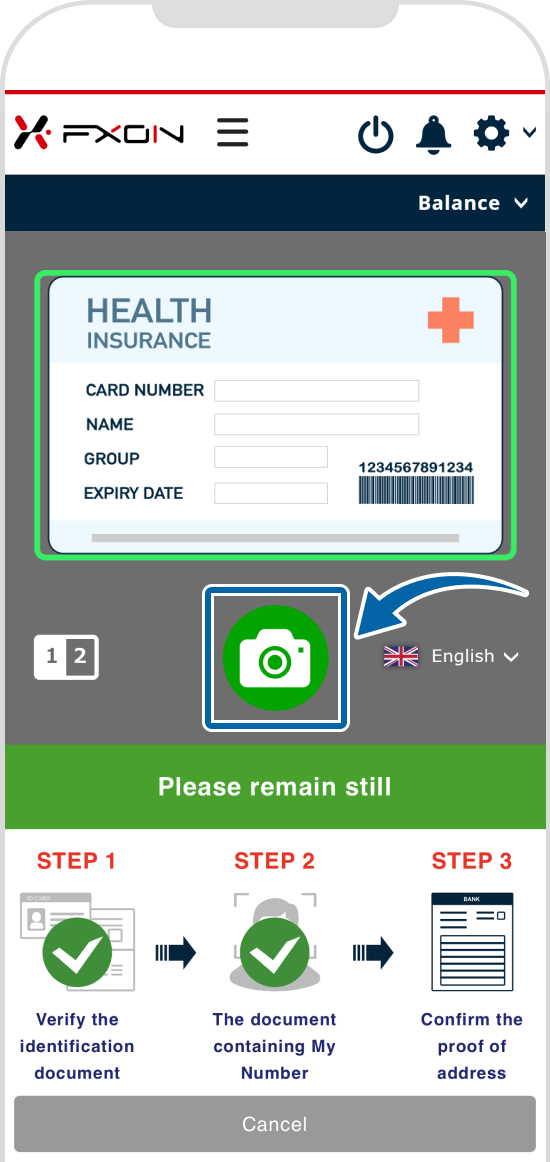
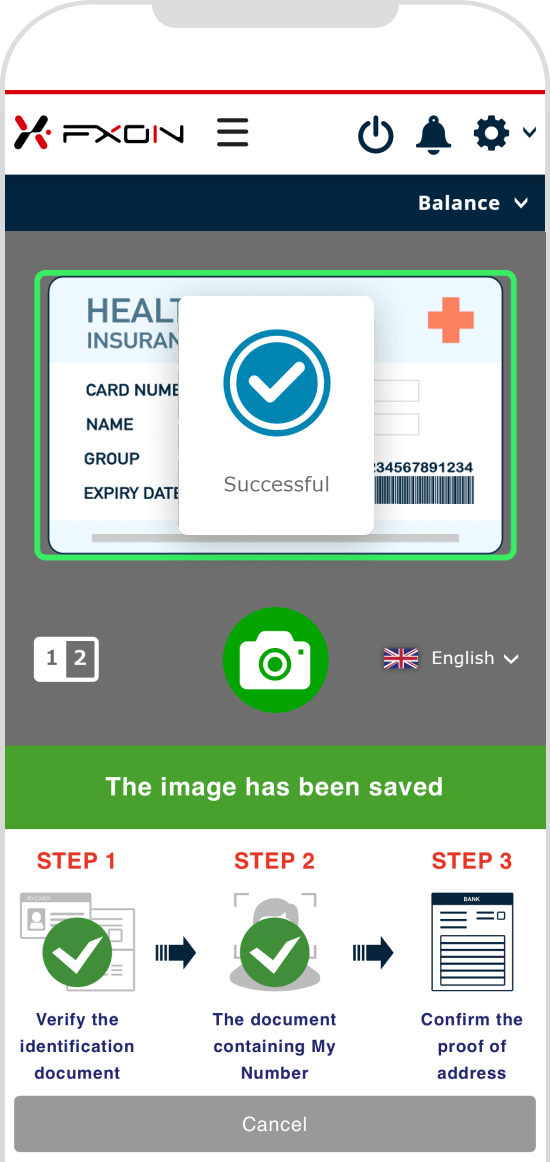
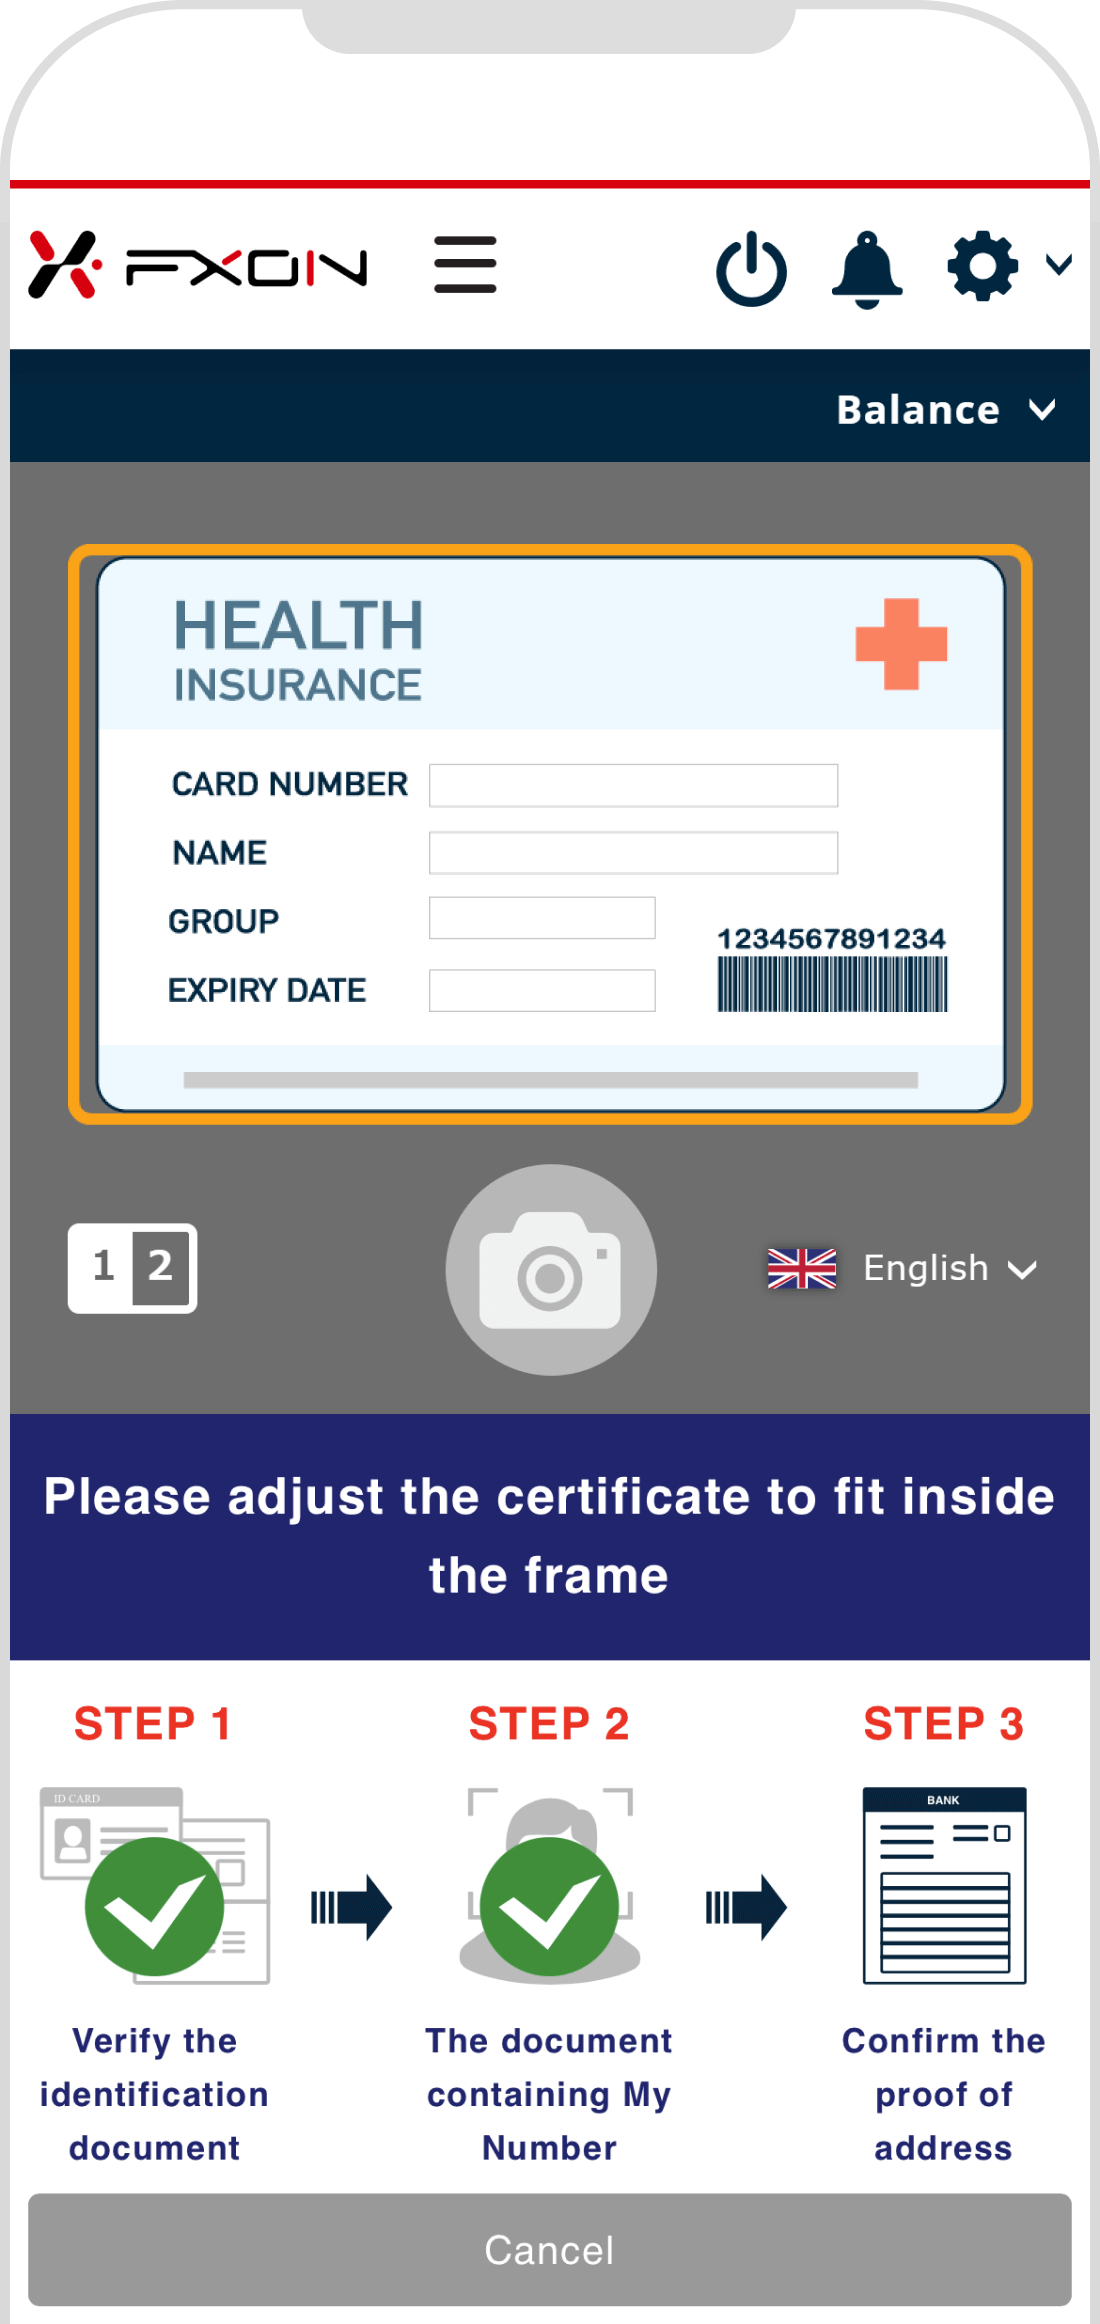
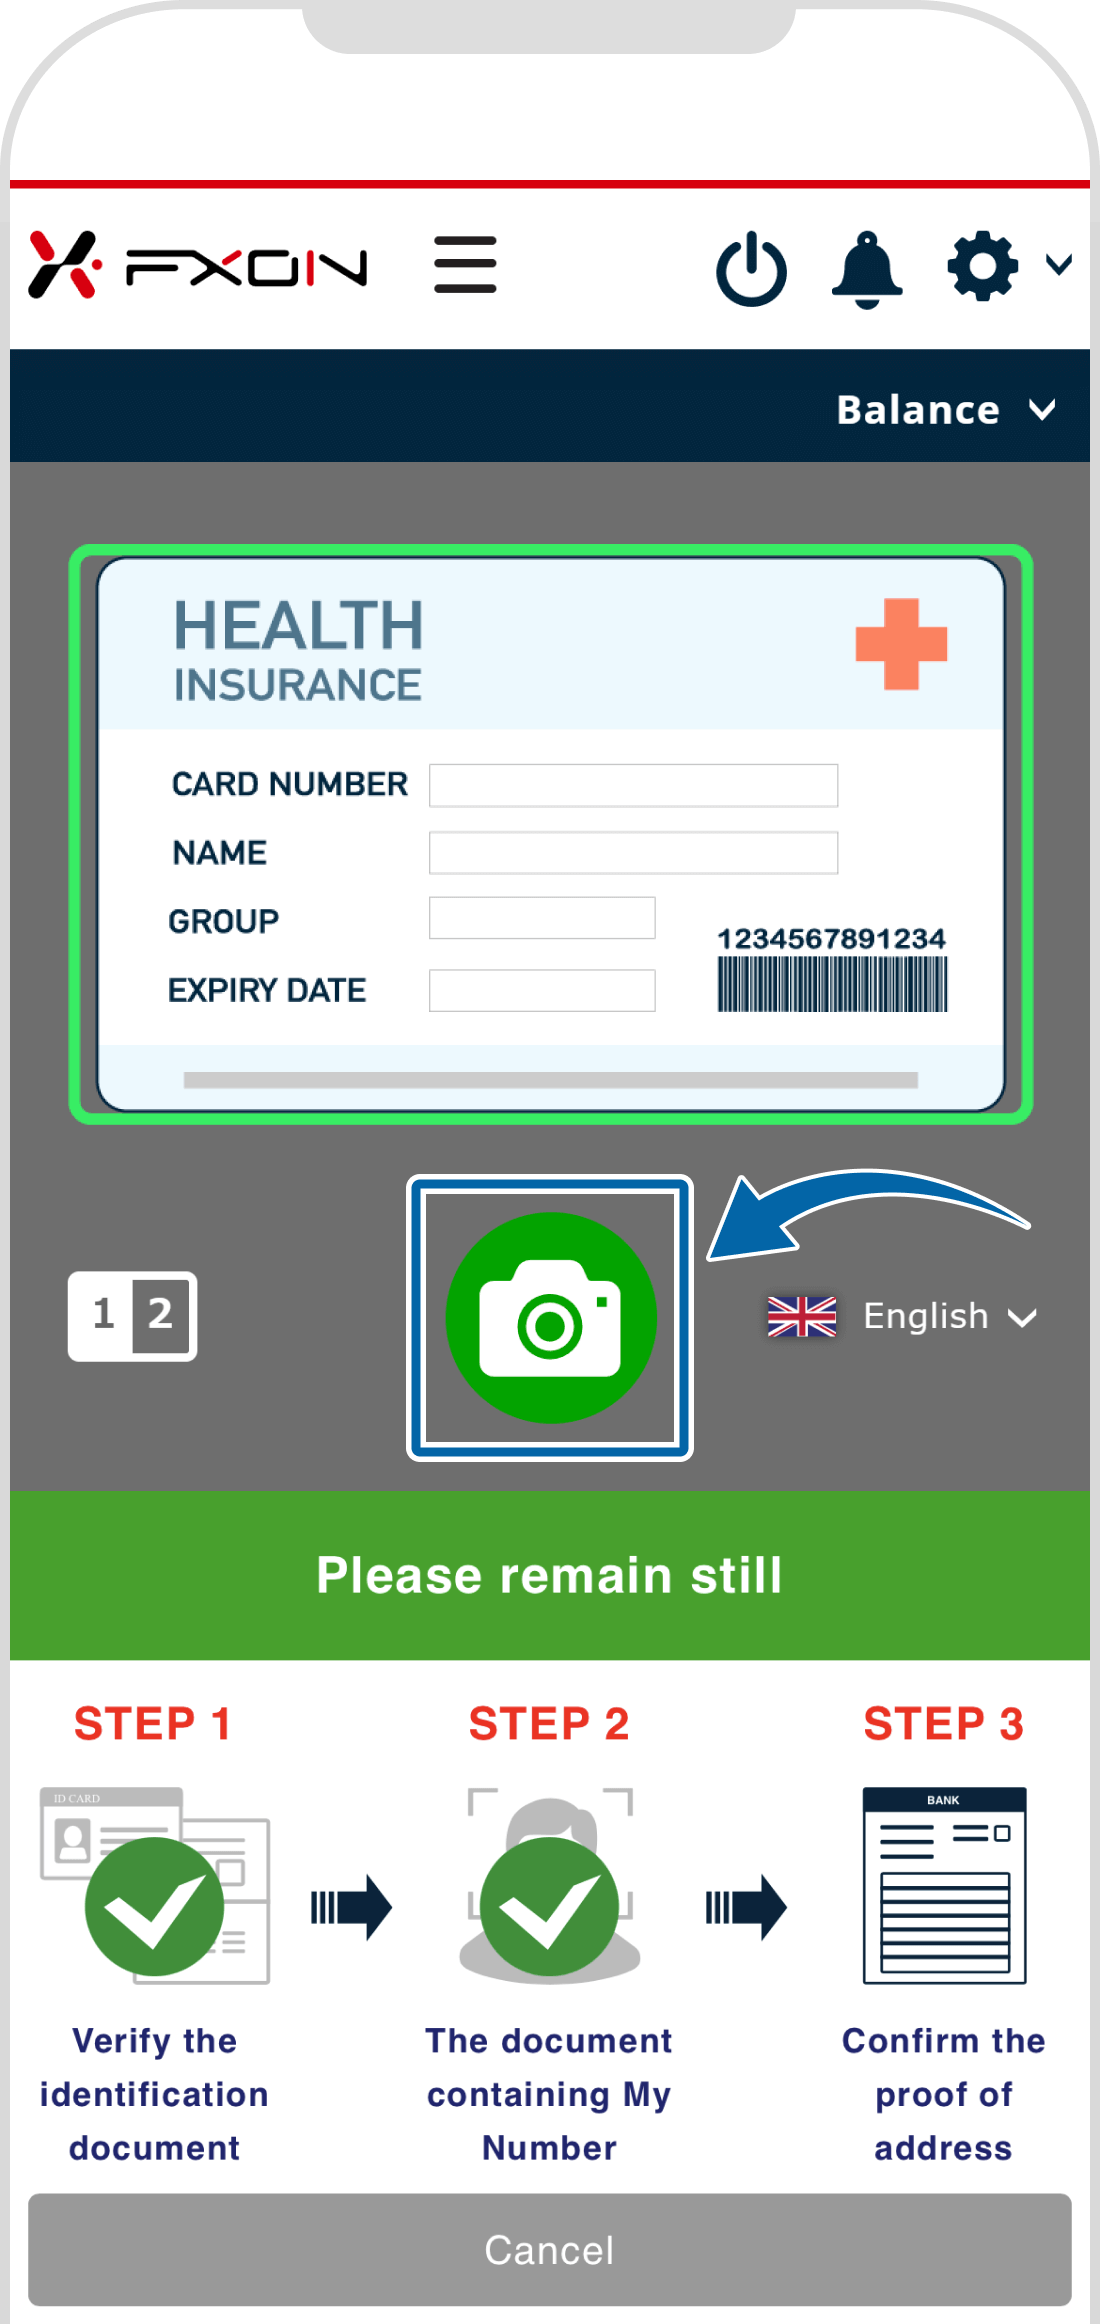
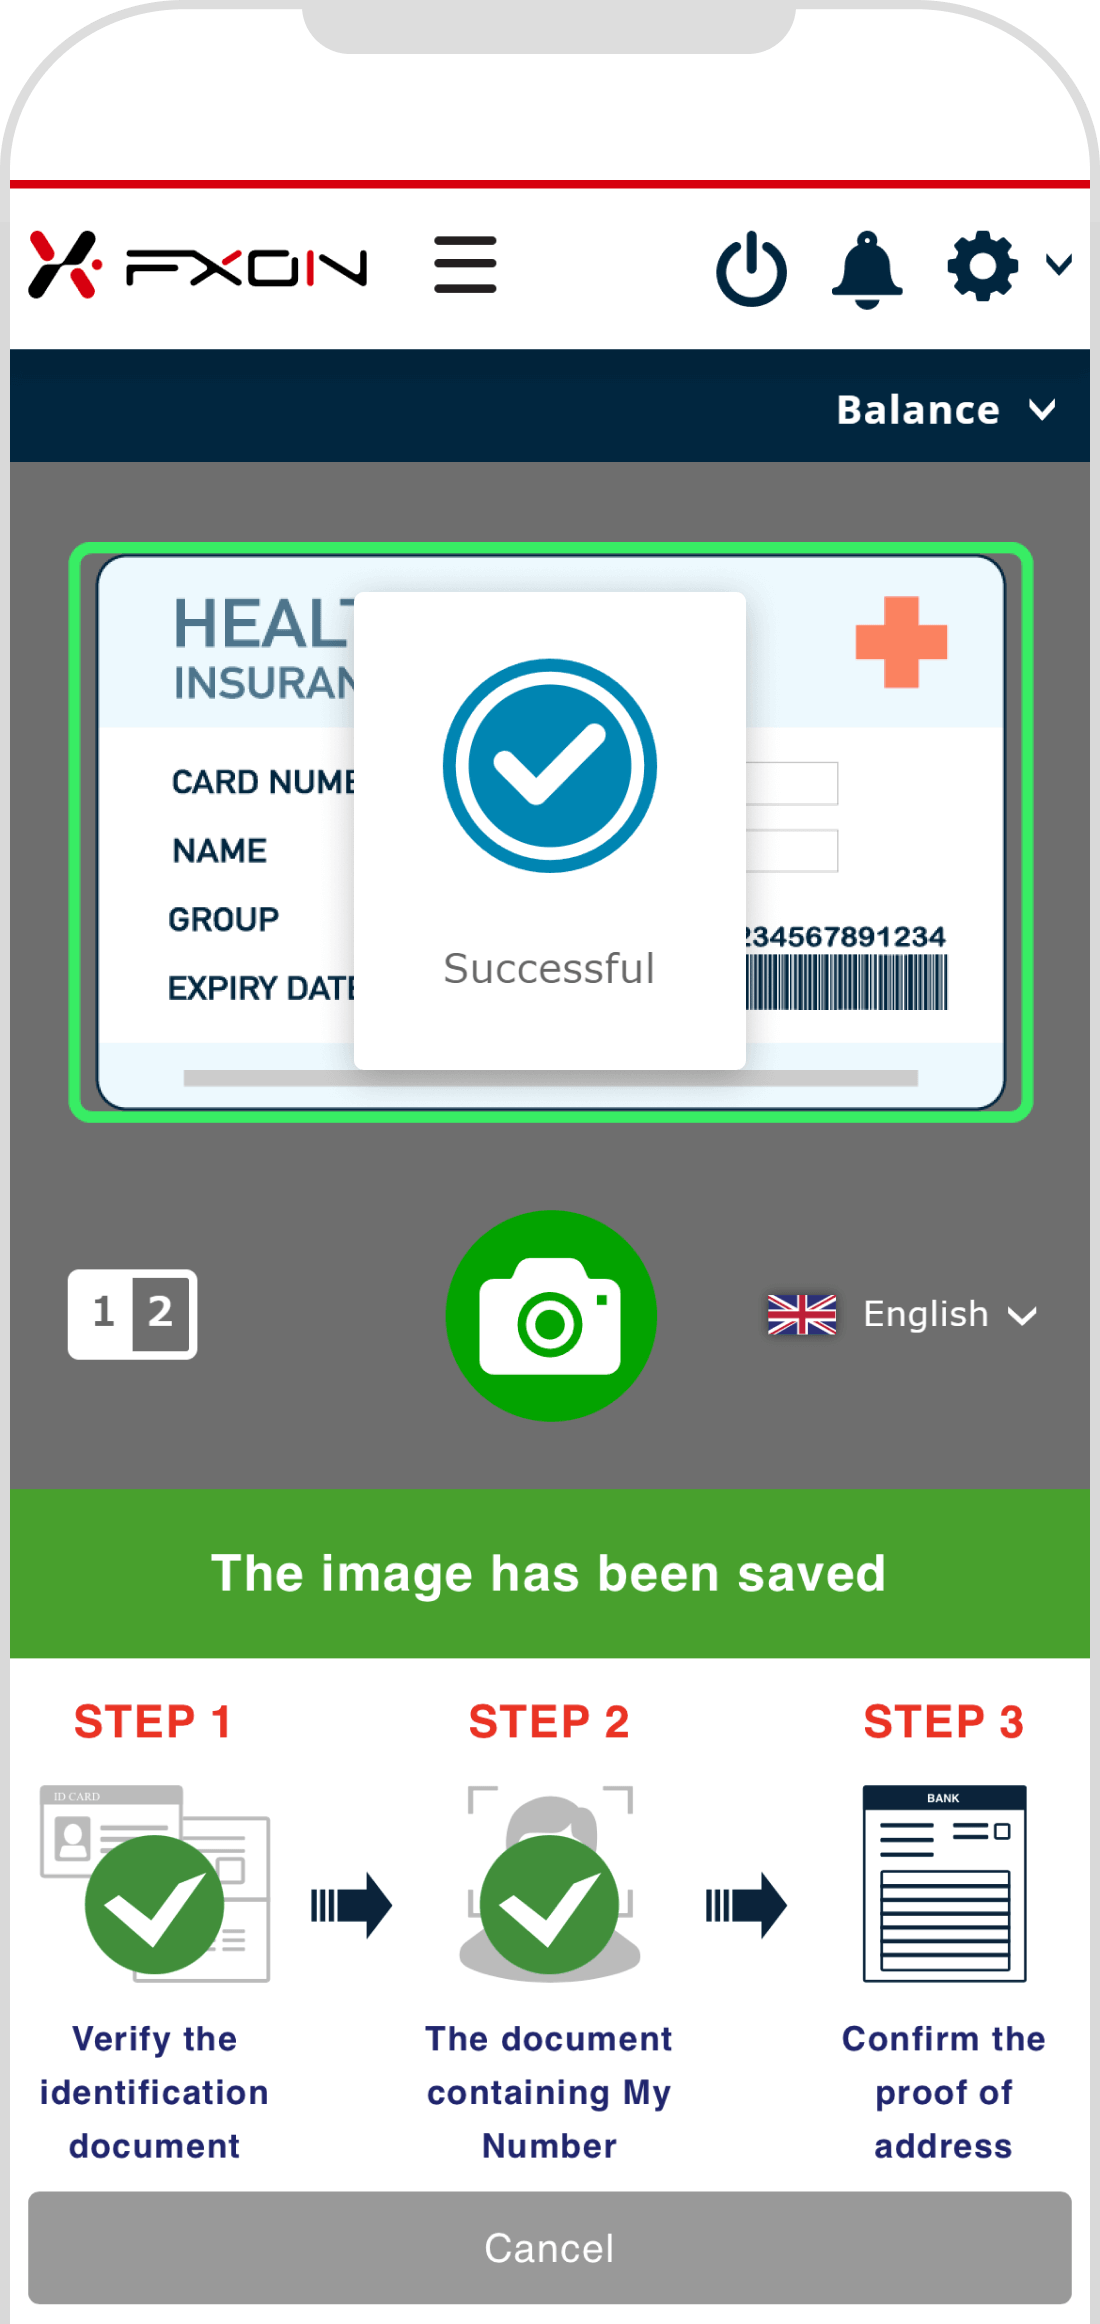
The back camera will turn on. Place the document face up, fit it in the frame, and hold the camera still. When the frame and camera icon turn green with the message "Please remain still", tap the camera icon to take a photo. If the message "The image has been saved" is displayed, it is successful.

STEP 1
Align the certificate with the frame

STEP 2
Take a photo

STEP 3
Save image
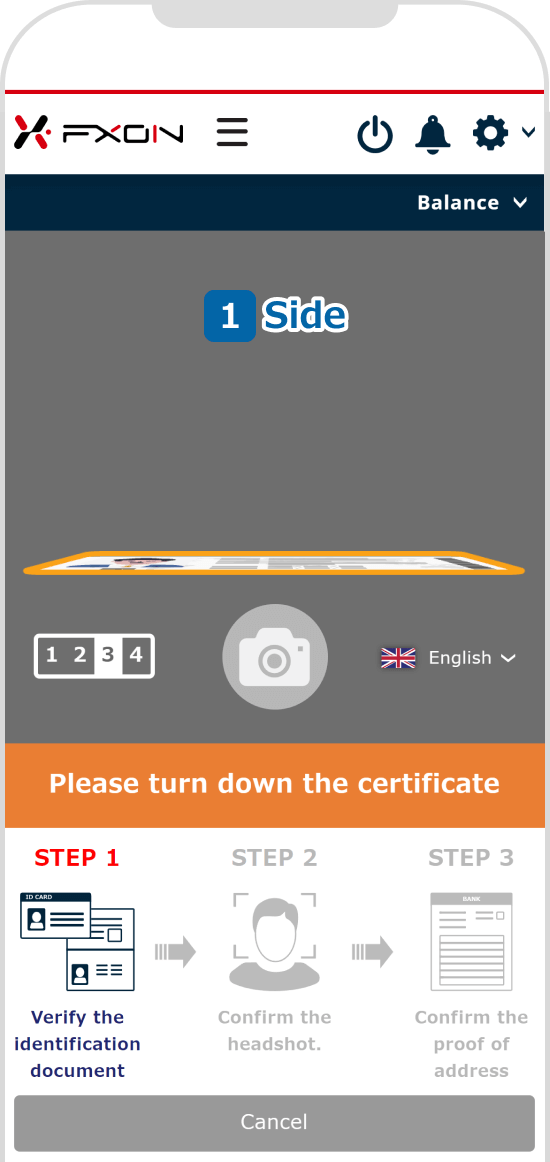
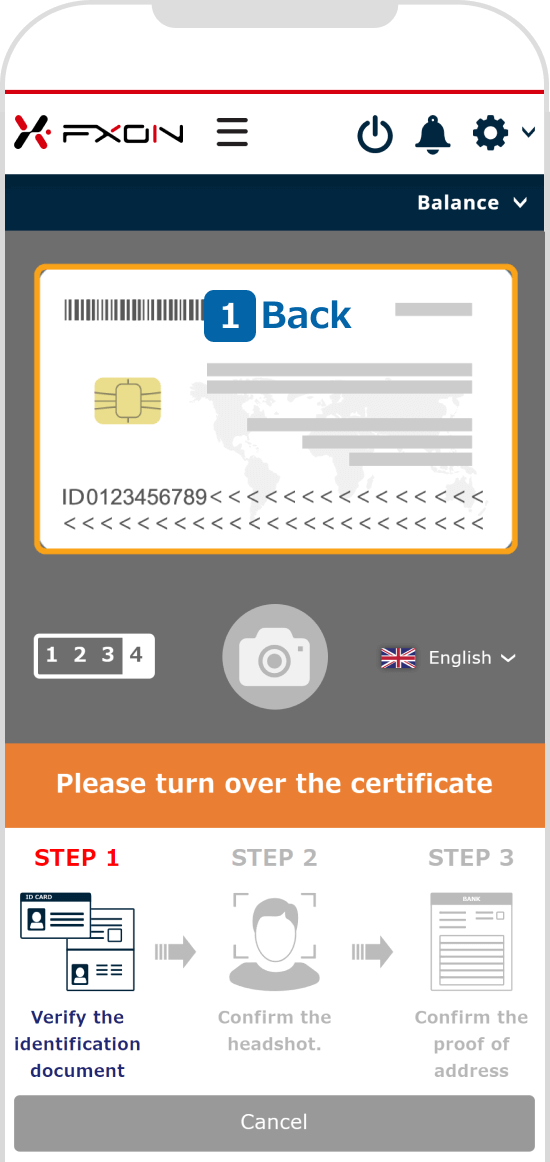
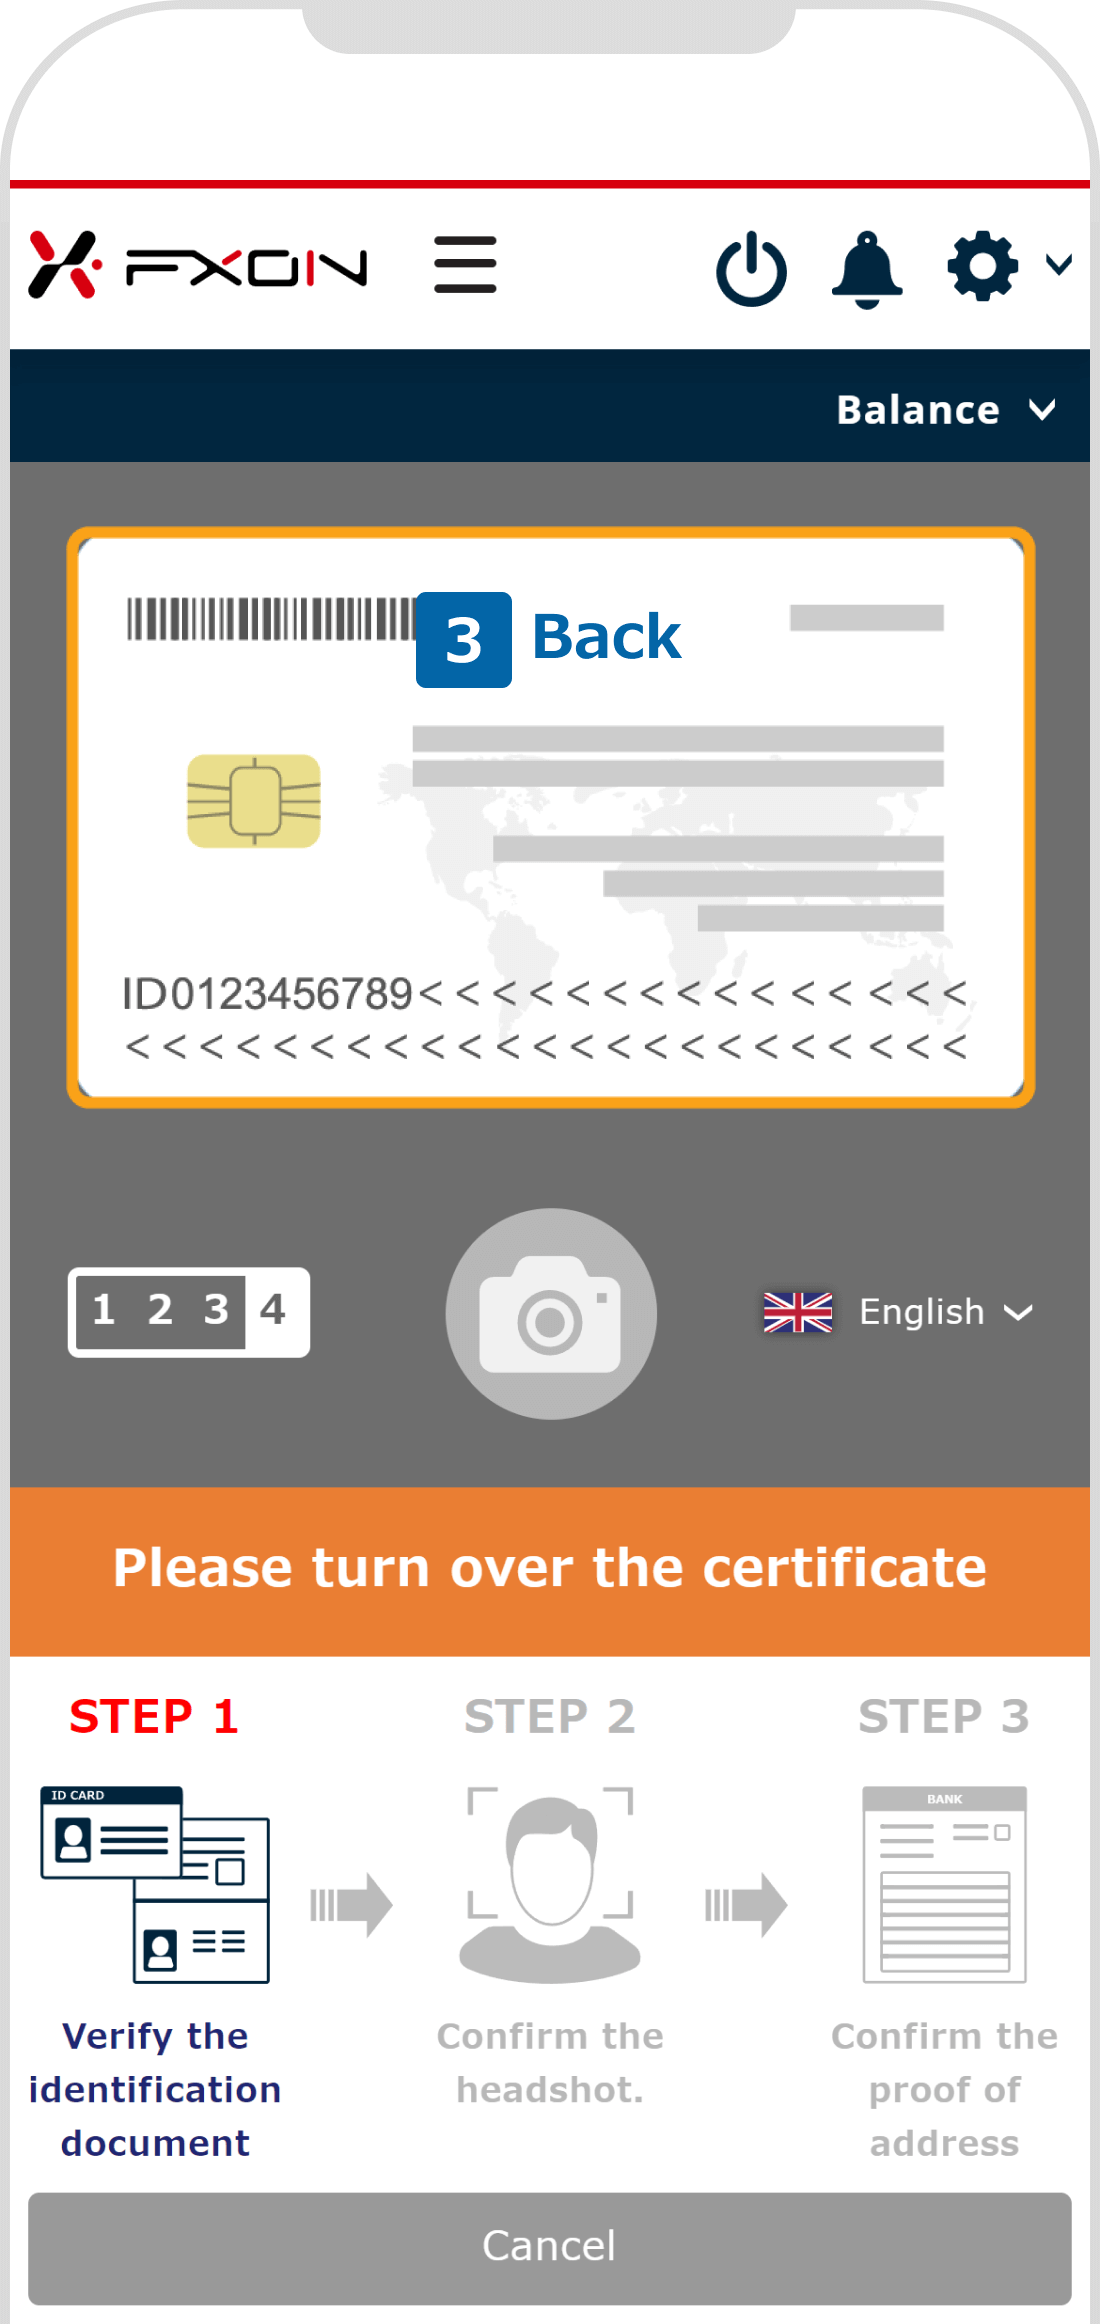
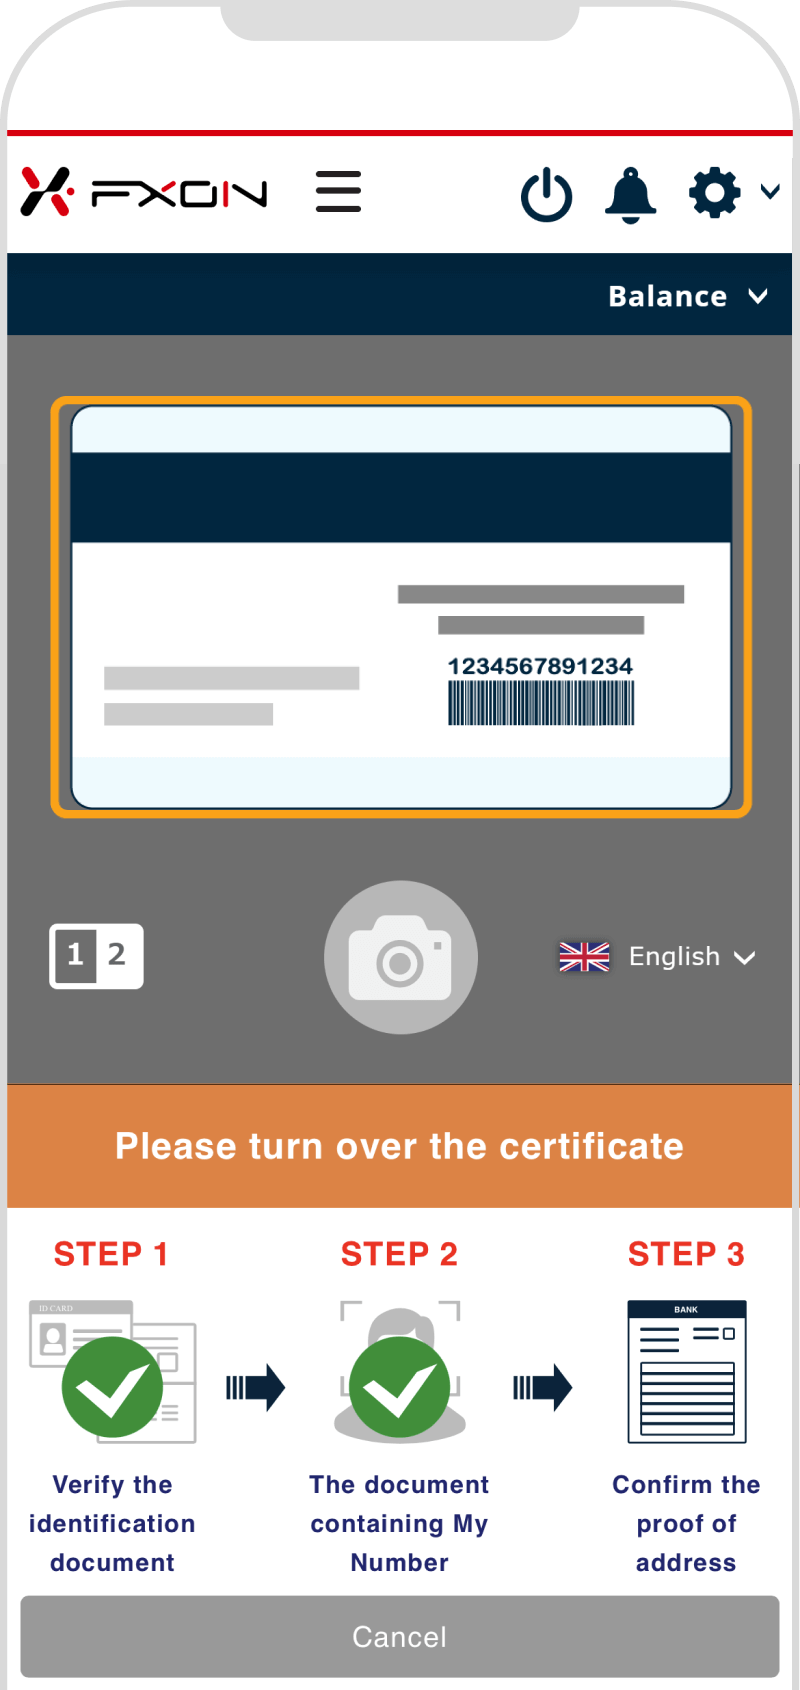
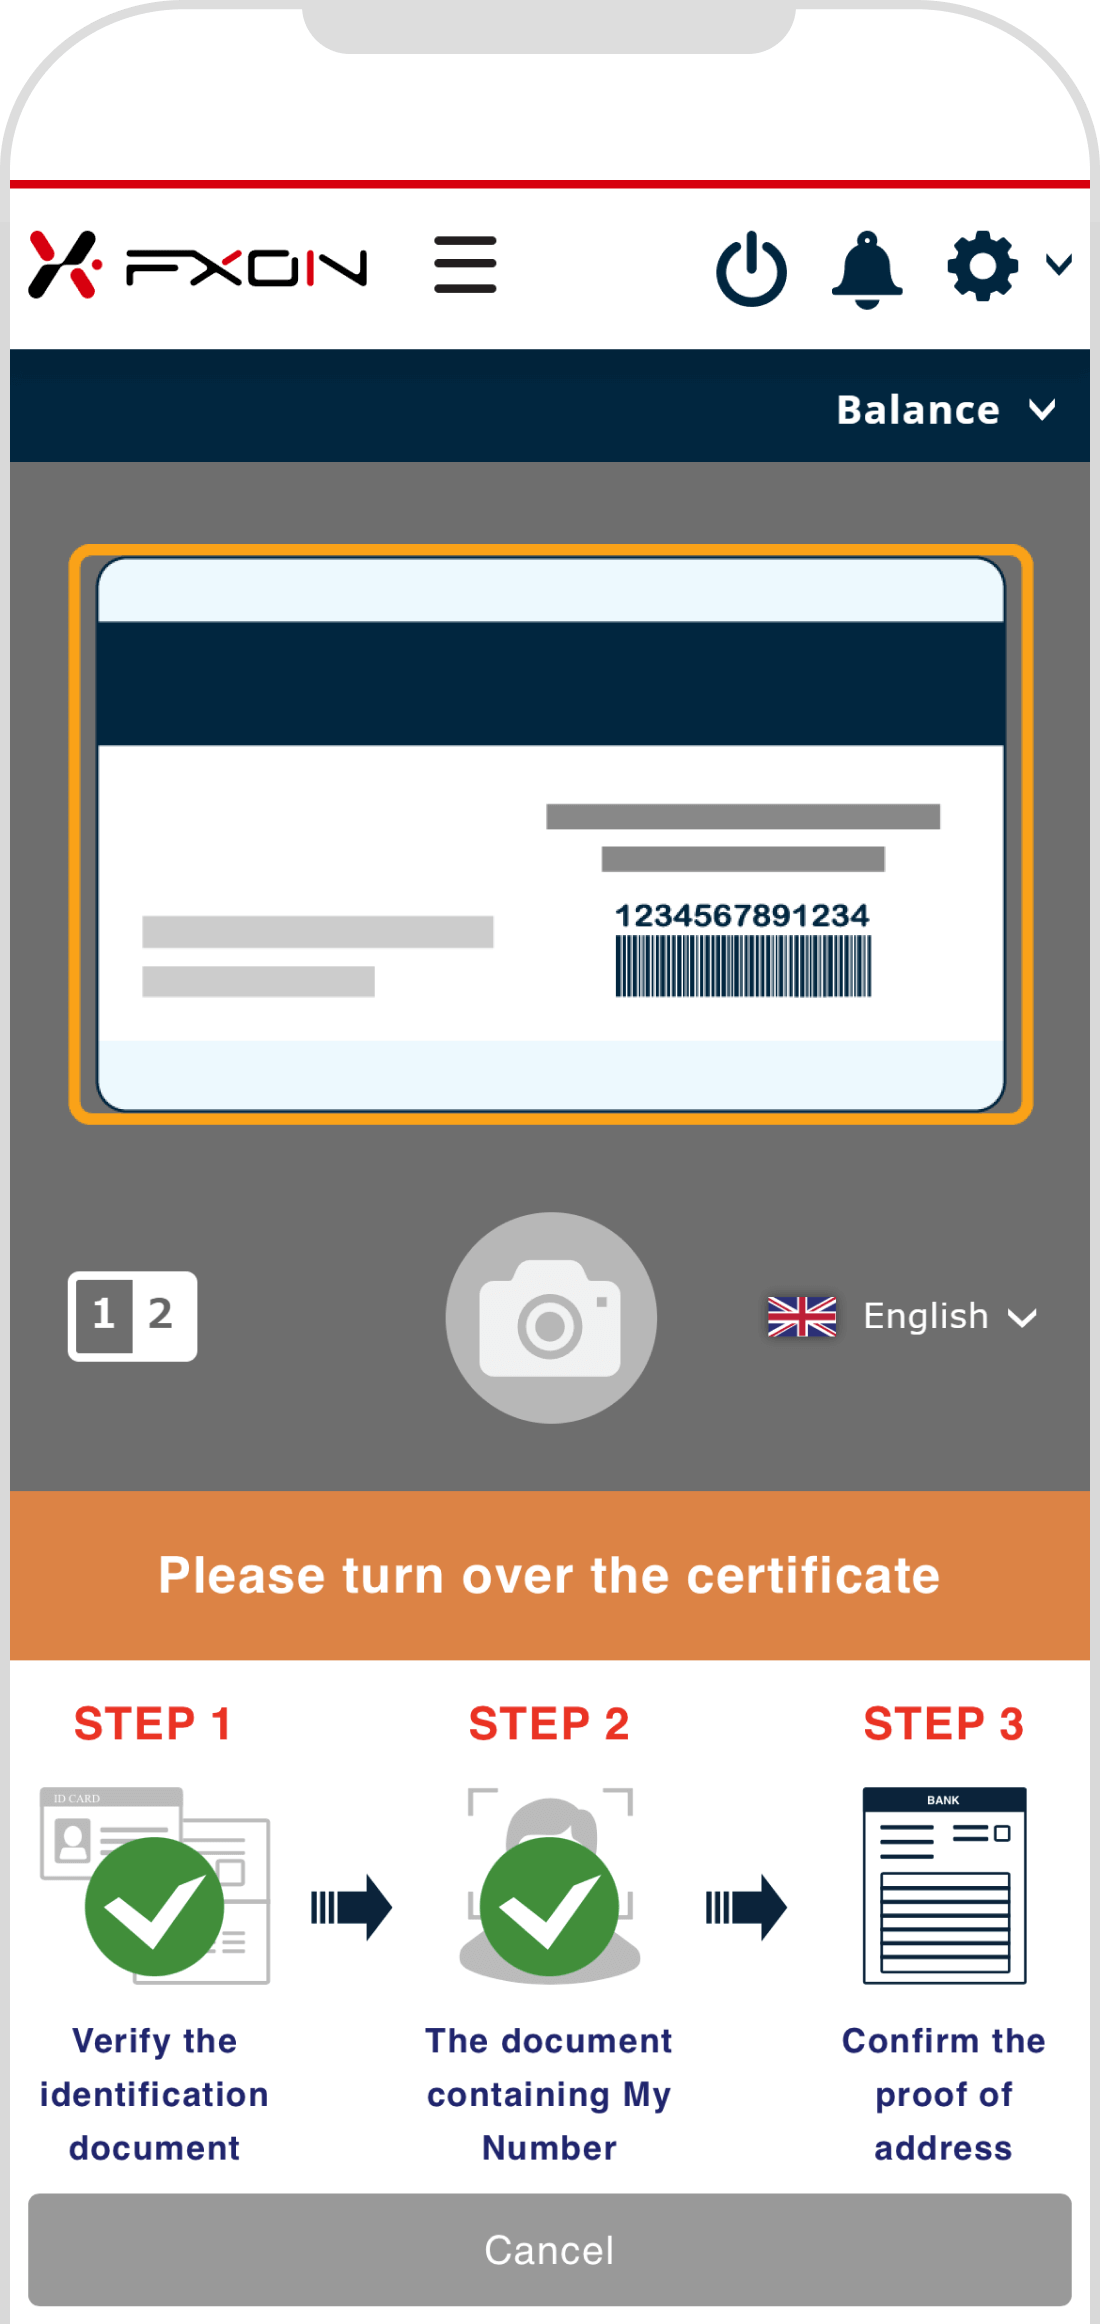
Follow the instructions on the screen and take photos of the (1) 65° view, (2) side, and (3) back of the document.

STEP 1
Tilted surface at 65 degrees
STEP 2
Side

STEP 3
Back
Photos should be sharp and readable. Adjust the focus to make them clear.
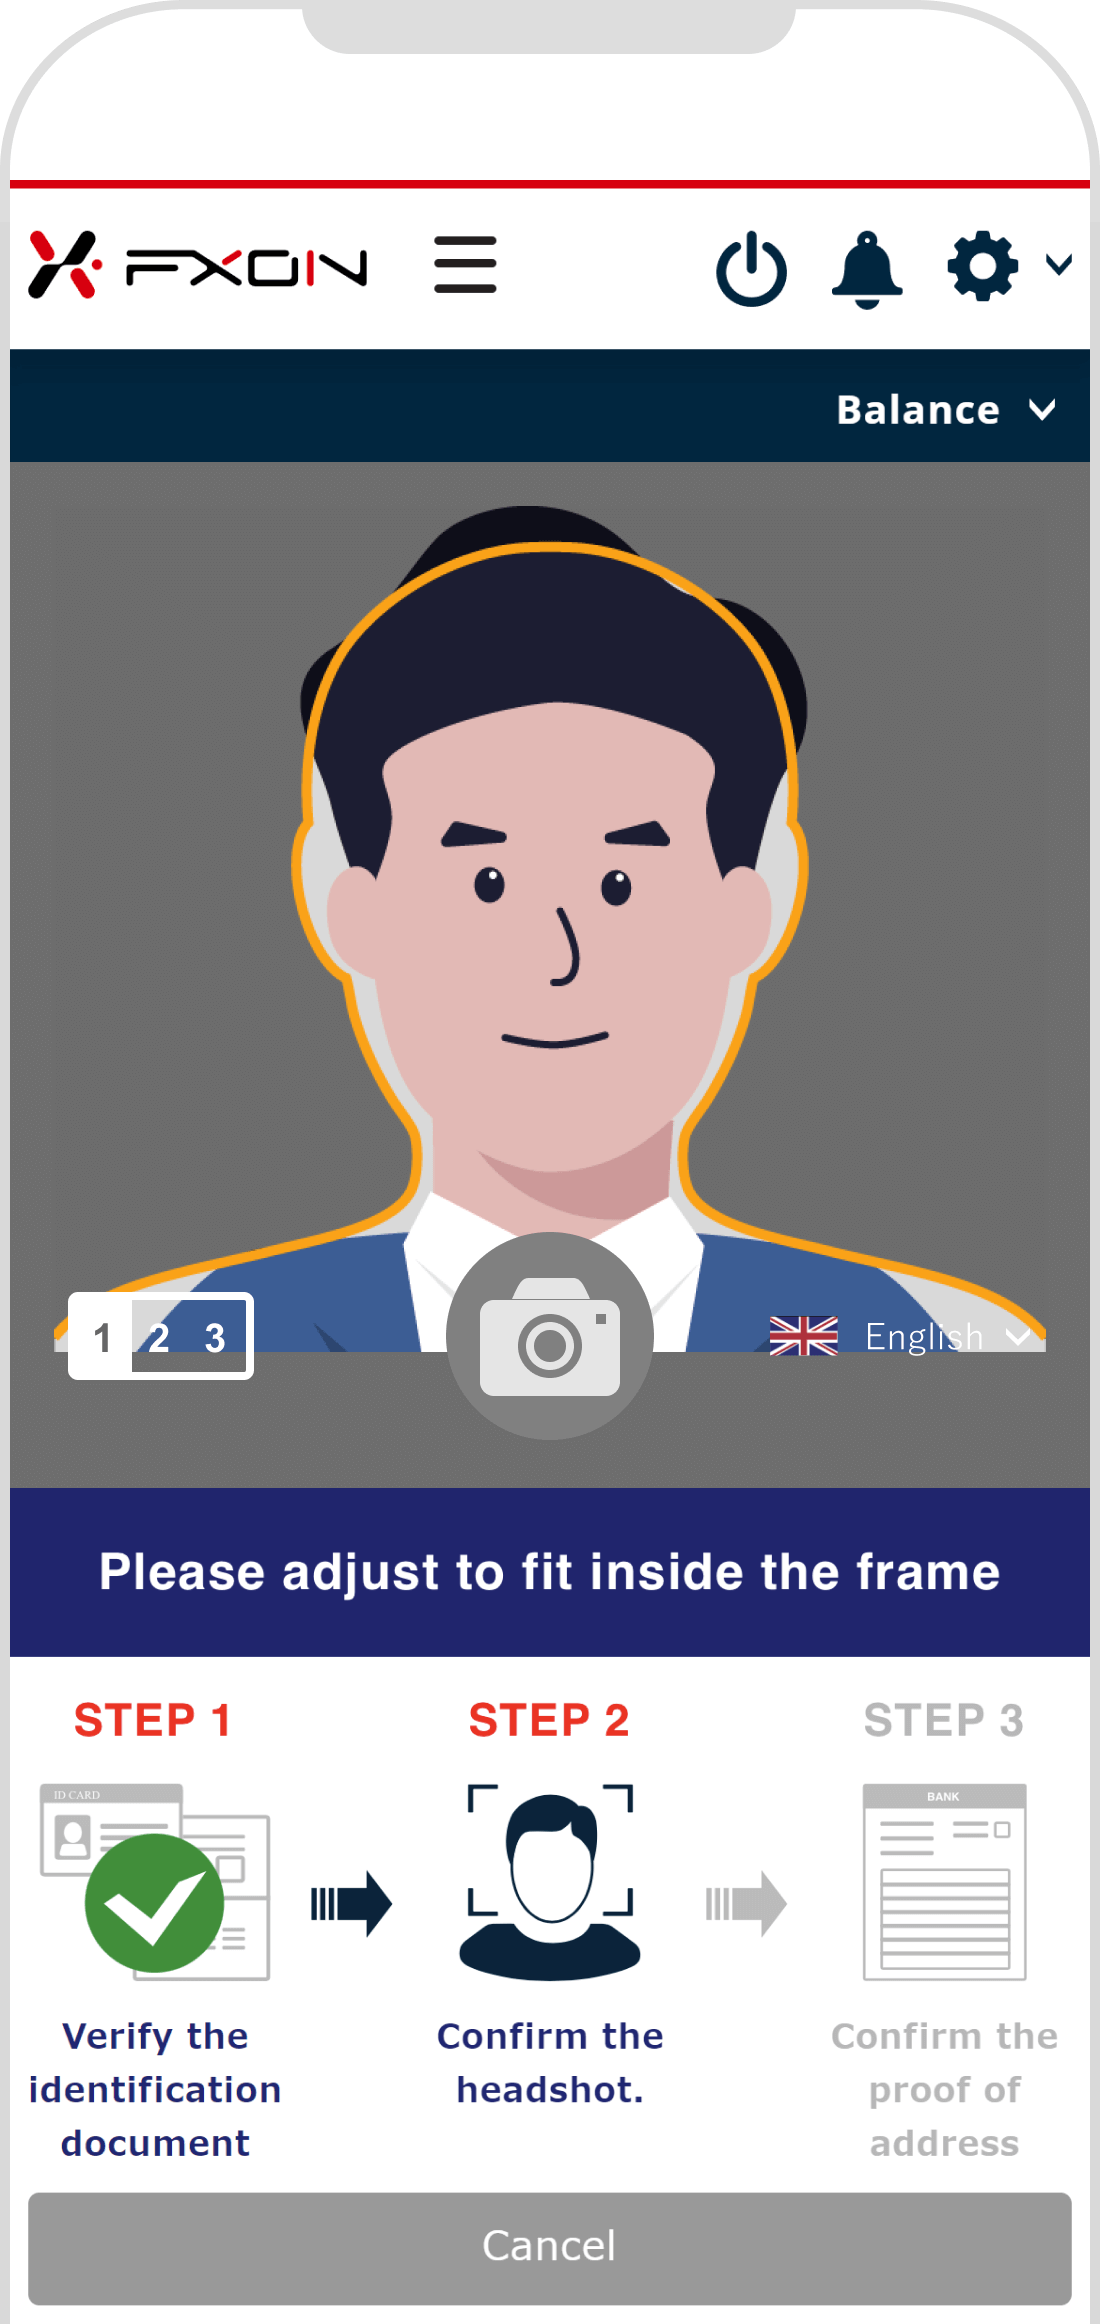
9. Face verification [Step (i)]
Please wait for the server connection.

STEP 1
Align your face with the frame i

STEP 2
Align your face with the frame ii
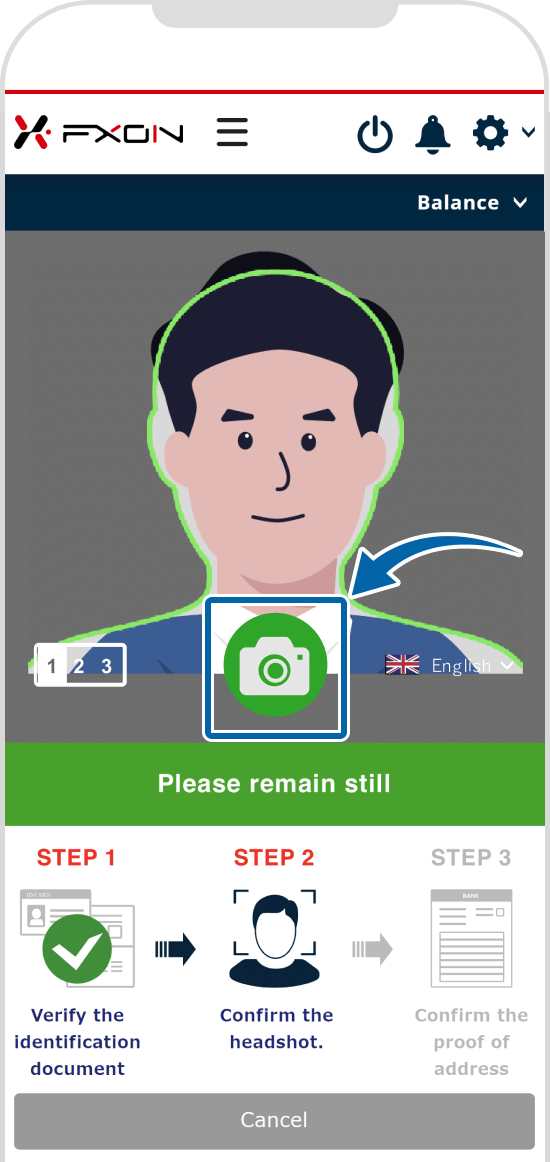
10. Face verification [Step (ii)]
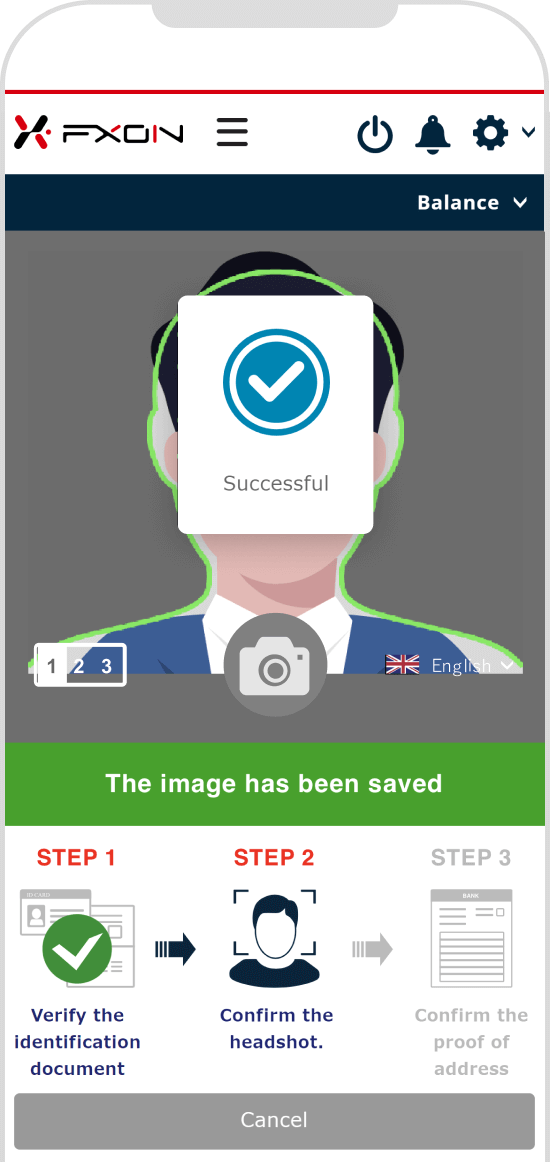
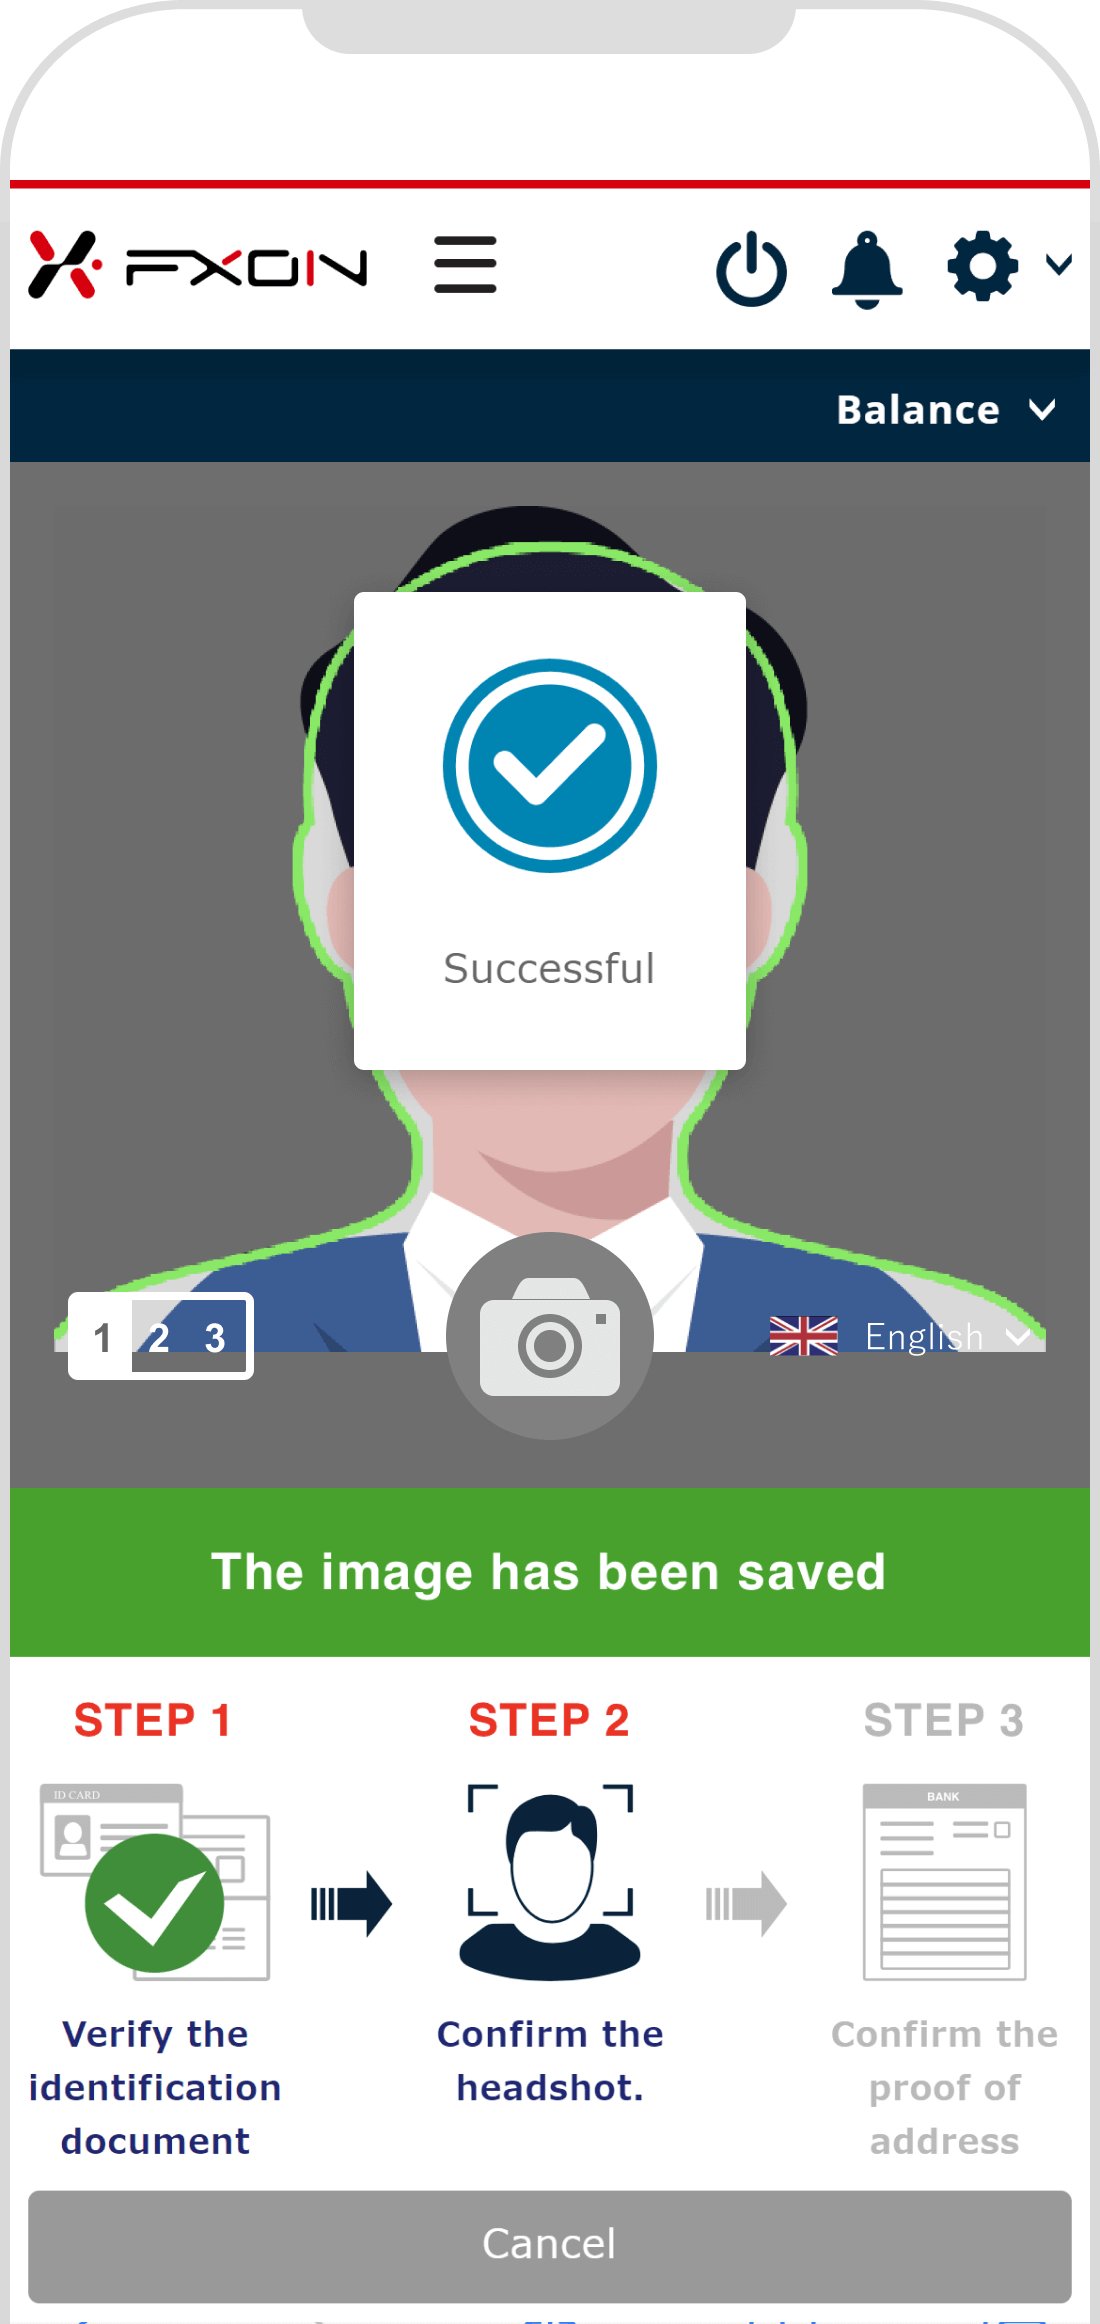
Next, the front camera will turn on. Fit your face in the frame, and hold the camera still. When the frame and camera icon turn green with the message "Please remain still", tap the camera icon to take a photo. If the message "The image has been saved" is displayed, it is successful.
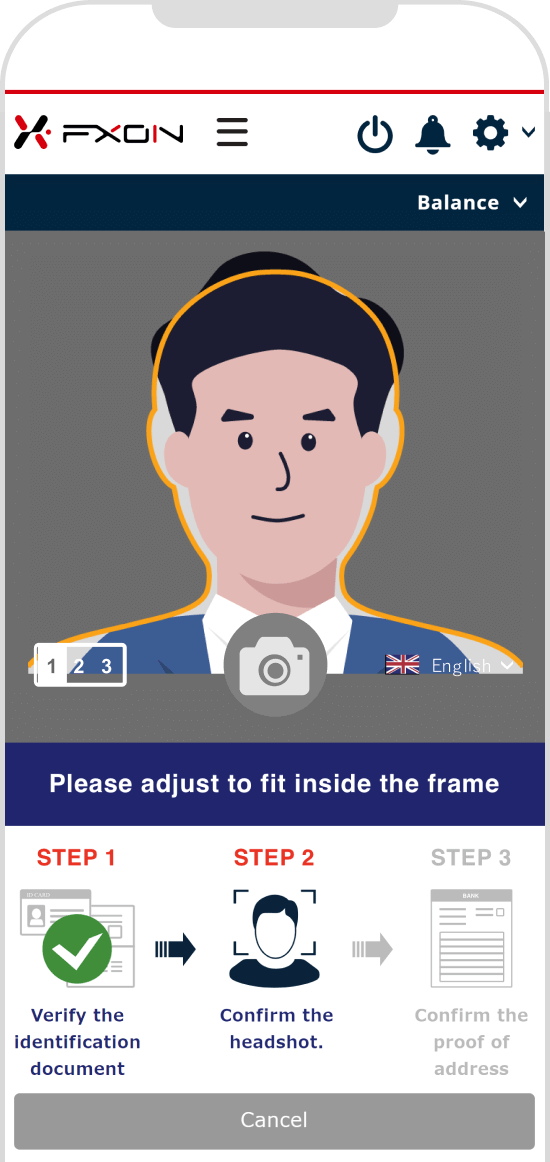
STEP 1
Align your face with the frame and remain still
STEP 2
Remain still

STEP 3
Save image
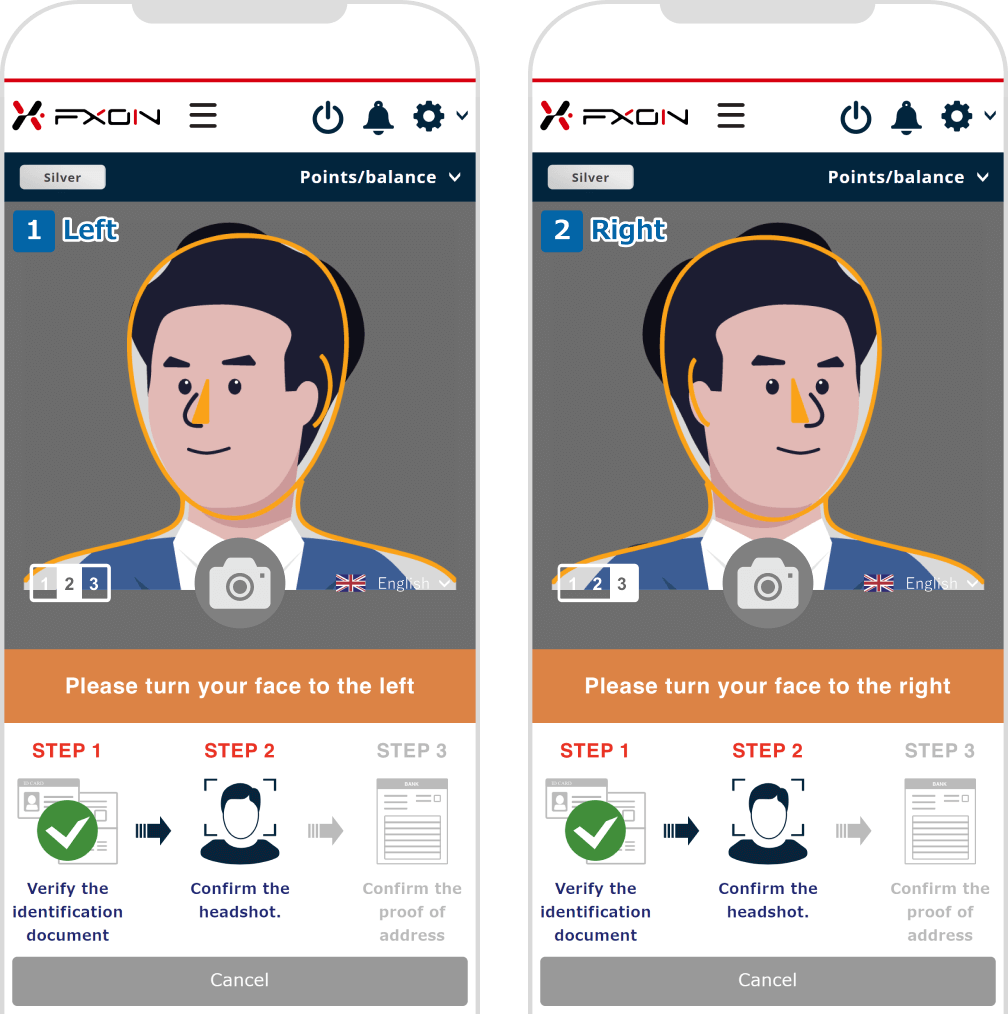
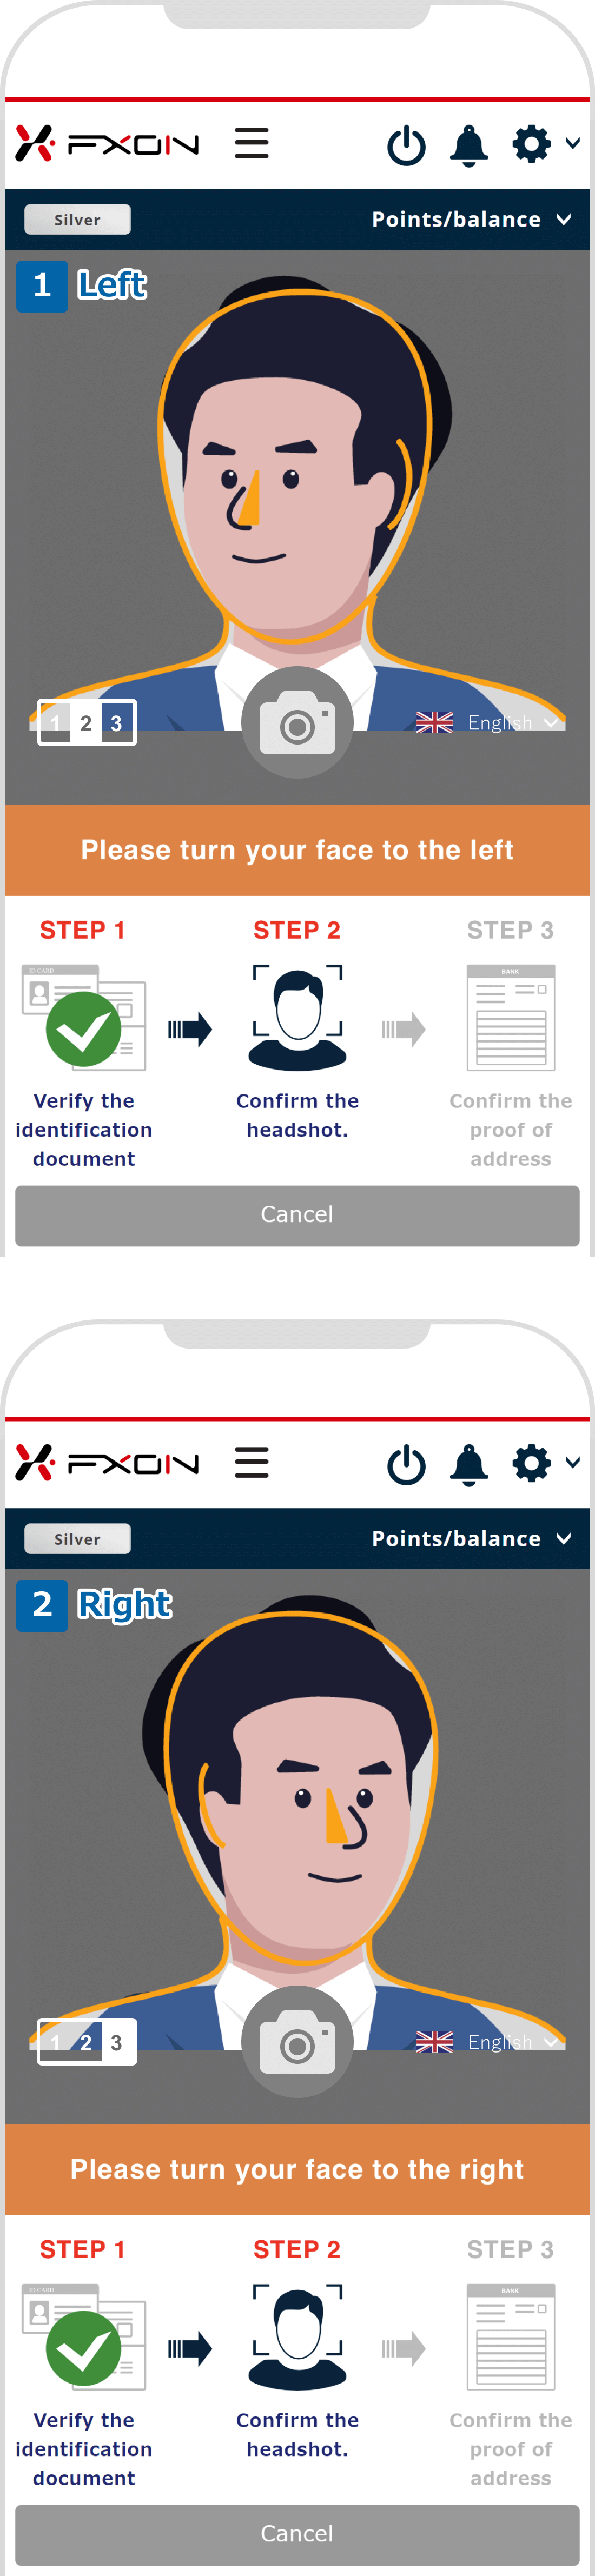
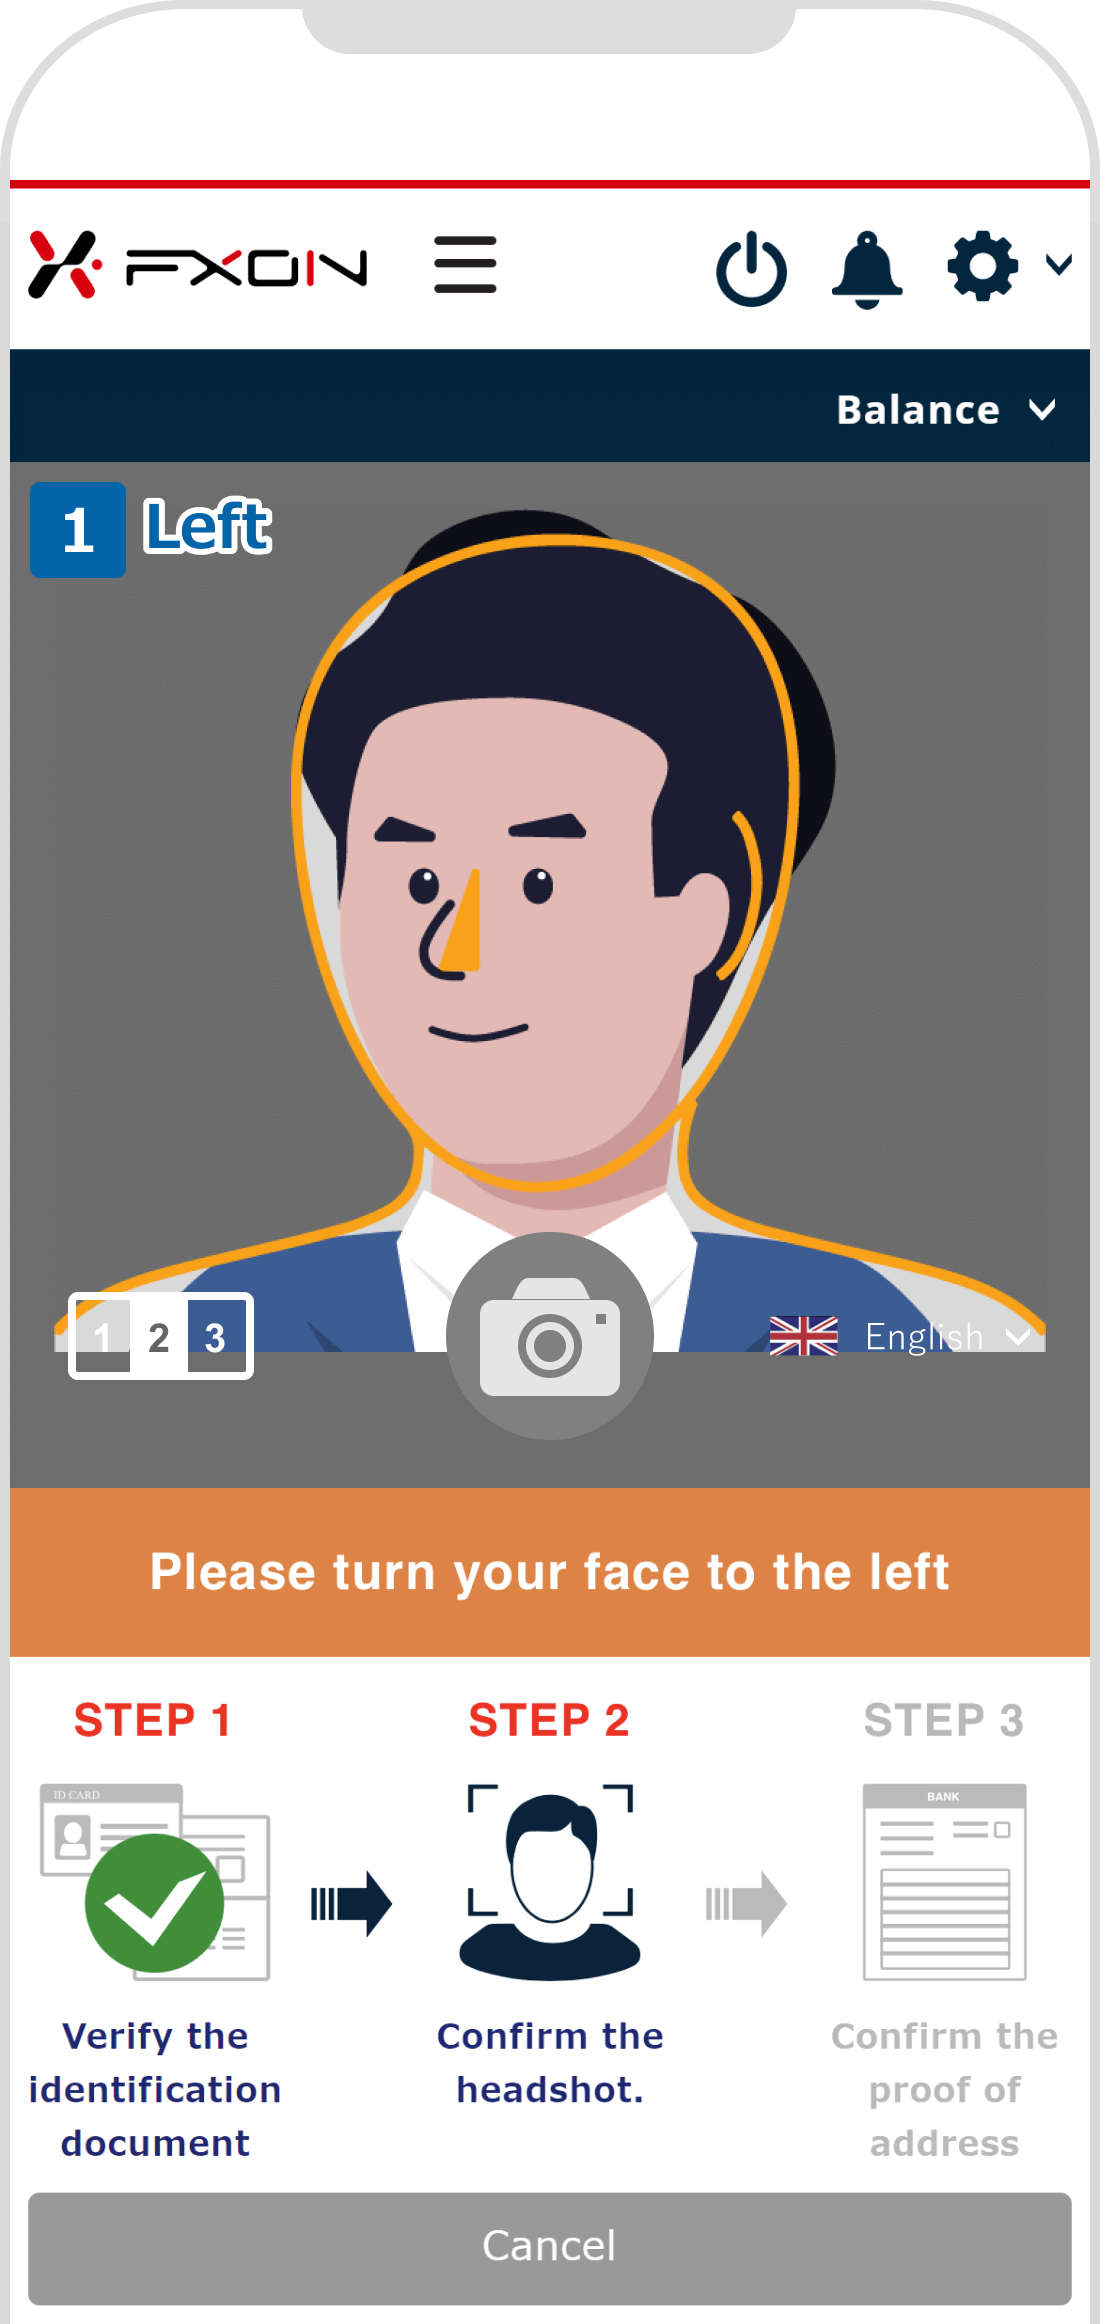
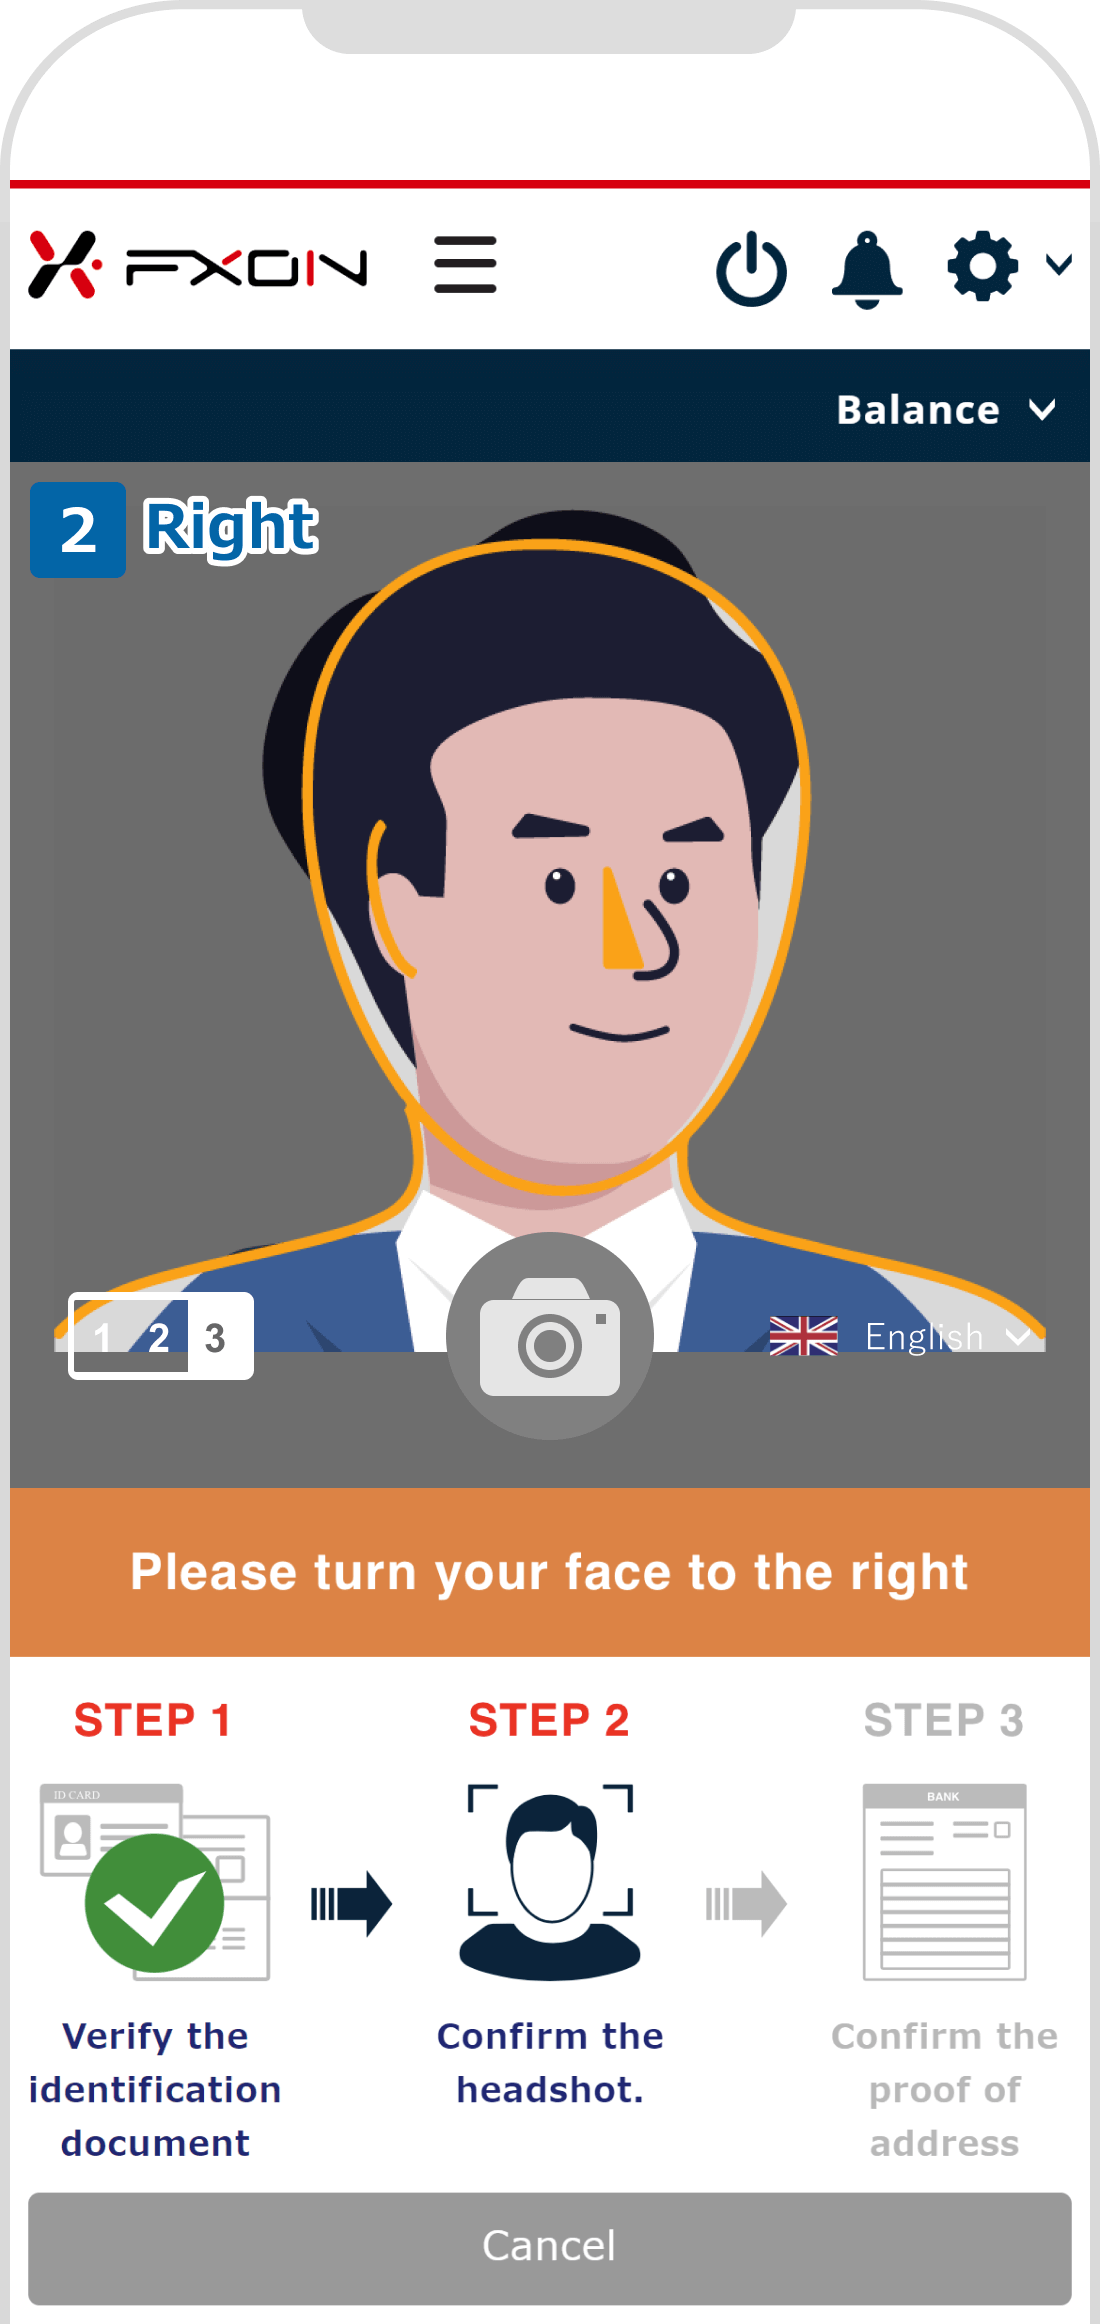
In the same way, take photos of your face at around 30 degrees to the (1) left and (2) right.
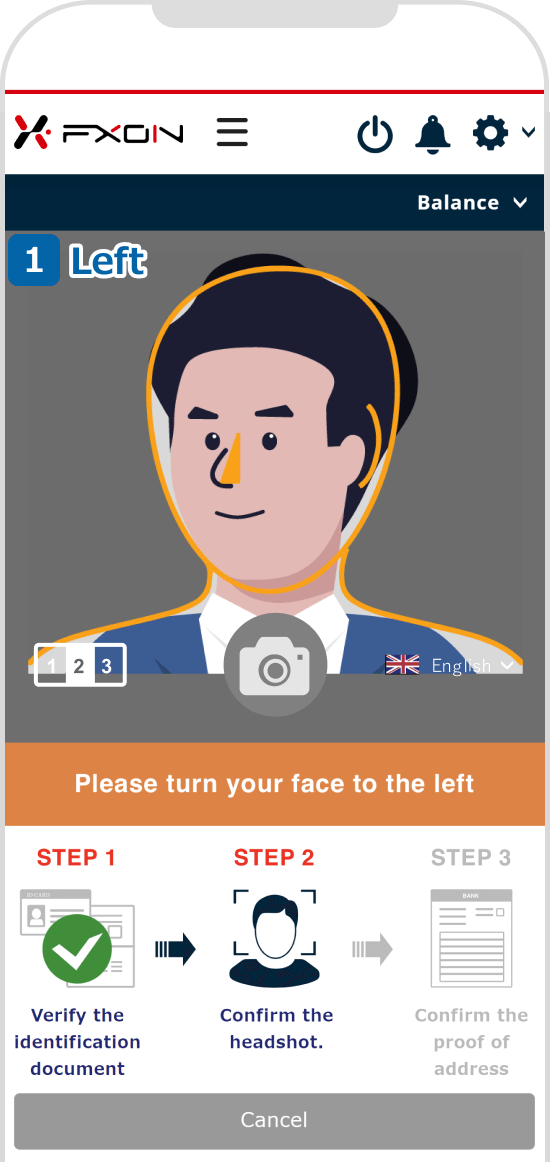

STEP 1
Tilted to the left
STEP 2
Tilted to the right
Take photos in good lighting where your face can be recognized correctly. Backlight should be avoided.
Adjust the focus to make your face clear.
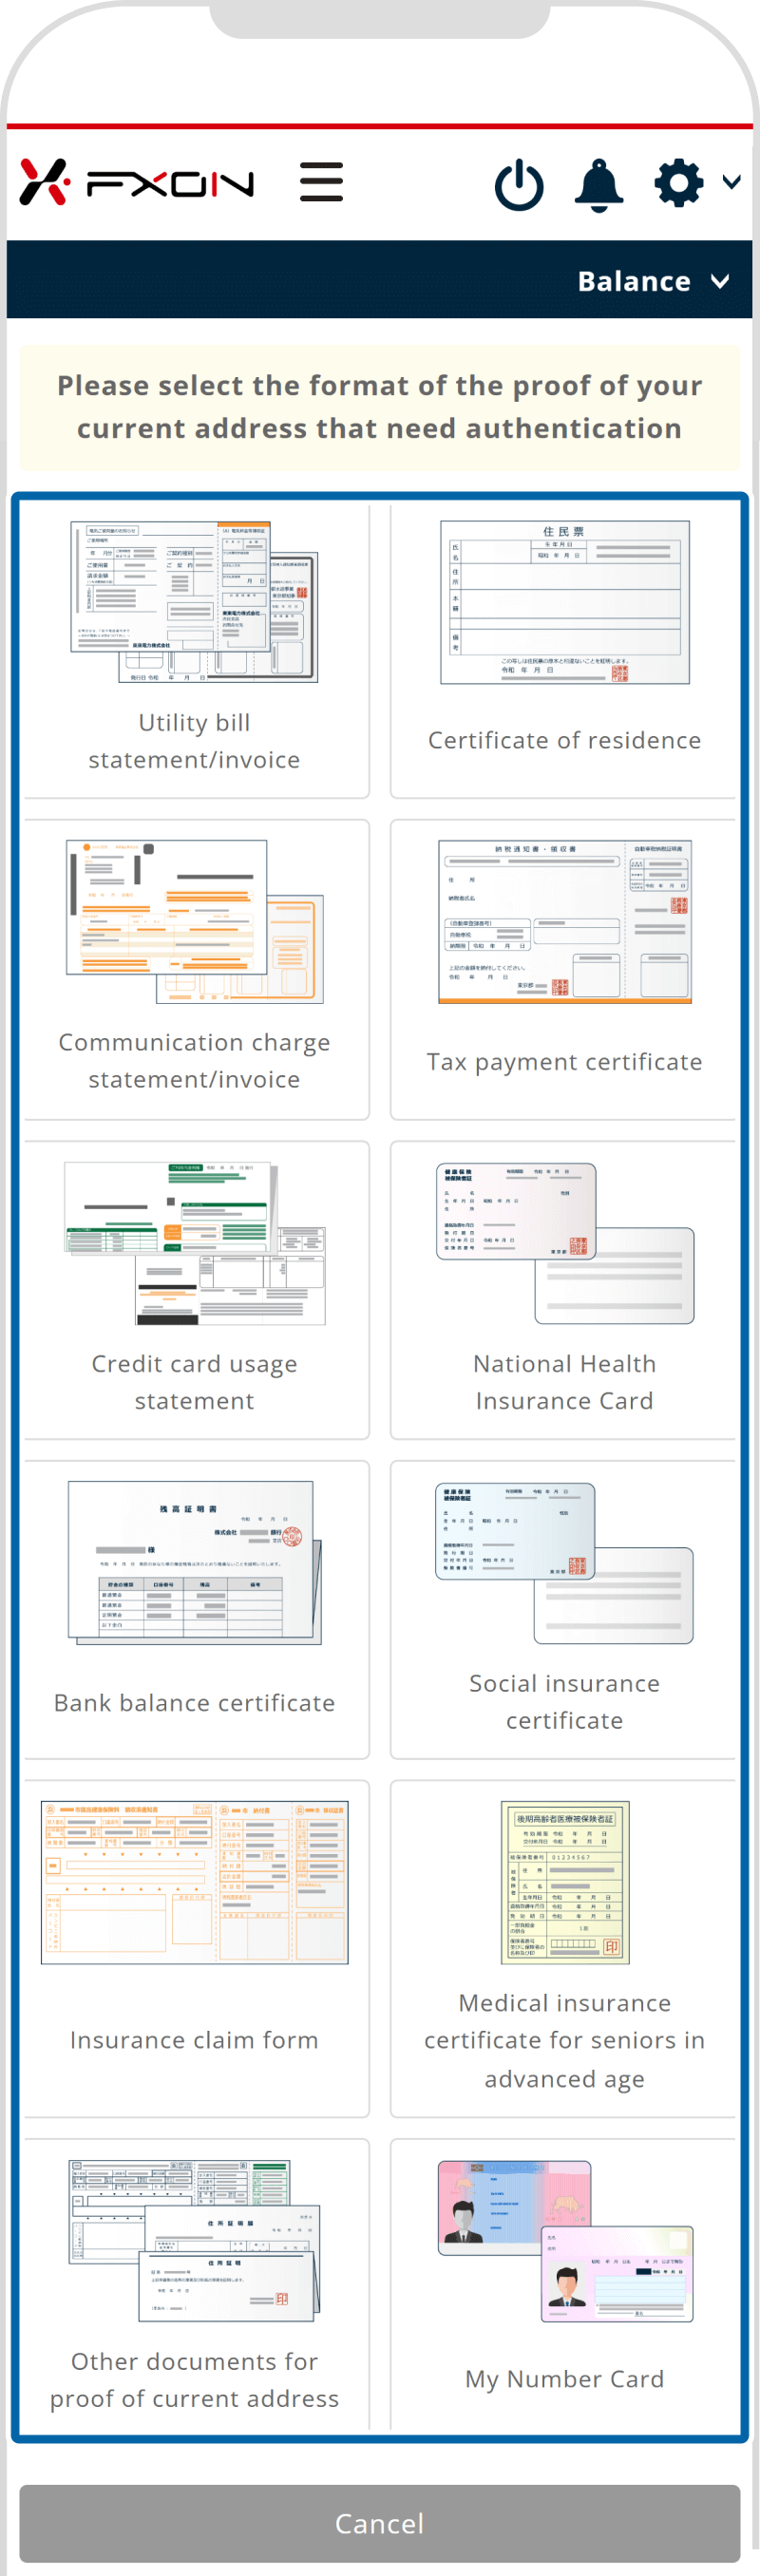
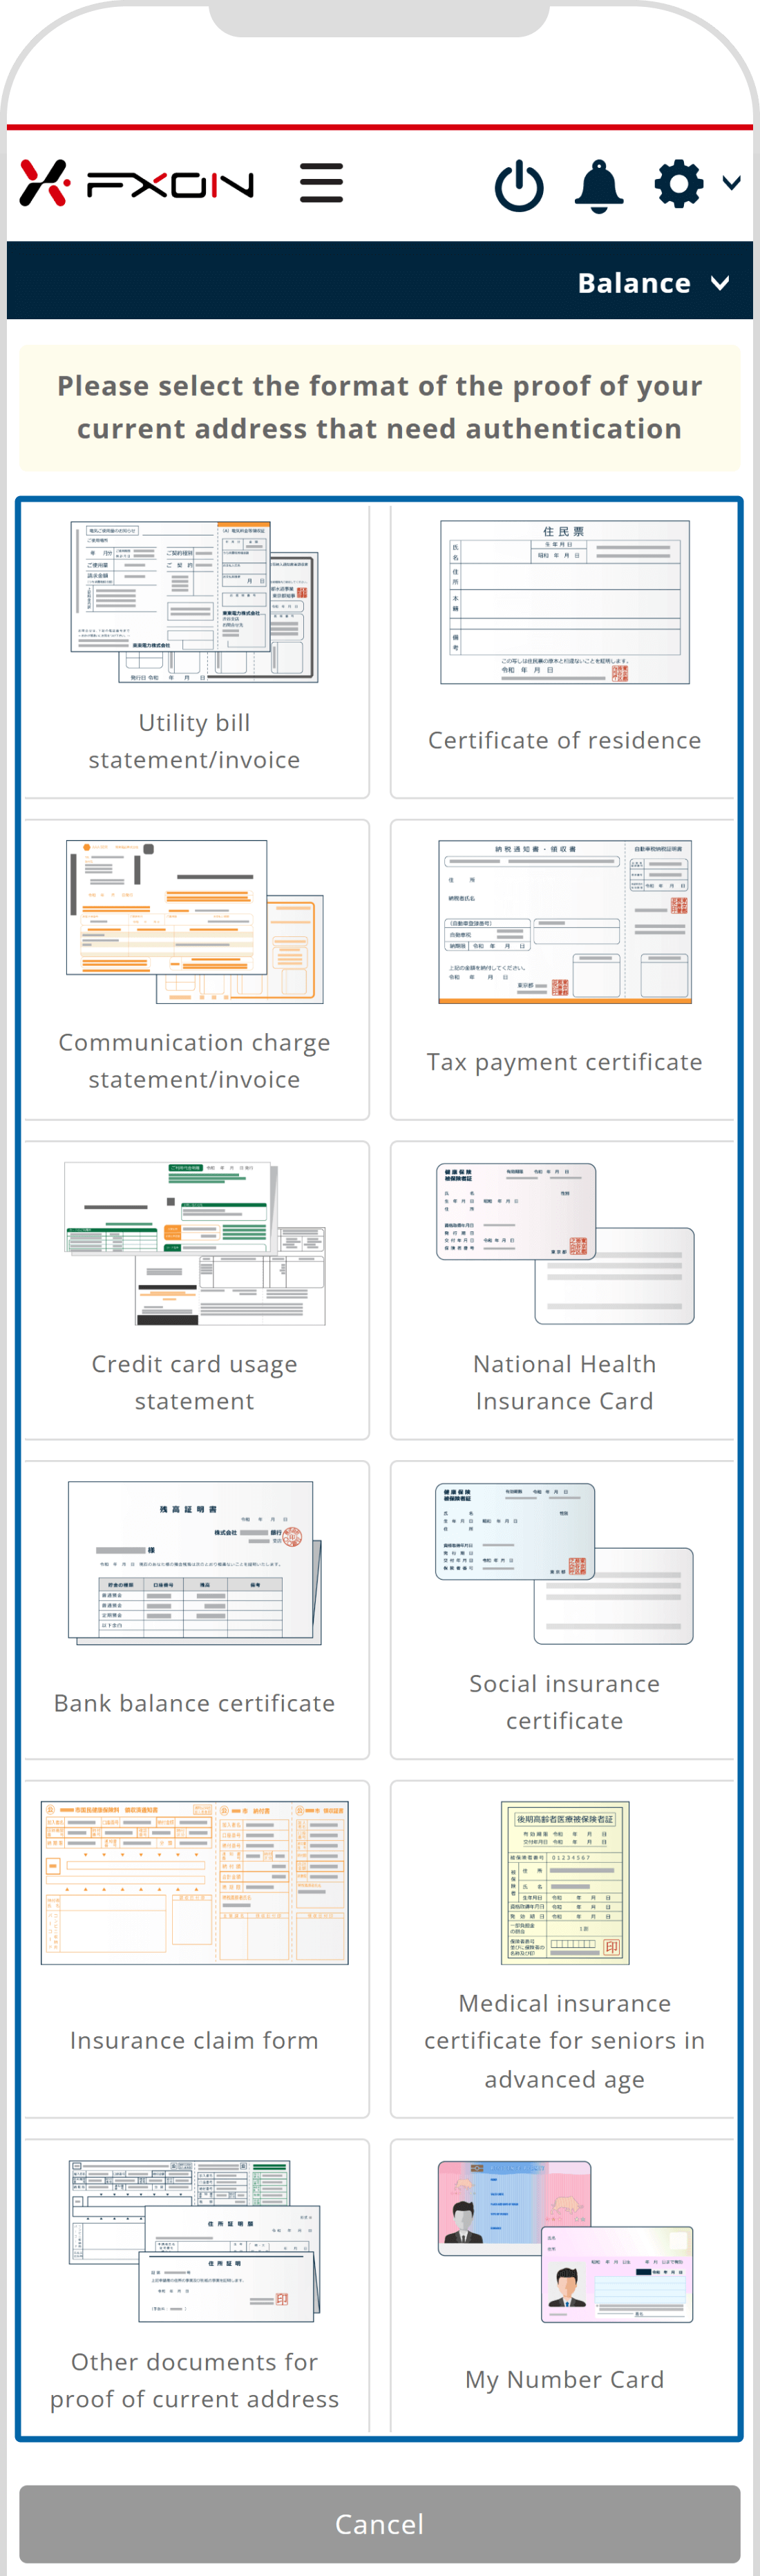
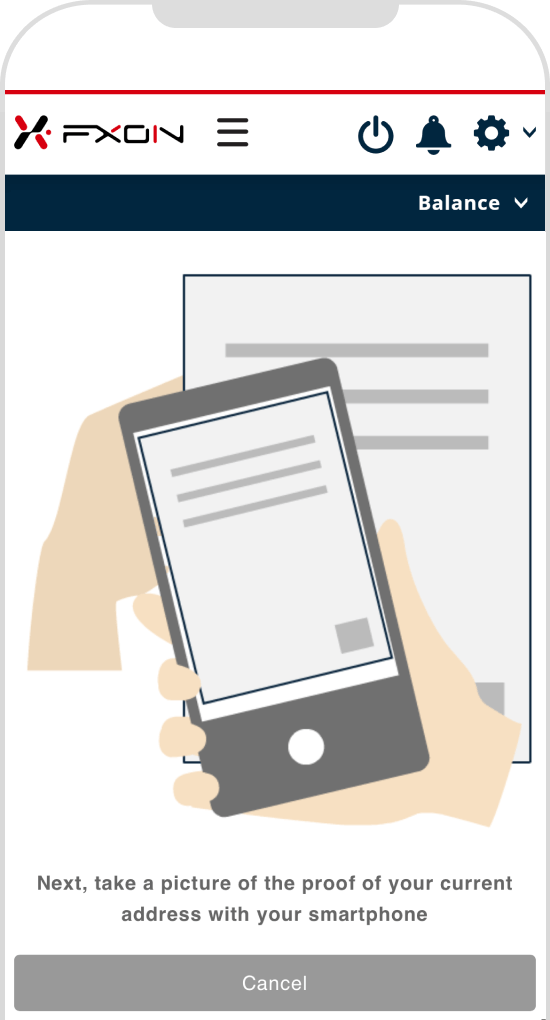
11. Proof of residence selection
When the message "Please select the format of the proof of your current address that needs authentication" appears on your smartphone, tap your document type.
If you are submitting "Card type", go to 12. Card-type Proof of residence verification [Step (i)].
If you are submitting "Bill, statement, or payment form type", go to 14. A4 size proof of residence selection [Step (i)]
12. Card-type Proof of residenc verification [Step (i)]
Please hold the document in your hand and wait for the server connection.
STEP 1
Card-type Proof of residenc verification

STEP 2
Connect to the server

13. Card-type Proof of residence verification [Step (ii)]
The back camera will turn on. Place the document face up, fit it in the frame, and hold the camera still. When the frame and camera icon turn green with the message "Please remain still", tap the camera icon to take a photo. If the message "The image has been saved" is displayed, it is successful.
STEP 1
Align the certificate with the frame and remain still
STEP 2
Remain still
STEP 3
Save image
Follow the instructions on the screen and take a photo of the back of the document.
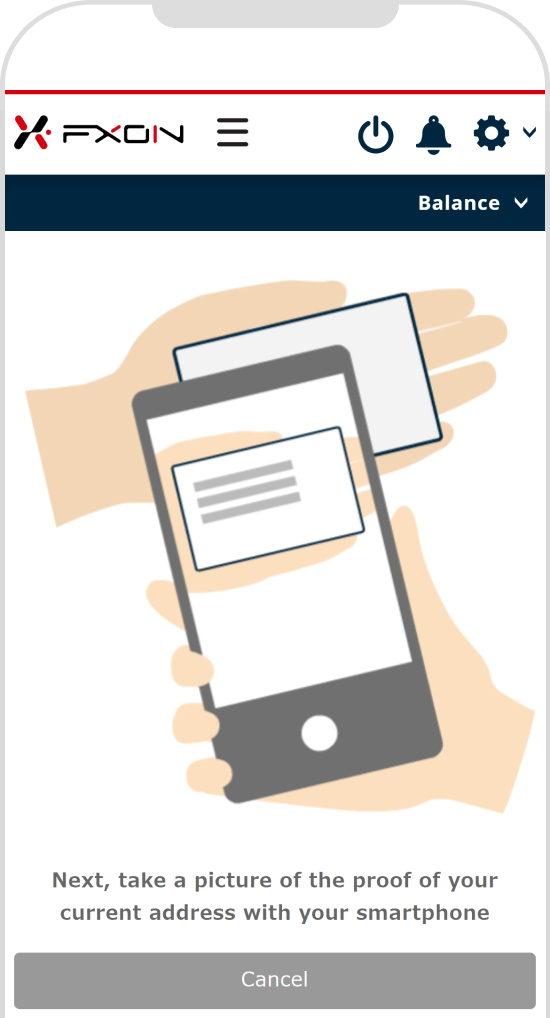
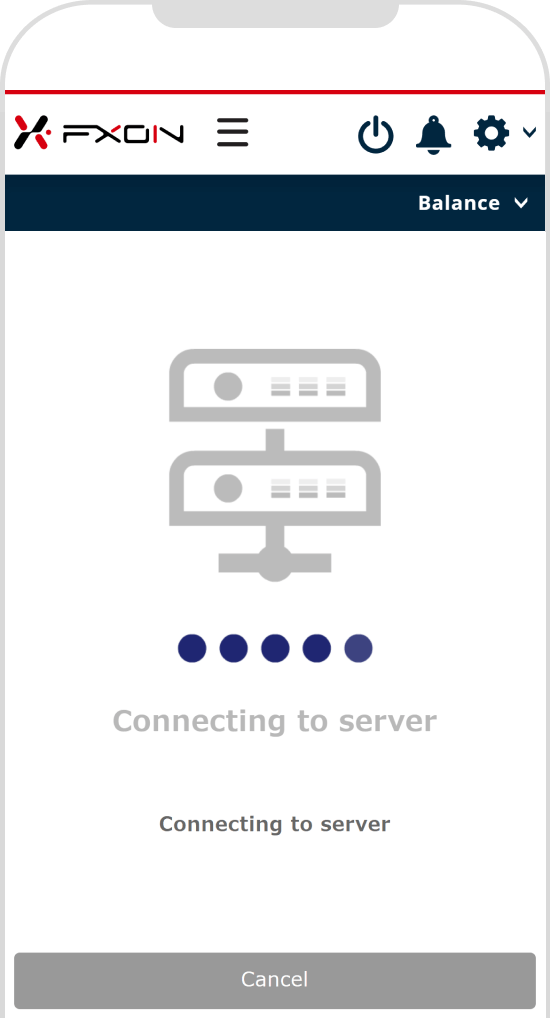
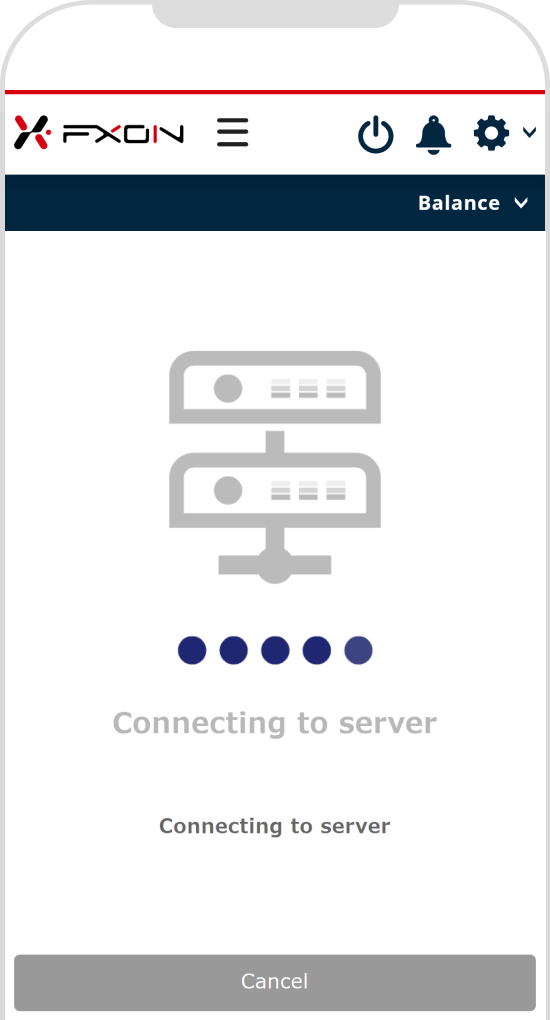
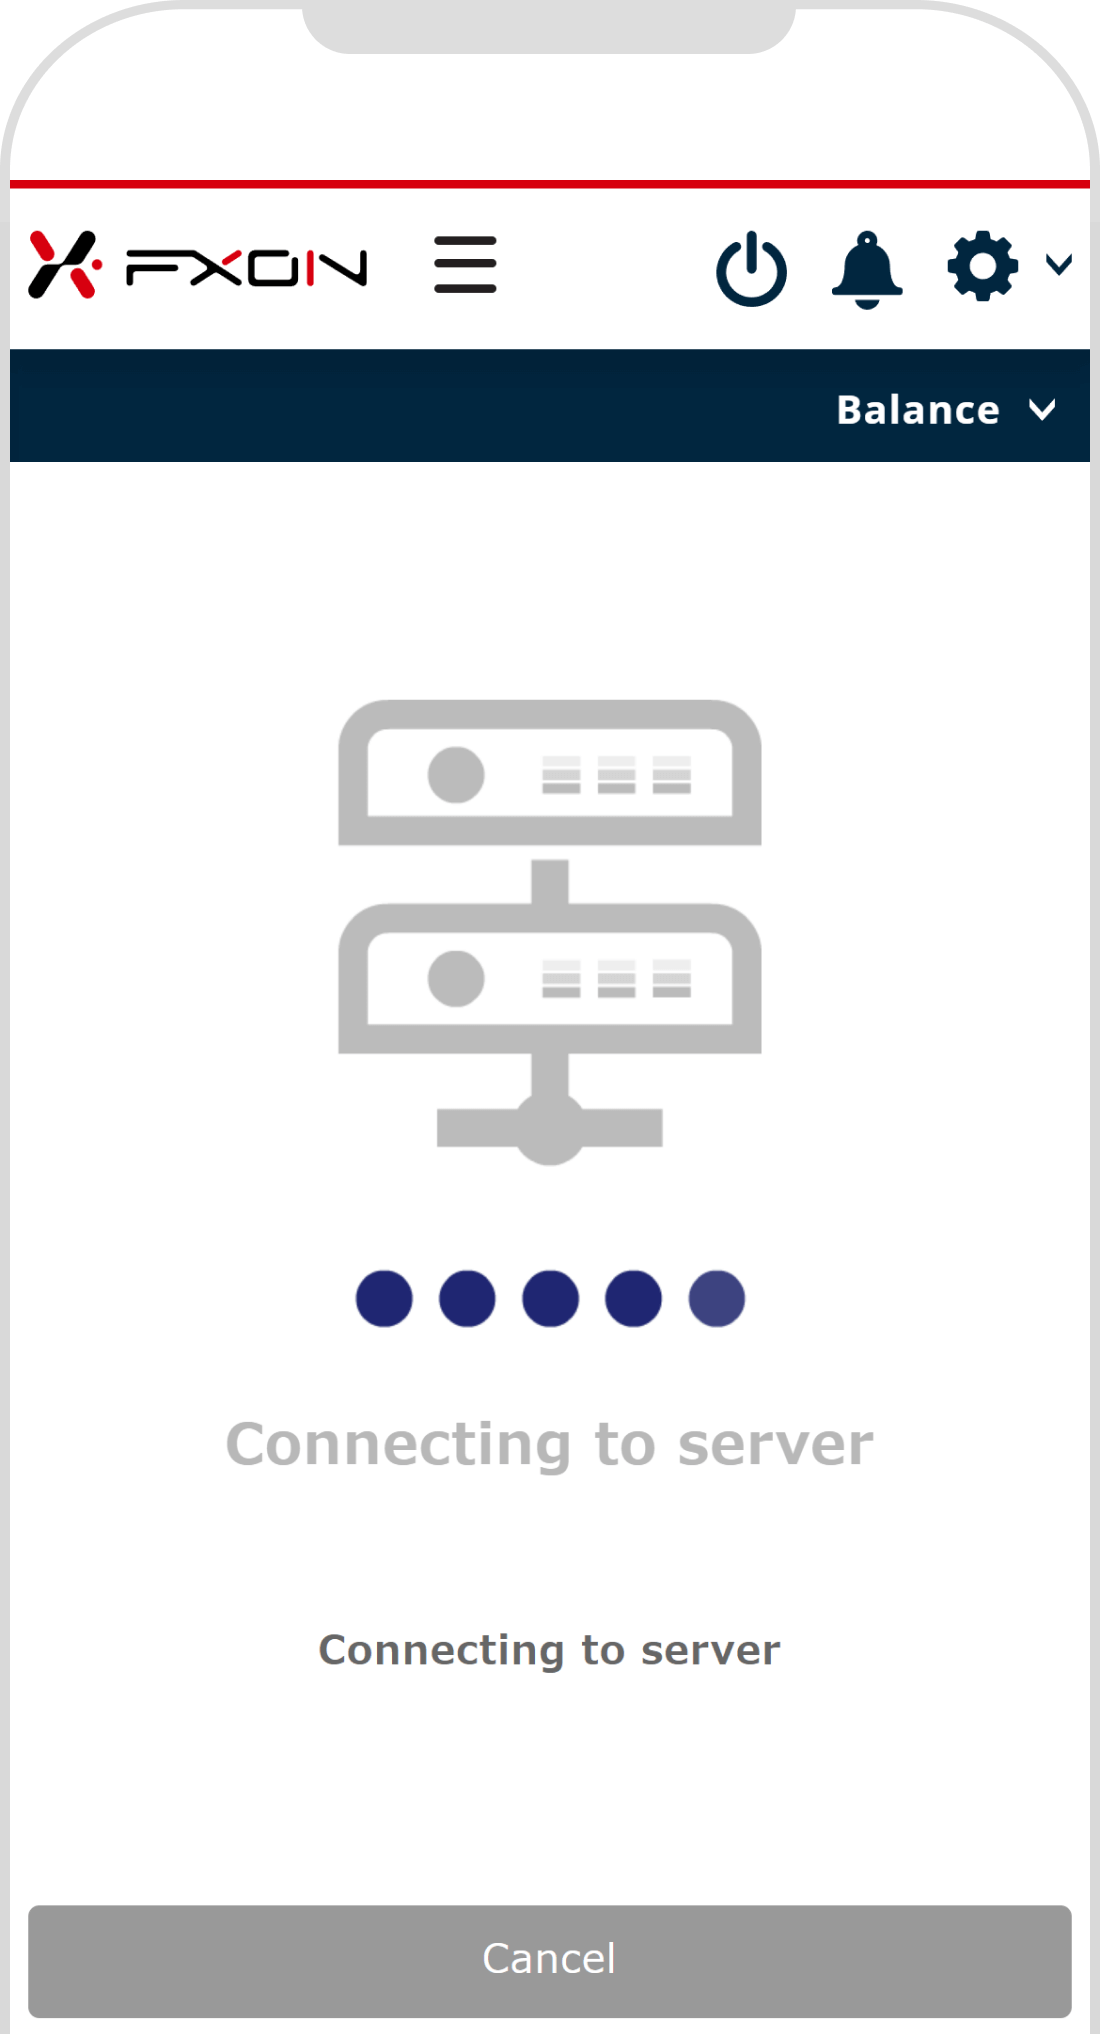
14. A4 size Proof of residence verification [Step (i)]
Please hold the document in your hand and wait for the server connection.
STEP 1
Capture A4 document-type proof of address

STEP 2
Connect to the server
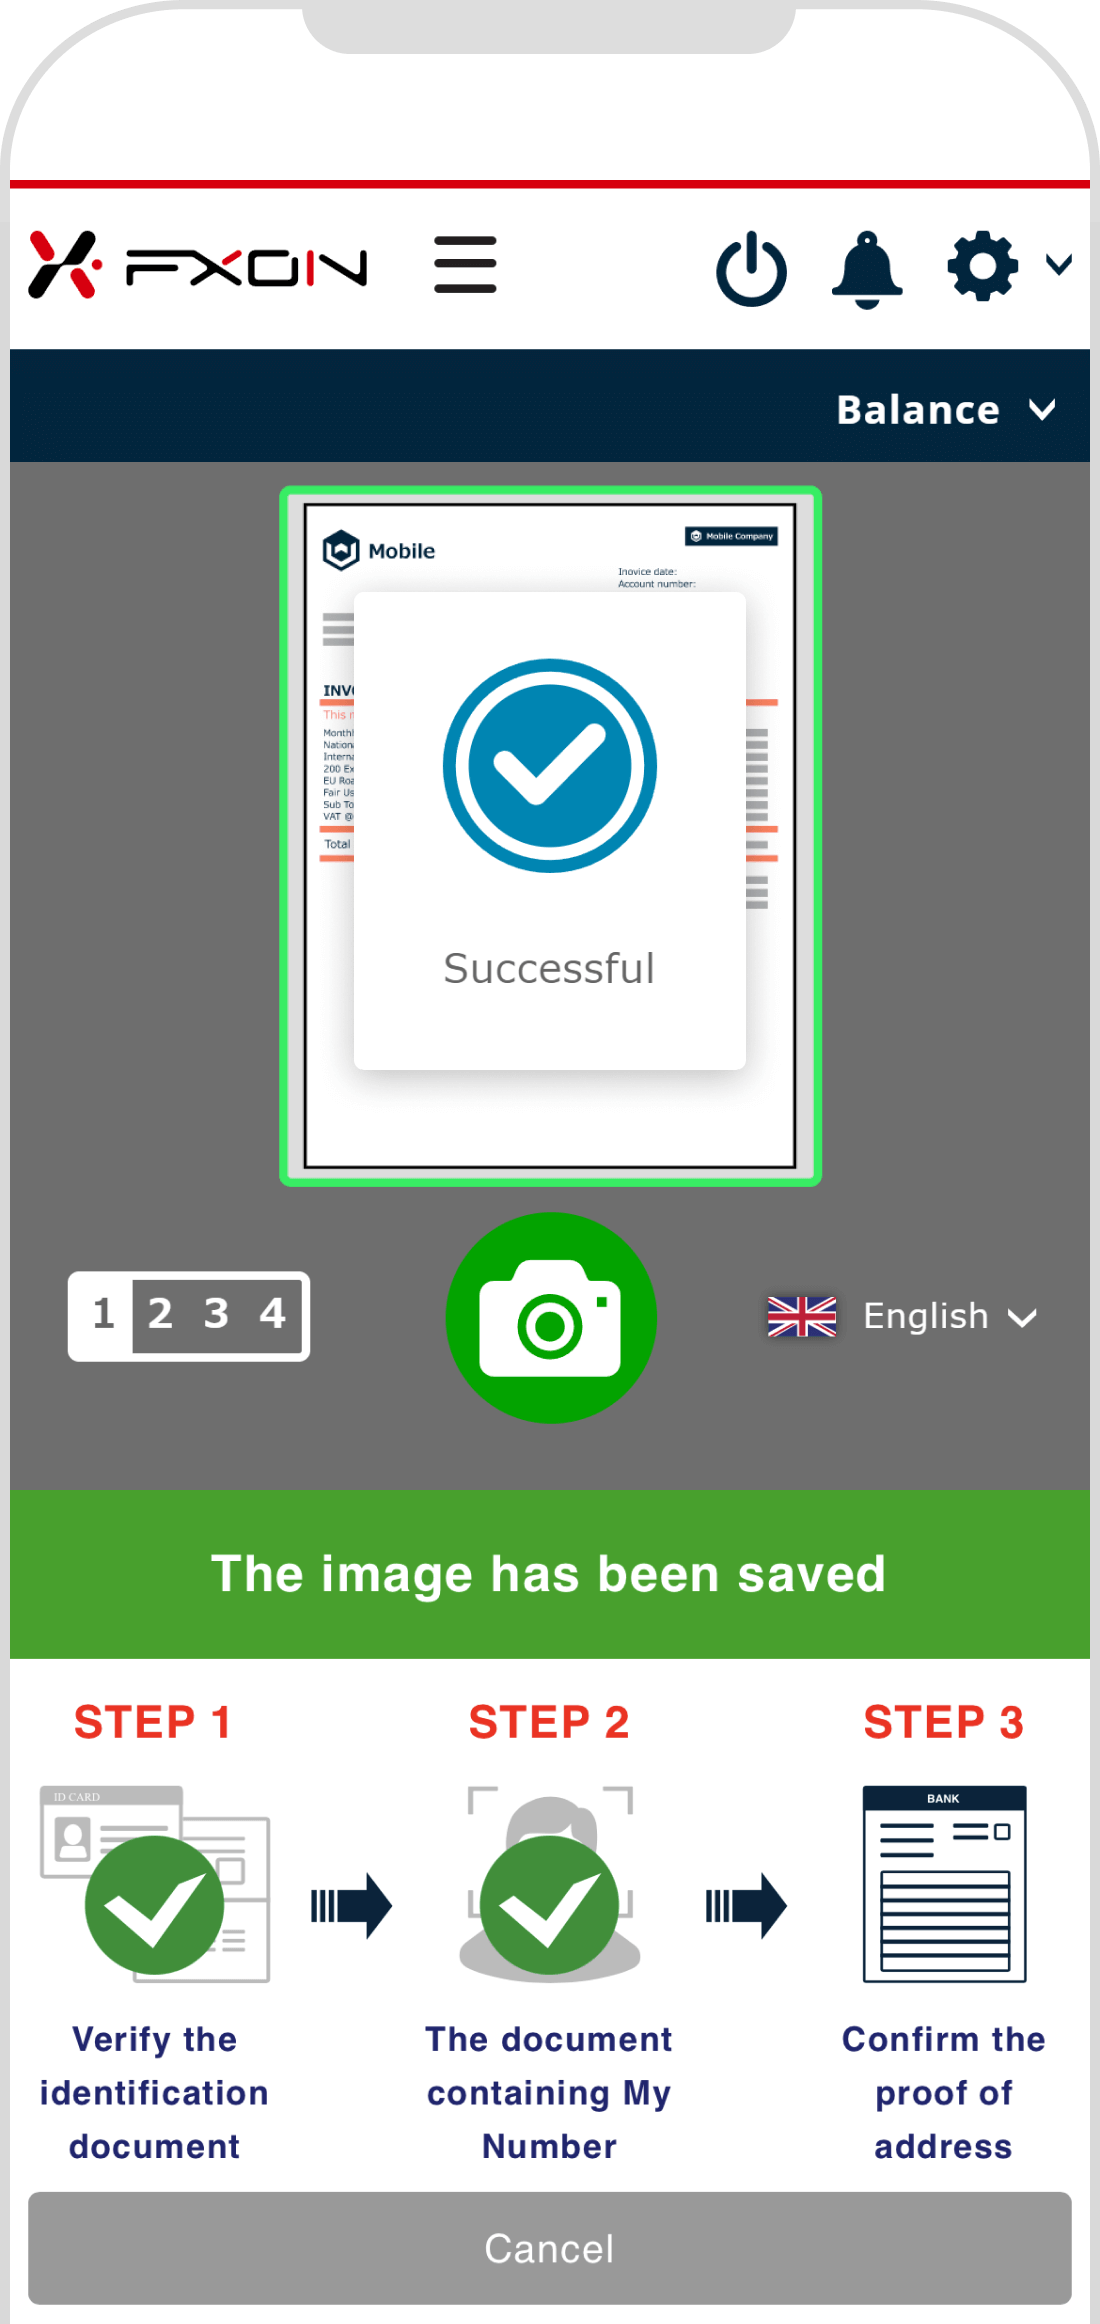
15. A4 size Proof of residence verification [Step (ii)]
The back camera will turn on. Place the document face up, fit it in the frame, and hold the camera still. When the frame and camera icon turn green with the message "Please remain still", tap the camera icon to take a photo. If the message "The image has been saved" is displayed, it is successful.
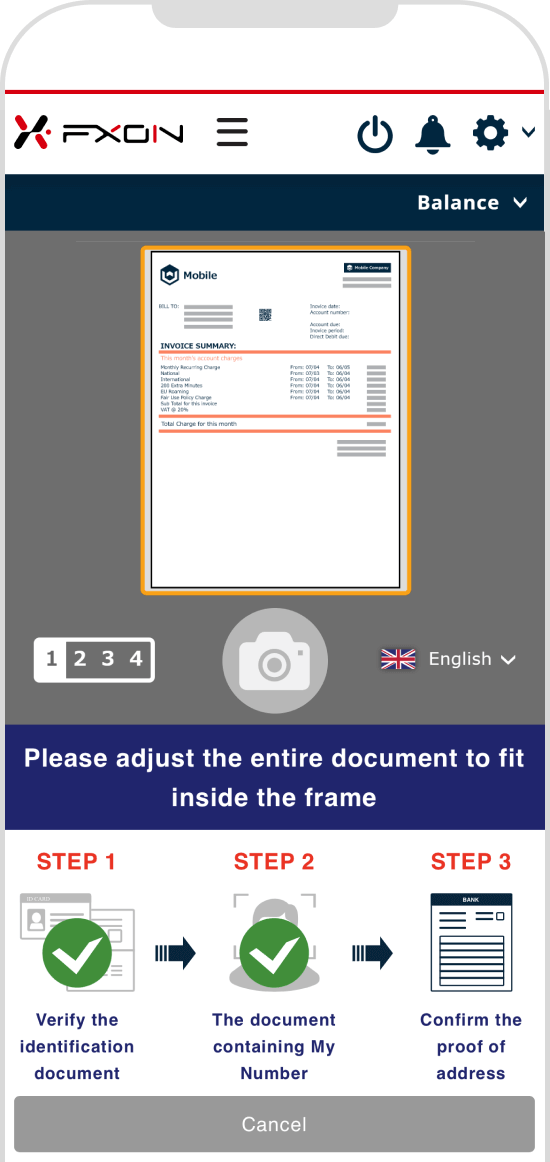
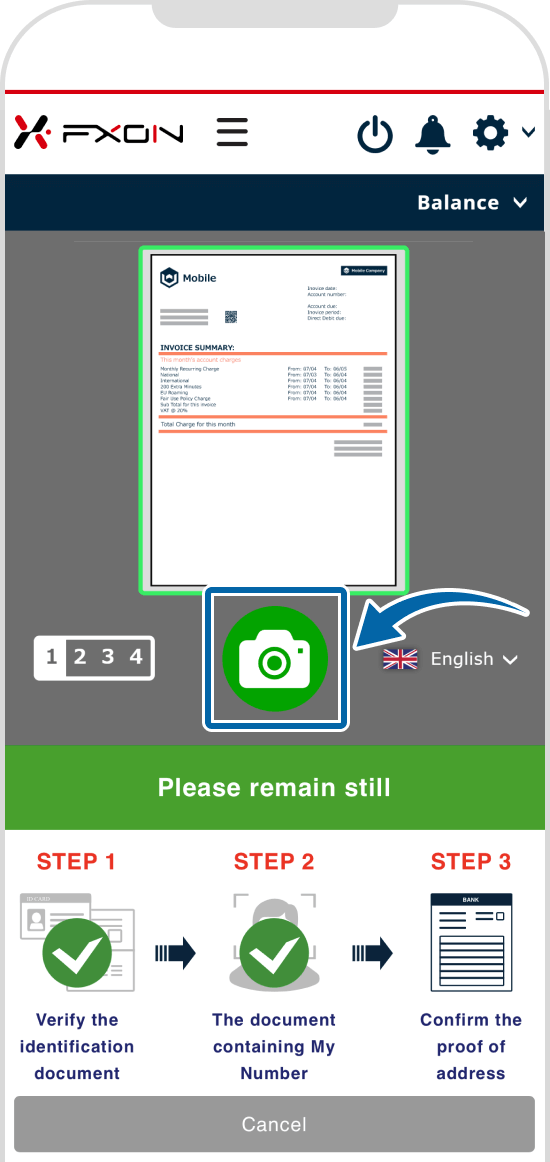
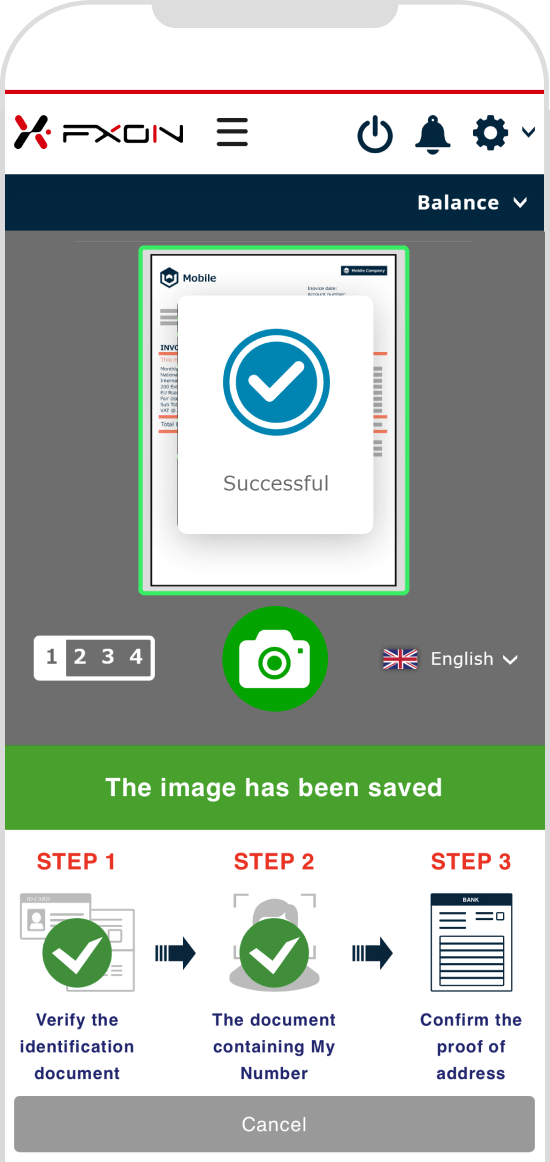
STEP 1
Align the entire document with the frame and remain still
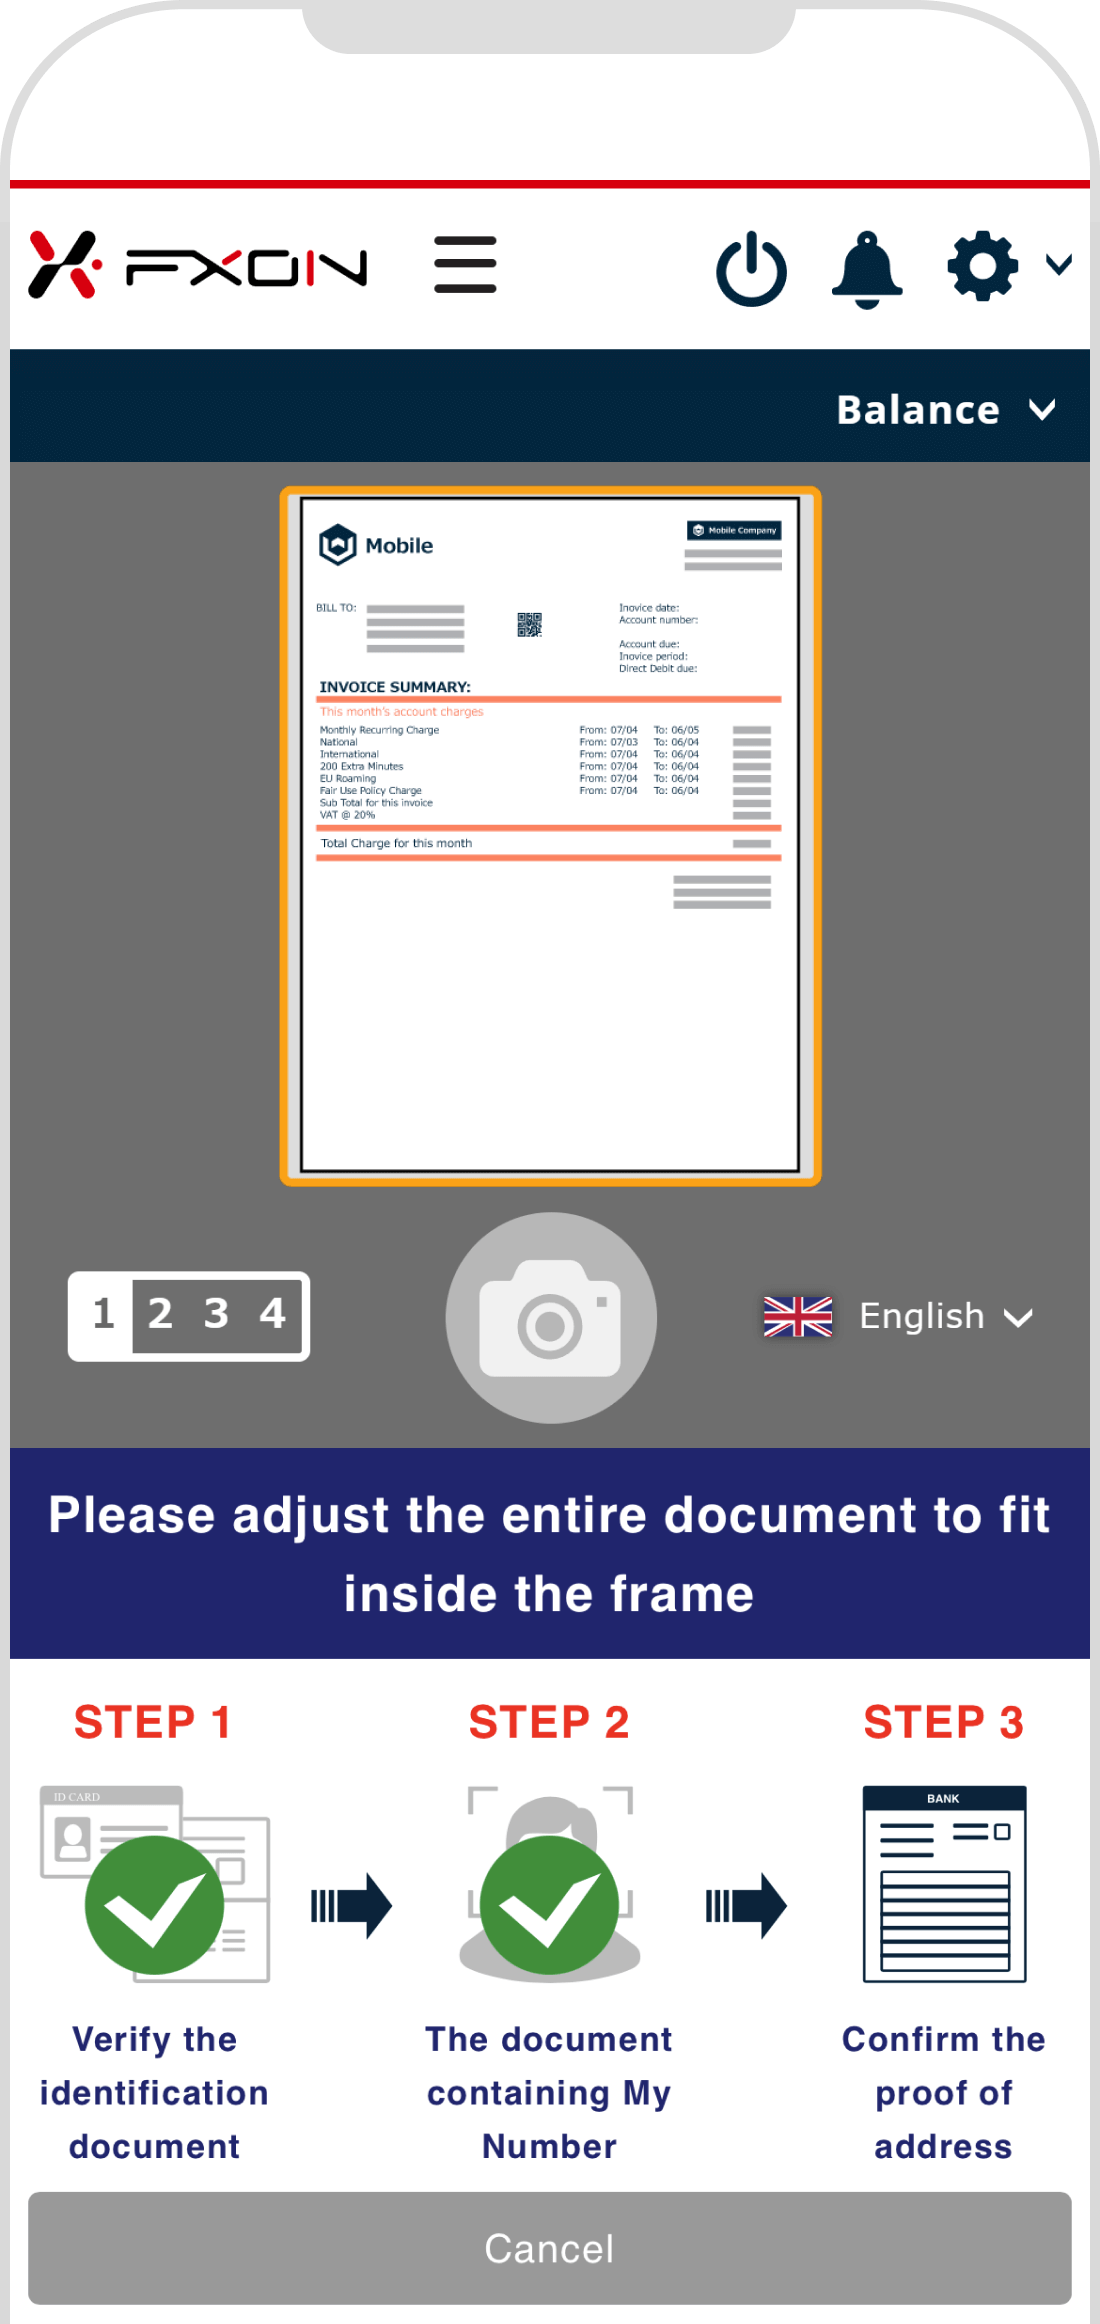
STEP 2
Remain still
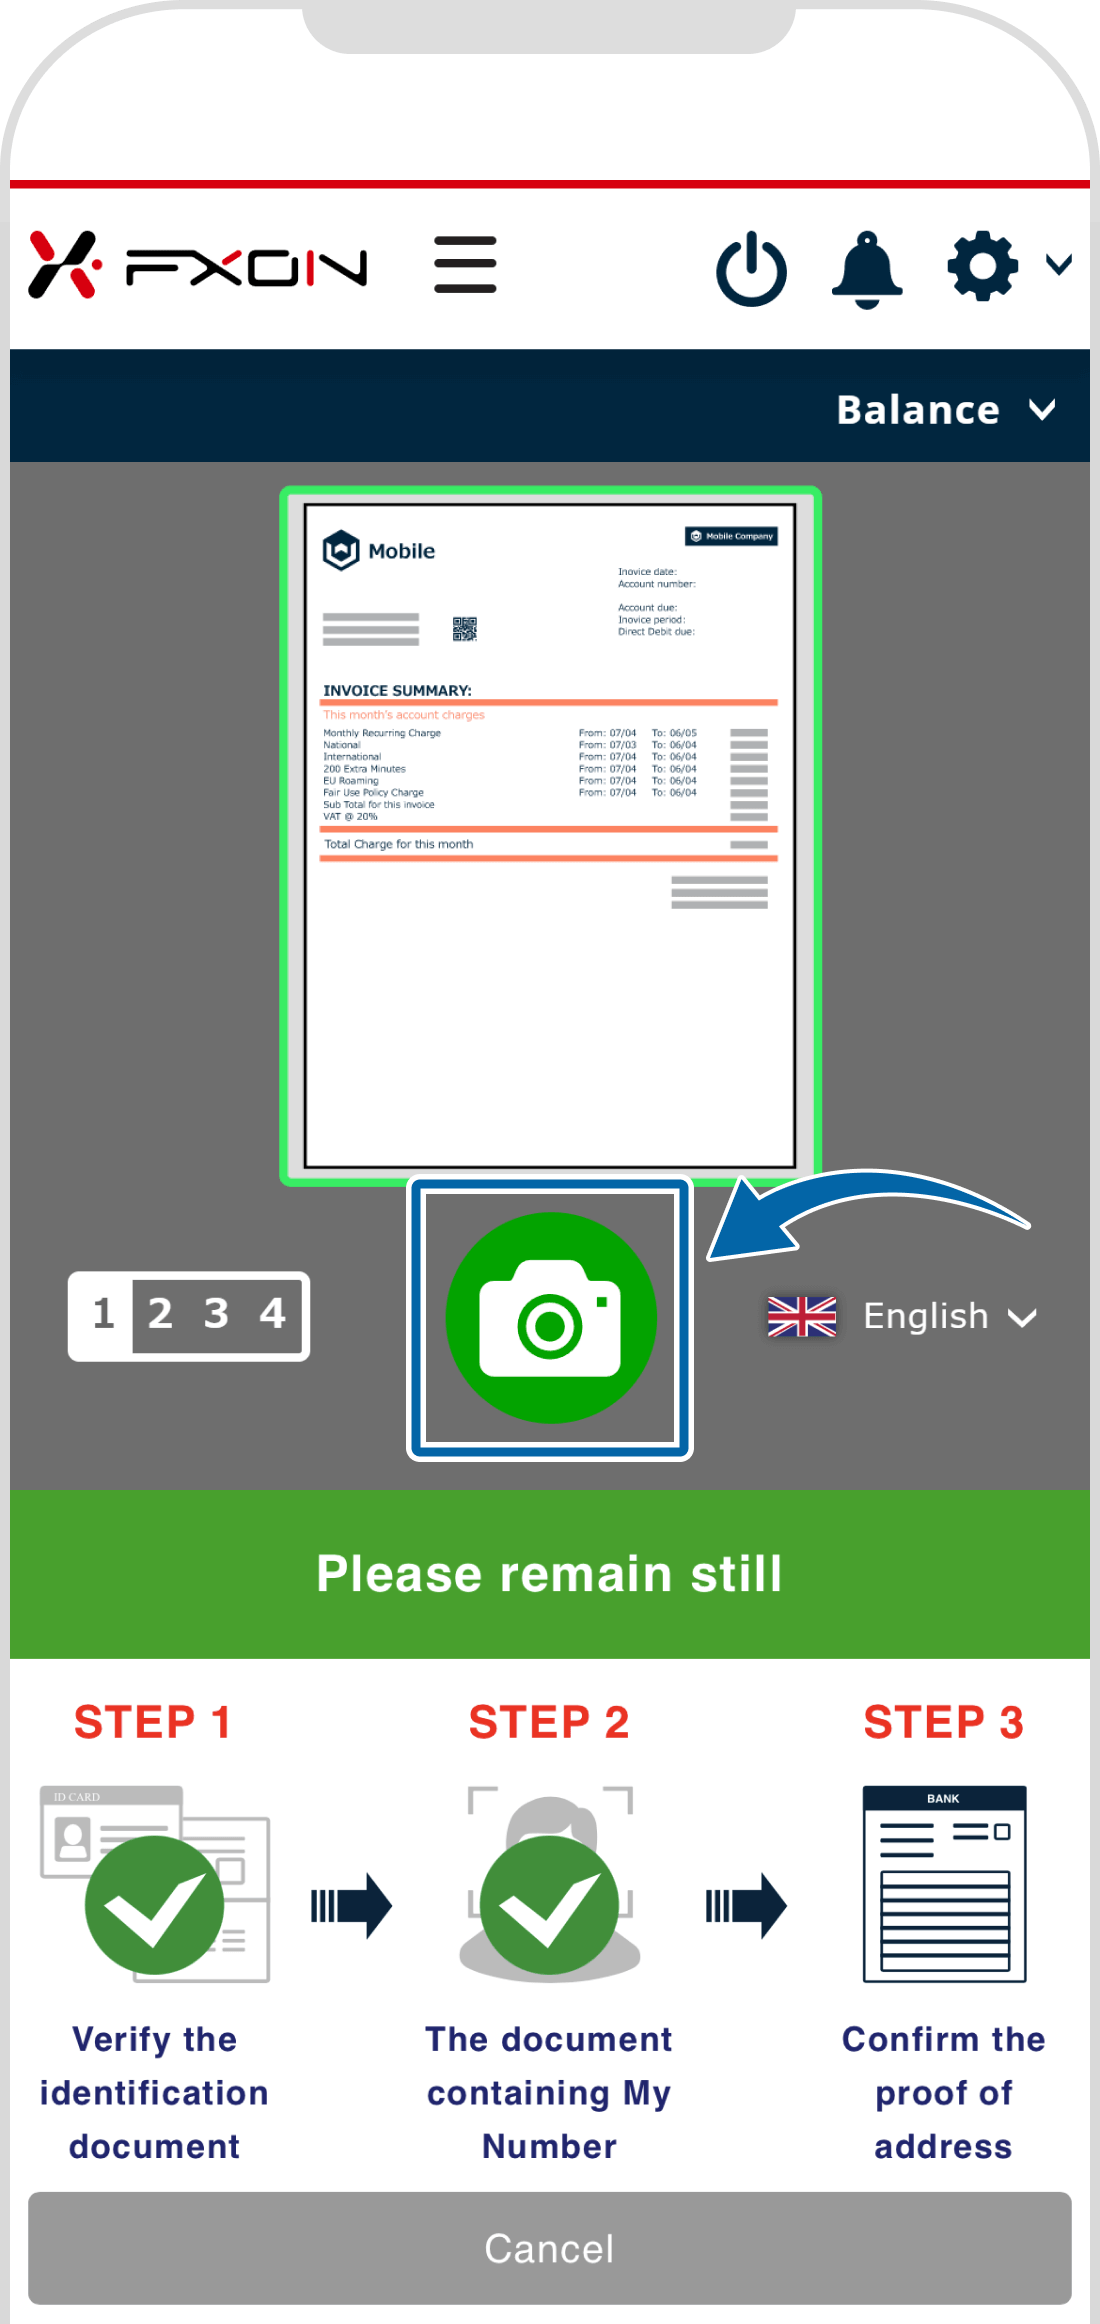
STEP 3
Save image
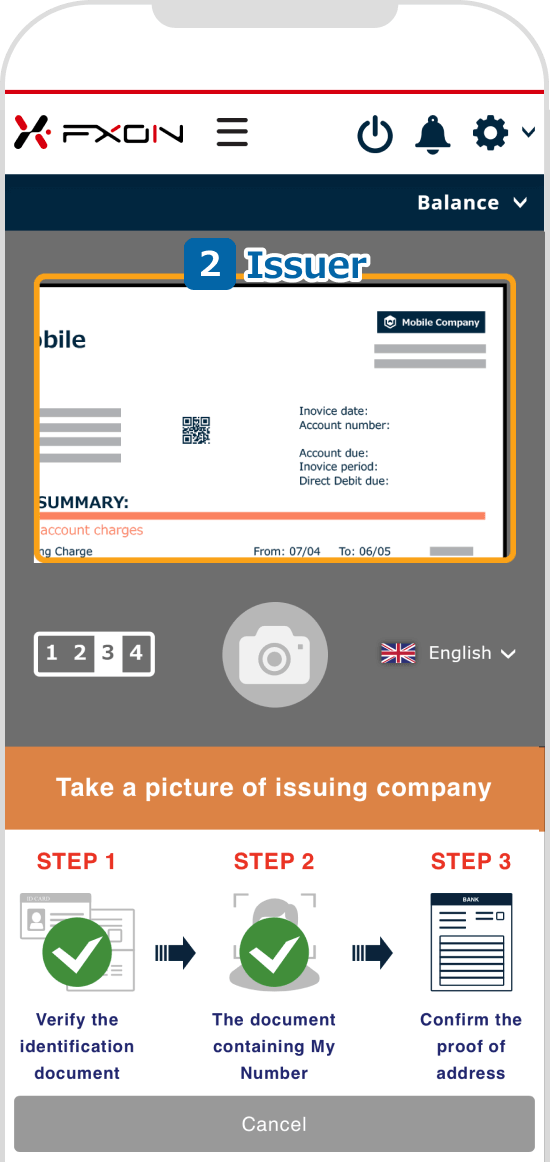
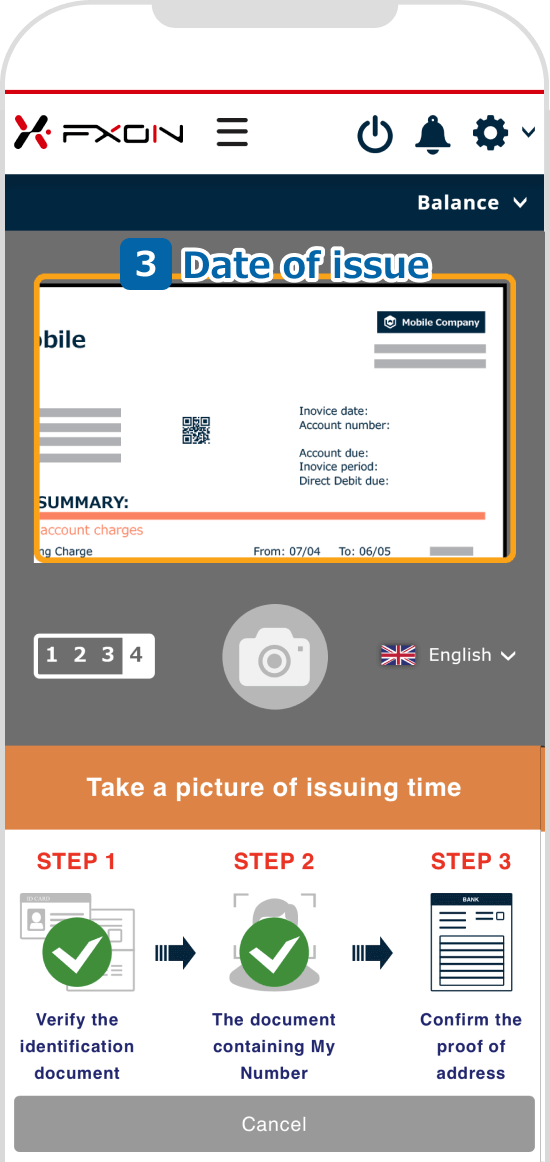
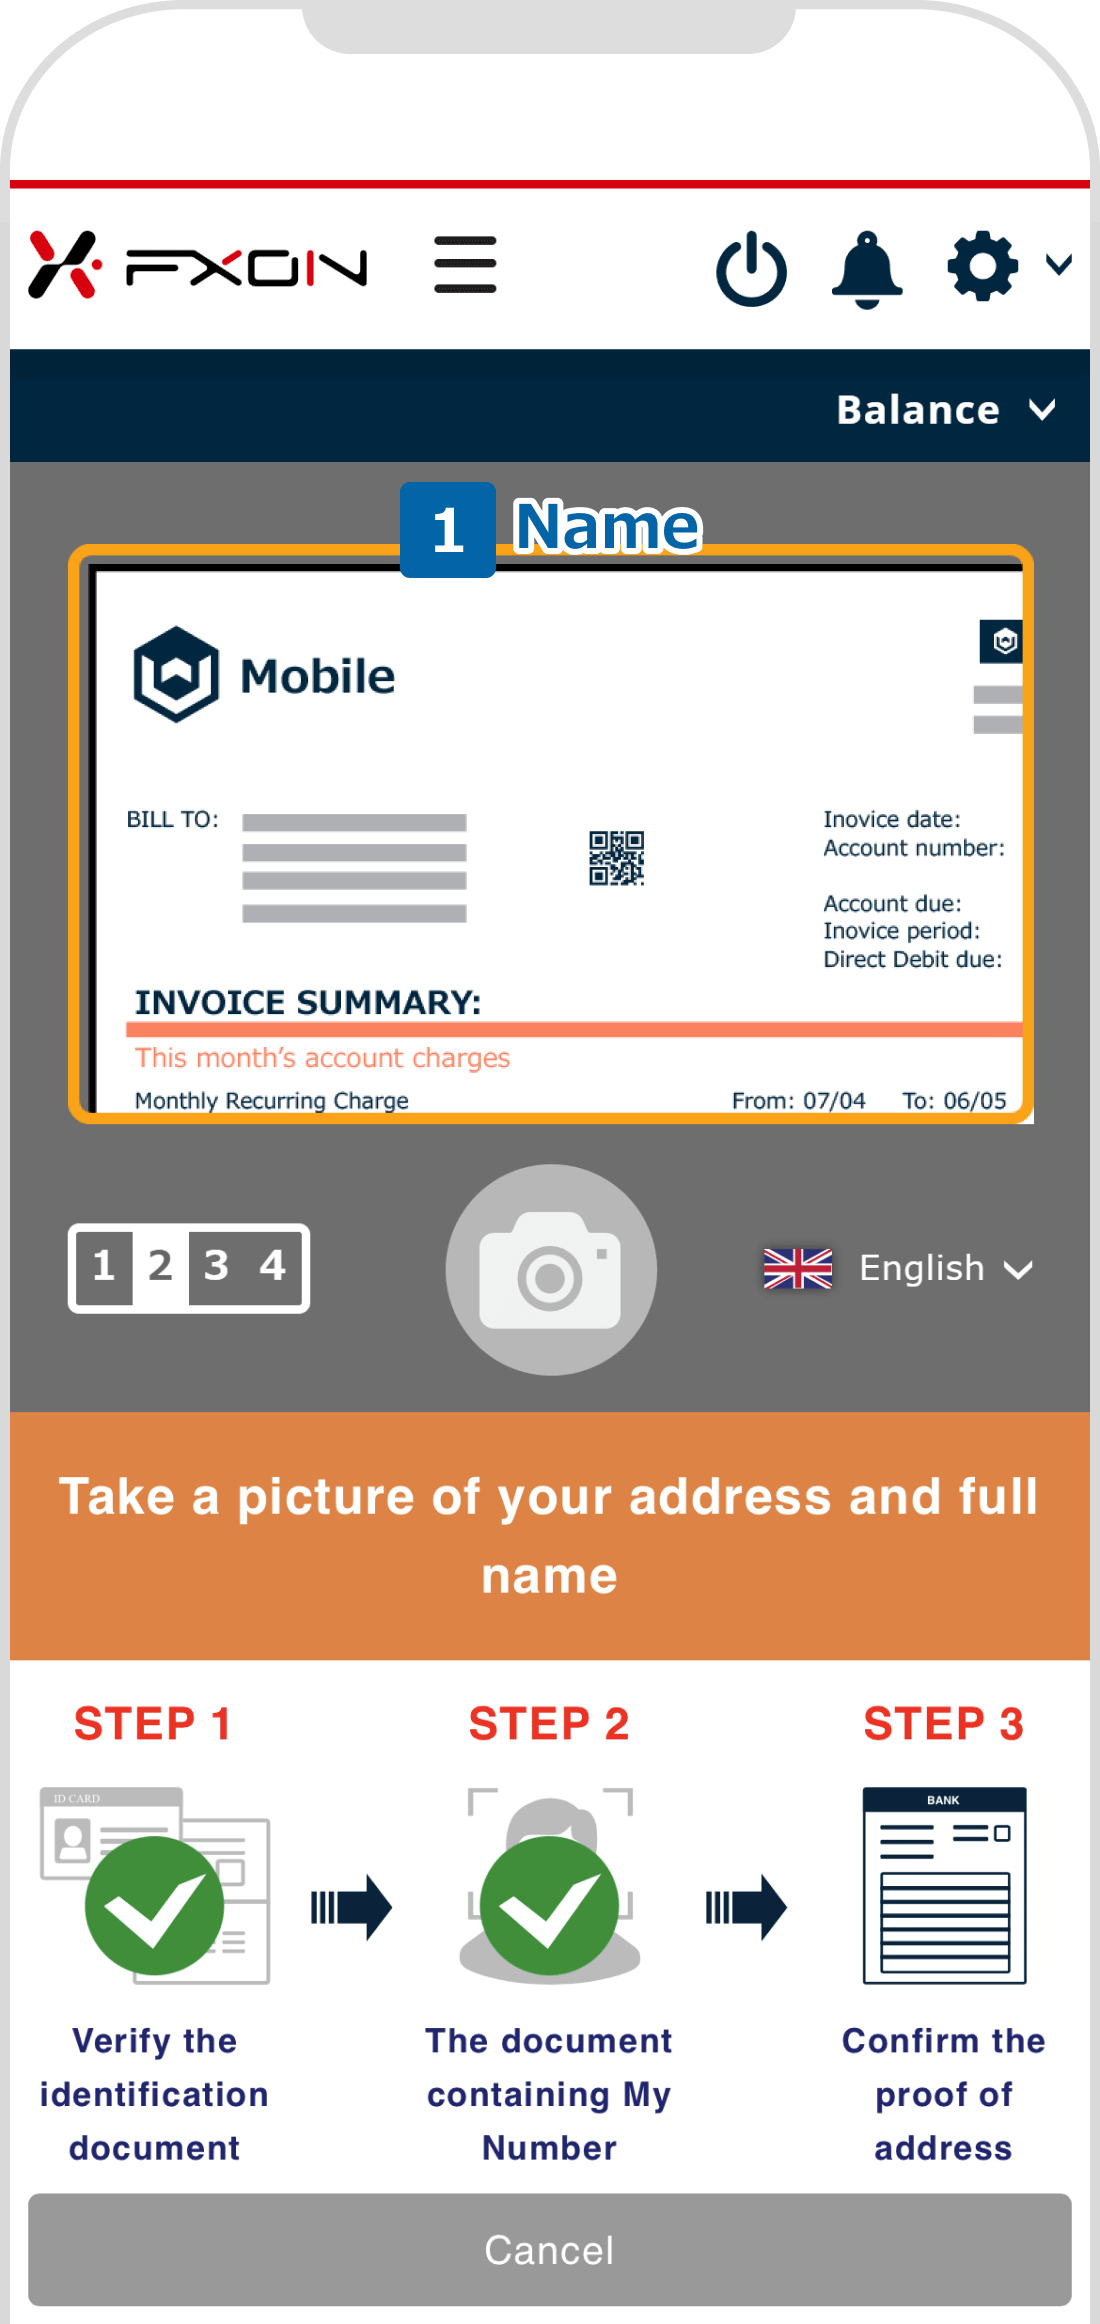
Follow the instructions on the screen and take photos of the (1) name and address, (2) issuer, and (3) date of issue.
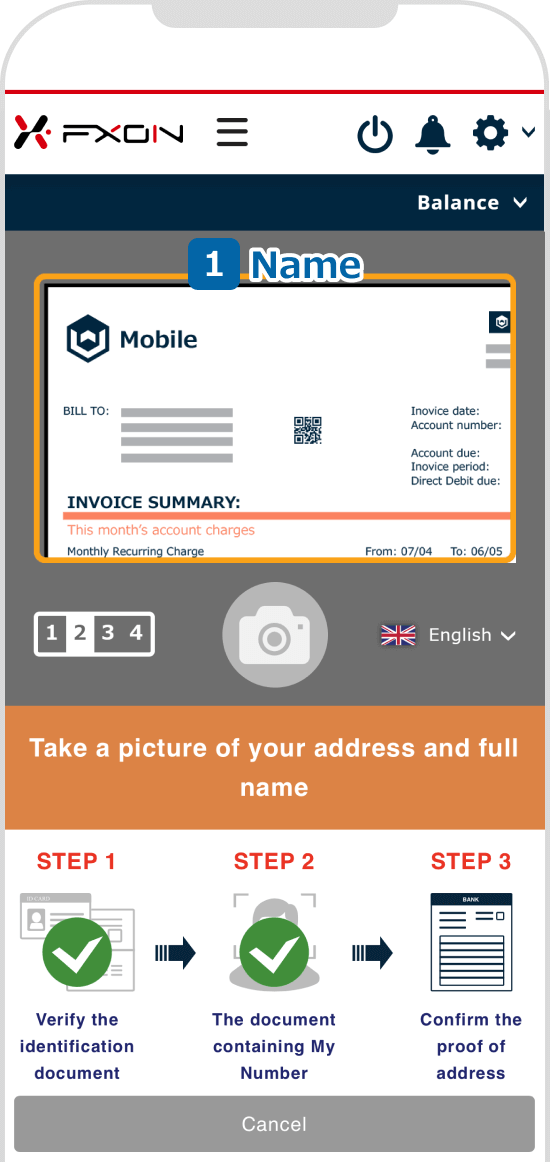
STEP 1
Address and name
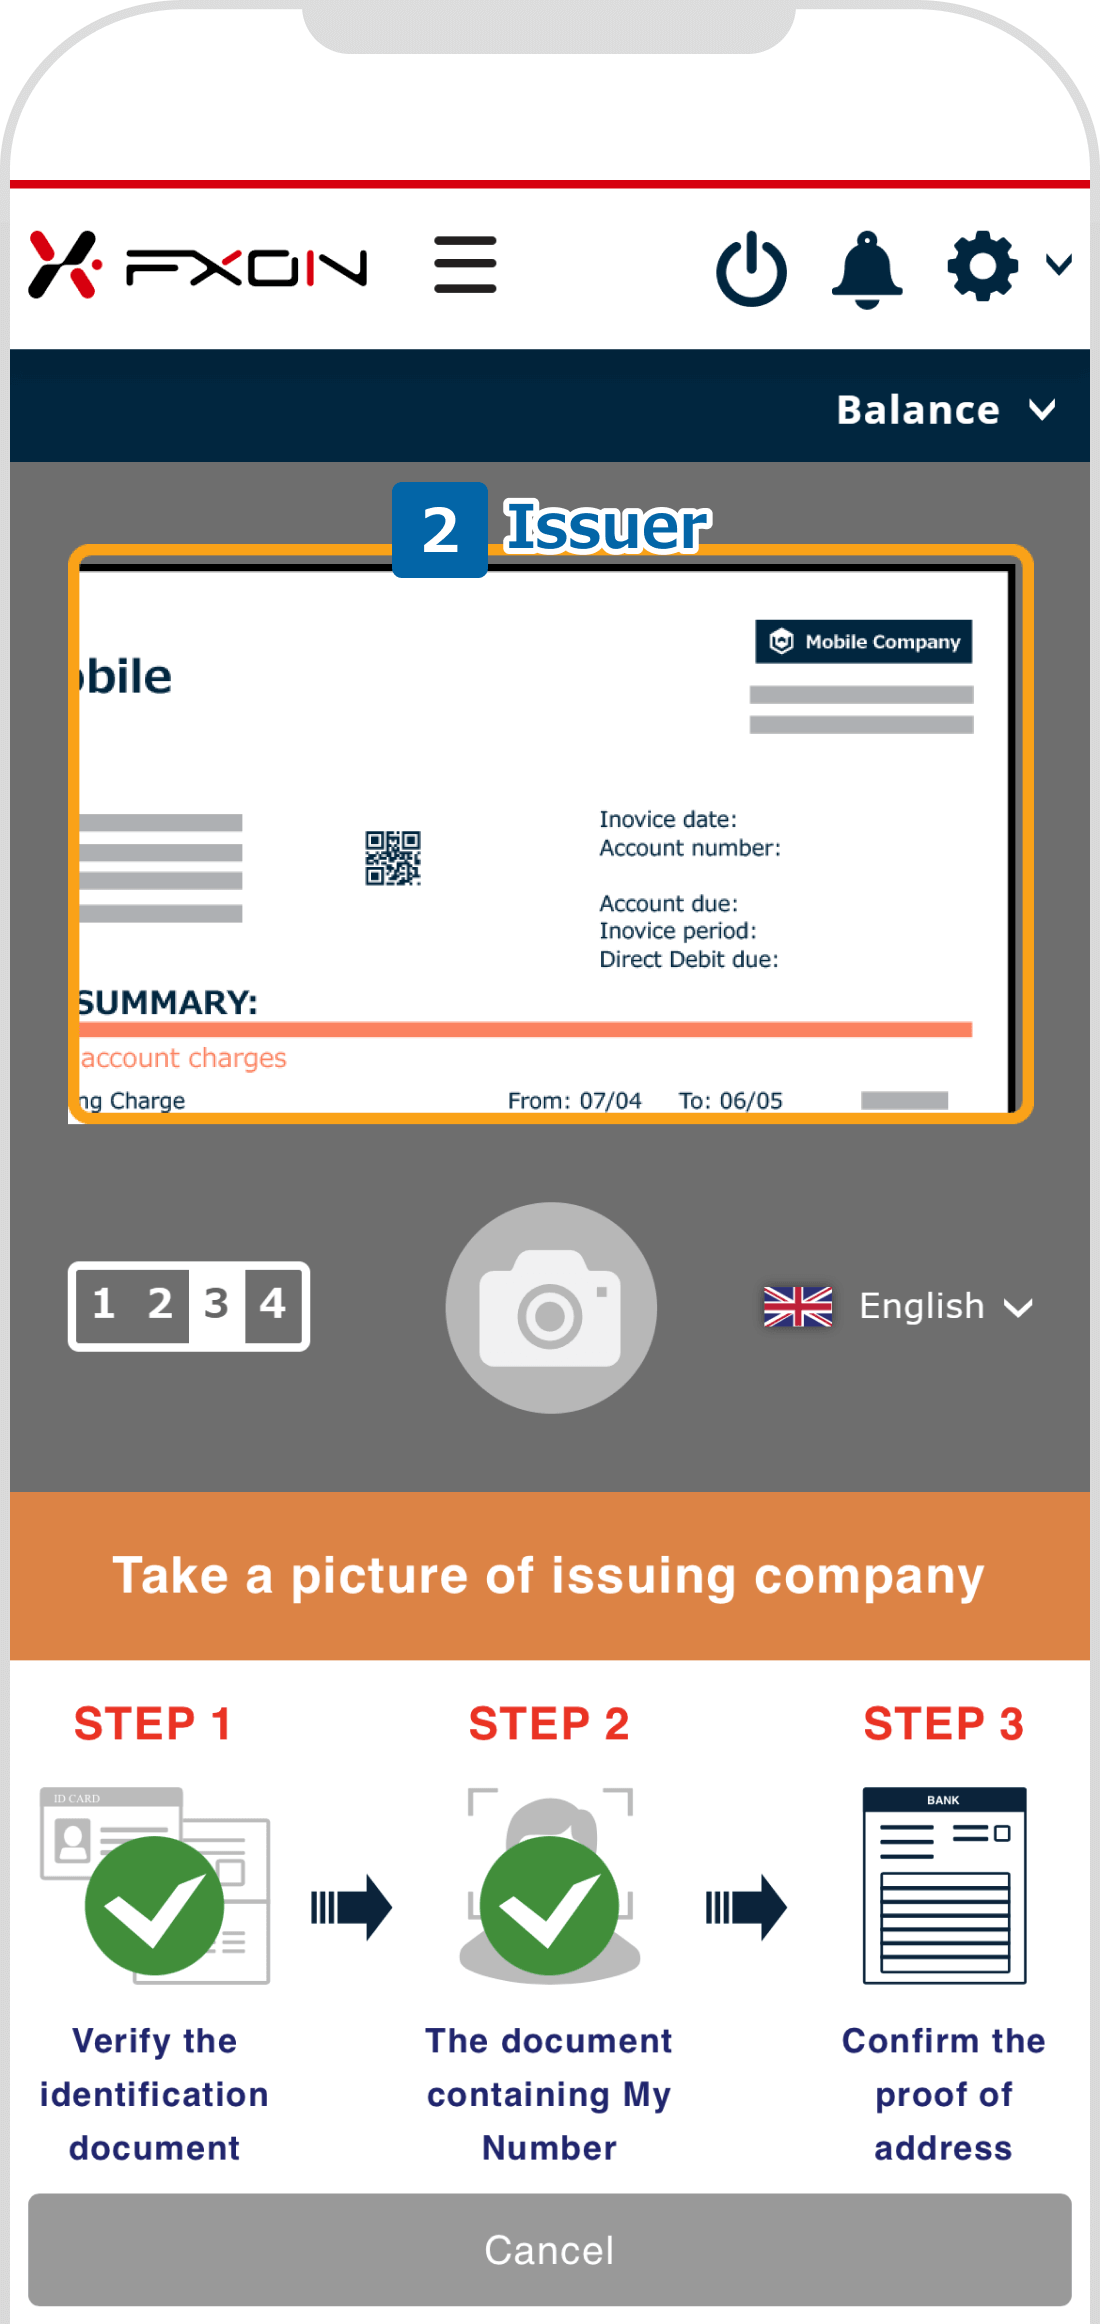
STEP 2
Issuer
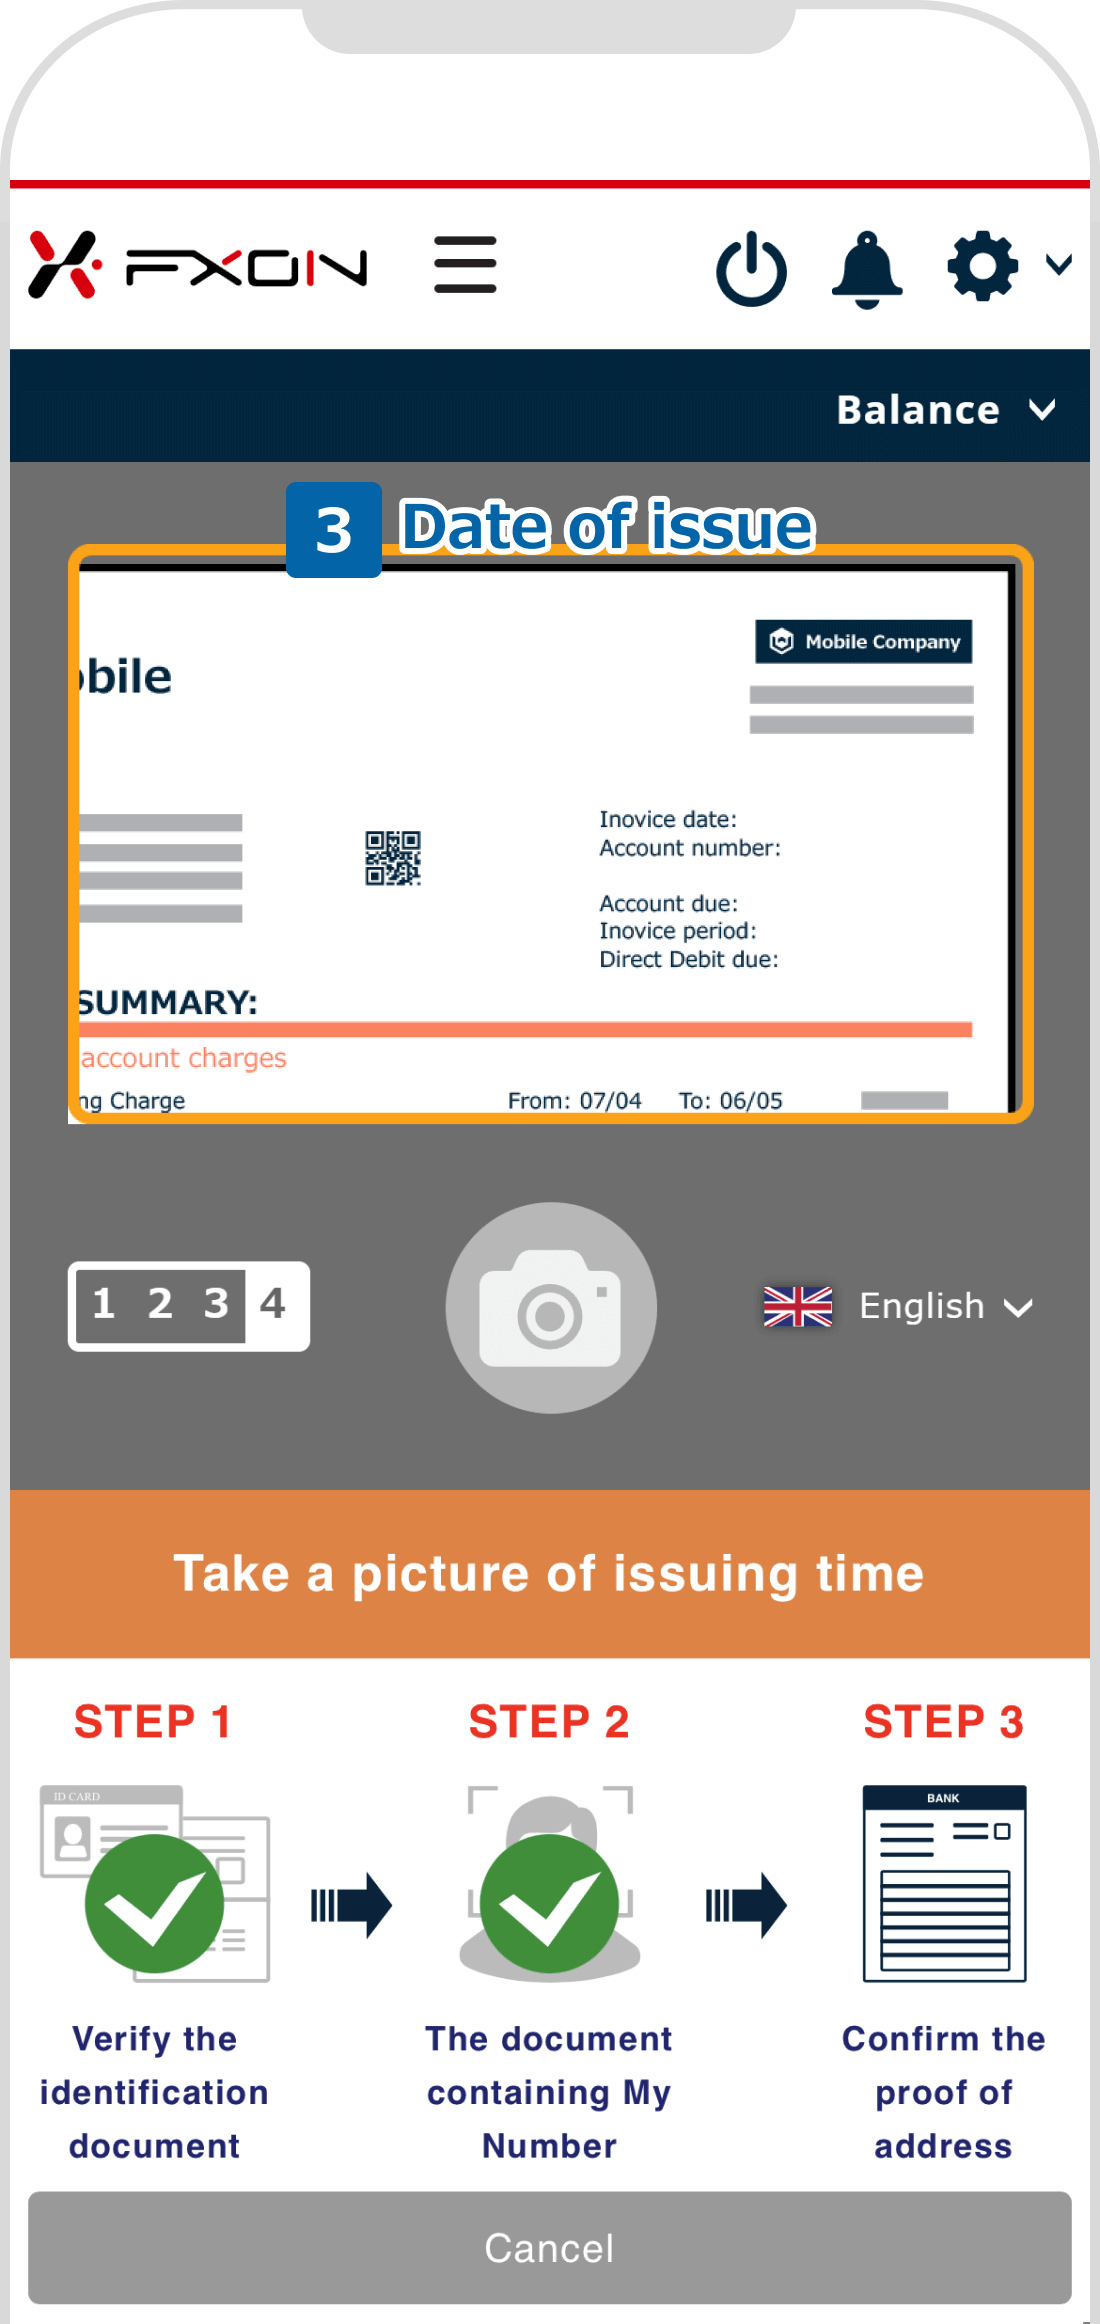
STEP 3
Date of issue
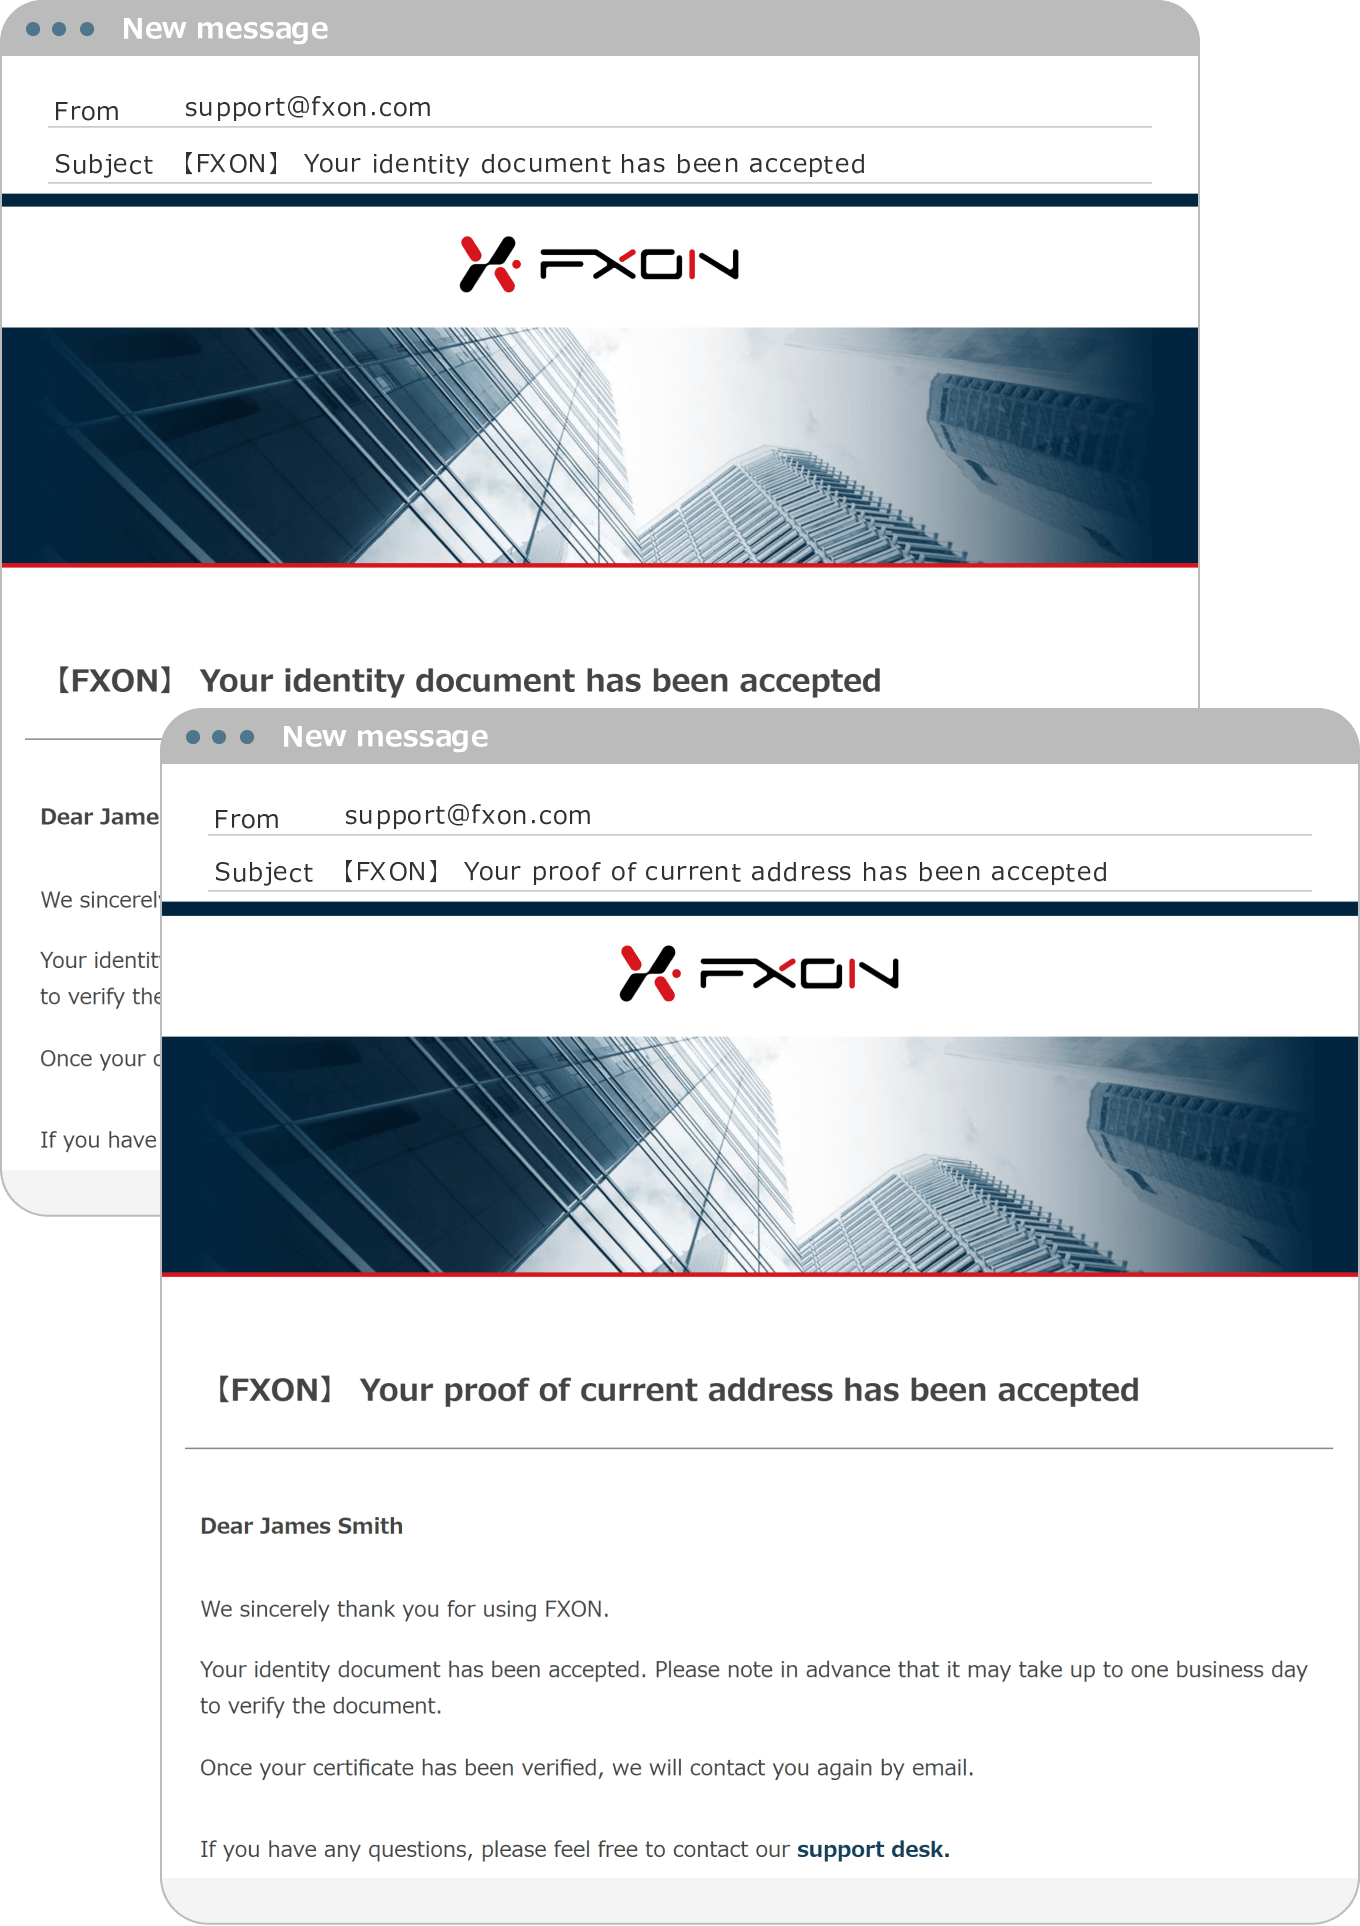
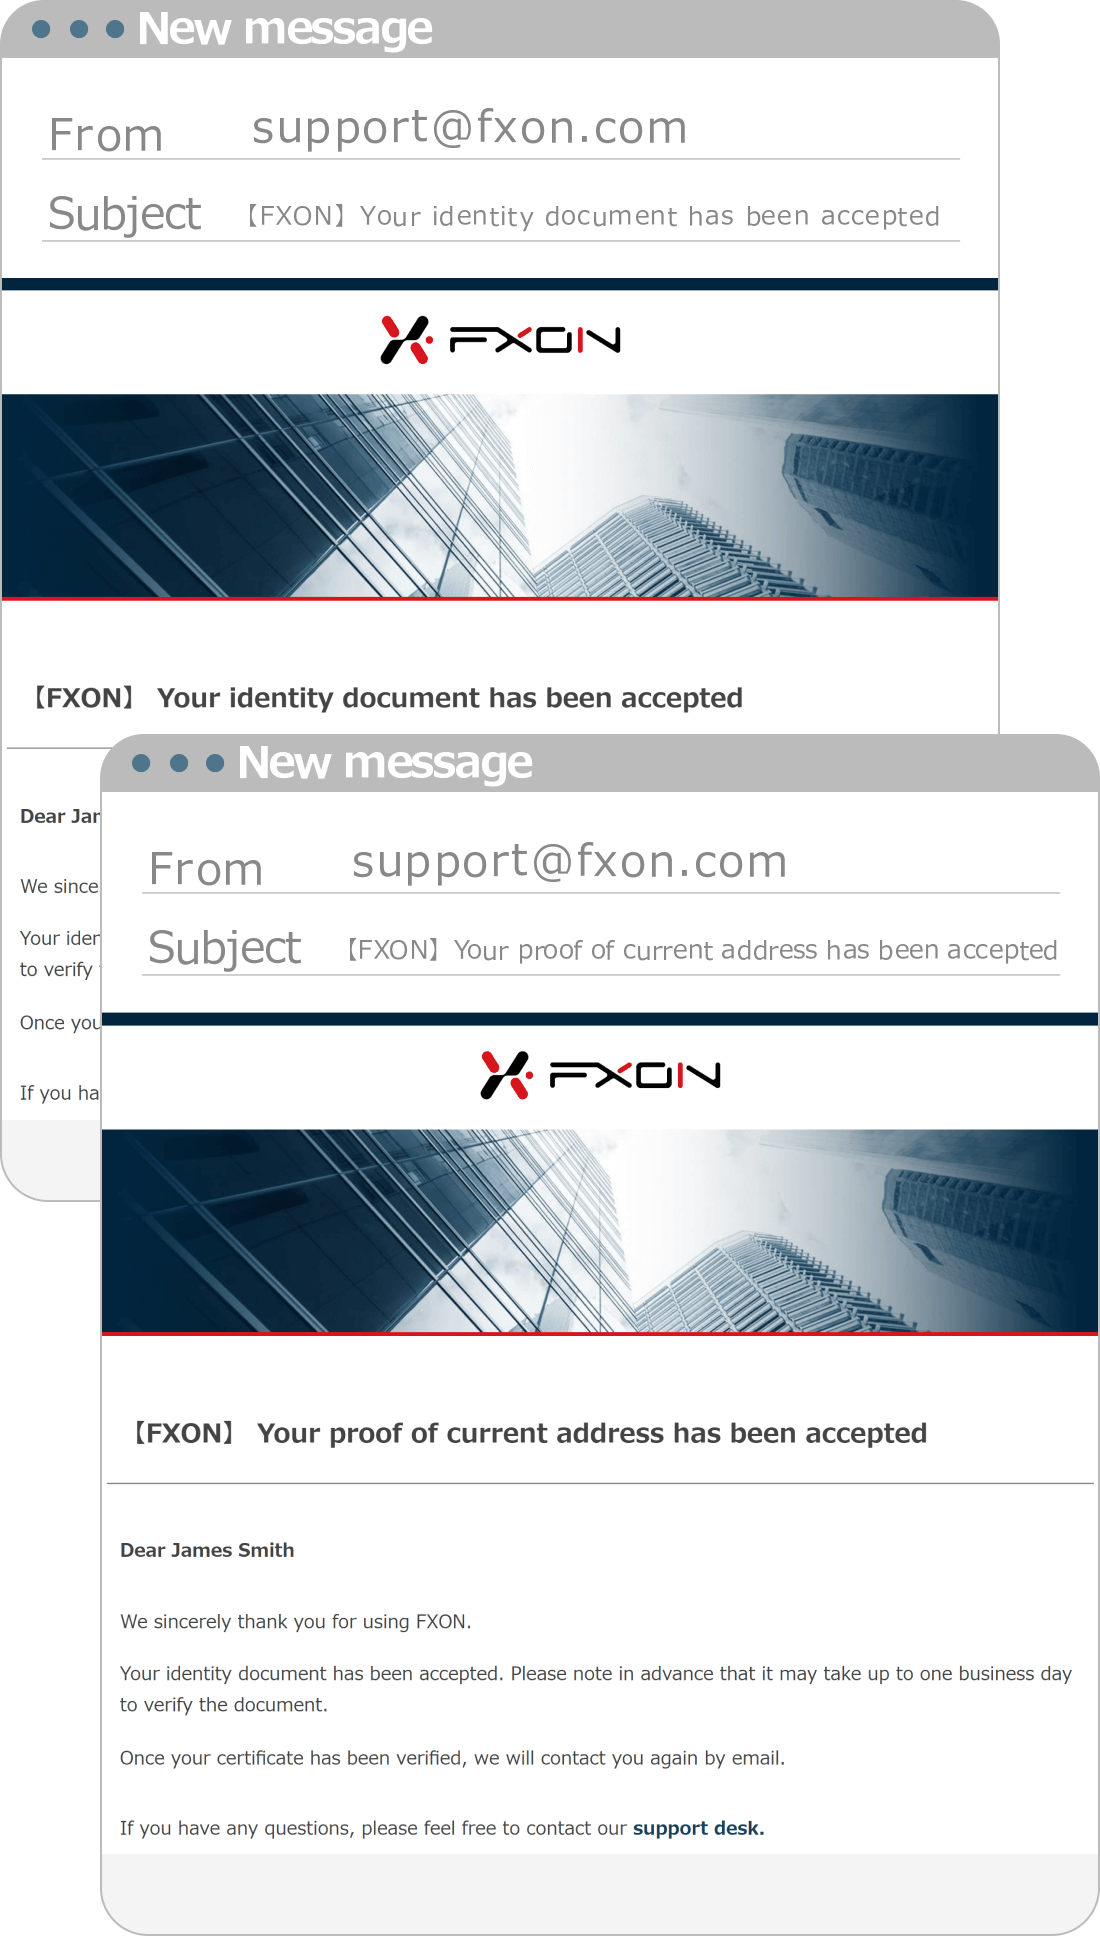
16. Document received email
The following emails will be sent to your email address.
Subject:【FXON】 Your proof of identity has been accepted
Subject:【FXON】 Your proof of current address has been accepted
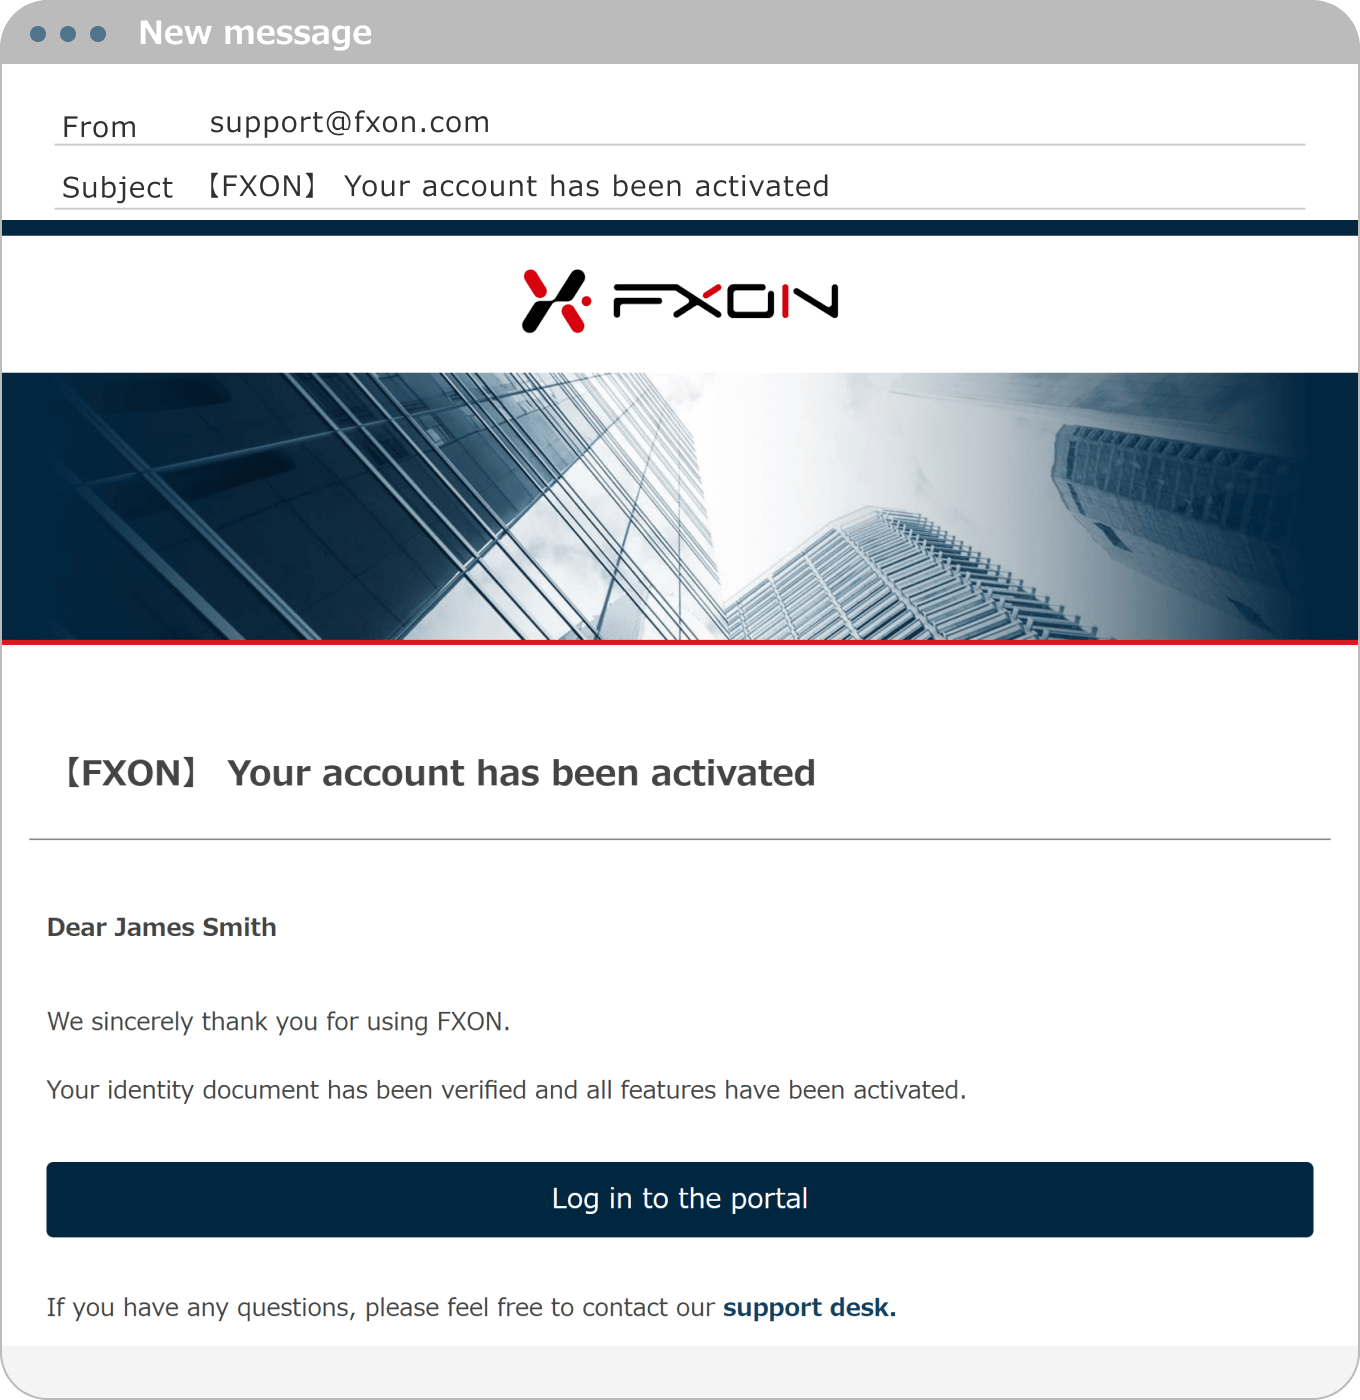
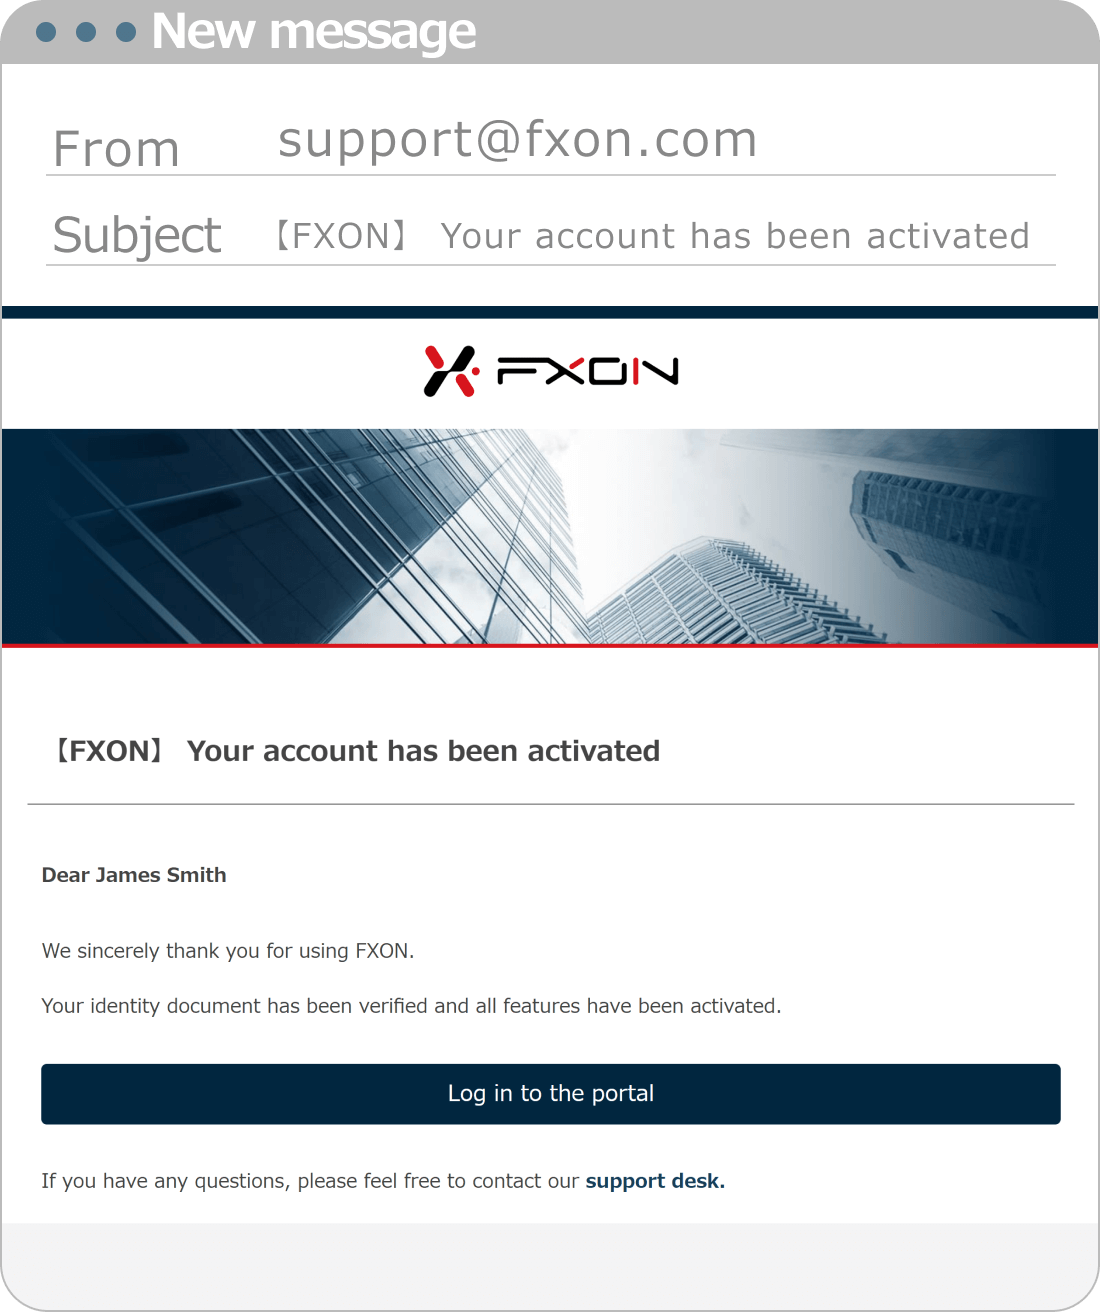
17. Document verified email
Once the review process is completed, we will send you the following email. If your application is incomplete, we will also contact you by email.
Subject:【FXON】Your account has been activated
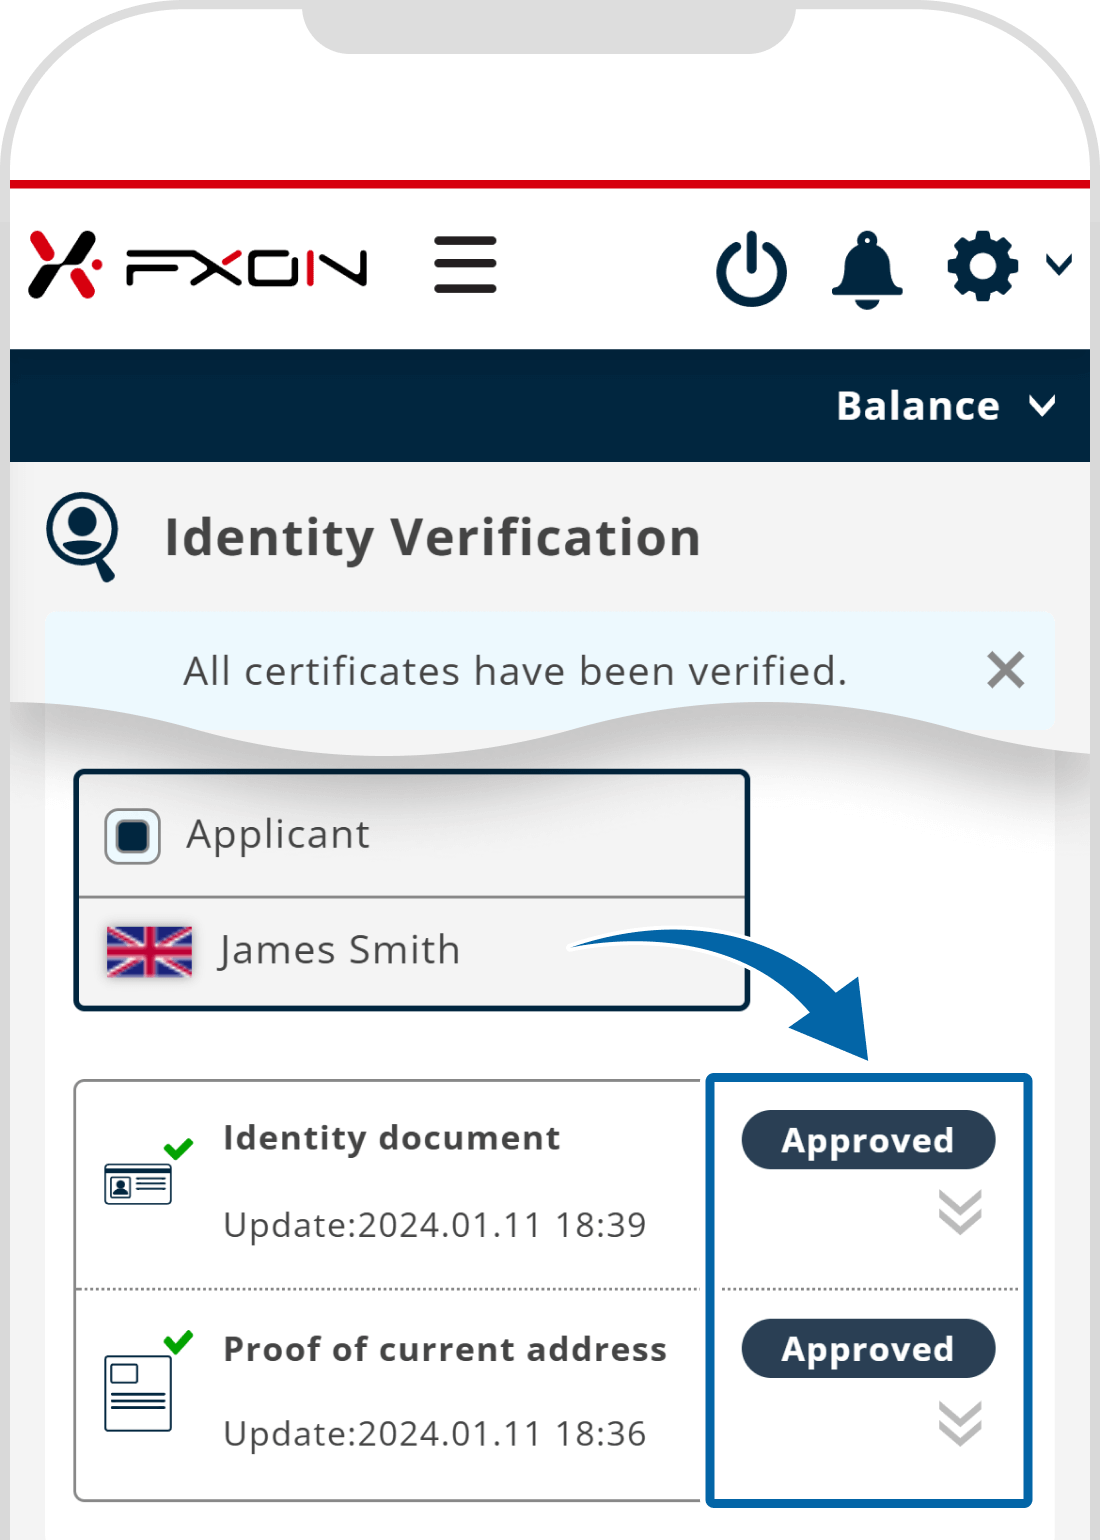
18. Status after completion of approval
After the verification, please make sure the status has been changed to Approved.
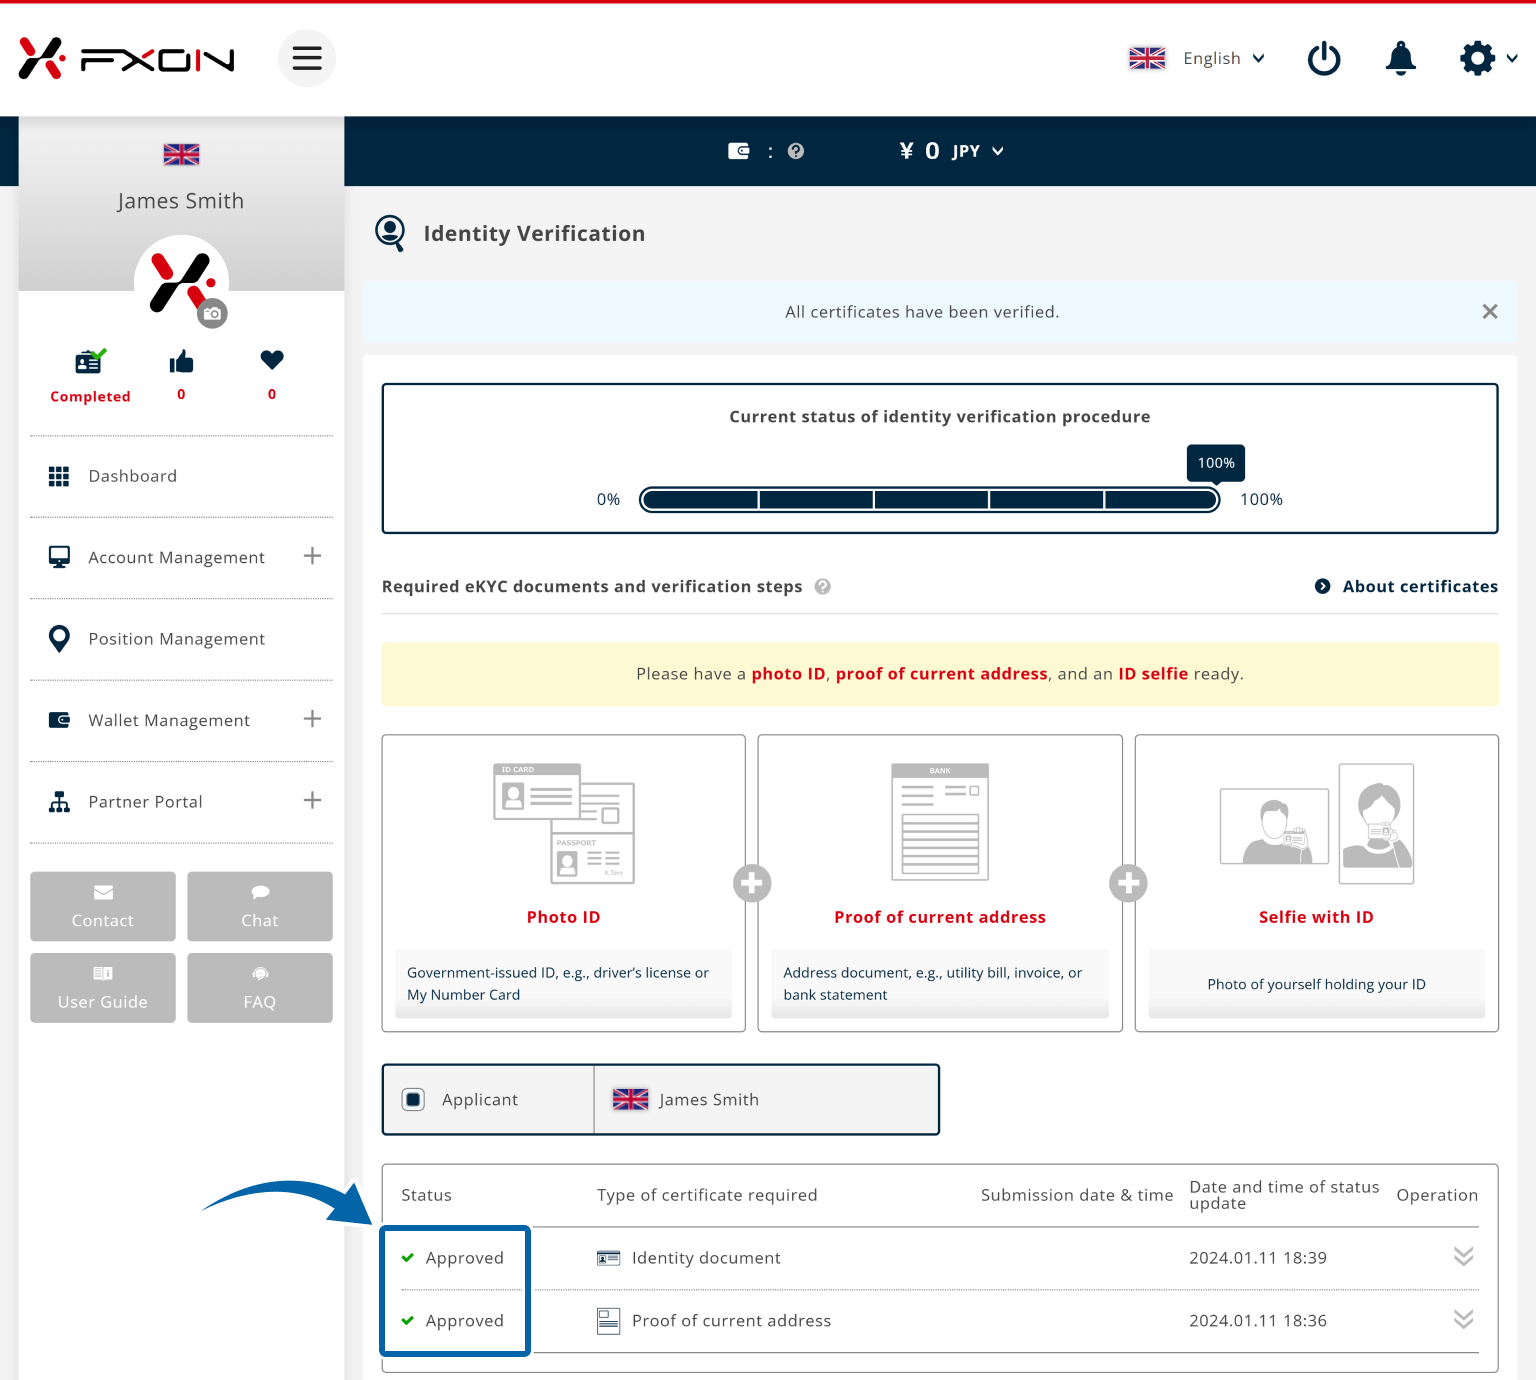
Customers applying for a personal account can open a real account once identity verification is complete. Customers applying for a corporate account can open a real account after both identity and corporate verification have been completed.
For information on how to make a deposit after opening your account, please refer to the details below.
Was this article helpful?
That’s Great!
Thank you for your feedback
Sorry! We couldn't be helpful
Thank you for your feedback
Feedback sent
We appreciate your effort and will try to fix the article
0 out of 0 people found this article helpful.
Popular related questions
2024.05.13
I entered the verification code and got an error.
2024.05.13
Can I open a corporate account as a sole proprietor?
2024.05.13
Any documents be sent to my house upon signing up?
2024.05.13
Can I open a corporate account if I already have a personal account?
2024.05.13
What are the US tax obligations?
Search Helpcenter