FXON services will be temporarily suspended due to phased system upgrades and a platform redesign. As functions will be restricted in stages, we kindly ask that you close open positions and withdraw your account funds by March 31. (Details here)
FXON services will be temporarily suspended due to a full platform redesign. We kindly ask that you close open positions and withdraw your account funds by March 31. (Details here)
With the FXON Partner Program, you can easily create your own promotional links and run original campaigns using the link builder. This allows for effective customer acquisition and the potential to increase partner rebate remuneration.
The steps for creating a partner's original campaign are as follows.
1. Menu bar
After logging into the FXON portal, go to the left menu and click (1) "Partner Portal" > (2) "Marketing".
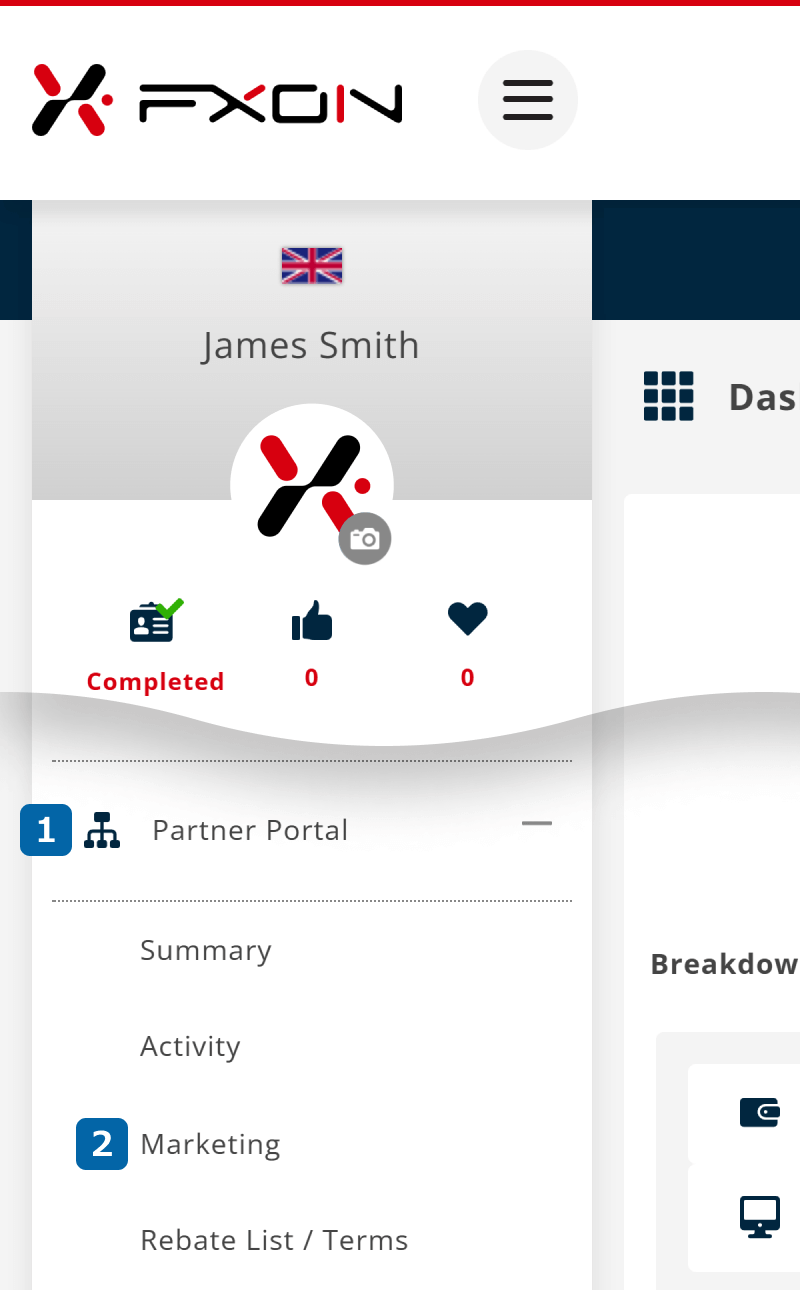
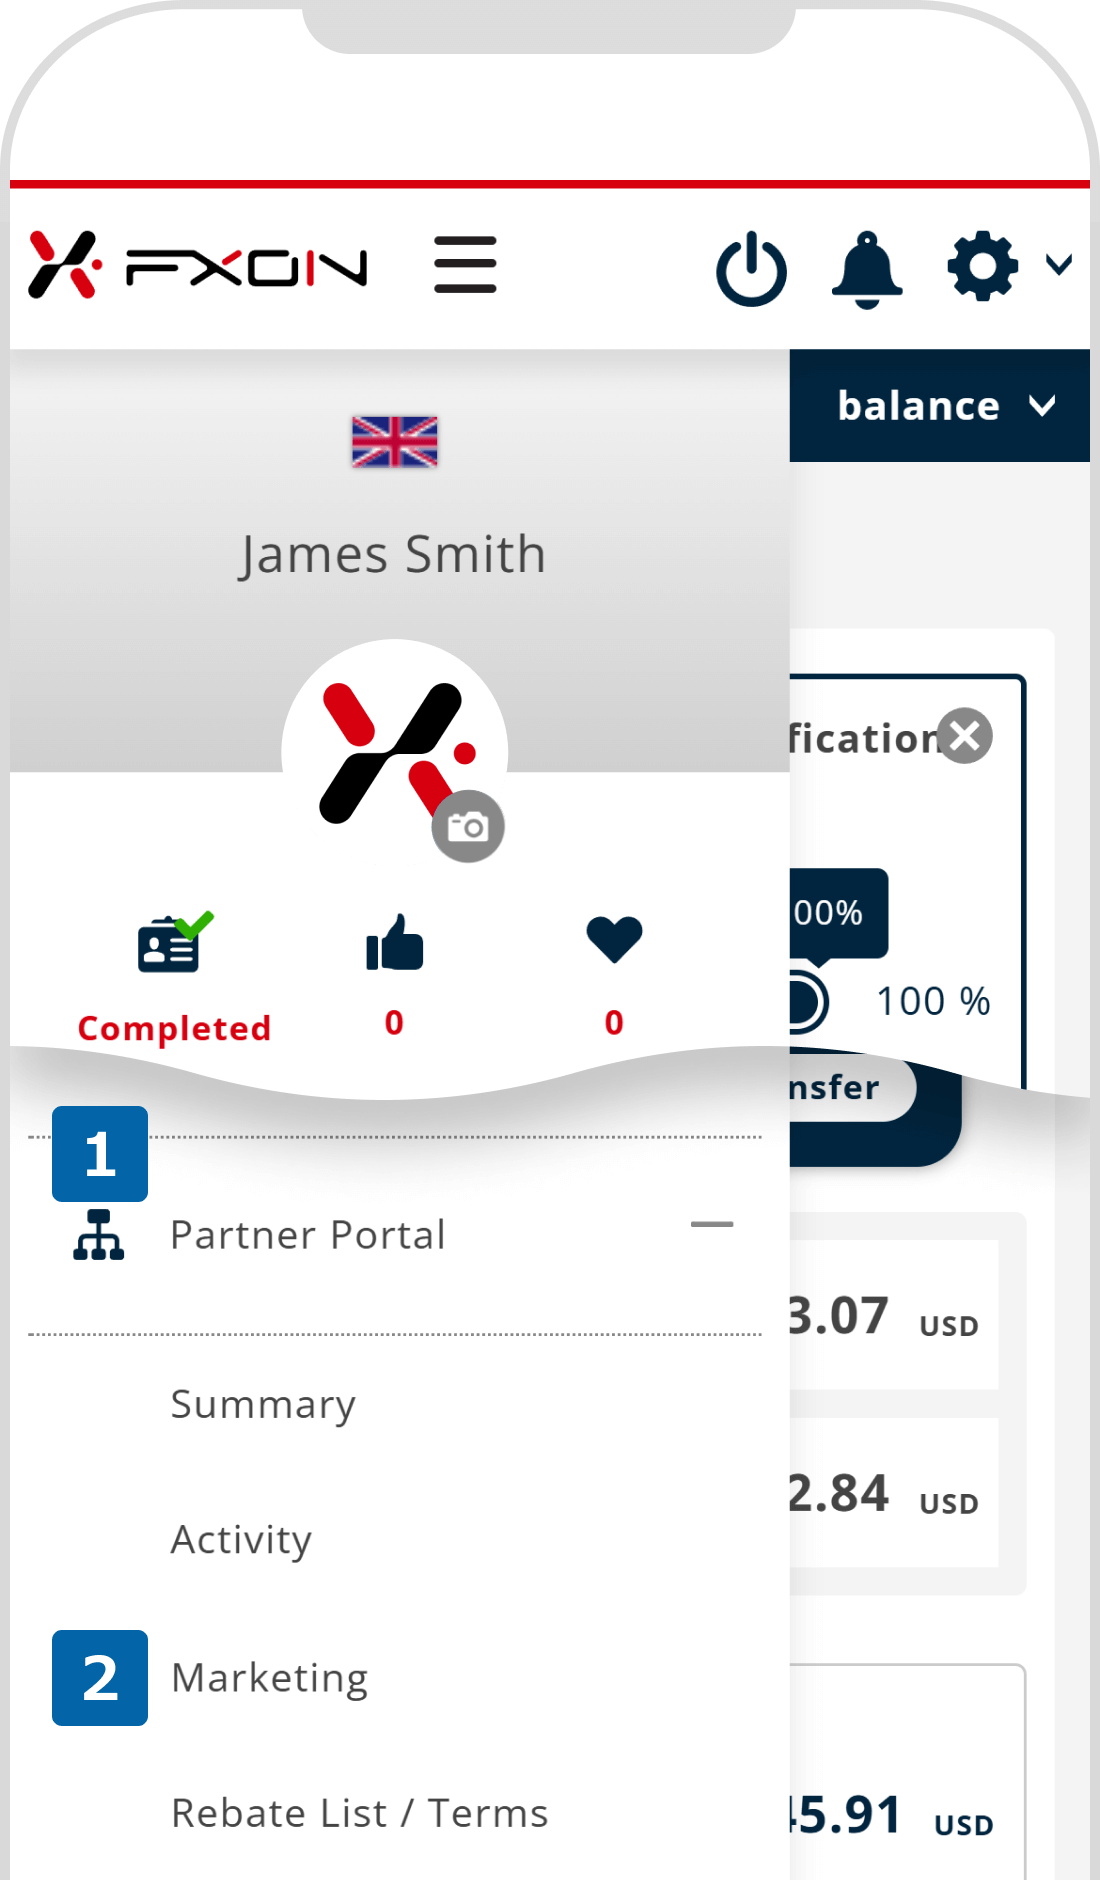
After logging into the FXON portal, tap the three lines (≡) at the top of the screen, then tap(1) "Partner Portal" > (2) "Marketing".
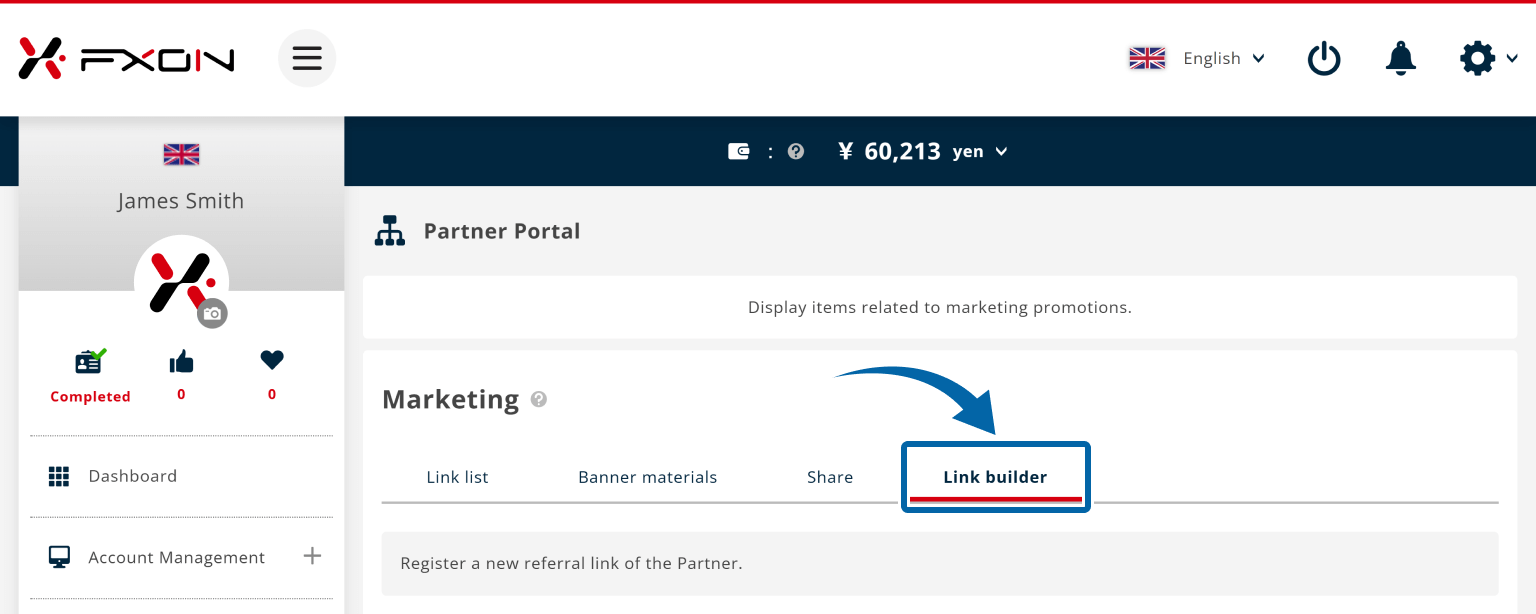
2. In the Marketing screen
In the Marketing screen, click on "Link builder."
In the Marketing screen, tap on "Link builder."
3. Creating a campaign link (i)
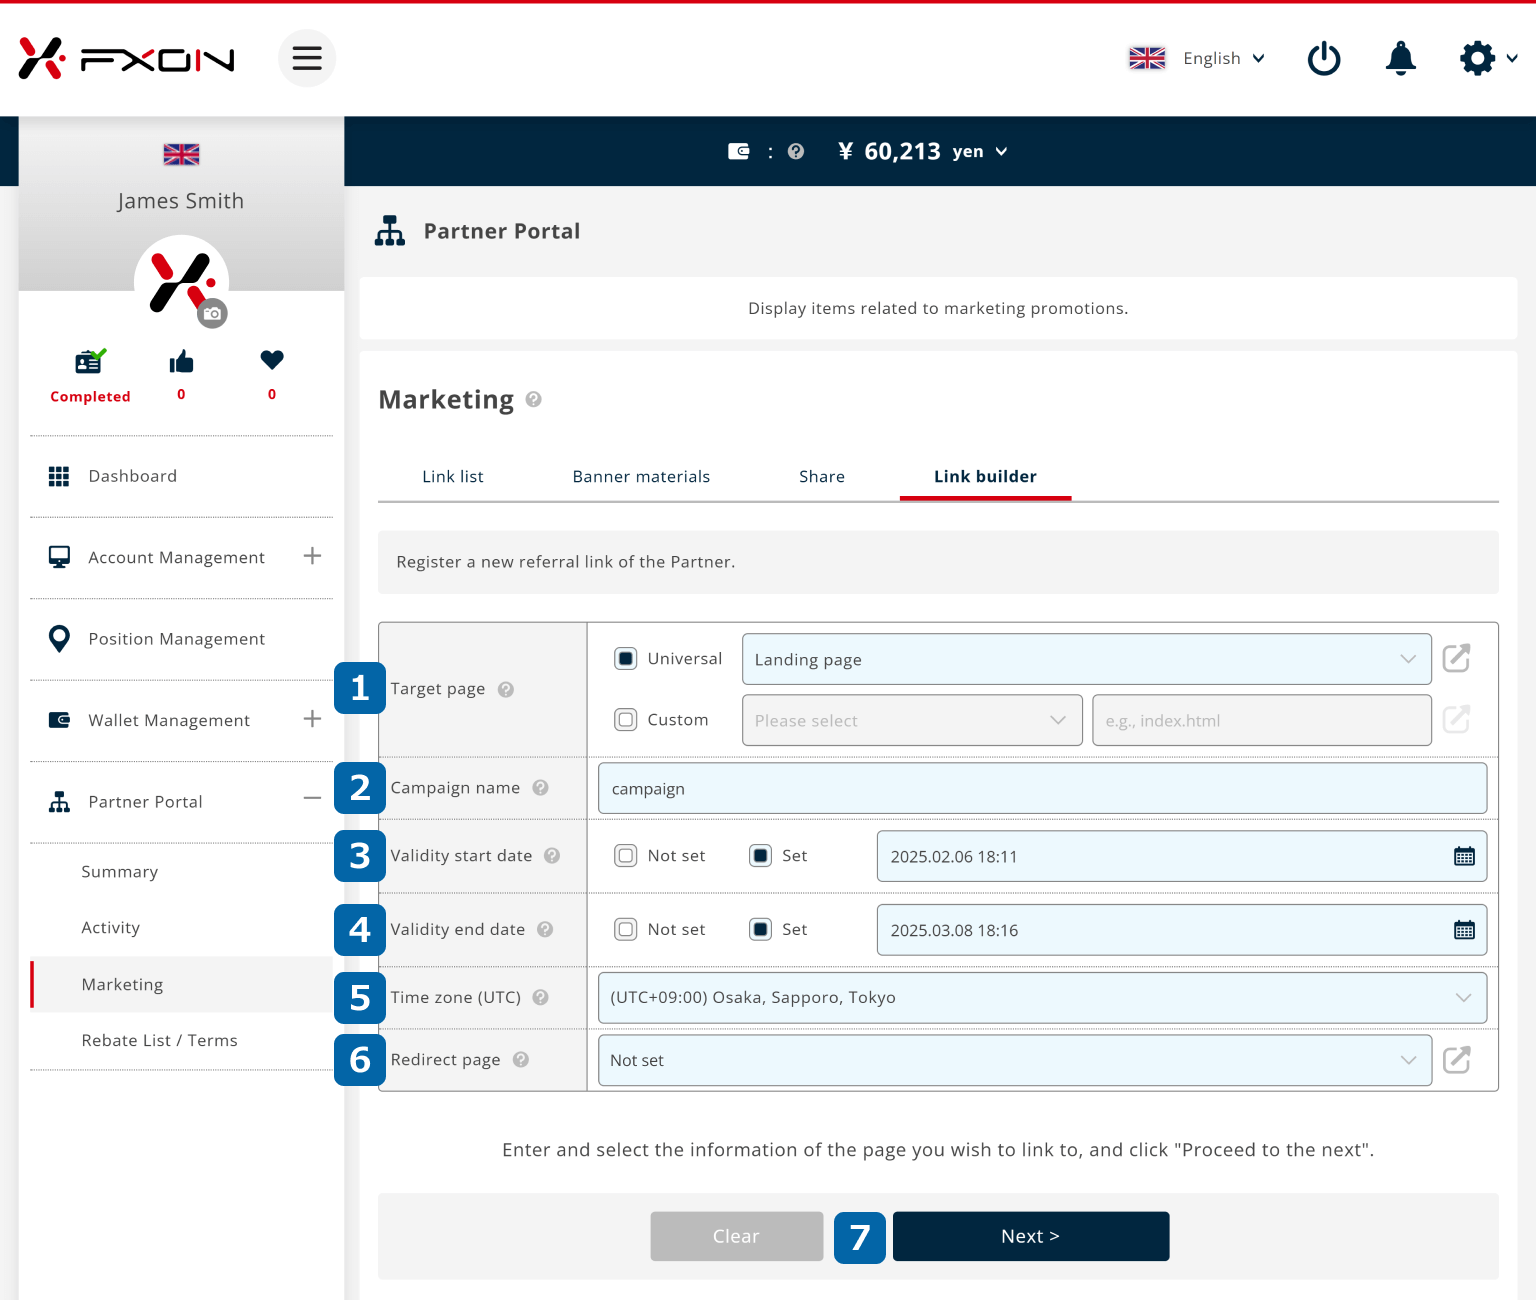
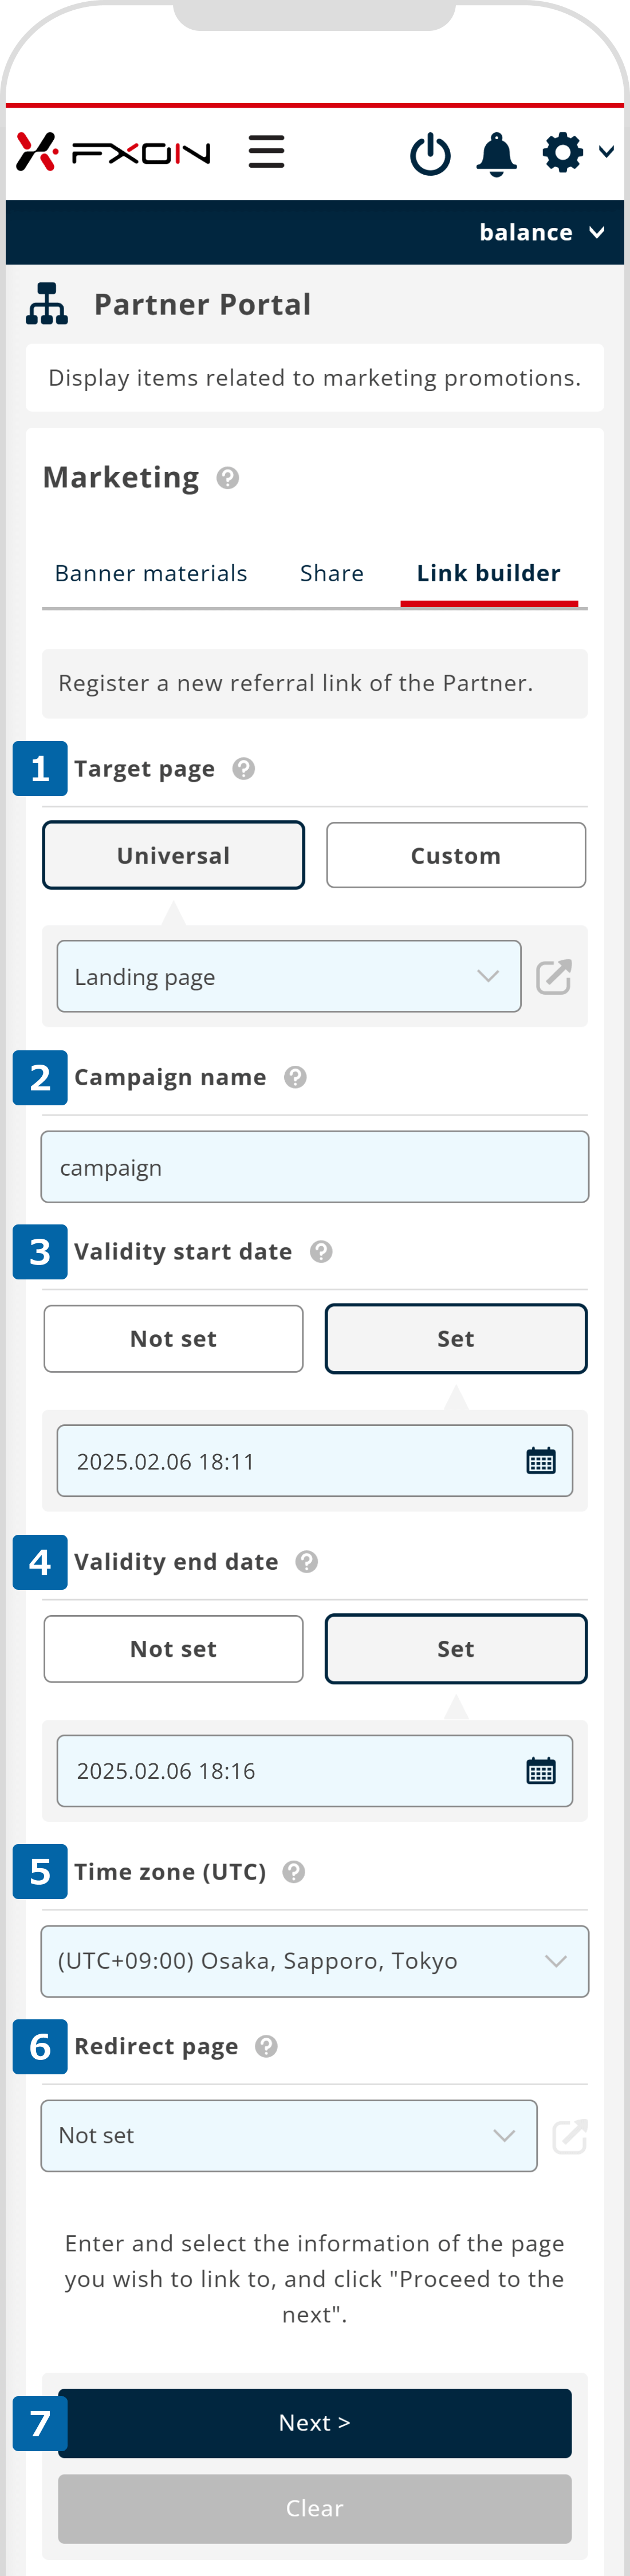
Enter and select the information for the campaign link to be created. (1) Target page (universal link or custom setting), (2) Campaign name, (3) Validity start date, (4) Validity end date, (5) Time zone (UTC), (6) Redirect page. Once the information is entered, the (7) "Next" button will appear, and you can click it.
Enter and select the information for the campaign link to be created. (1) Target page (universal link or custom setting), (2) Campaign name, (3) Validity start date, (4) Validity end date, (5) Time zone (UTC), (6) Redirect page. Once the information is entered, the (7) "Next" button will appear, and you can tap it.
① Target page
Track and measure visitors to the specified page.
【Universal】Select one from the pre-set links.
【Custom】Customize the link according to your objectives.
② Campaign name
By entering the campaign name, you can manage your marketing activities.
③ Validity start date
Set the start date for the link's validity period. Please select a future date for the start date. If you do not wish to set a validity period, select "Not set".
④ Validity end date
Set the end date for the link's validity period. Please select a future date for the end date. If you do not wish to set a validity period, select "Not set".
⑤ Time zone (UTC)
Choose the time zone for the validity period's date and time.
⑥ Redirect page
Set the page to be displayed after the link's validity period expires.
Key Point
The campaign page will become invalid after the expiration date, and the content will not be displayed even if accessed. In the "Redirect page", you can set the destination page that will be shown when the campaign link is clicked after the expiration. This allows you to redirect users to the appropriate page instead of the expired campaign page.
4. Creating a campaign link (ii)
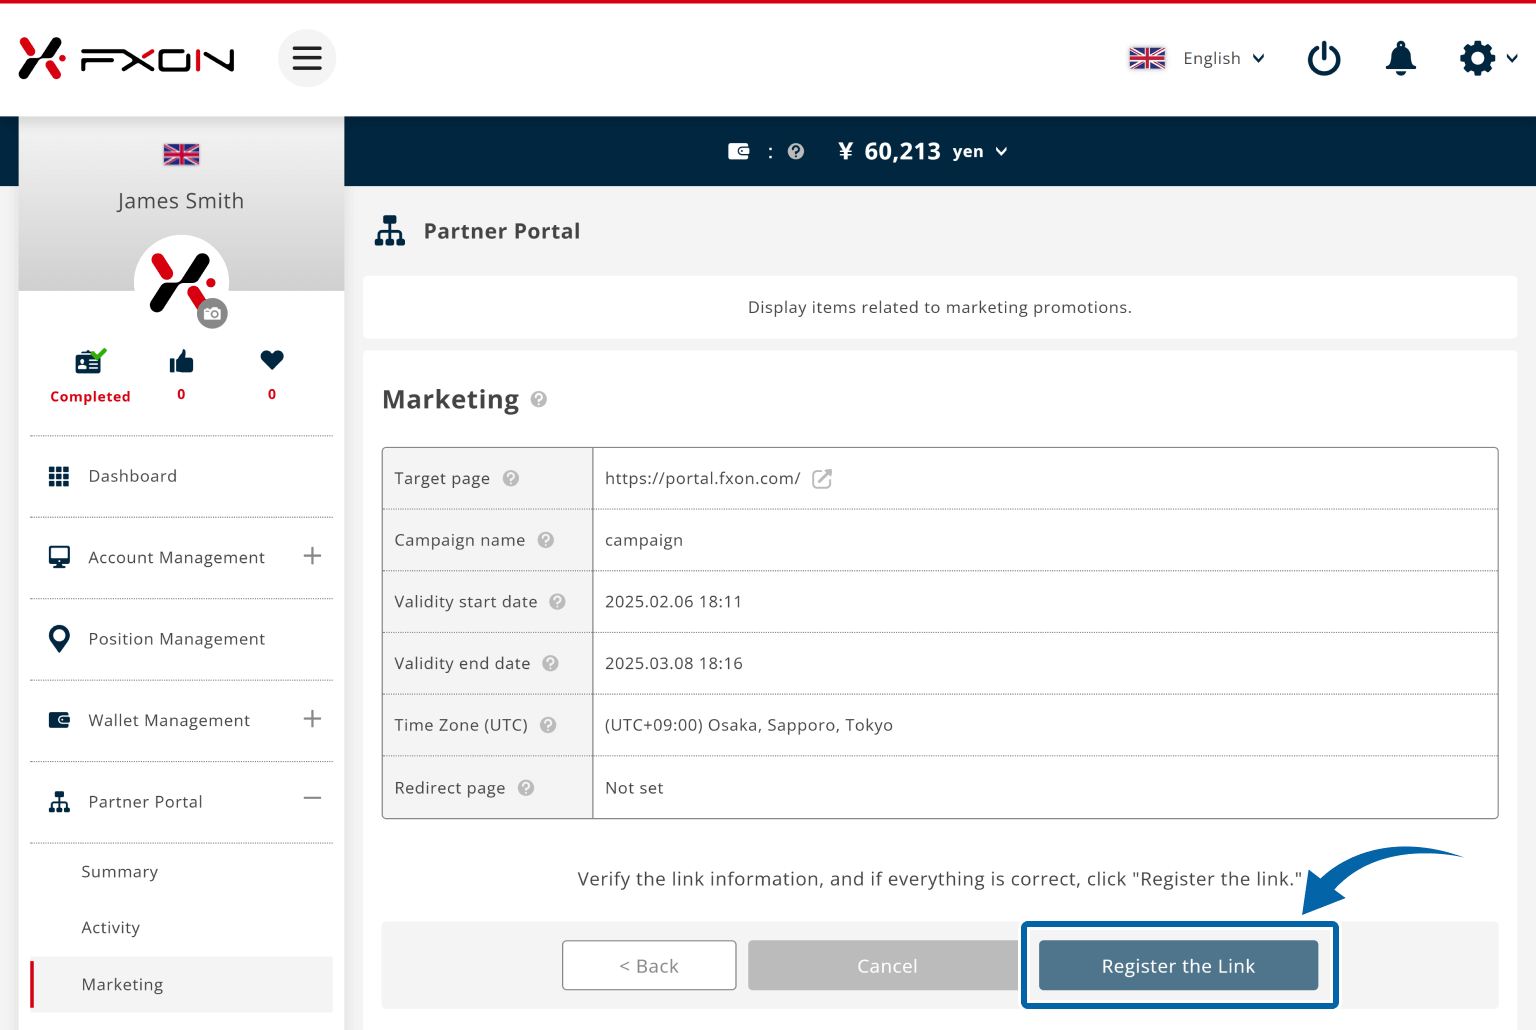
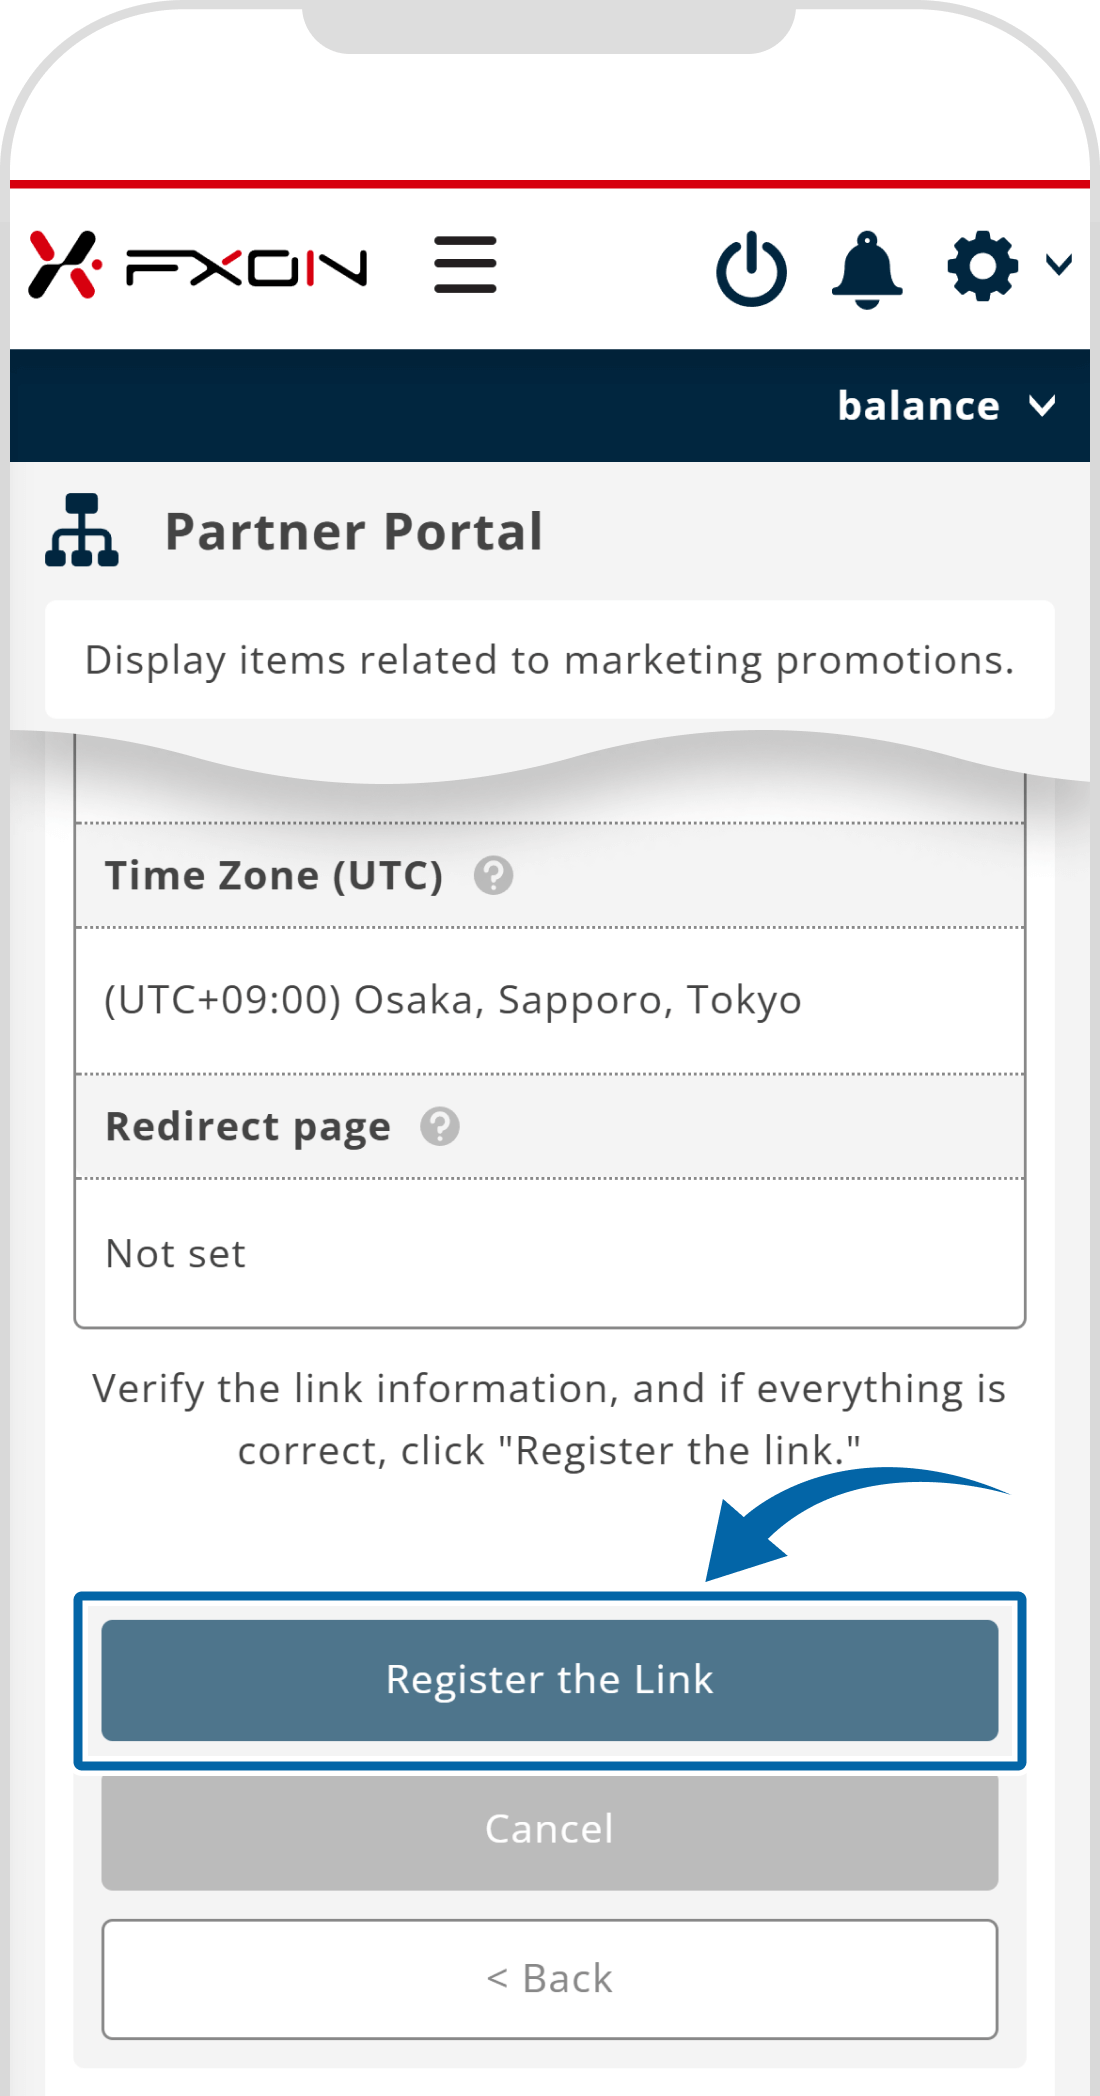
Review the details on the confirmation page to ensure there are no errors, then click "Register the Link."
Review the details on the confirmation page to ensure there are no errors, then tap "Register the Link."
5. Campaign link registration complete
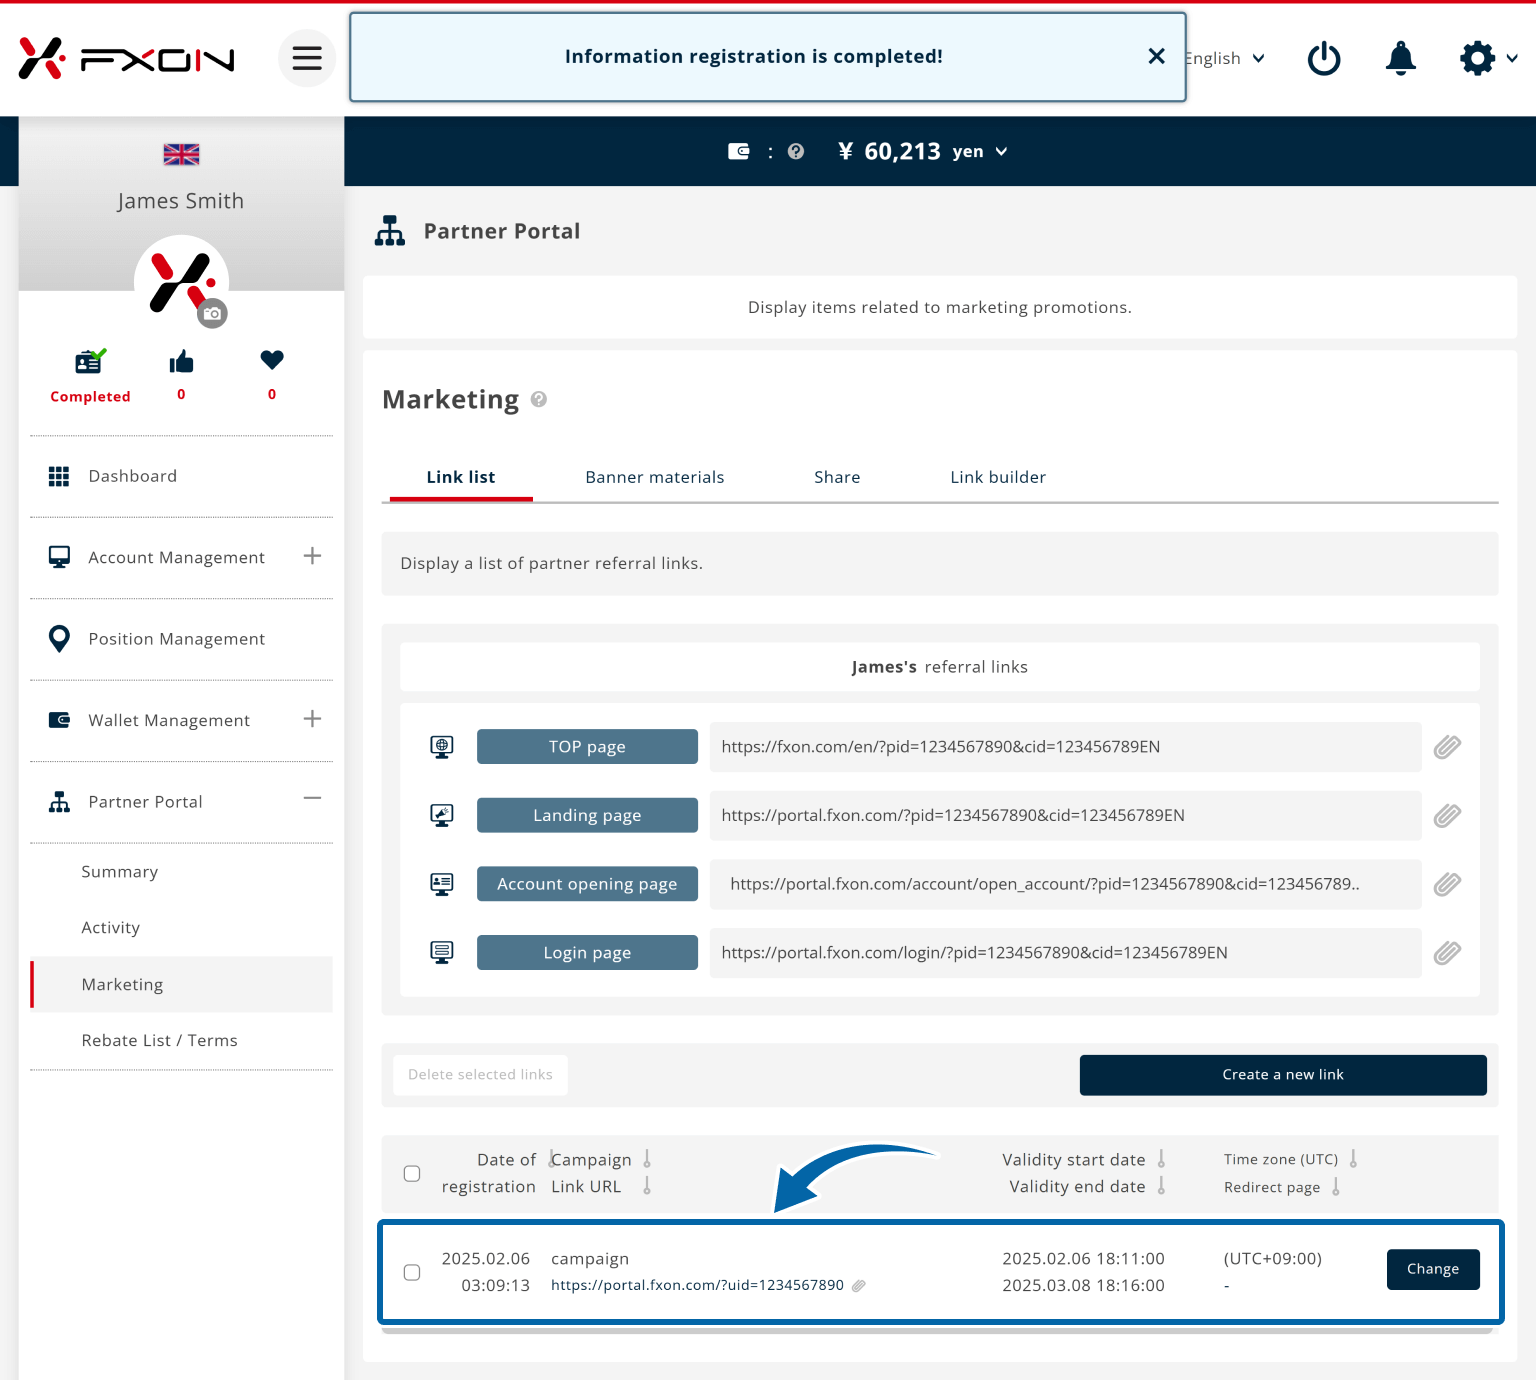
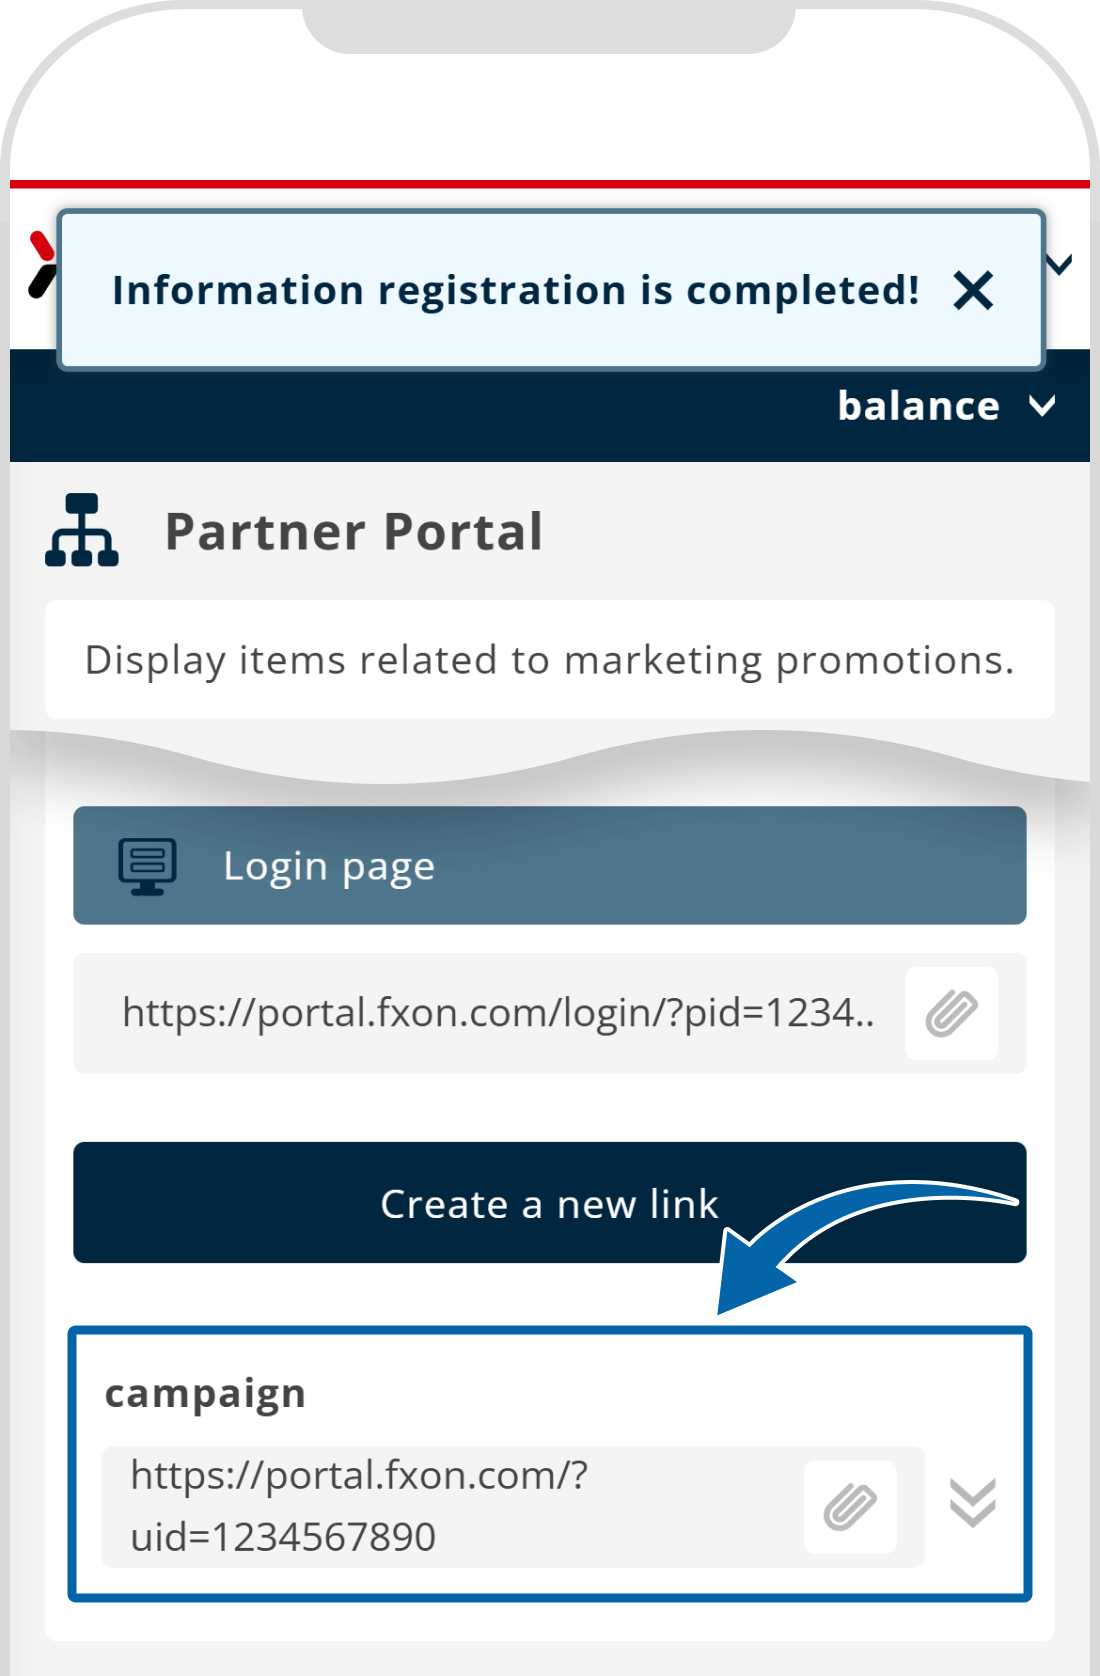
You will be automatically redirected to the "Link list," and when "Information registration is completed!" appears at the top of the screen, the campaign link registration is complete. The registered campaign link will be displayed at the bottom of the screen.
Knowledge
By clicking the "Change" button on the right side of the campaign link, you can modify the registered details.
By tapping the "Change" button on the right side of the campaign link, you can modify the registered details.
Please refer to the following article below for how to use campaign links.