FXON services will be temporarily suspended due to phased system upgrades and a platform redesign. As functions will be restricted in stages, we kindly ask that you close open positions and withdraw your account funds by March 31. (Details here)
FXON services will be temporarily suspended due to a full platform redesign. We kindly ask that you close open positions and withdraw your account funds by March 31. (Details here)
How do I add a Japanese local bank account for withdrawals?
Withdrawal Methods
This article was :
Published in 2024.12.19
Updated in 2025.08.22
To add a Japanese local bank account for fund withdrawals, log in to the FXON Portal, then navigate to "Wallet Management" > "Withdrawal". On the Withdrawal of funds page, choose the JPY Wallet to show the Japan local bank wire transfer option. You can register up to five Japanese bank accounts.
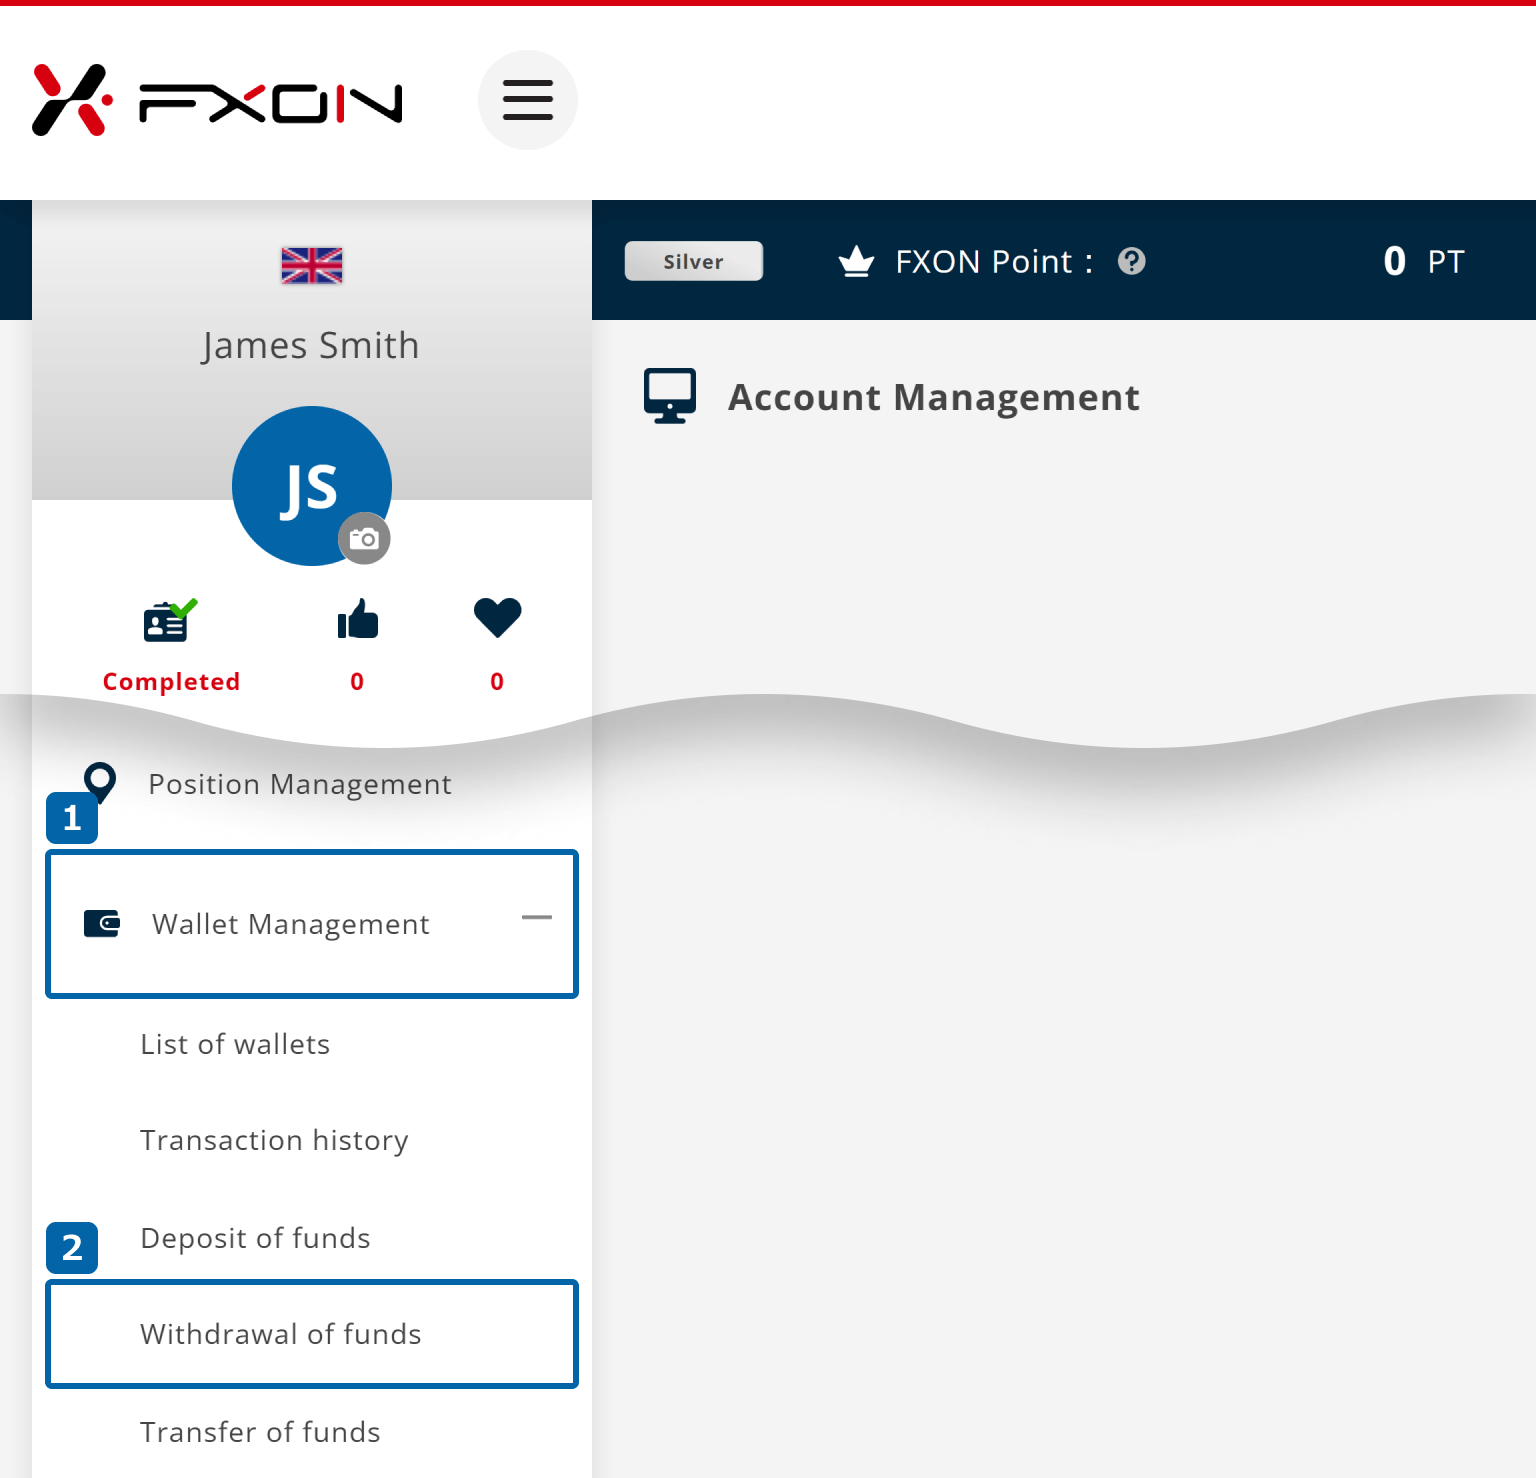
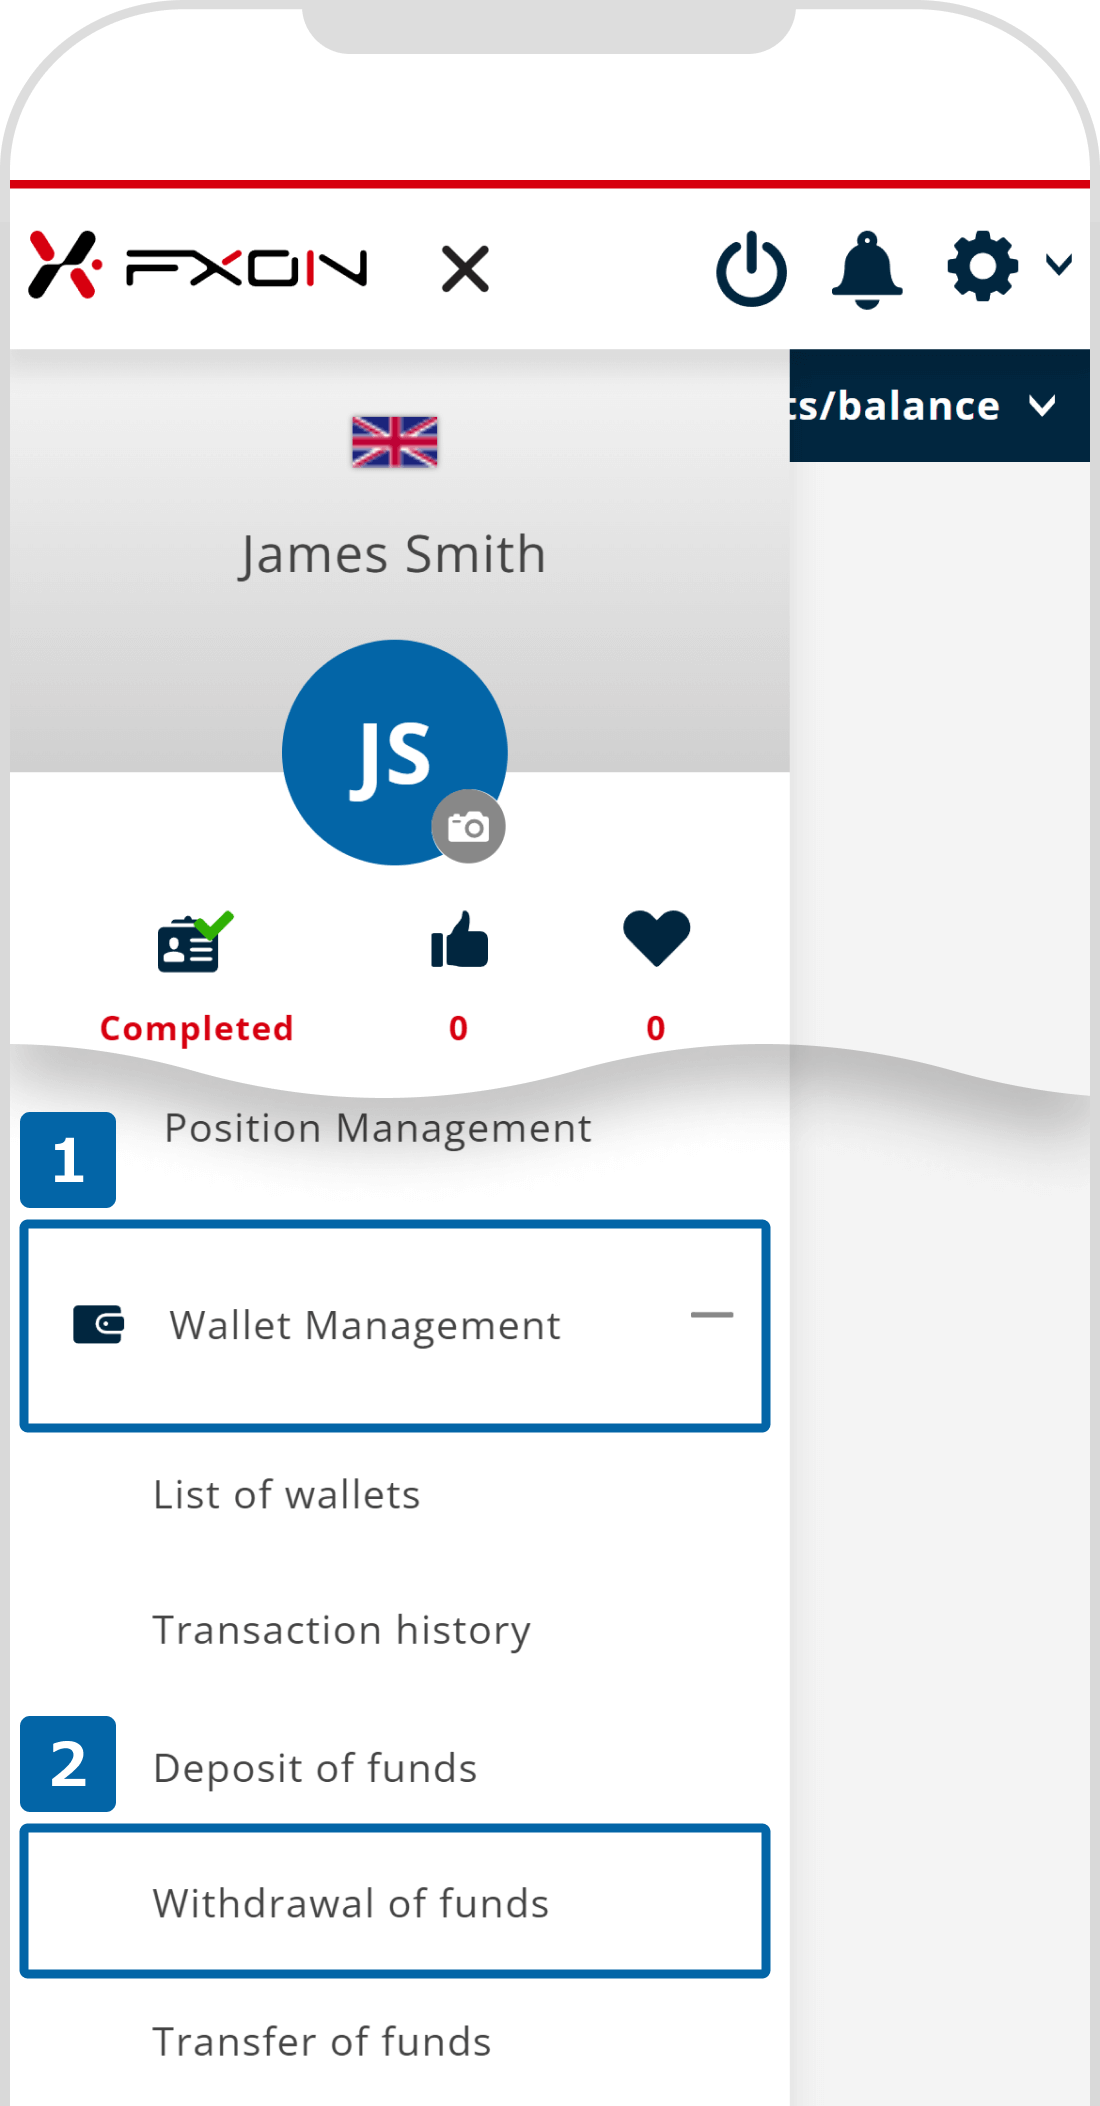
1. Menu bar
After logging in to the FXON Portal, click (1) "Wallet Management" > (2) "Withdrawal" on the side menu.
After logging in to the FXON Portal, tap the three lines (≡) at the top of the screen and choose (1) ''Wallet Management" > (2) ''Withdrawal''.
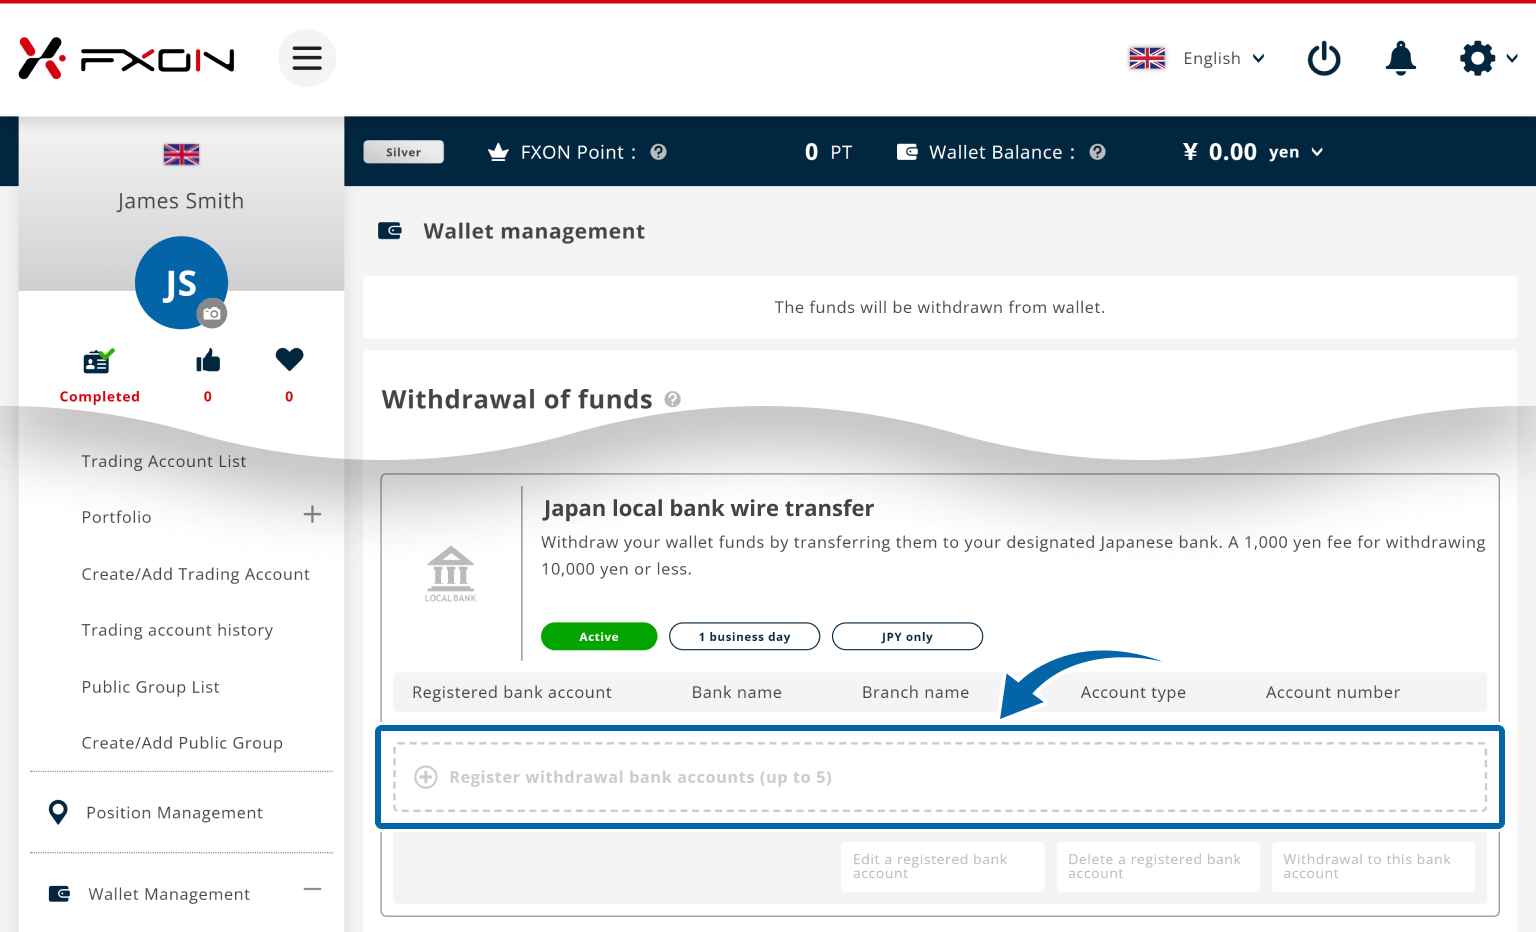
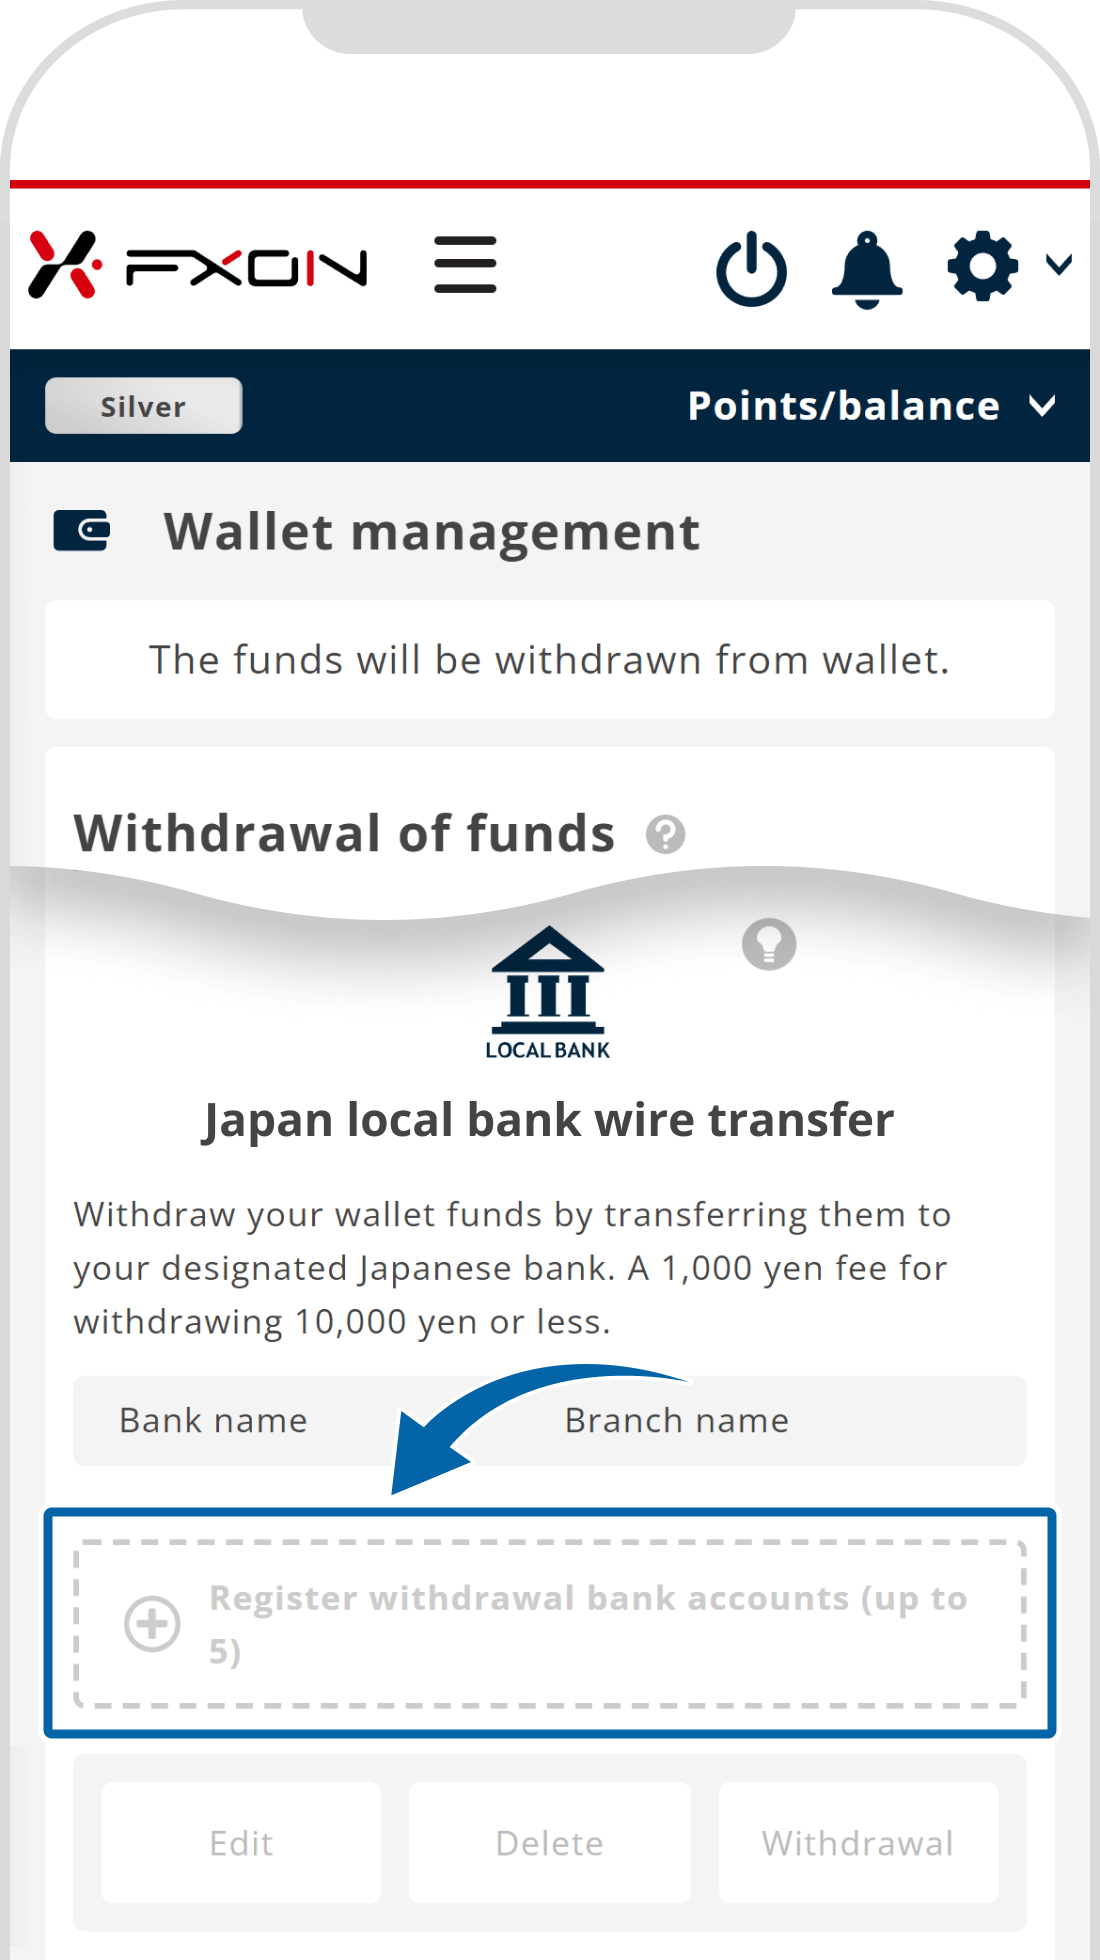
2. Withdrawal of funds
Go to the Withdrawal wallet and choose the JPY Wallet, then click "Add a bank account (up to 5)" of the local bank option.
Go to the Withdrawal wallet and choose the JPY Wallet, then tap "Add a bank account (up to 5)" of the local bank option.
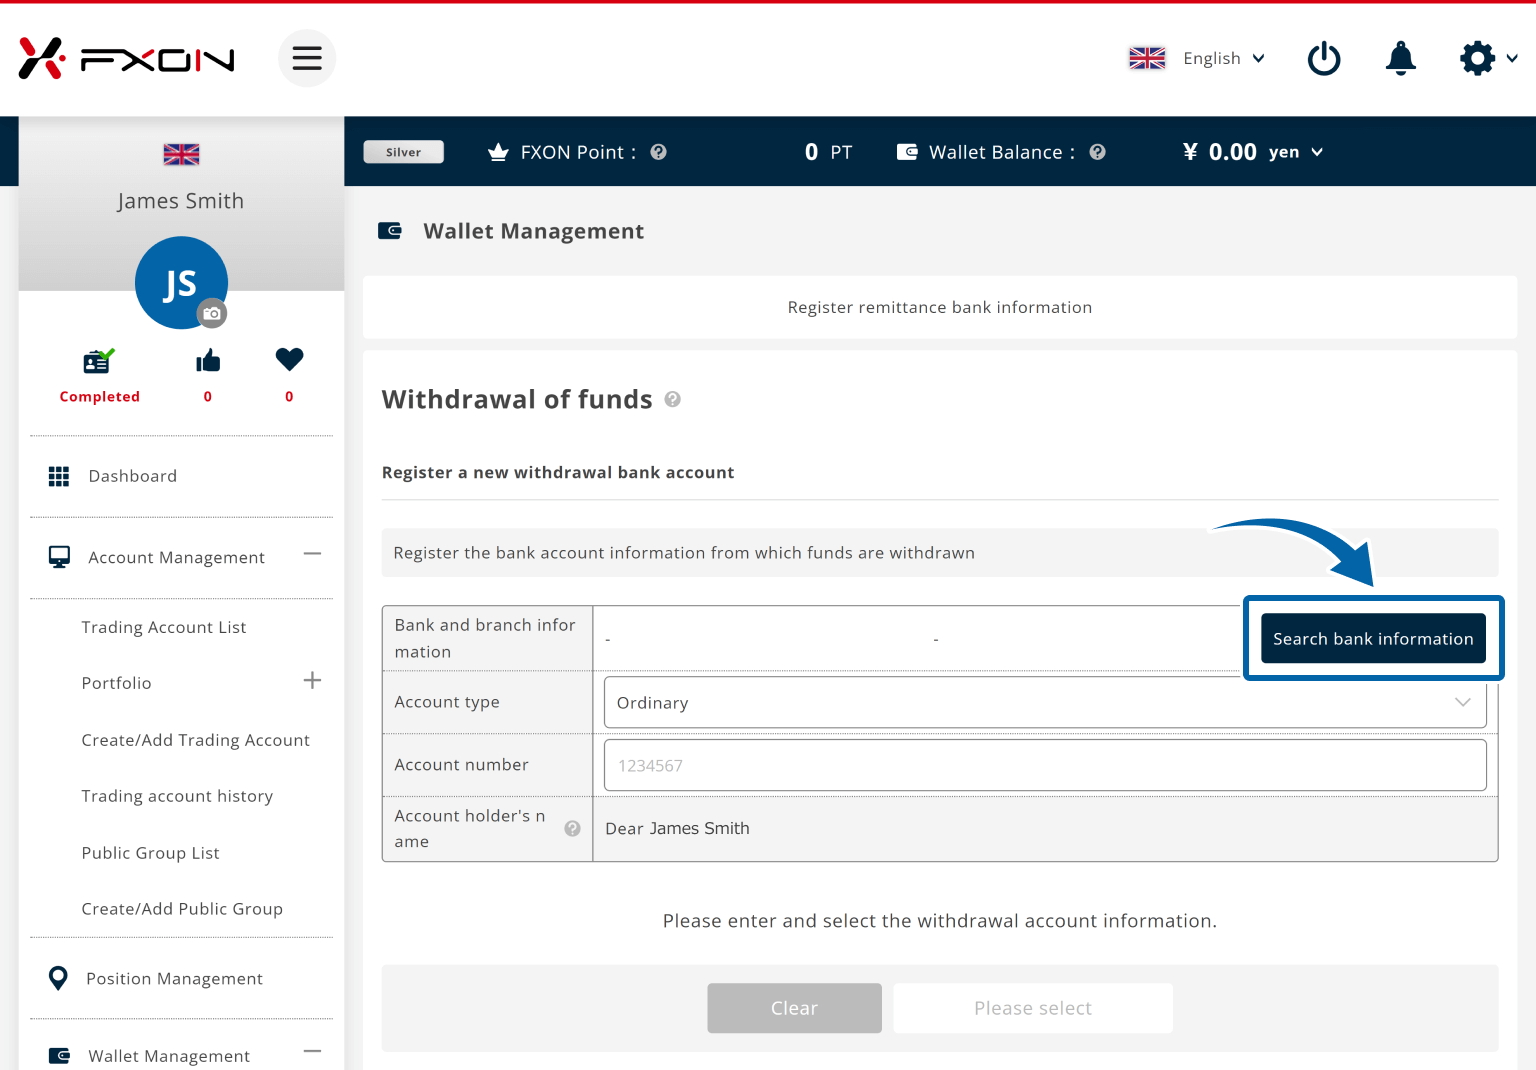
3. Search bank info
On the registration screen, click "Search".
On the new registration screen, tap "Search".
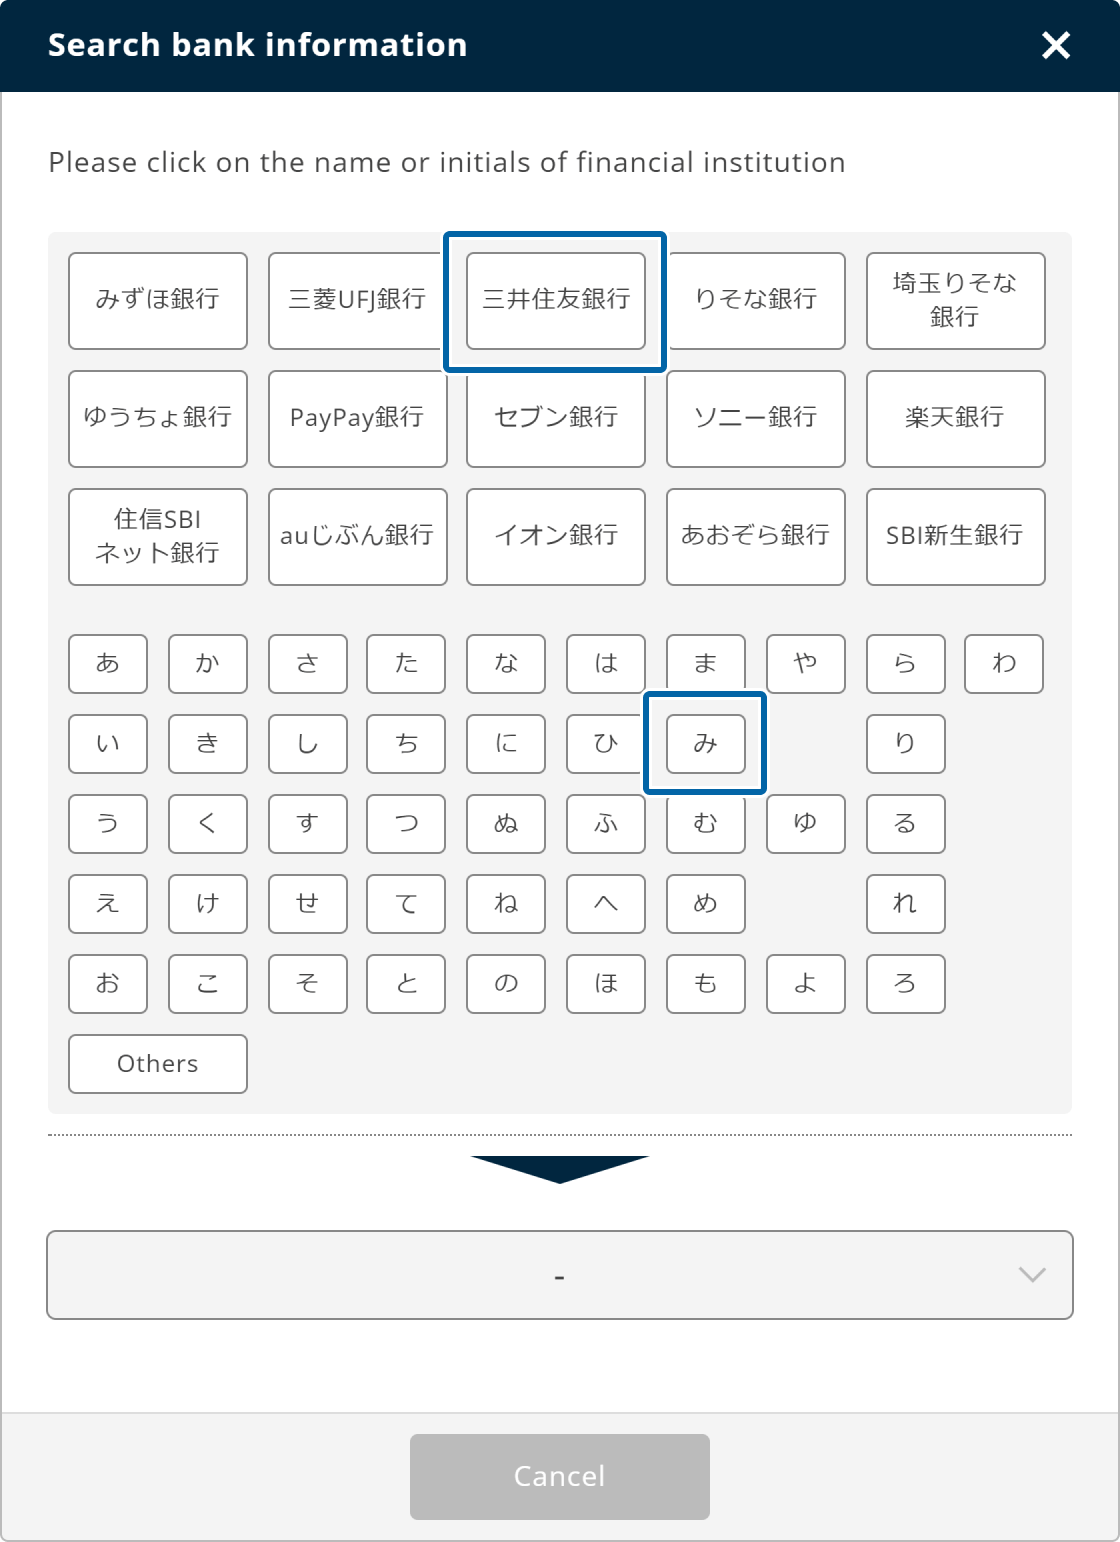
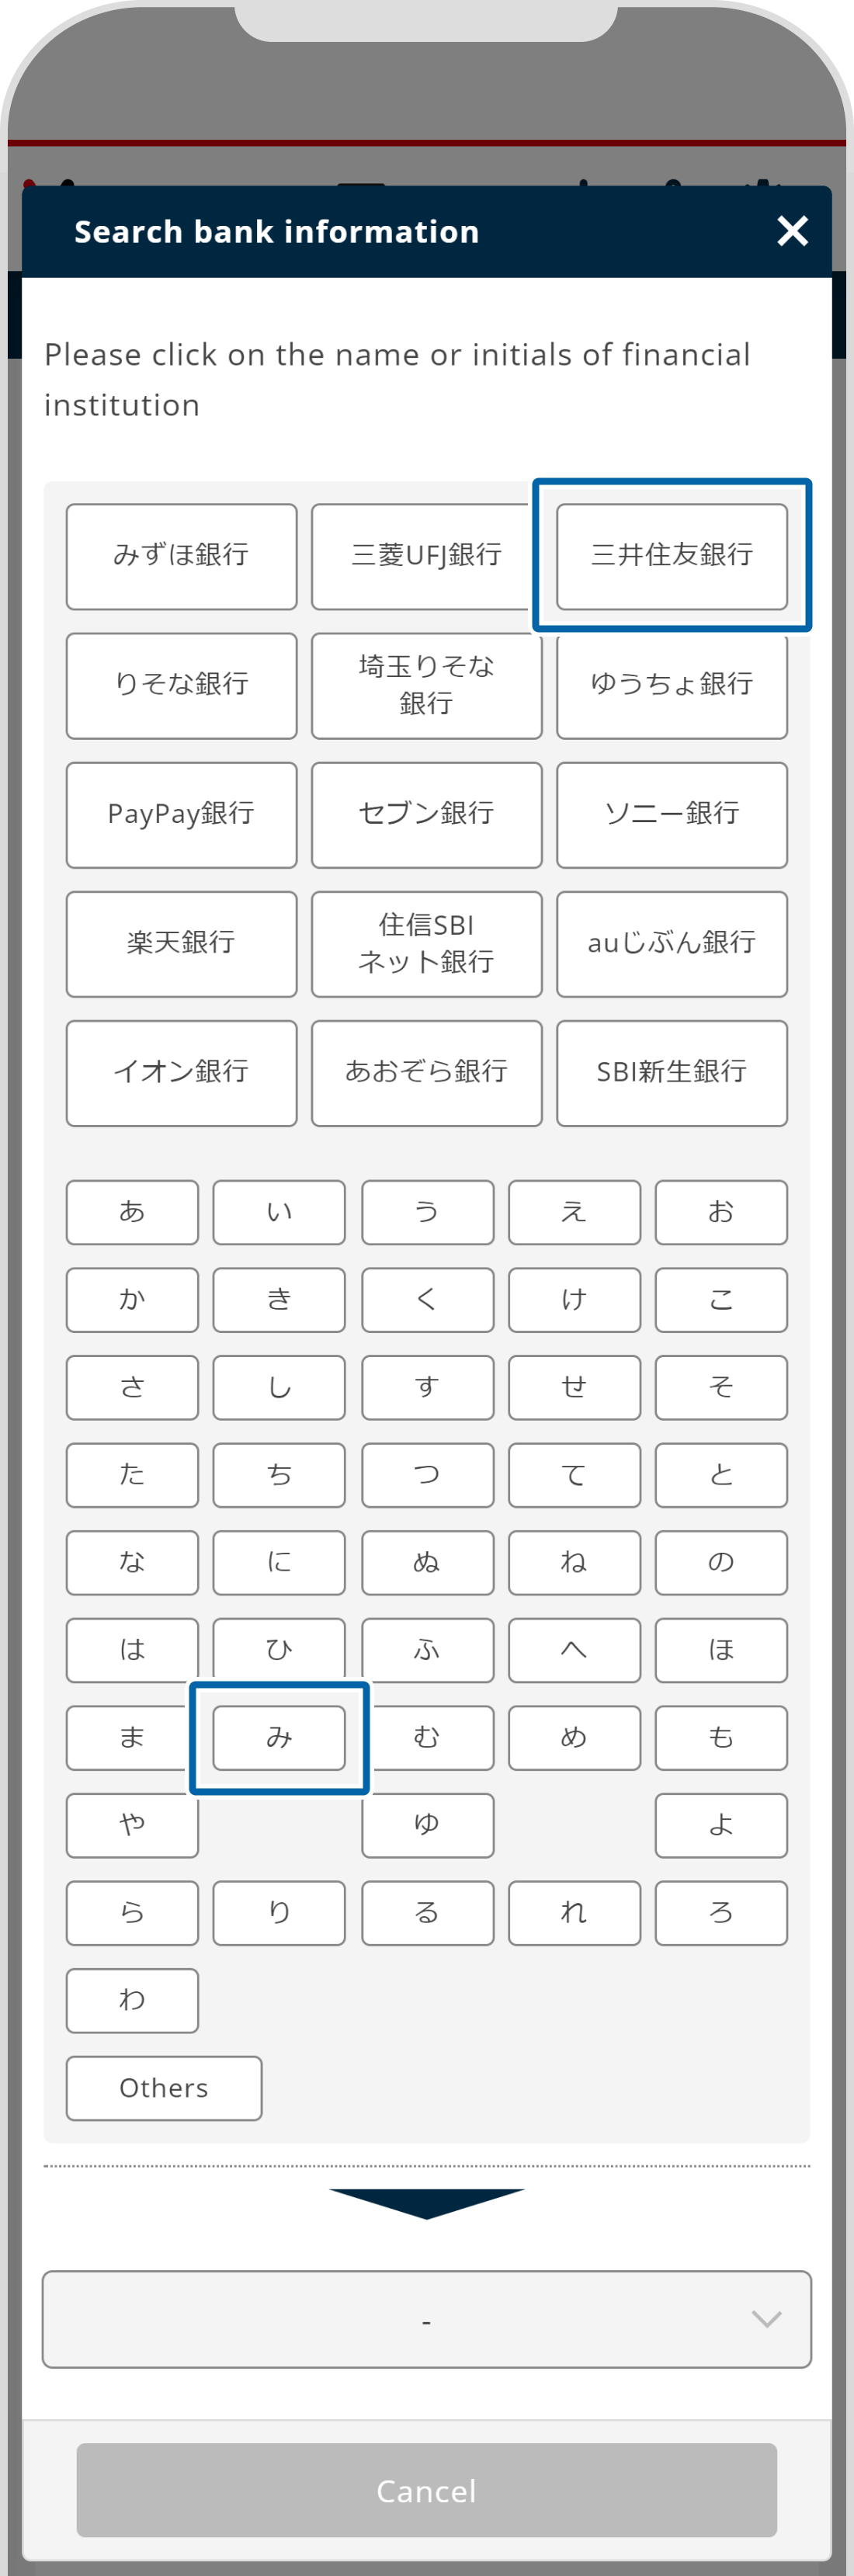
4. Select bank info
In the Search window, click your bank name or its first letter.
In the Search window, tap your bank name or its first letter.
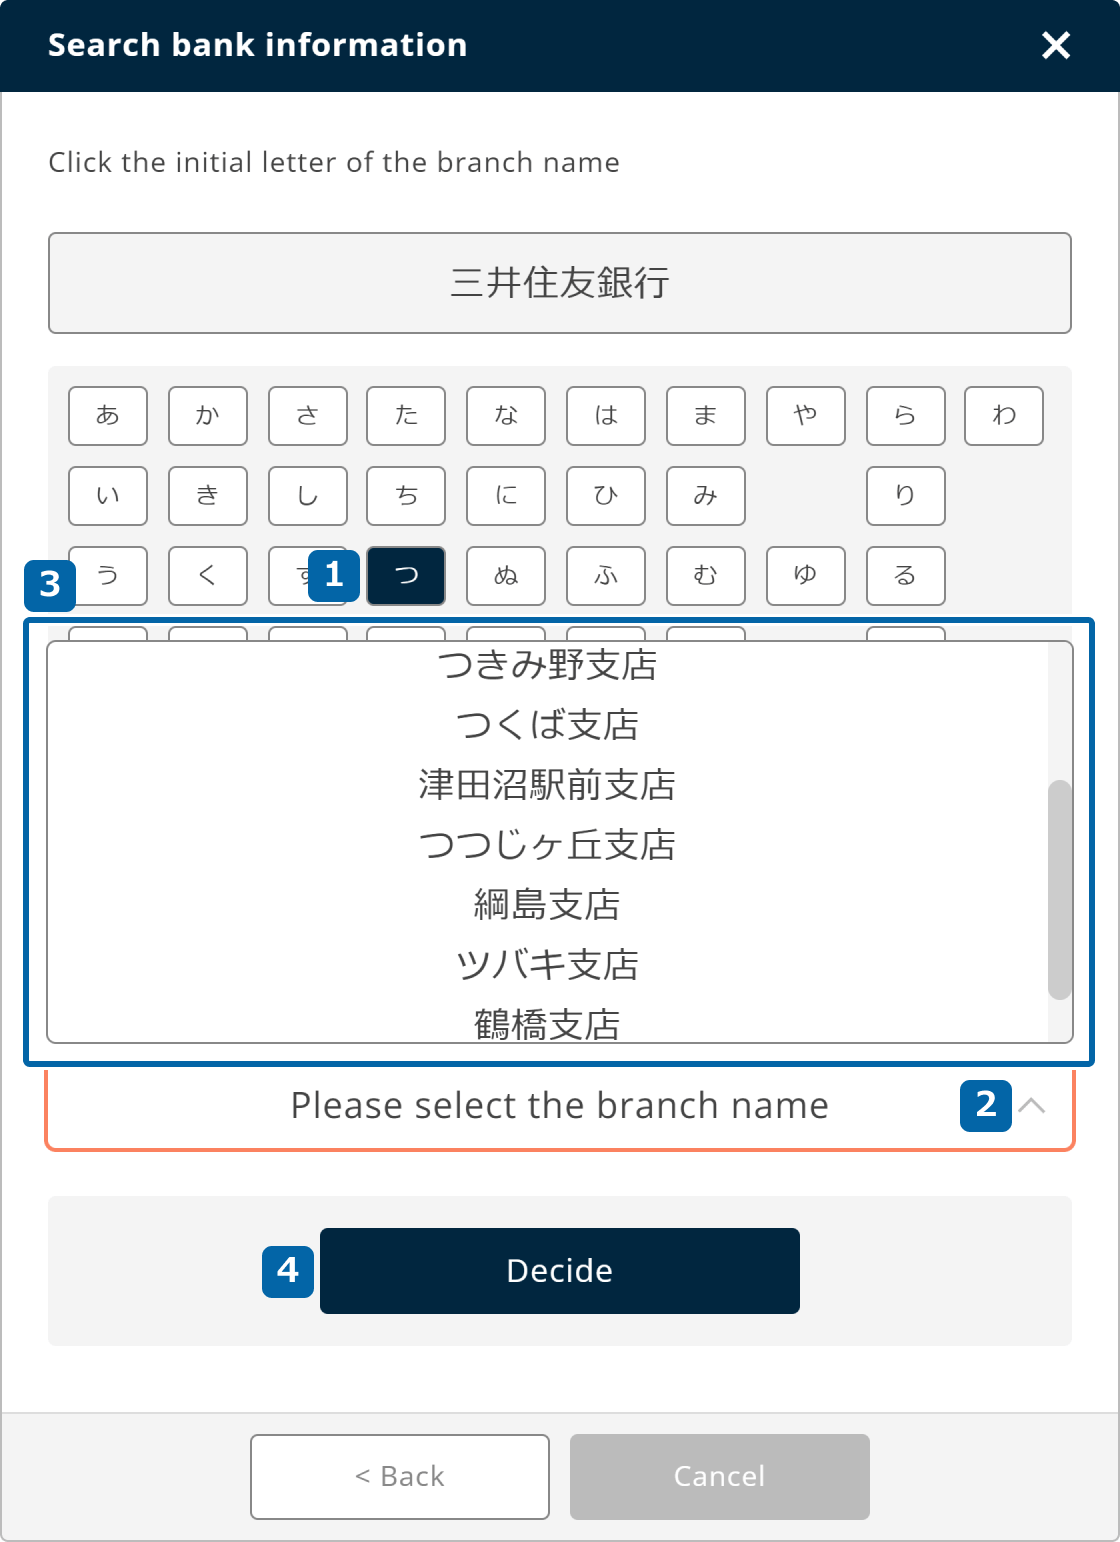
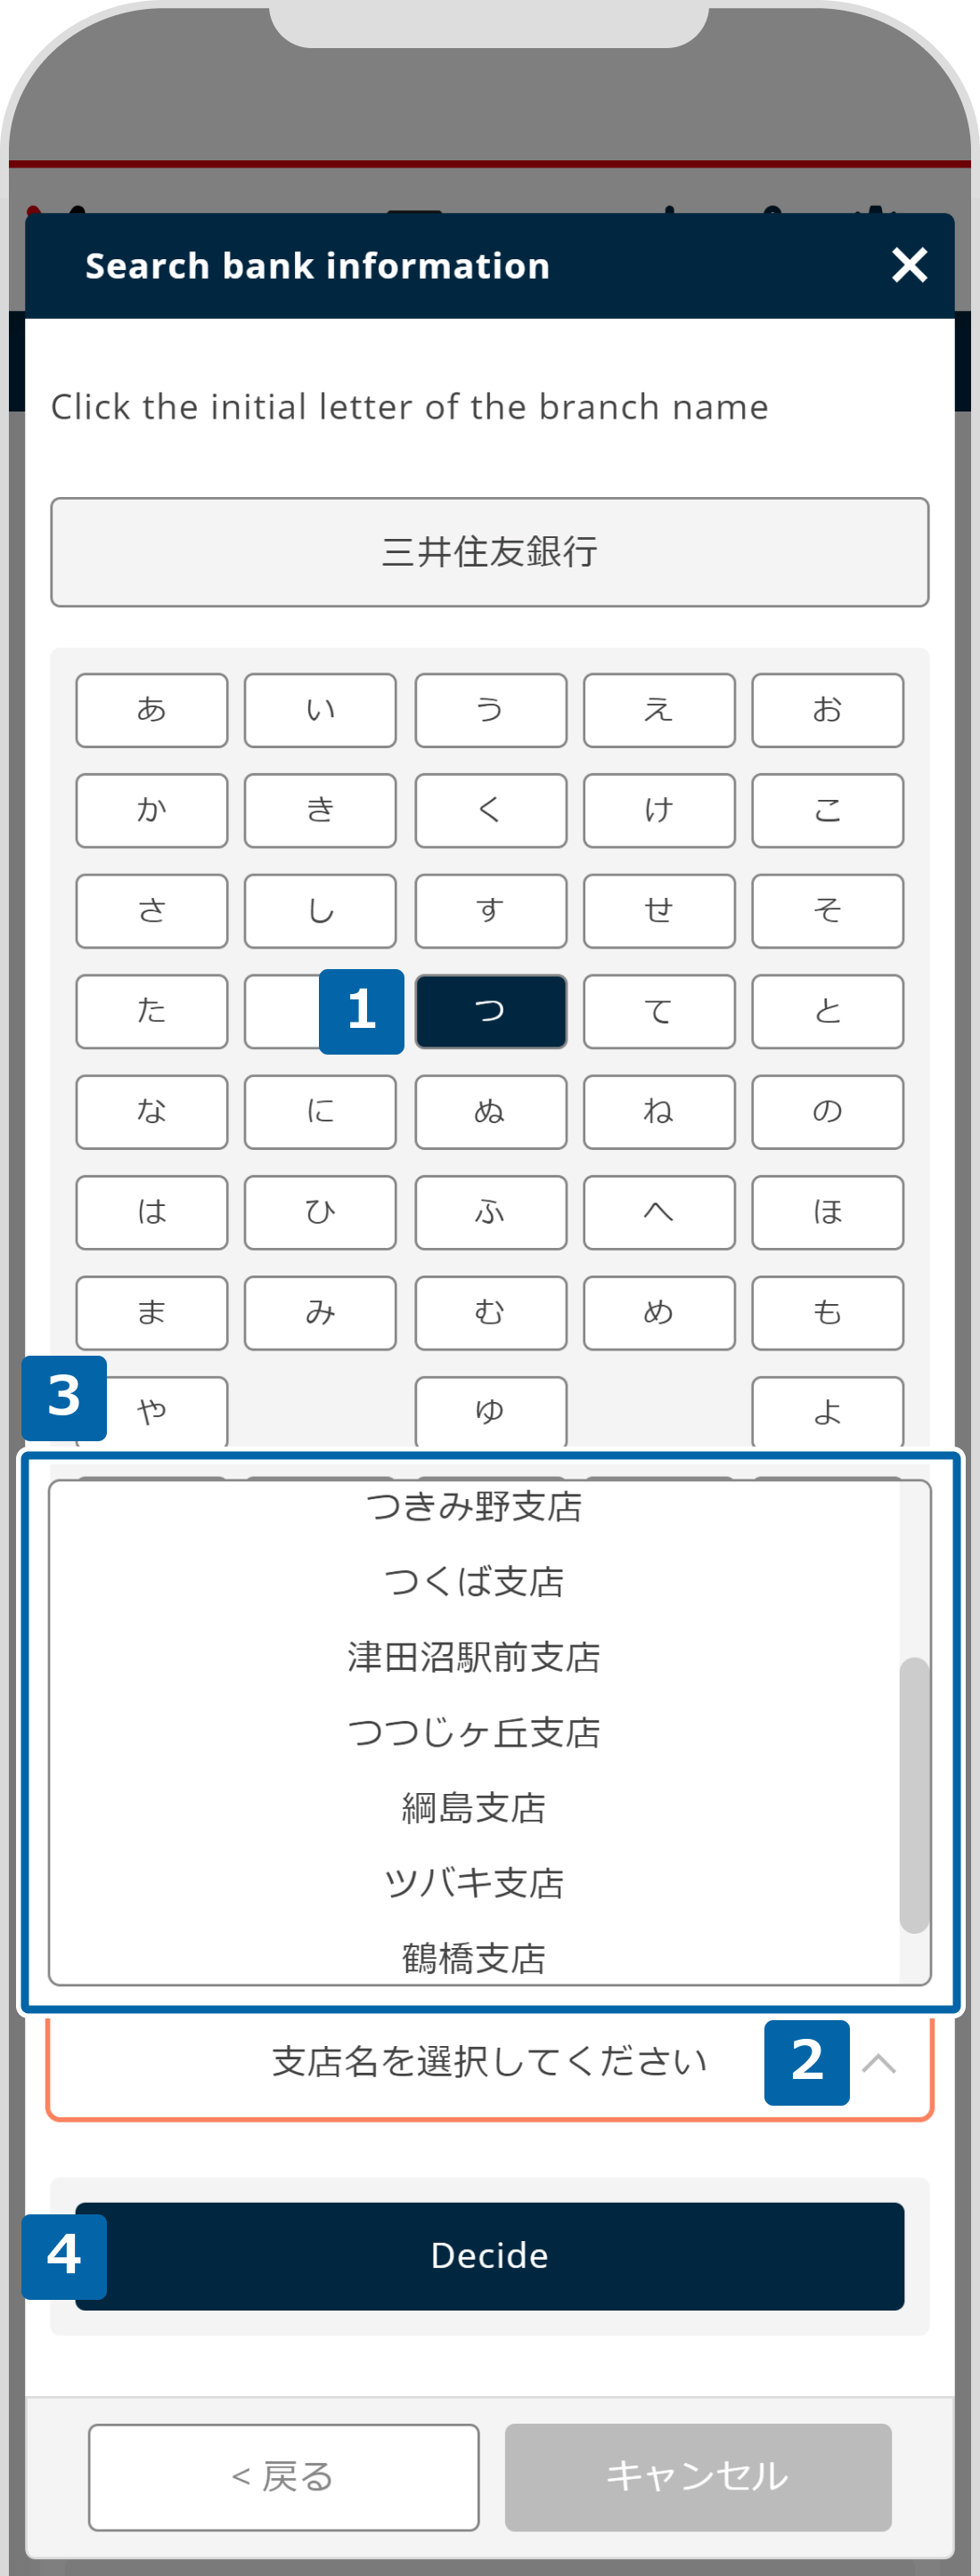
5. Select bank branch
Choose the (1) first letter of the branch name and click (2) "Please select the branch name" to show the (3) branch list. Select your branch and click (4) "Select".
Choose the (1) first letter of the branch name and tap (2) "Please select the branch name" to show the (3) branch list. Select your branch and tap (4) "Select".
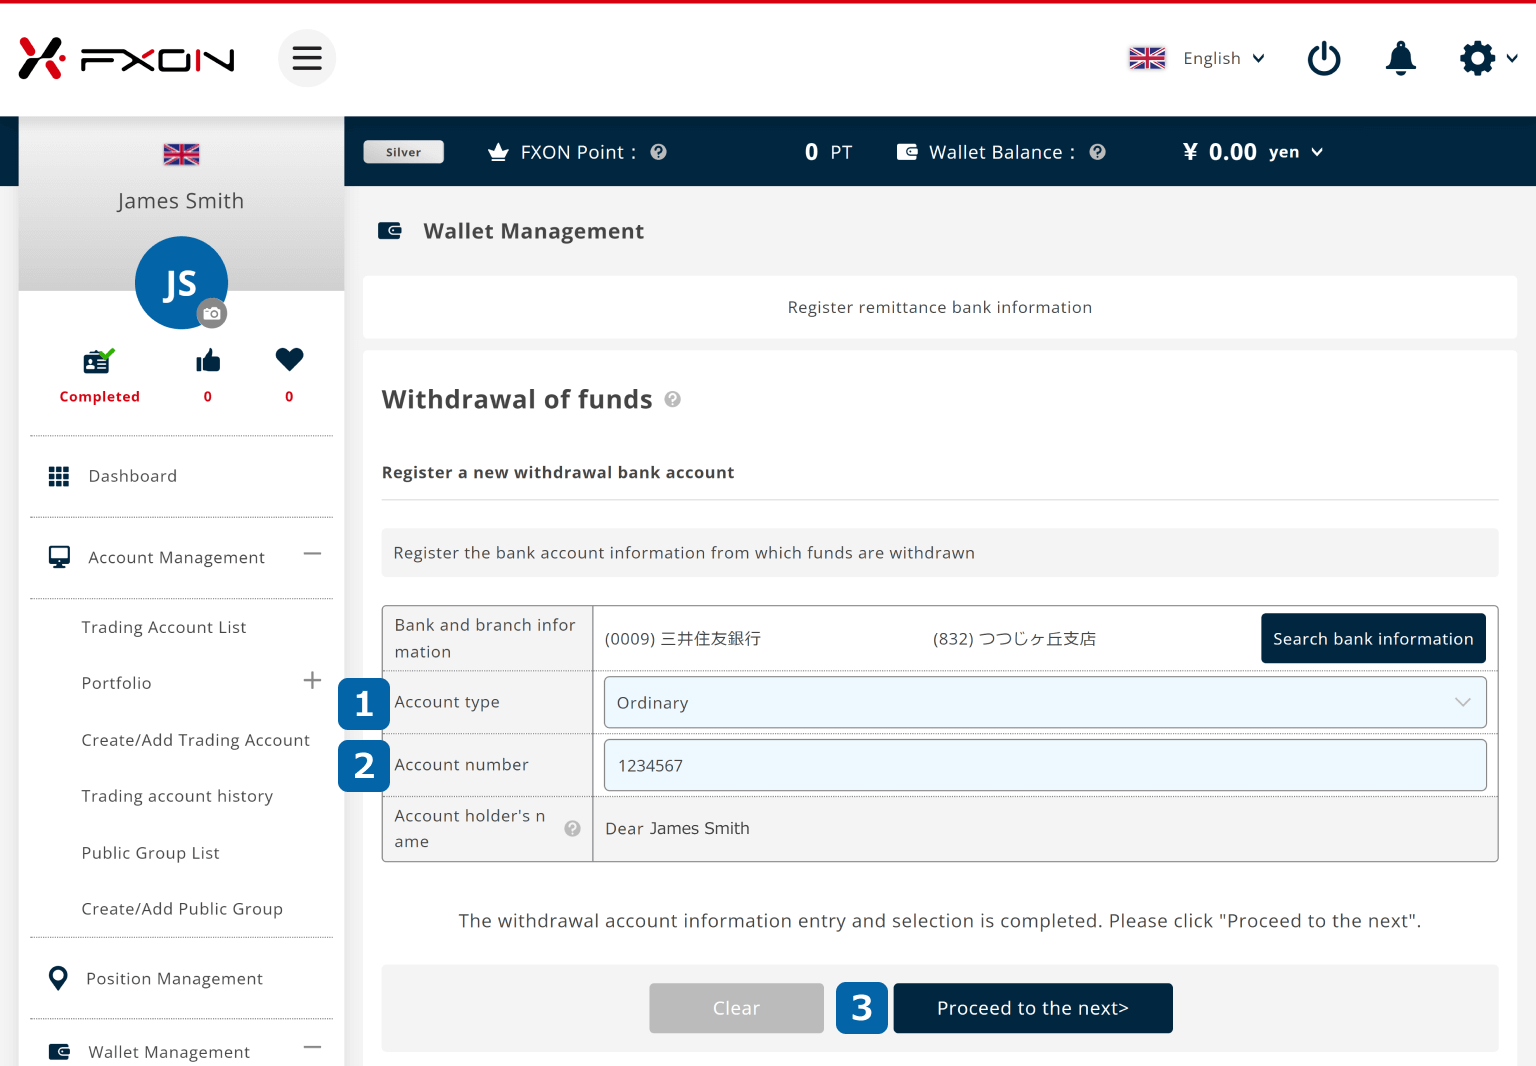
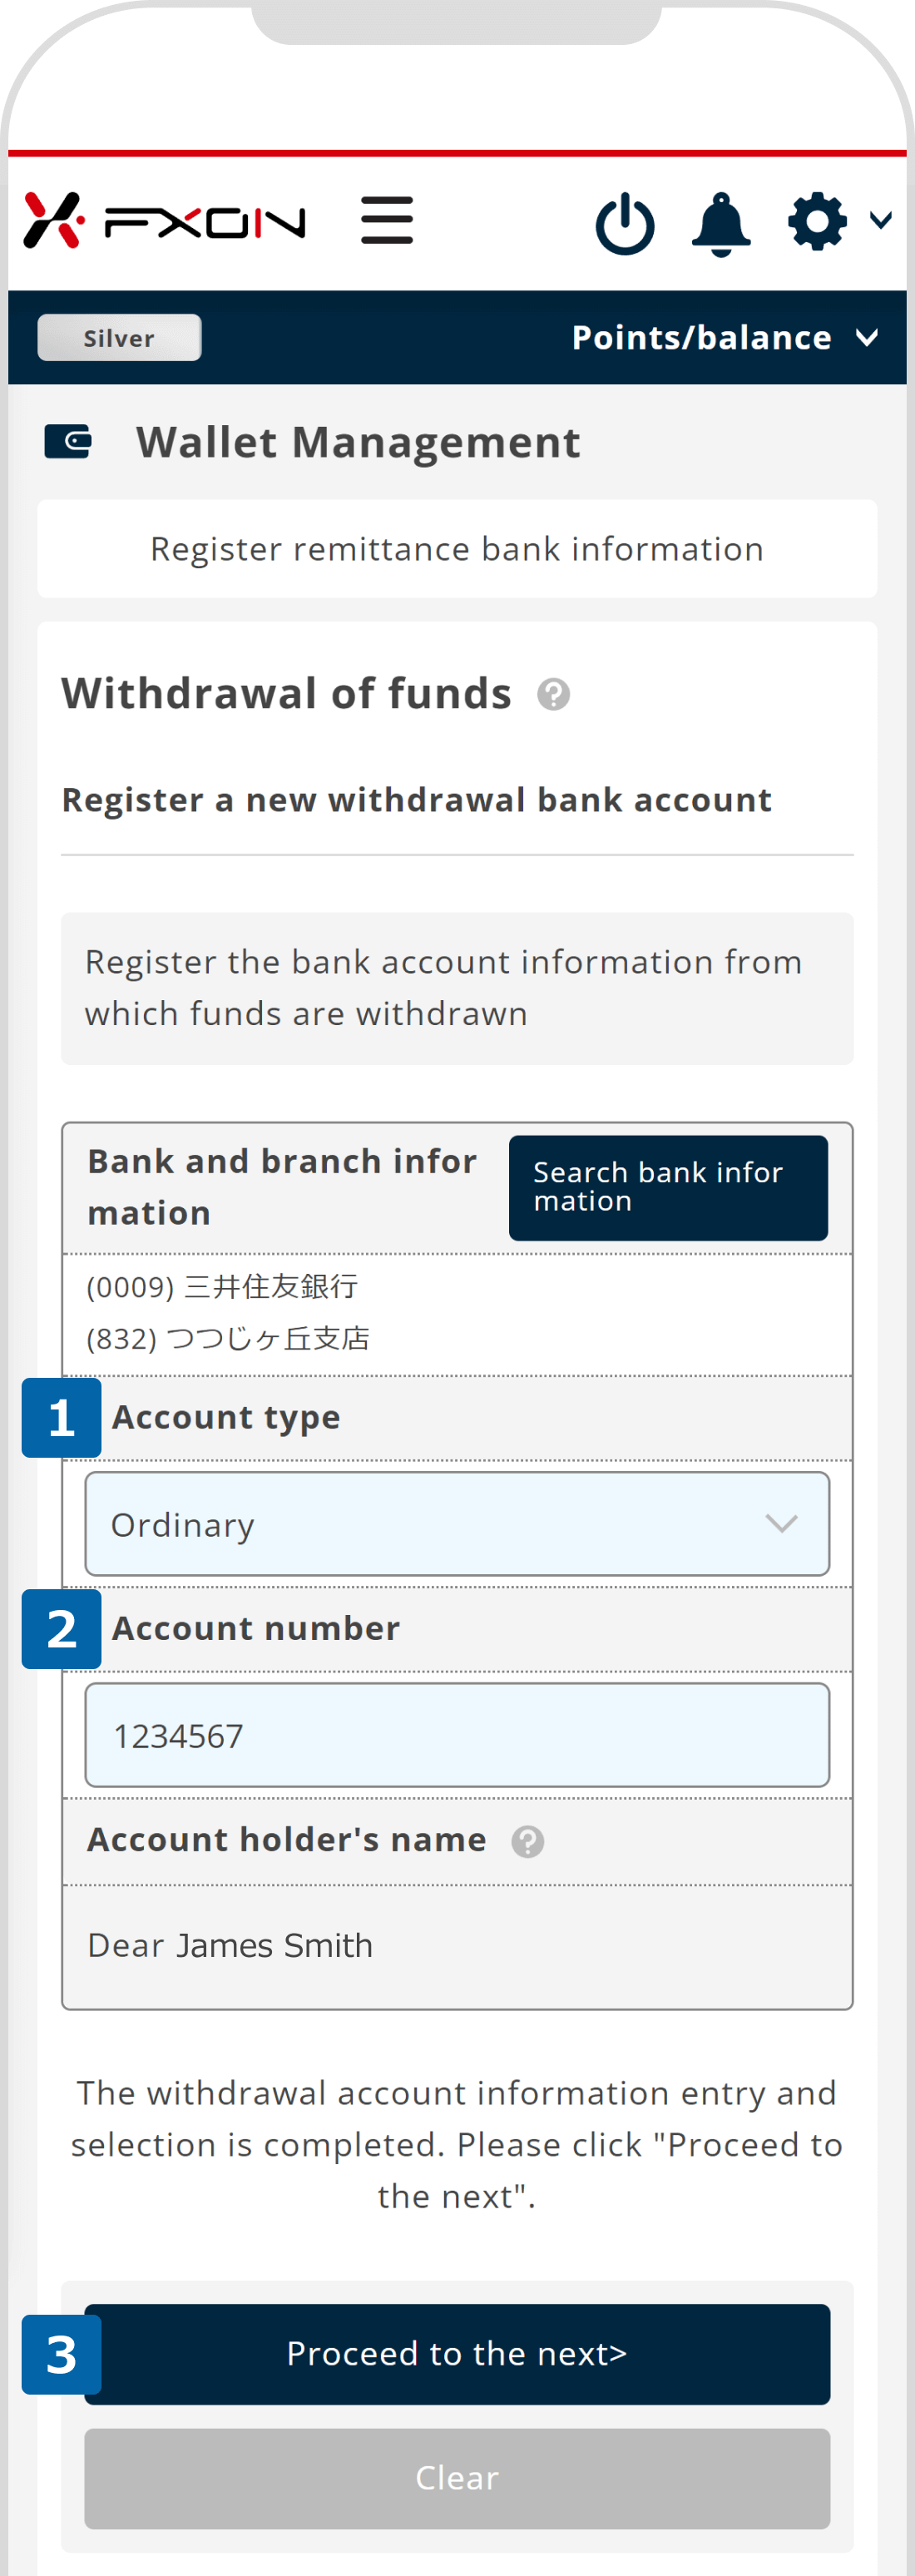
6. Enter your account number
After confirming that the bank and branch info is correct, enter (1) account type and (2) account number and click (3) "Next step".
After confirming that the bank and branch info is correct, enter your (1) account type and (2) account number and tap (3) "Next step".
Note
The account holder's name must match the name registered with FXON.
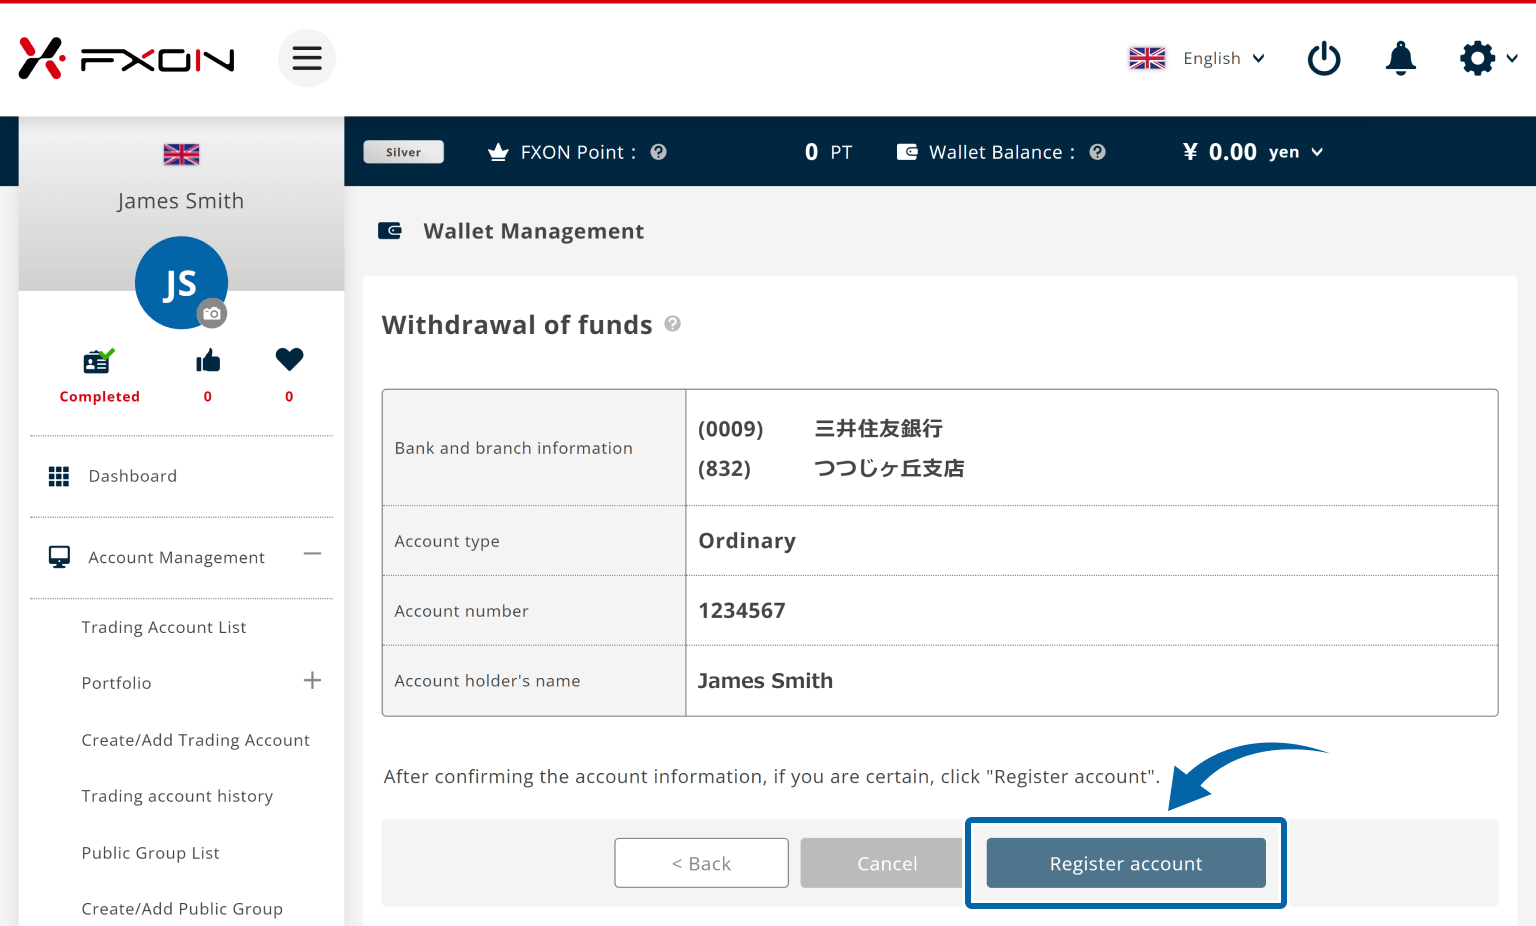
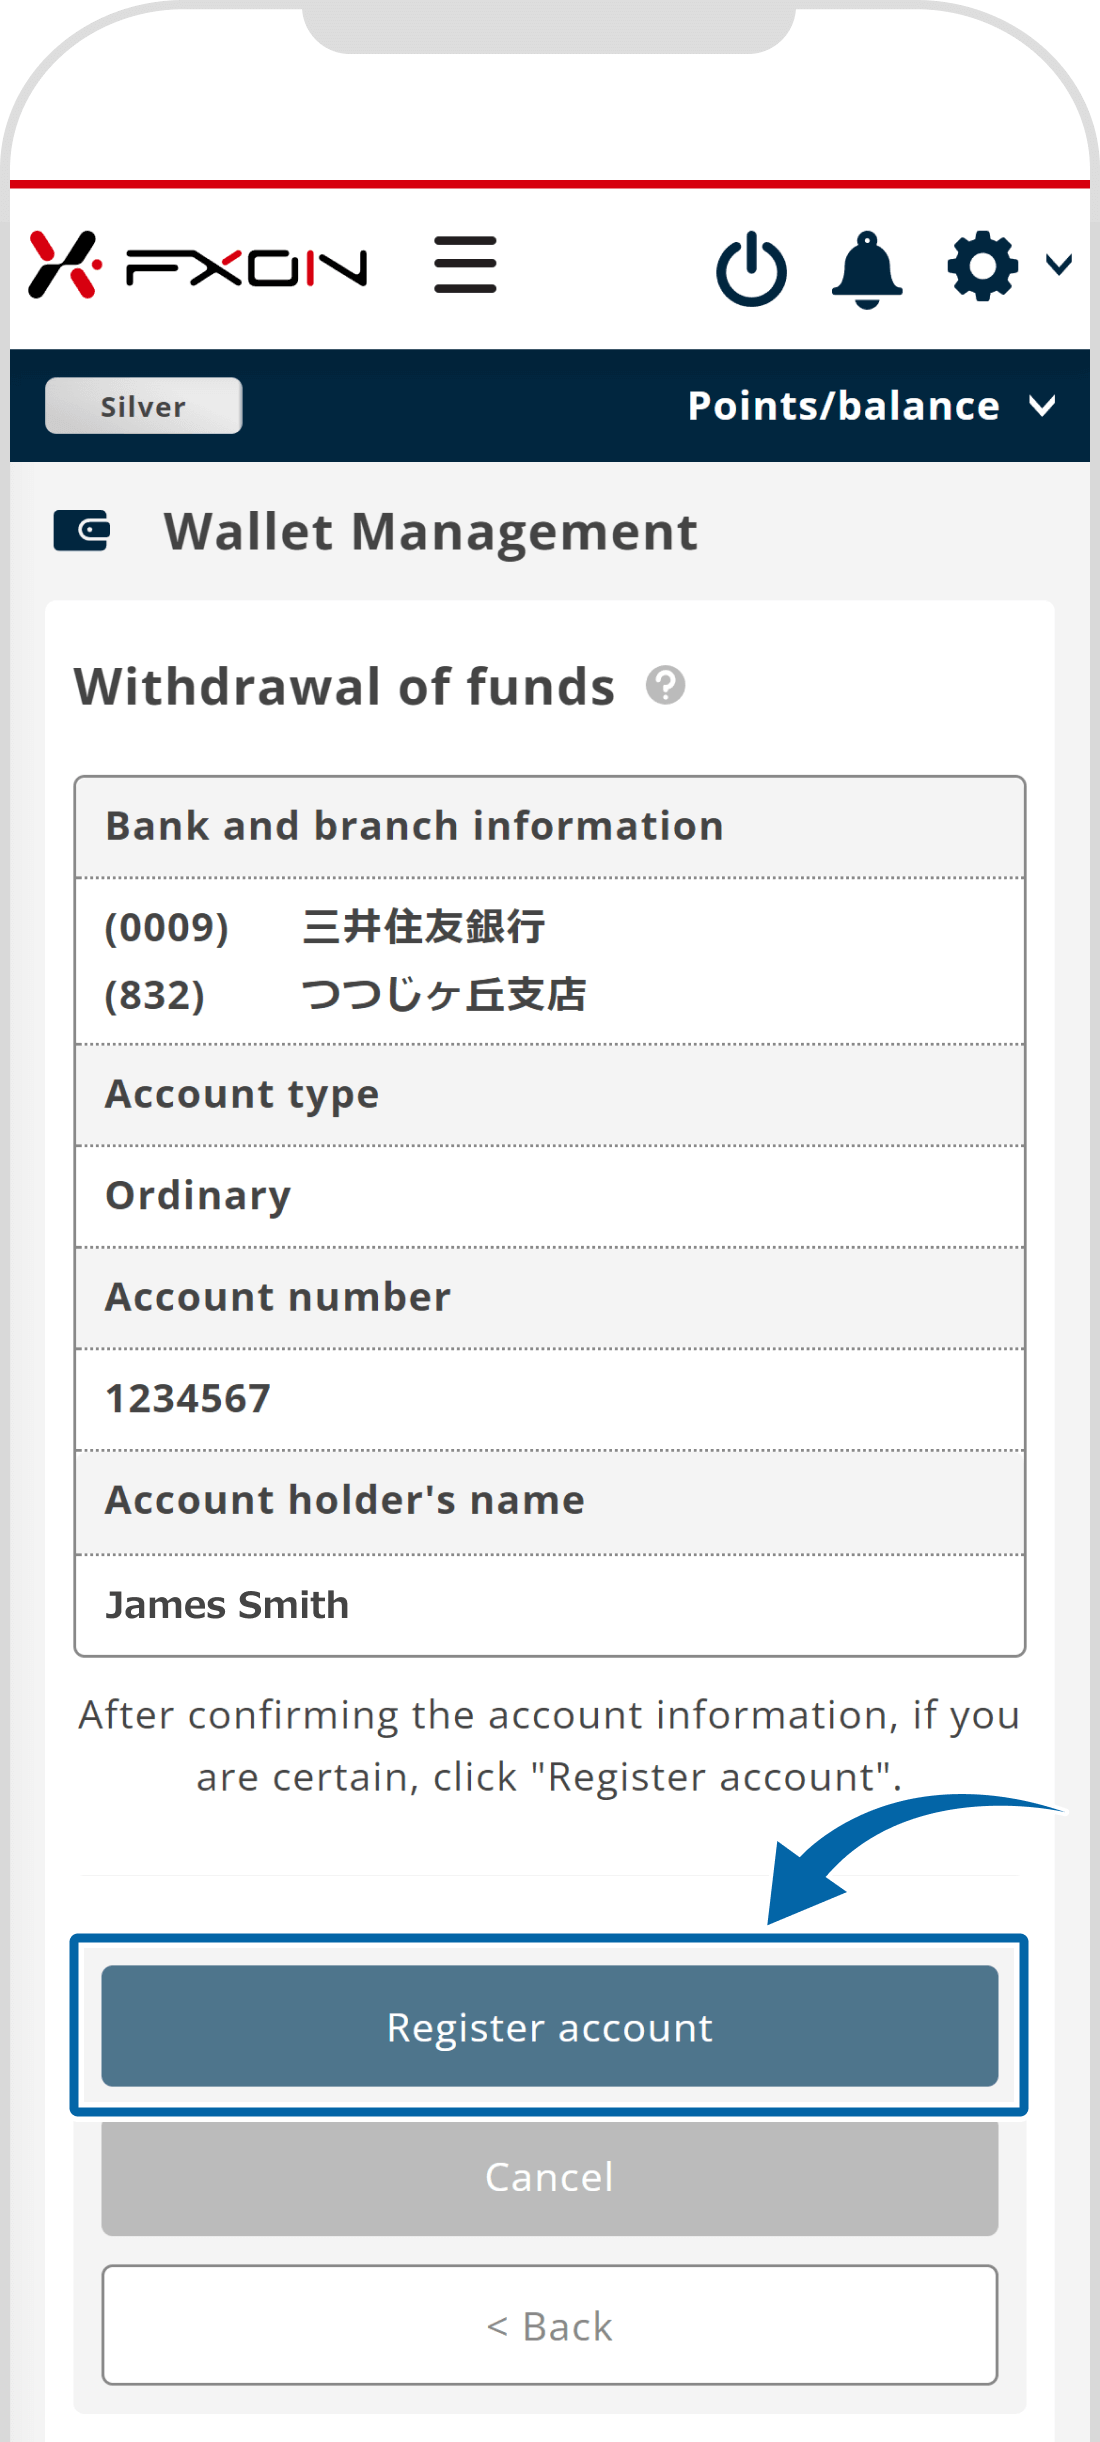
7. Confirmation
On the confirmation page, make sure that everything is correct and click "Register account".
On the confirmation page, make sure that everything is correct and tap "Register account".
8. Two-Factor Authentication
Please complete the two-factor authentication.
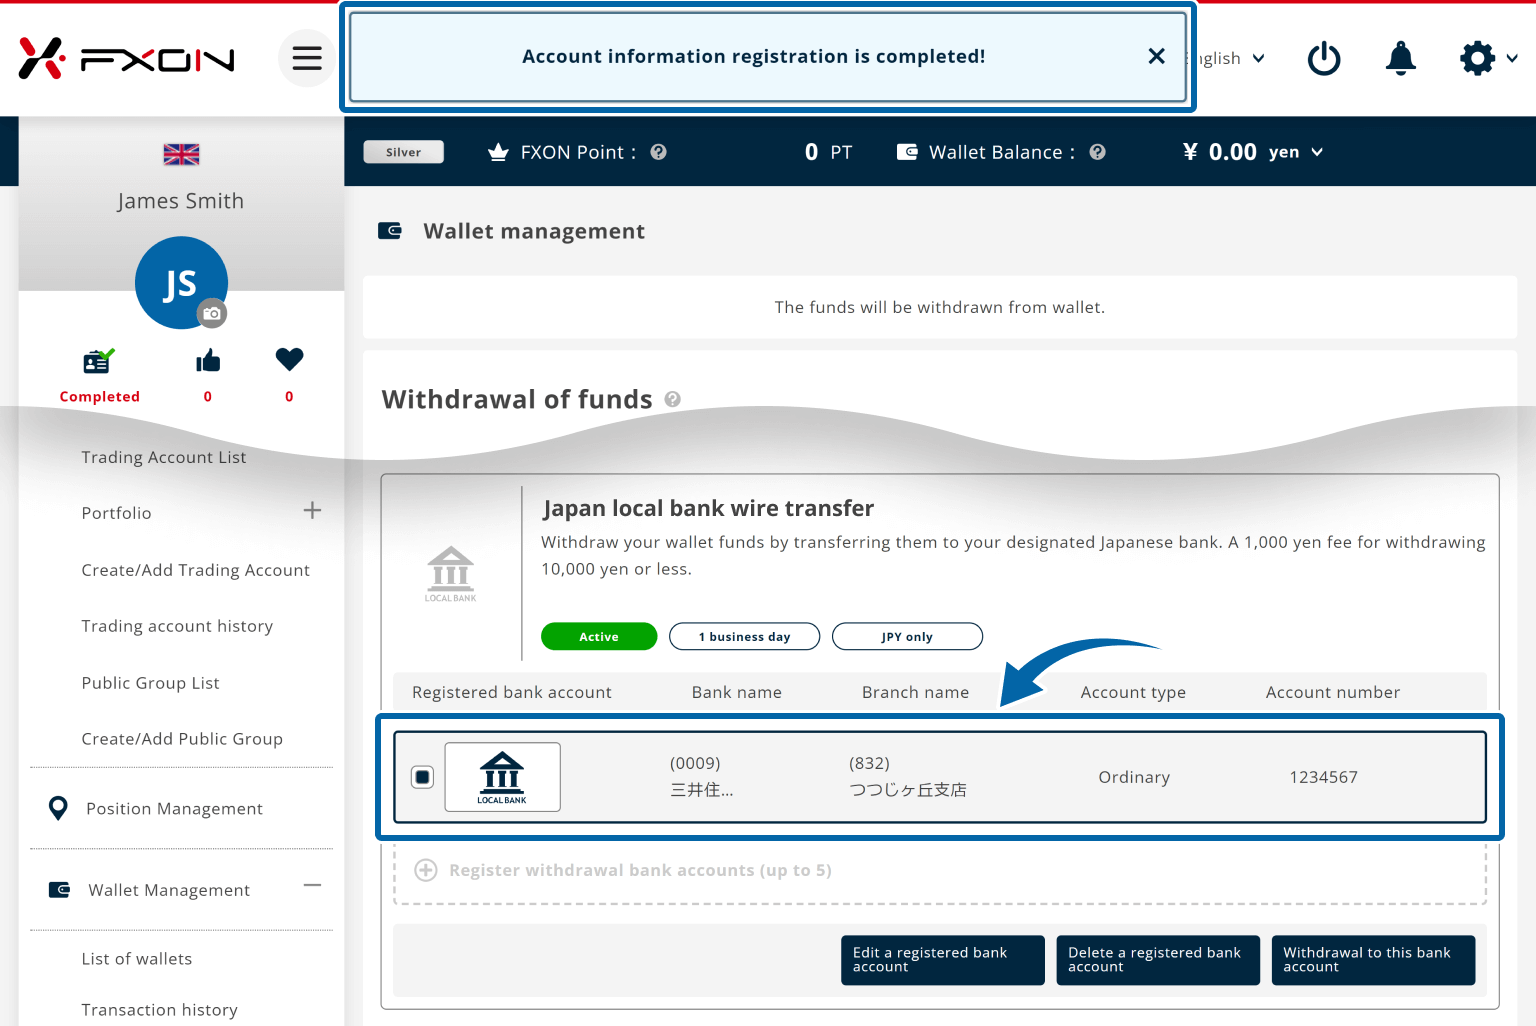
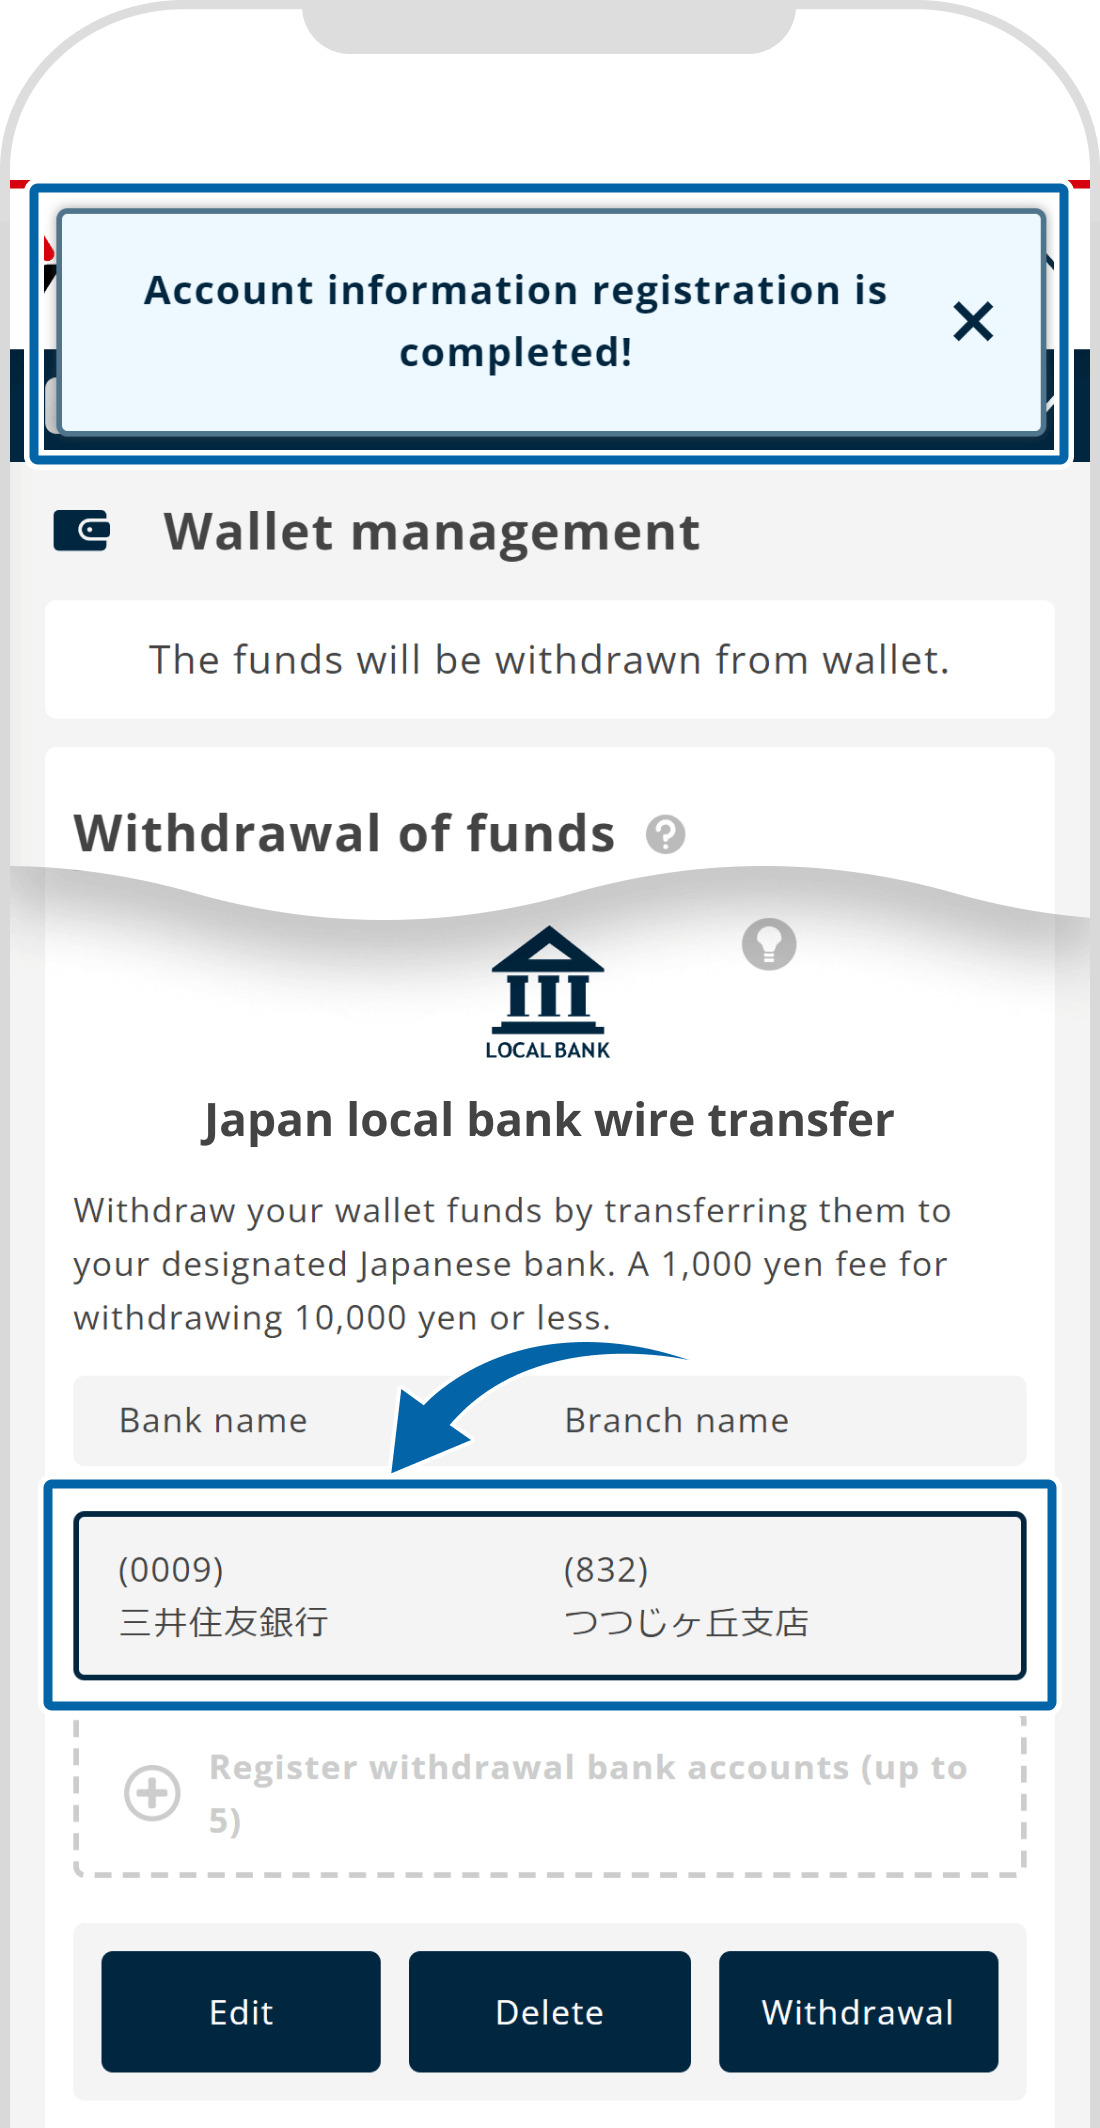
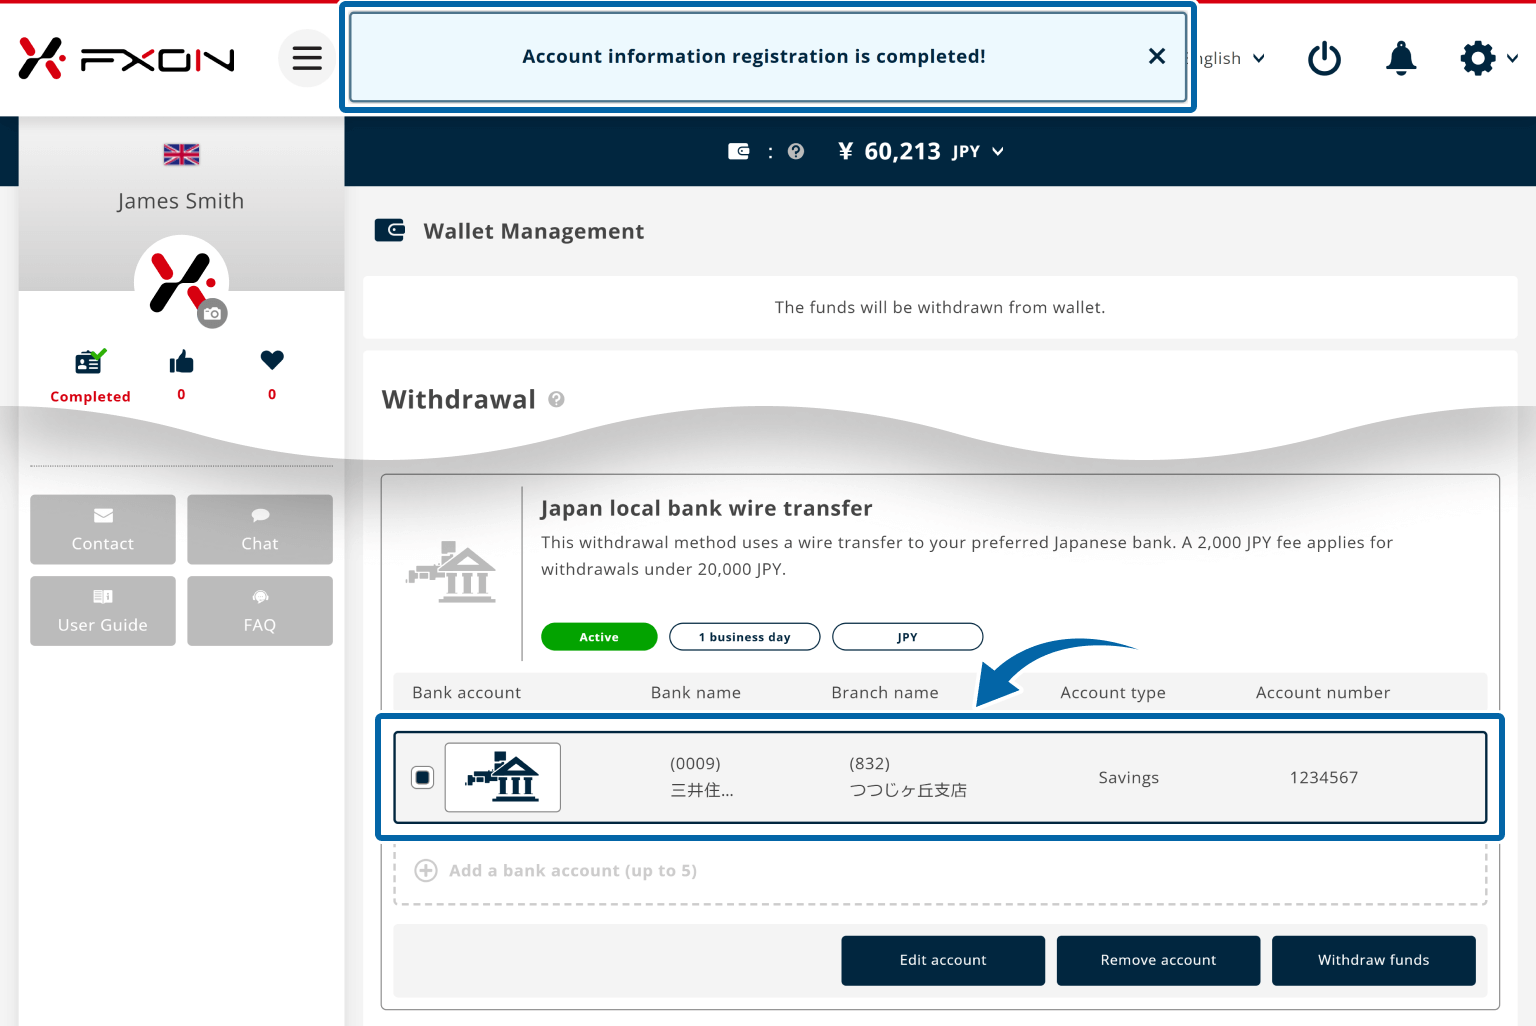
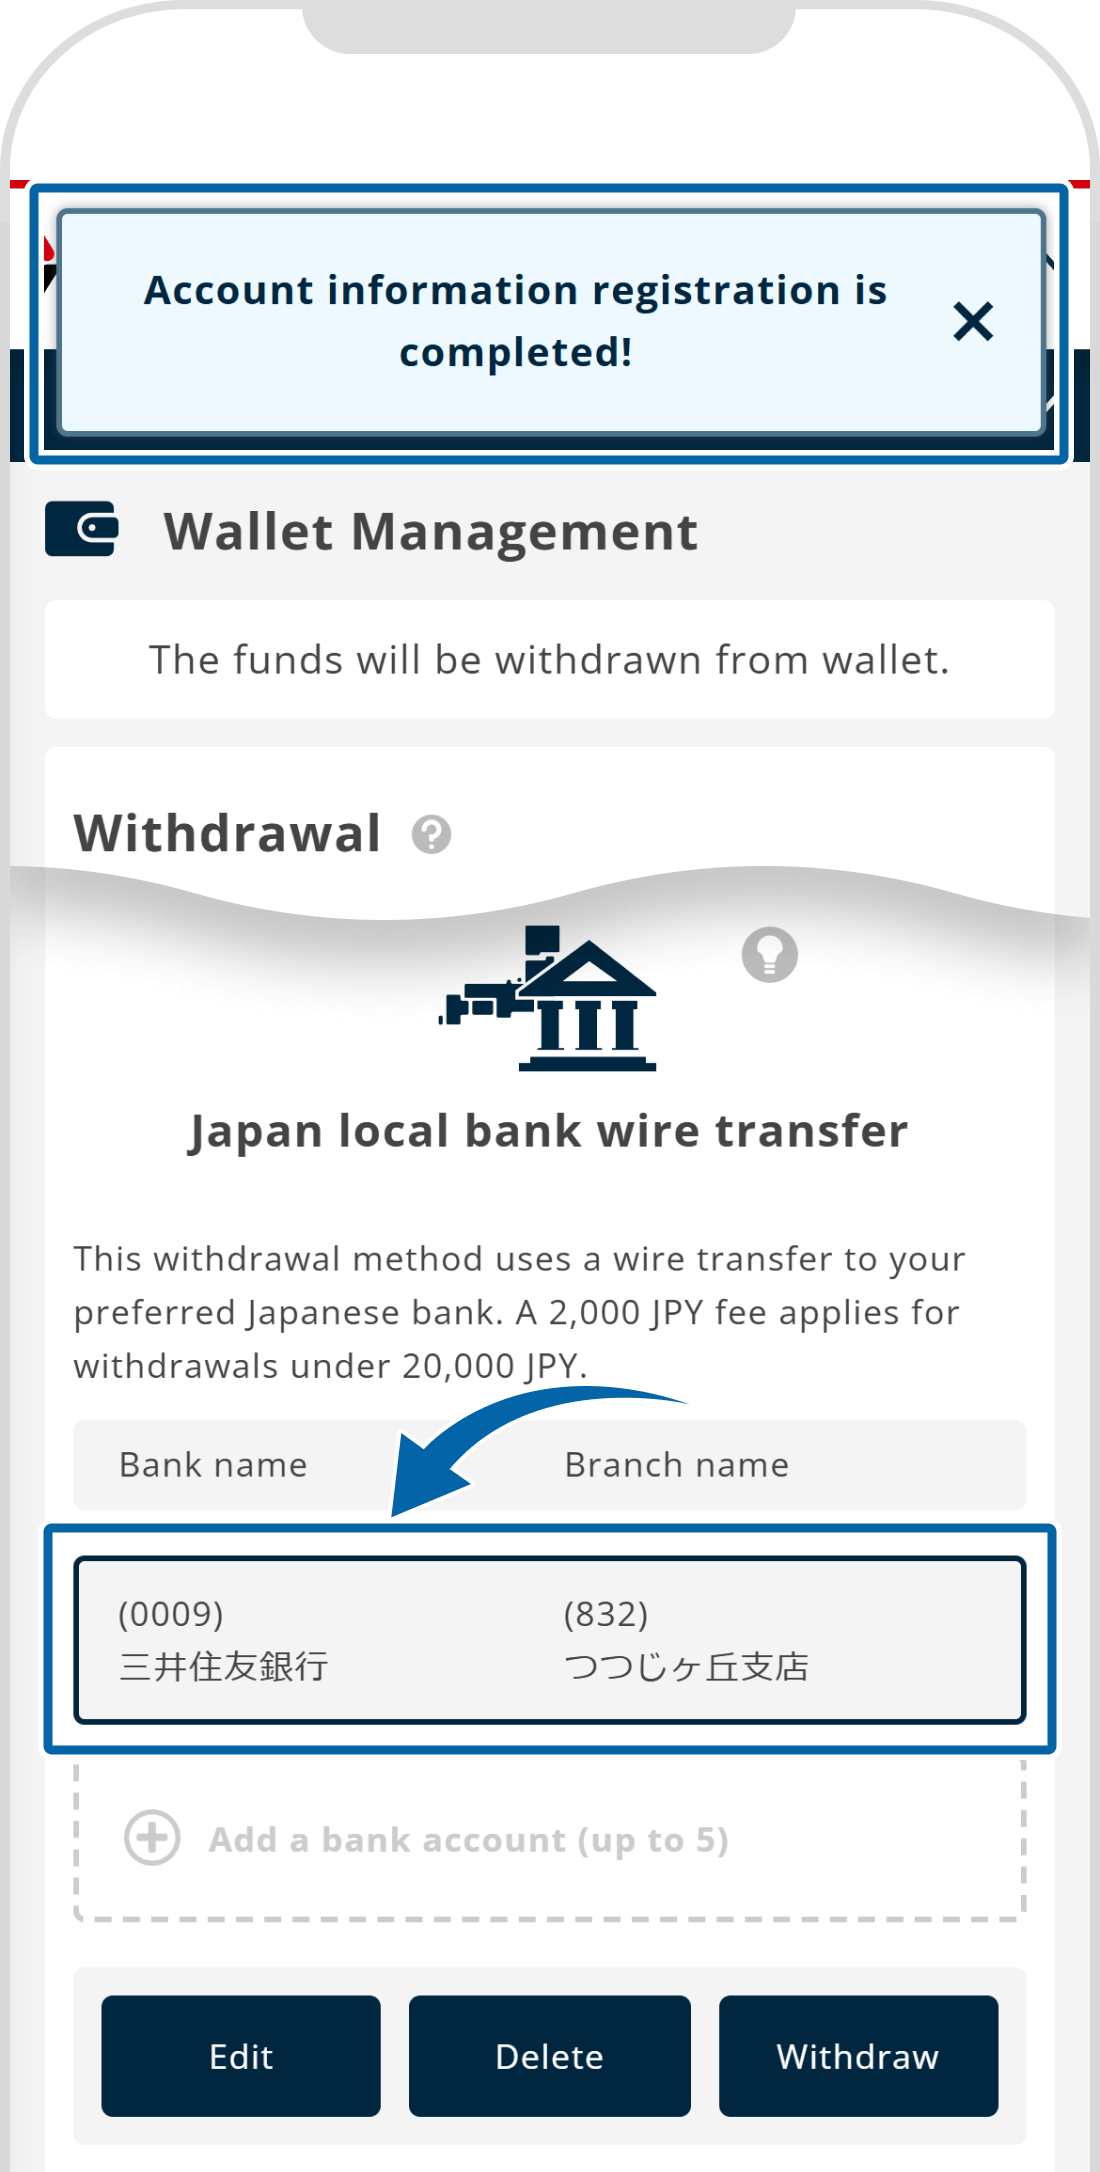
9. Registration completed
The message "Account information registration is completed!" will appear at the top. The new account will be listed as a registered bank account.
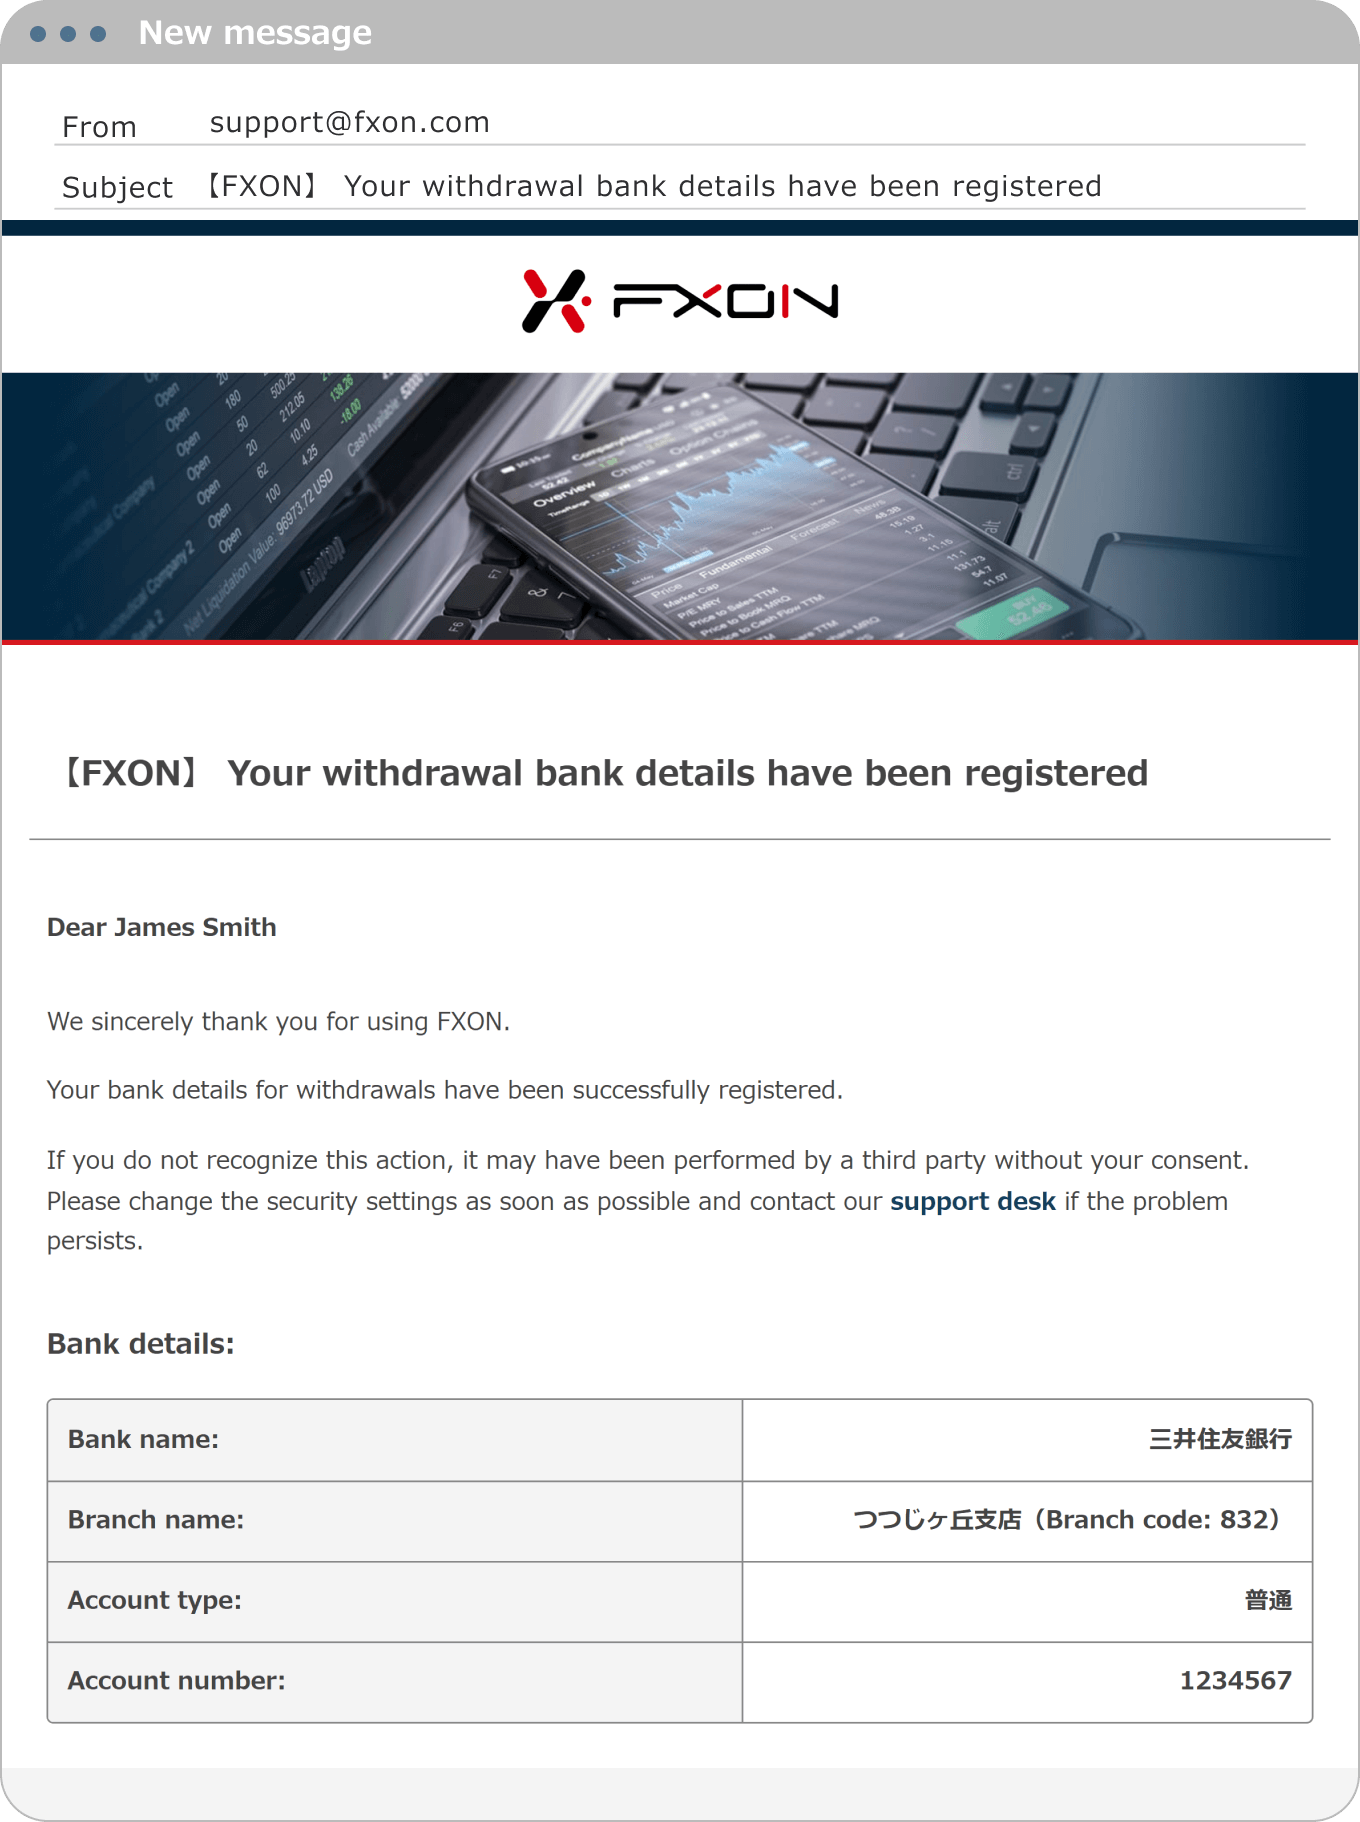
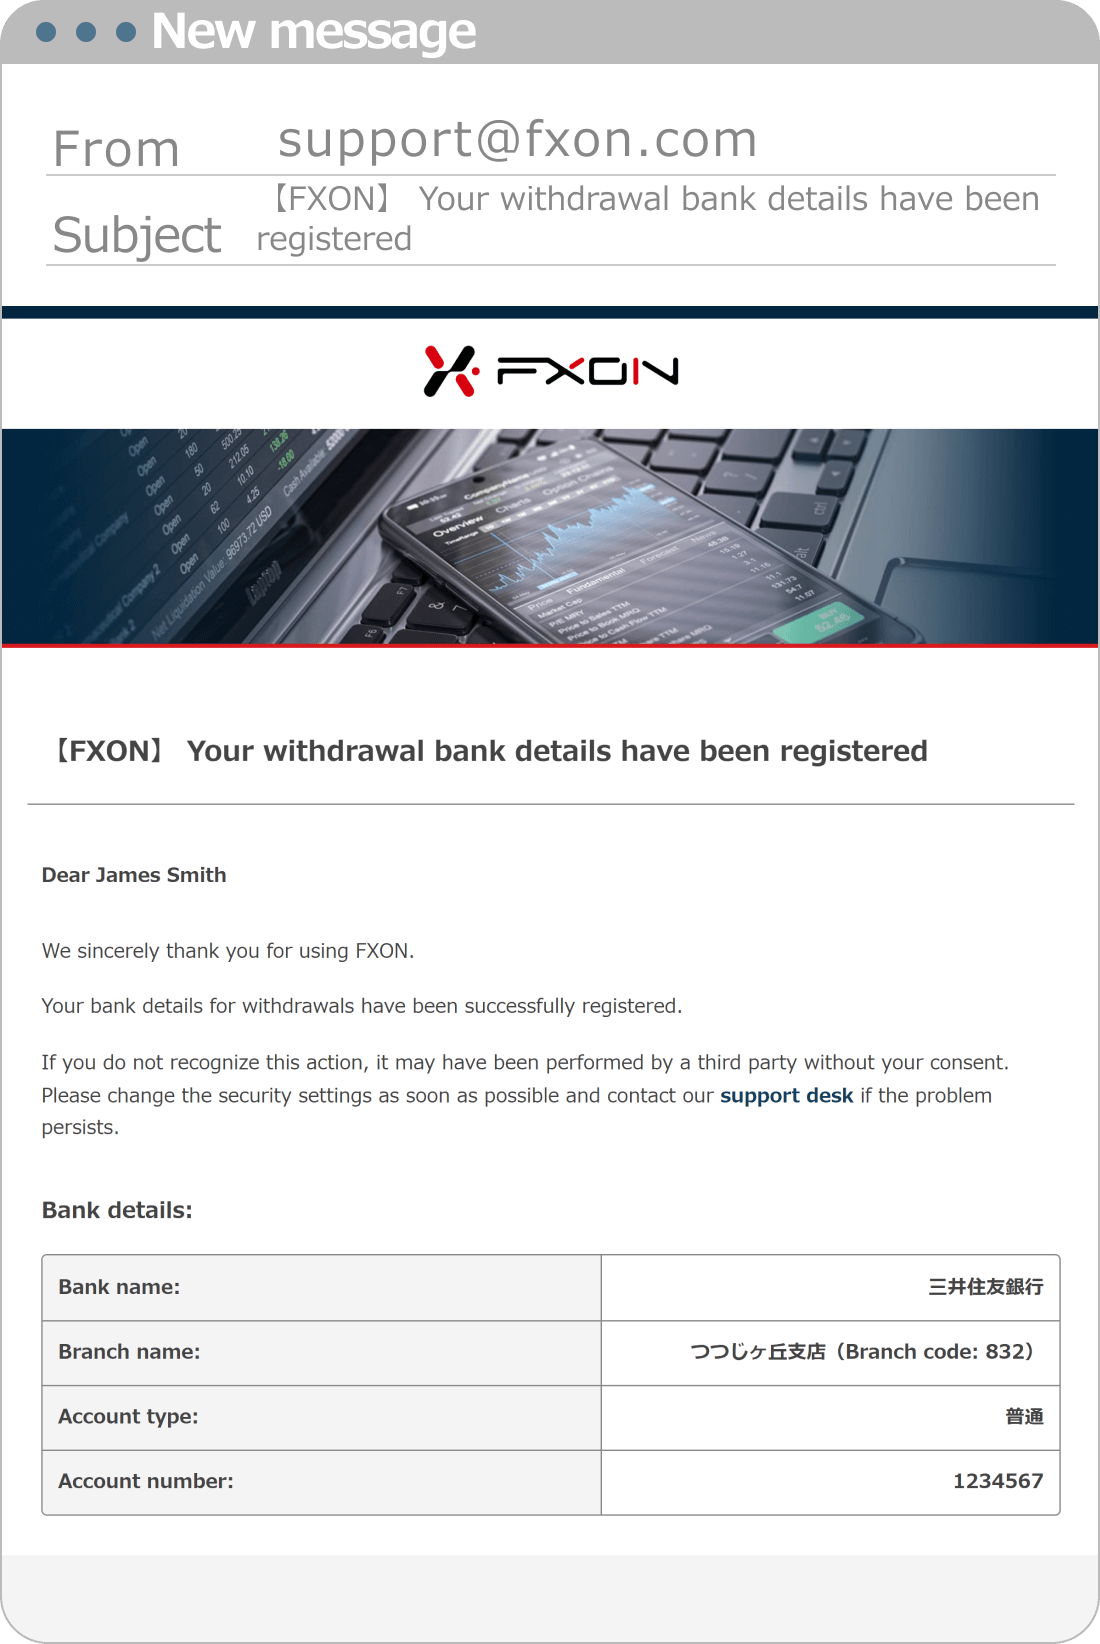
10. Withdrawal Bank Registration Confirmation Email
A confirmation email will be sent to your registered email address once your withdrawal bank details are registered. Please check your inbox.
Email subject: 【FXON】 Your withdrawal bank details have been registered
Was this article helpful?
That’s Great!
Thank you for your feedback
Sorry! We couldn't be helpful
Thank you for your feedback
Feedback sent
We appreciate your effort and will try to fix the article