Introduction for Using【STEP 3】Corporate Verification Procedure (Corporate Account)
Subject:
individual
corporation
This article was :
Published in 2024.06.21
Updated in 2024.07.05
The corporate verification process is conducted online via the FXON portal and the applicant's smartphone. Please have the applicant's valid identification documents and corporate verification documents ready. The submitted documents will be reviewed and approved by FXON.
Please note that expired certificates will not be accepted.
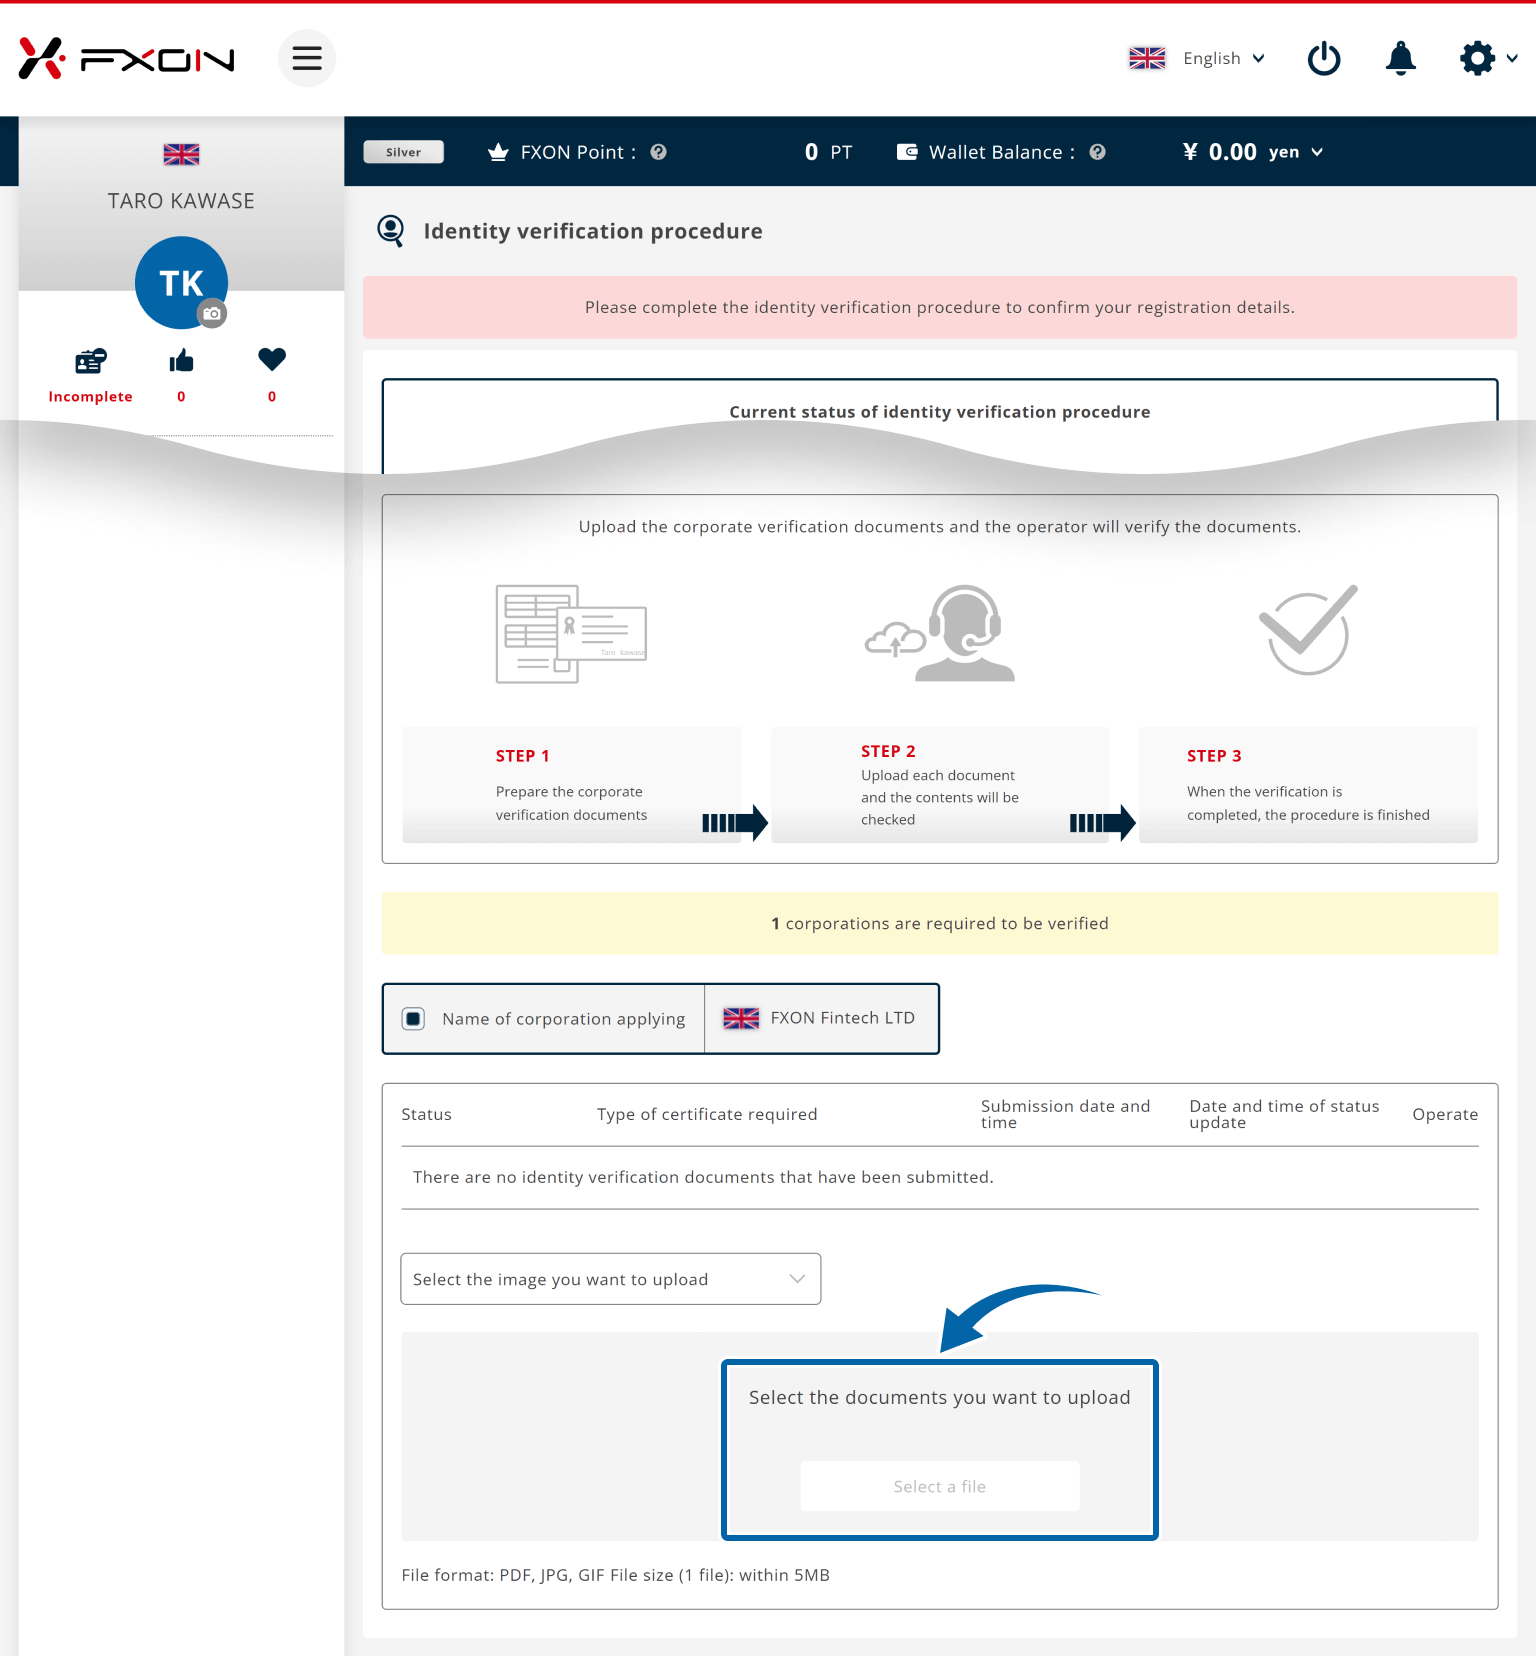
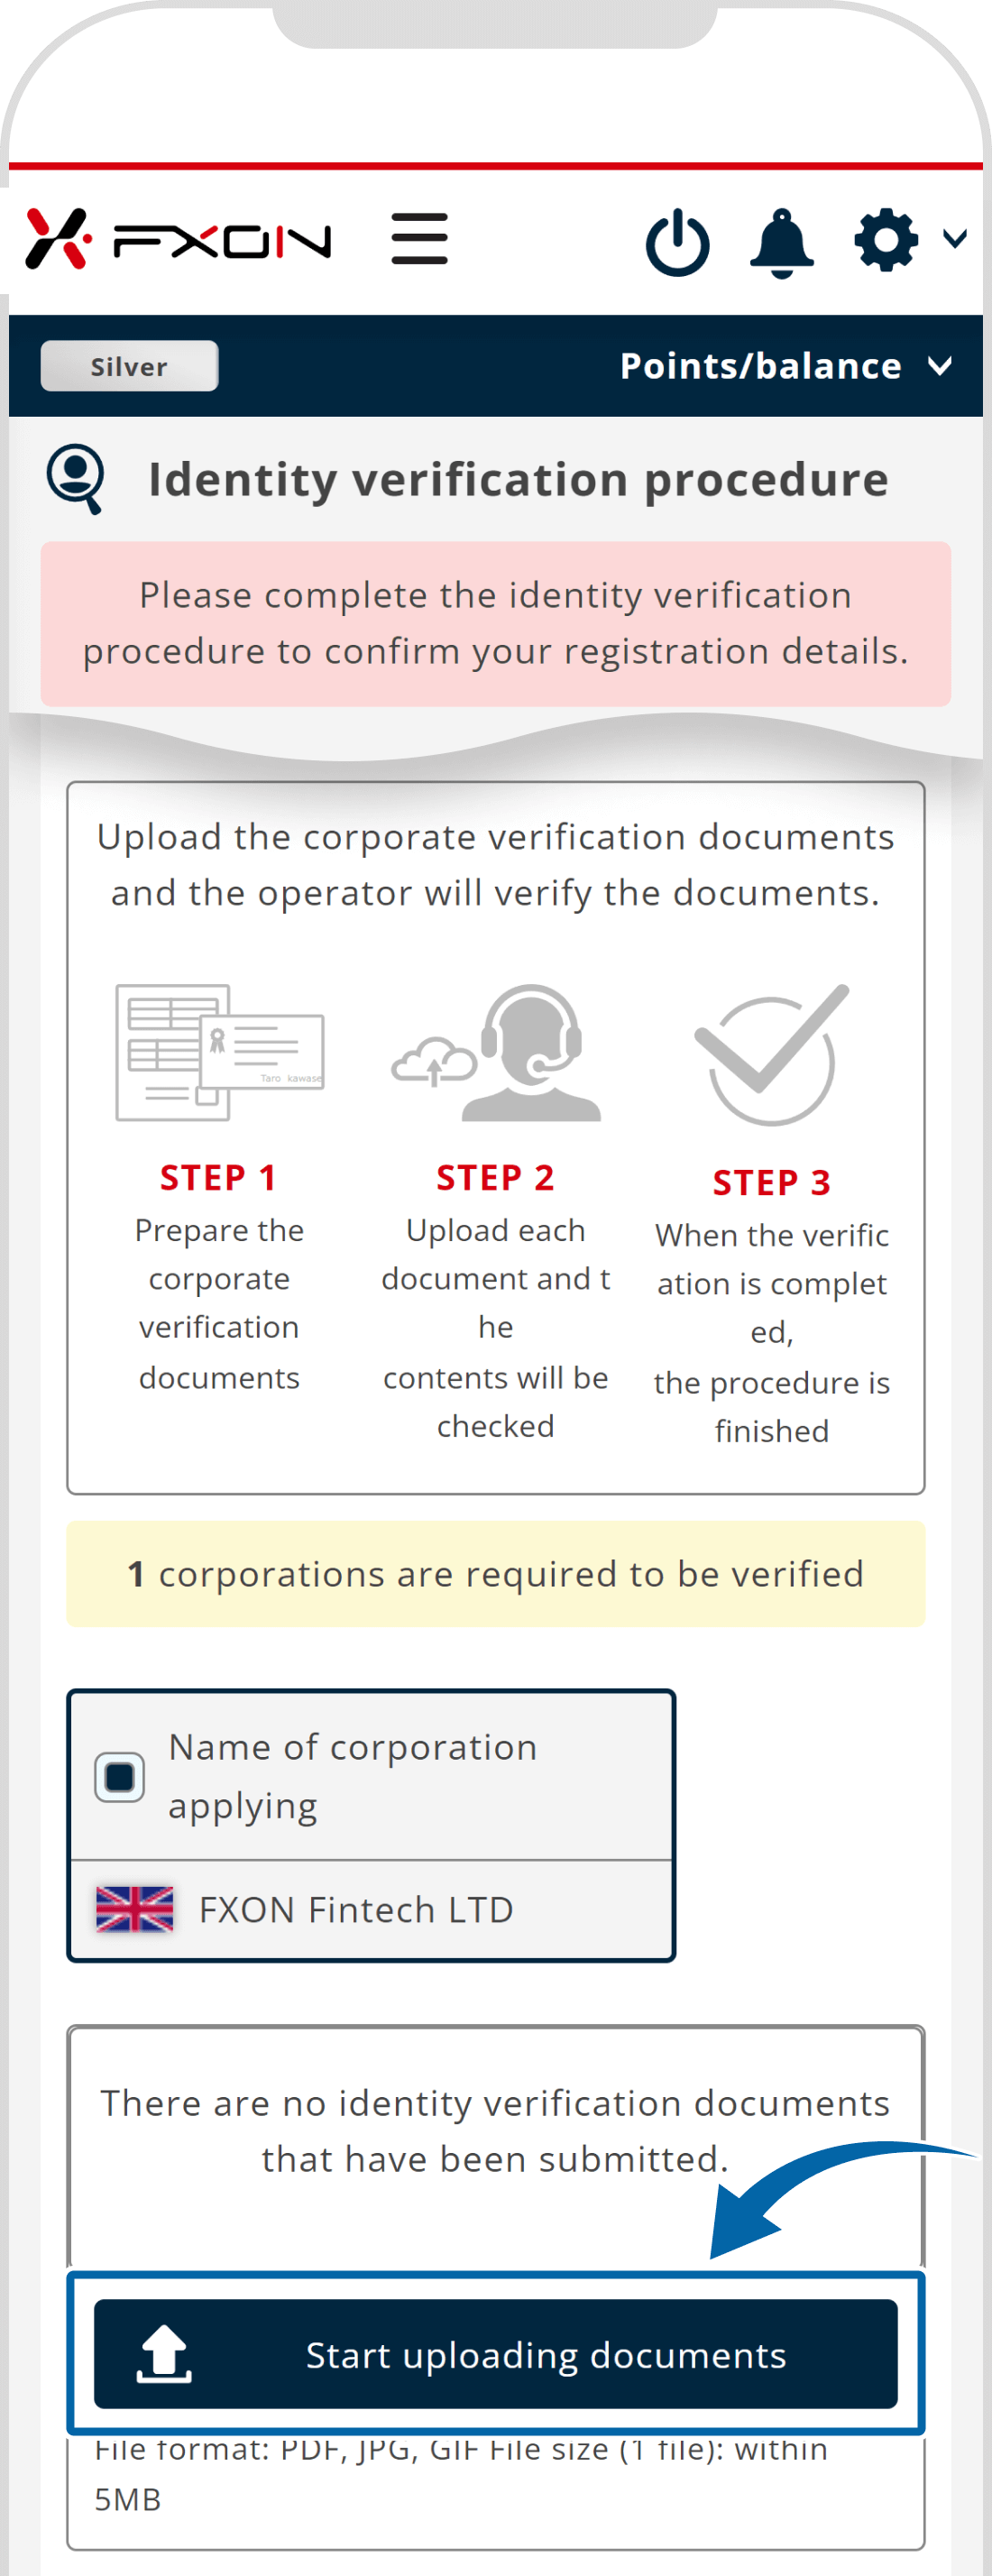
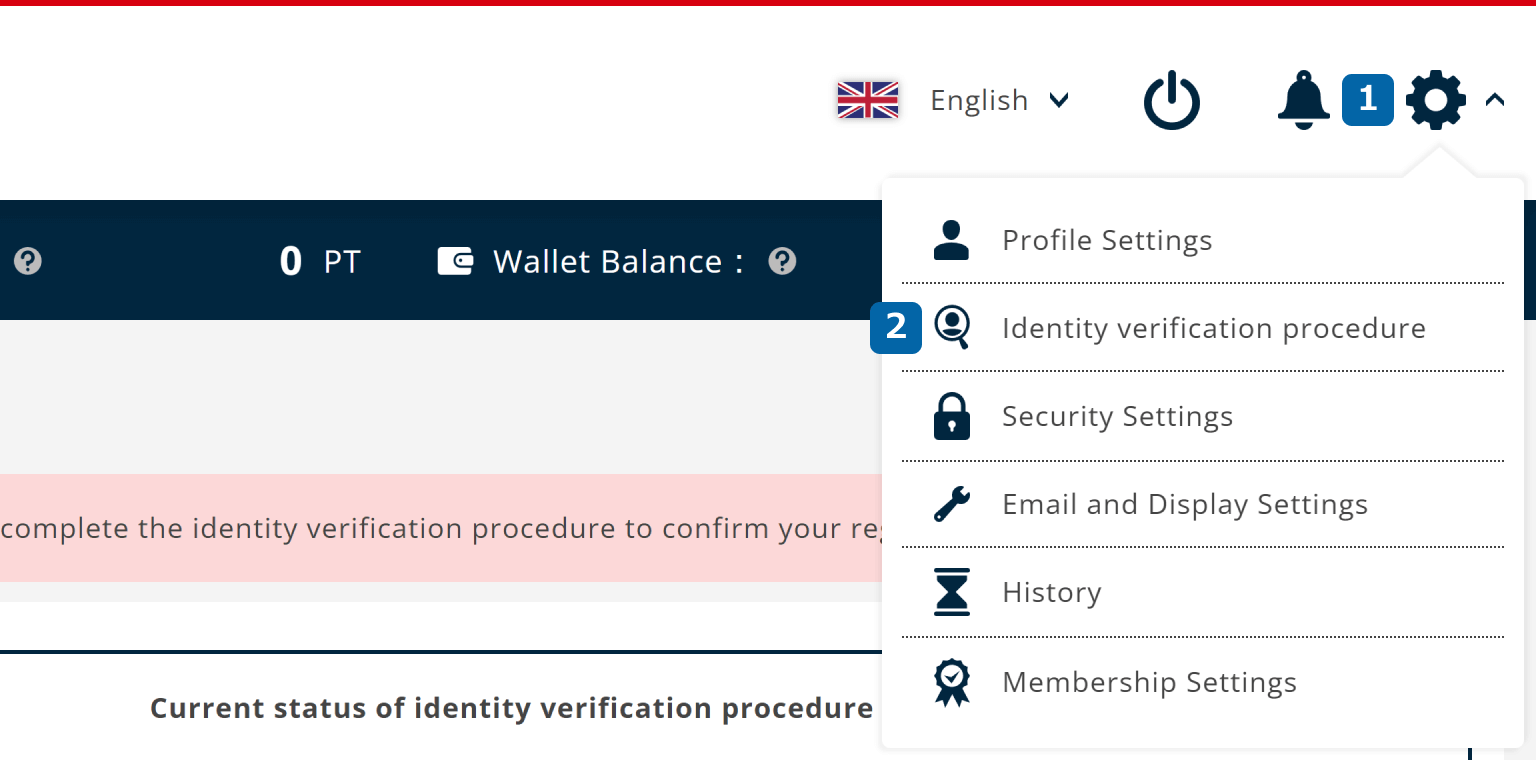
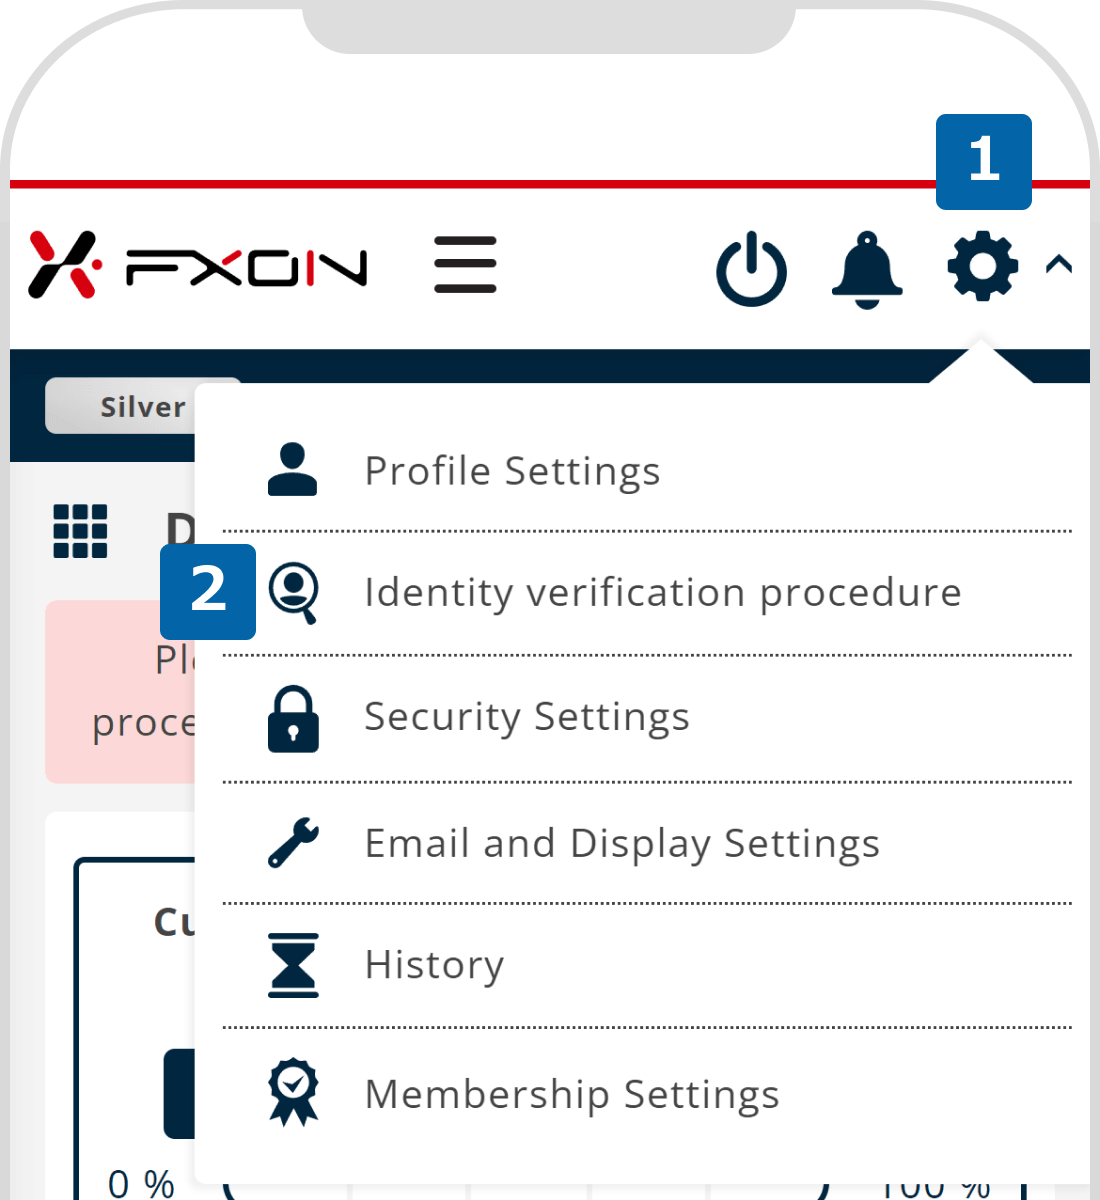
1. Display the identity verification procedure screen
After logging into the FXON portal, click on (1) Settings (gear icon) > (2) "Identity verification procedure" in the upper right corner of the screen.
After logging into the FXON portal, tap (1) Settings (gear icon) > (2) "Identity verification procedure" in the upper right corner of the screen.
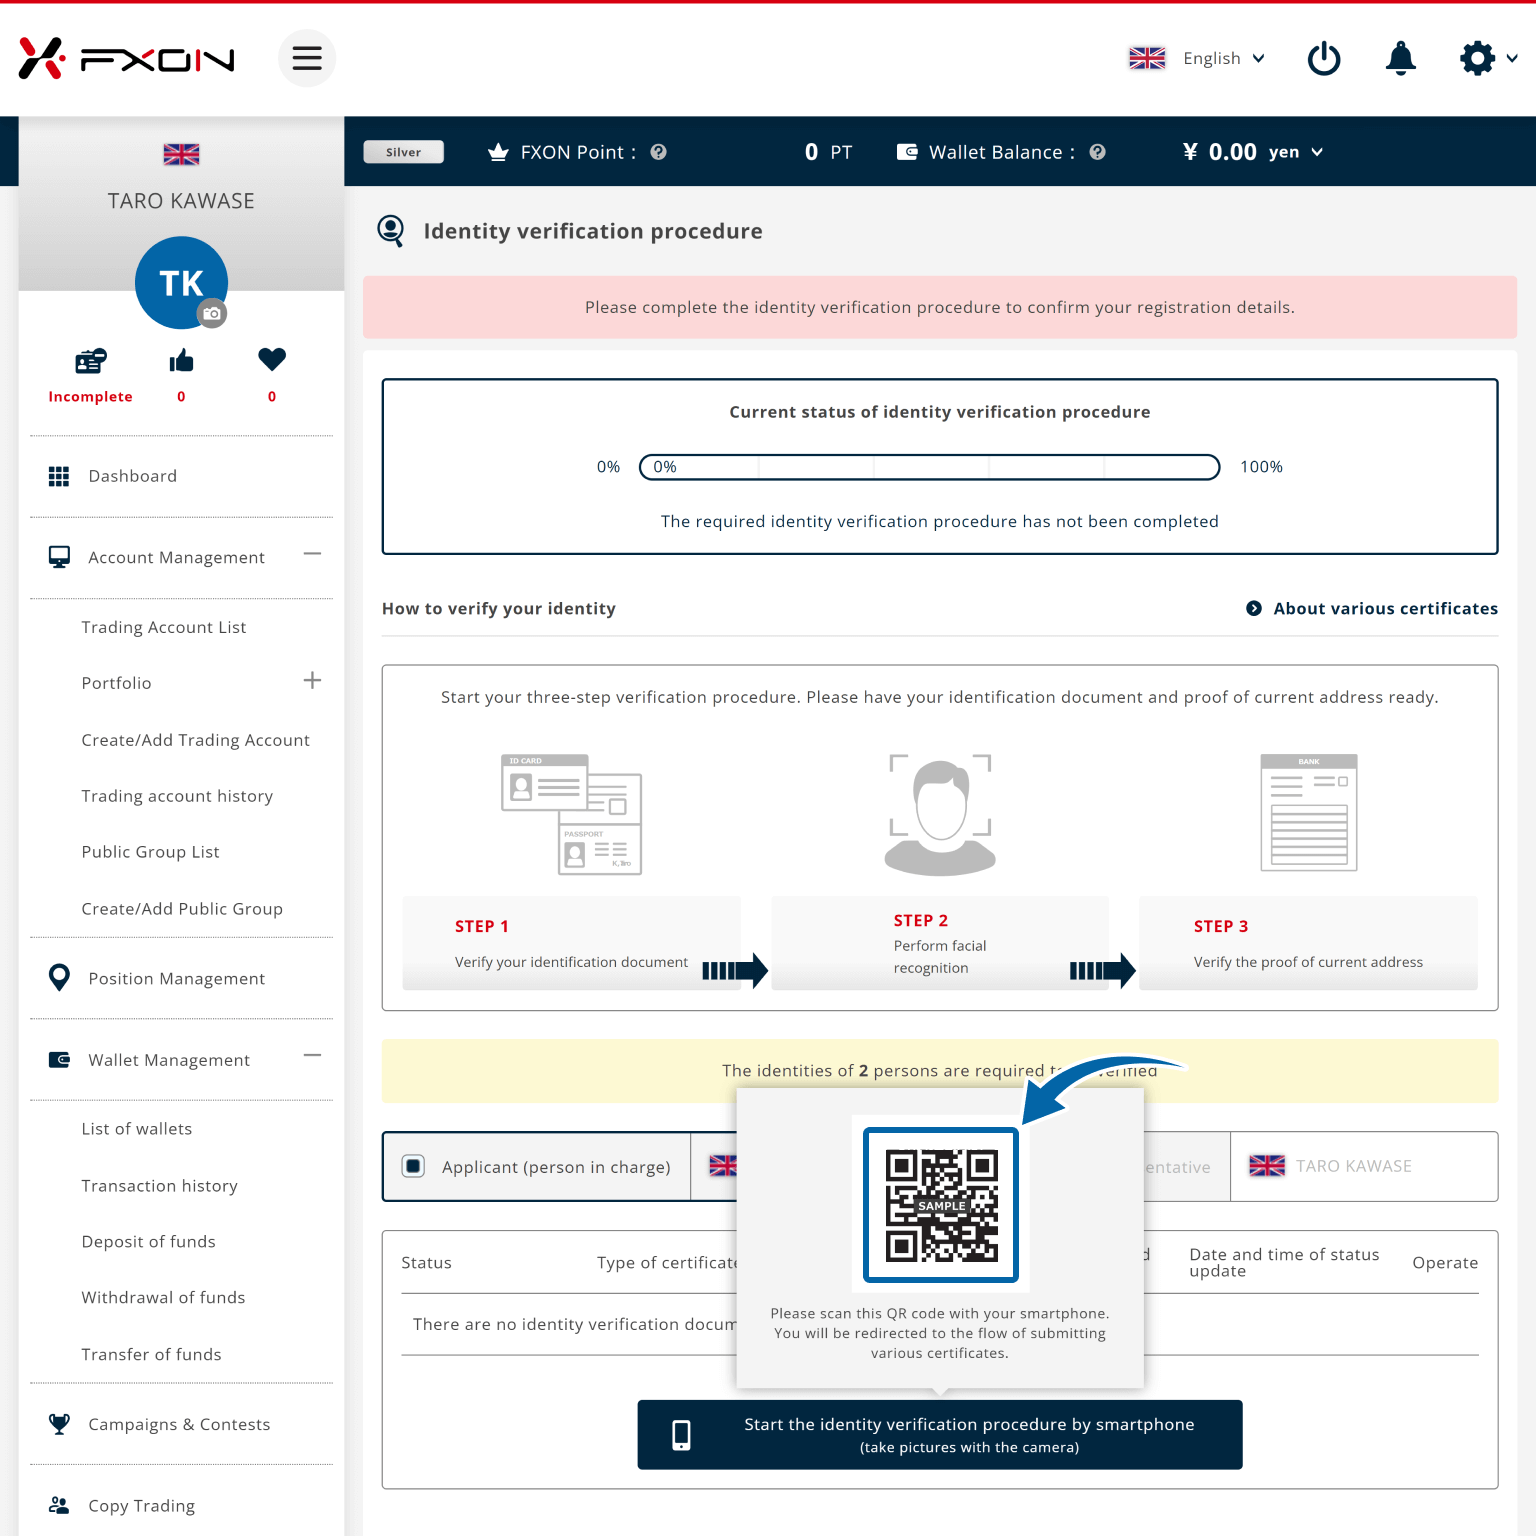
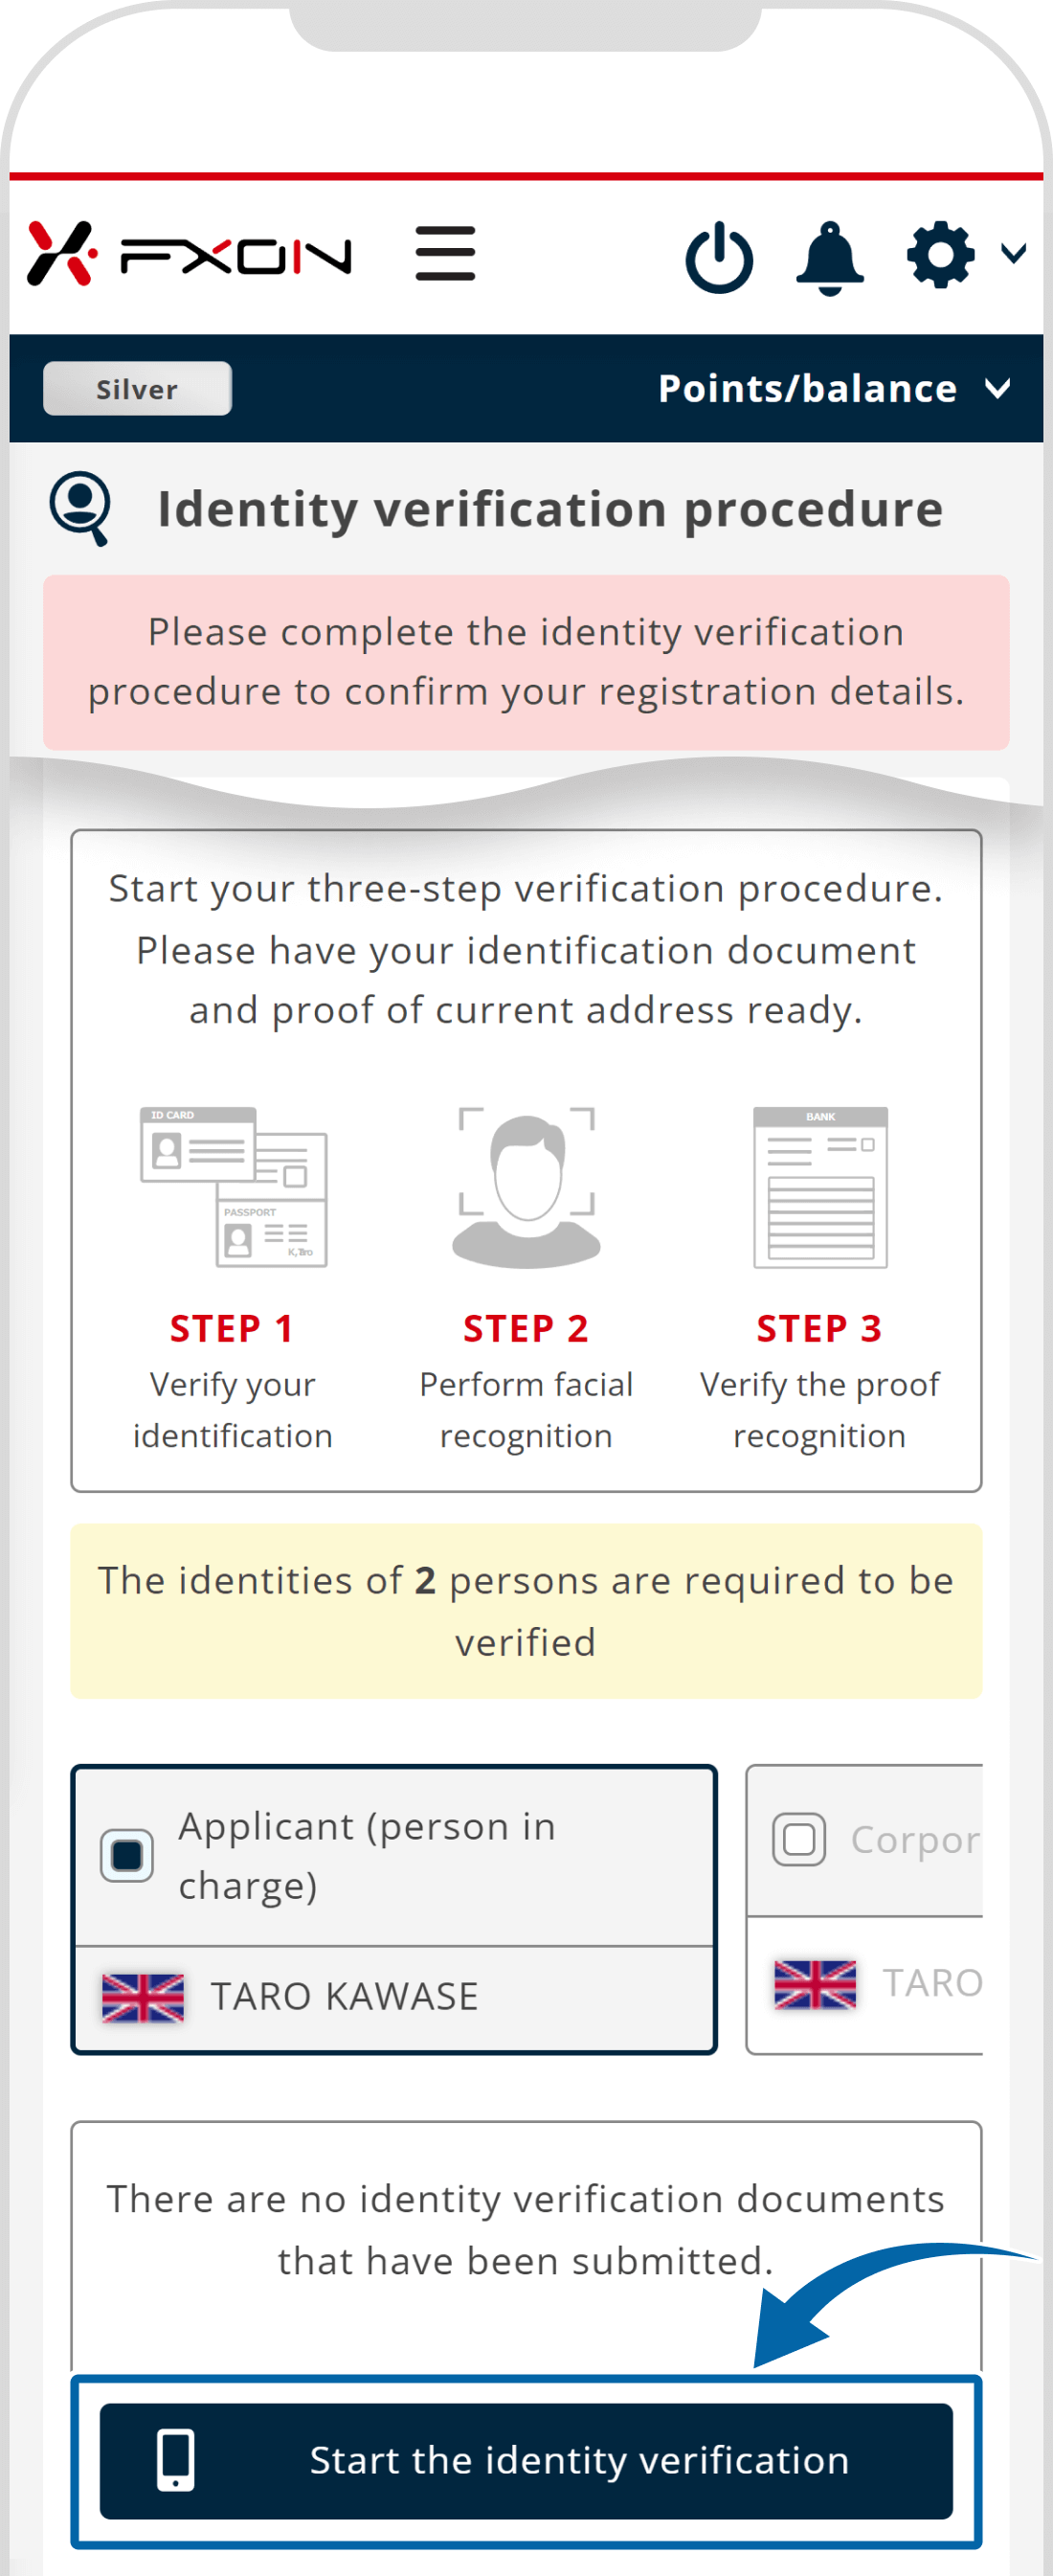
2. Corporate verification procedure on FXON portal
Please check the current status of the corporate verification procedure. Have (1) an "Identification Document" and (2) a "Proof of Current Address" ready, and click Start the identity verification procedure by smartphone (take pictures with the camera).
Please check the current status of the identity verification procedure. Have (1) an "Identification Document" and (2) a "Proof of Current Address" ready, and tap Start the identity verification procedure by smartphone (take pictures with the camera).
Tip
For the types of documents that can be used for corporate verification (eKYC), please refer to the following.
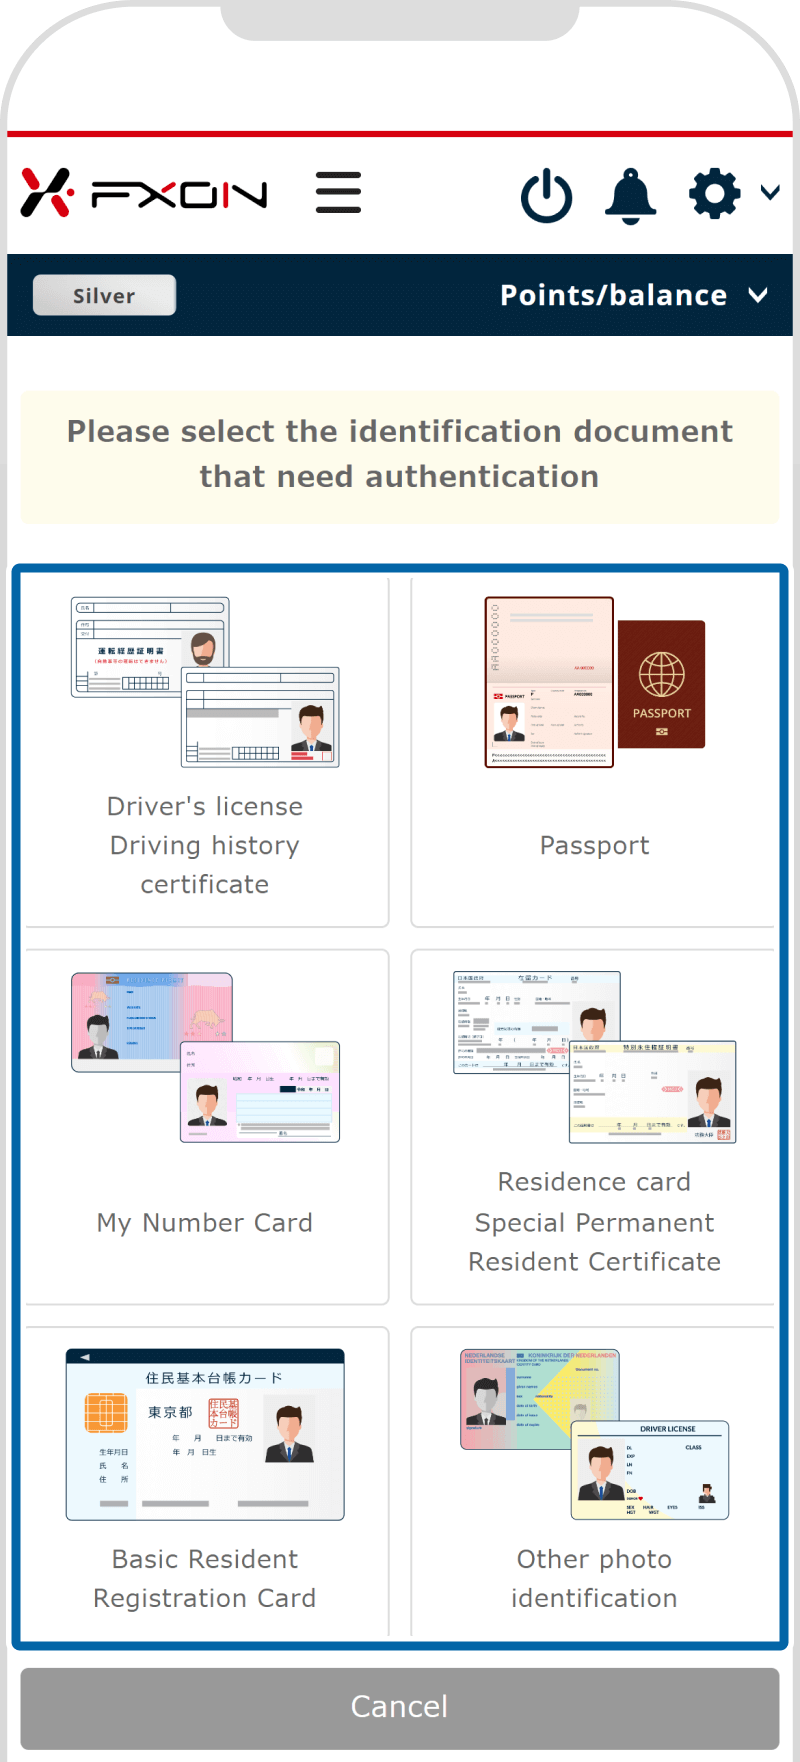
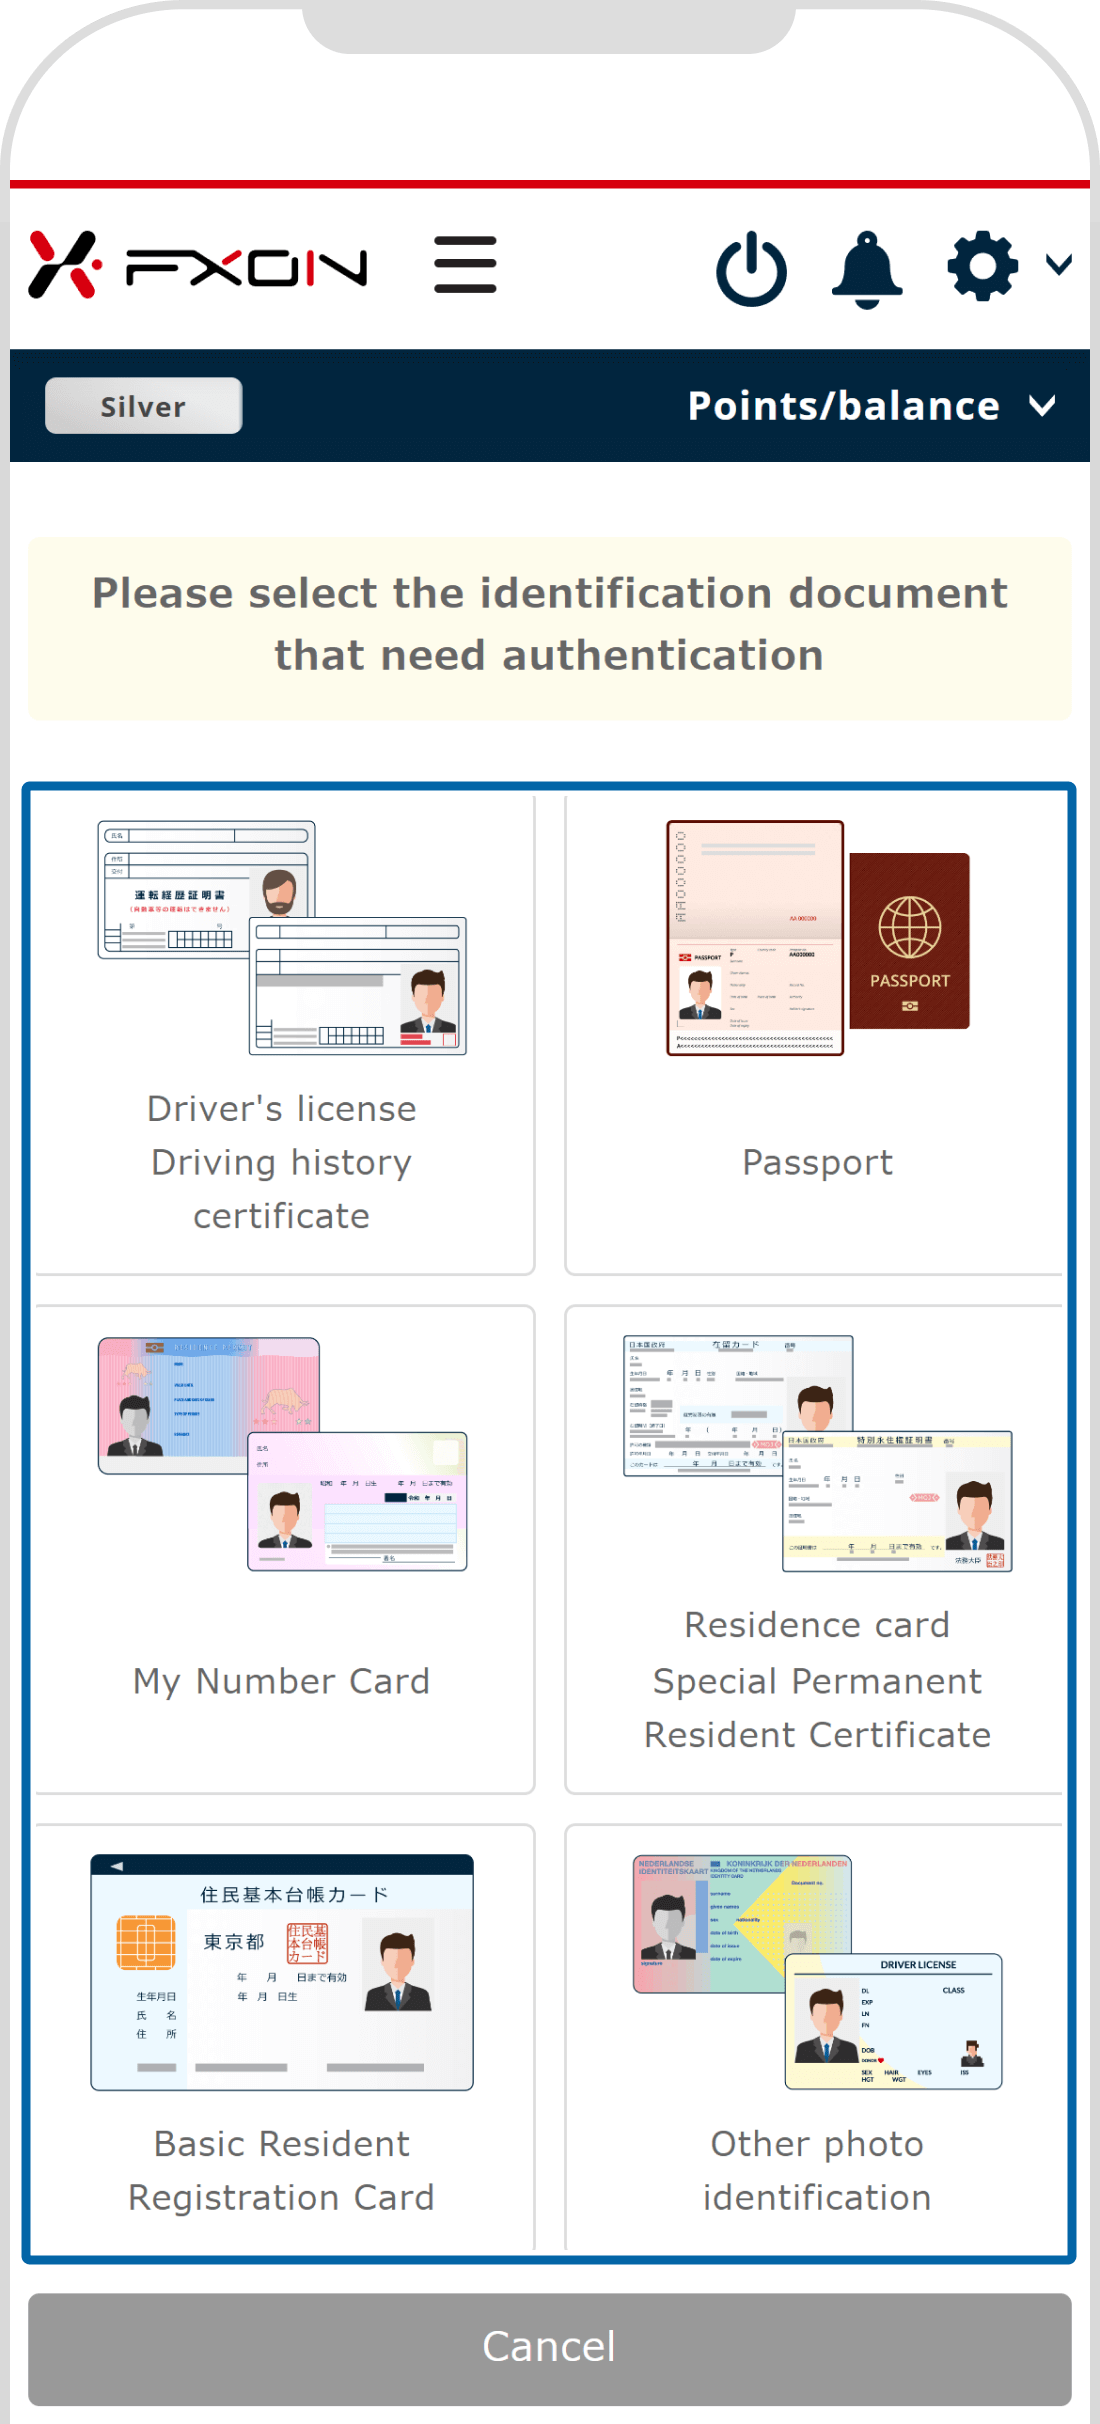
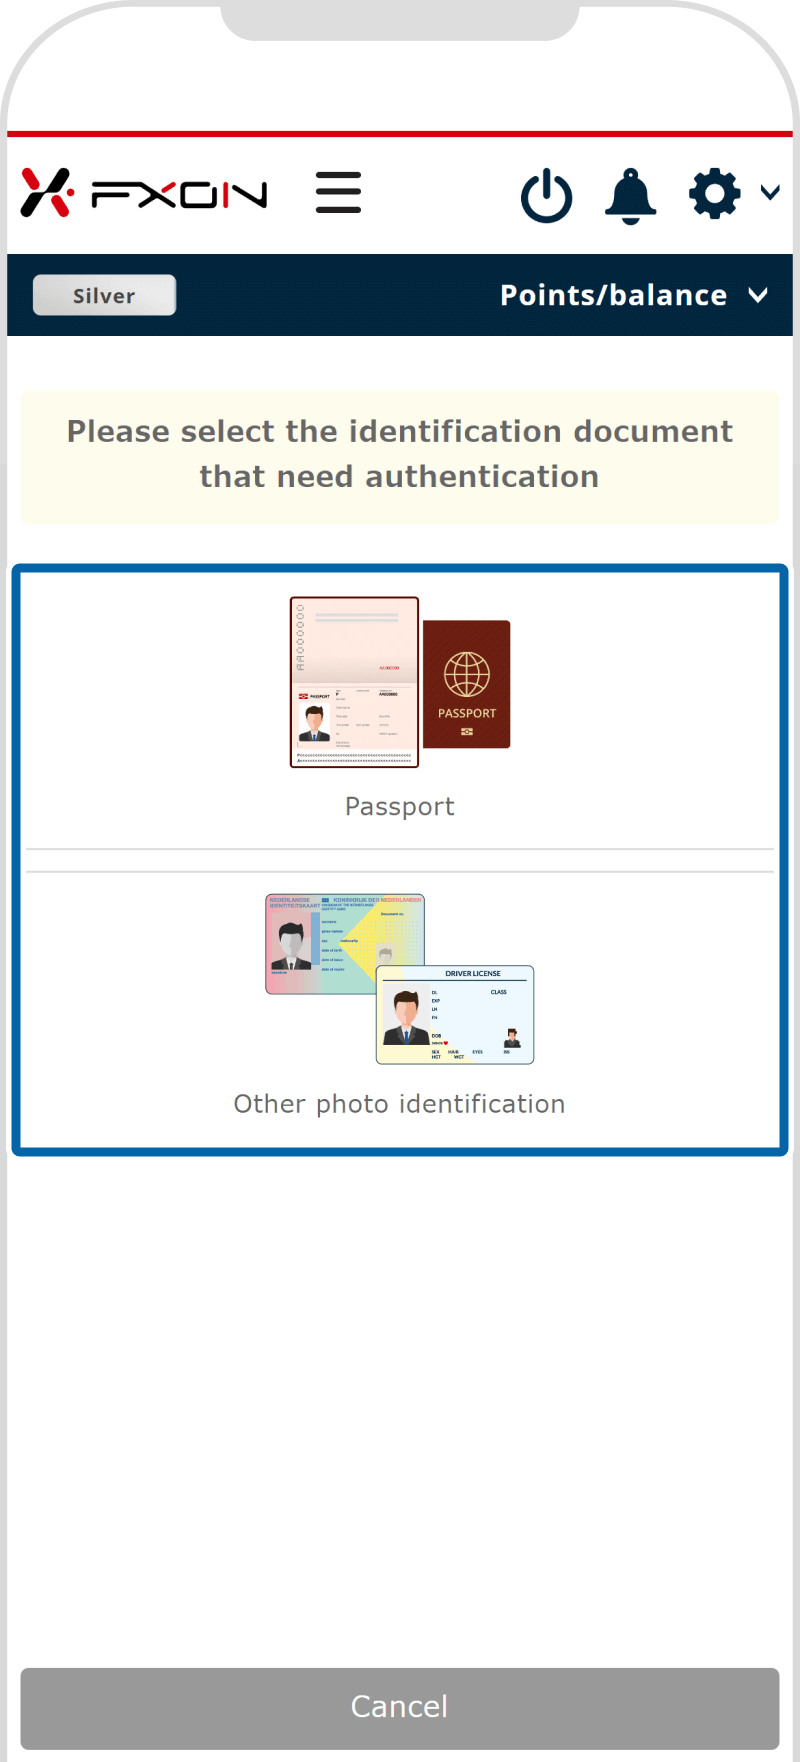
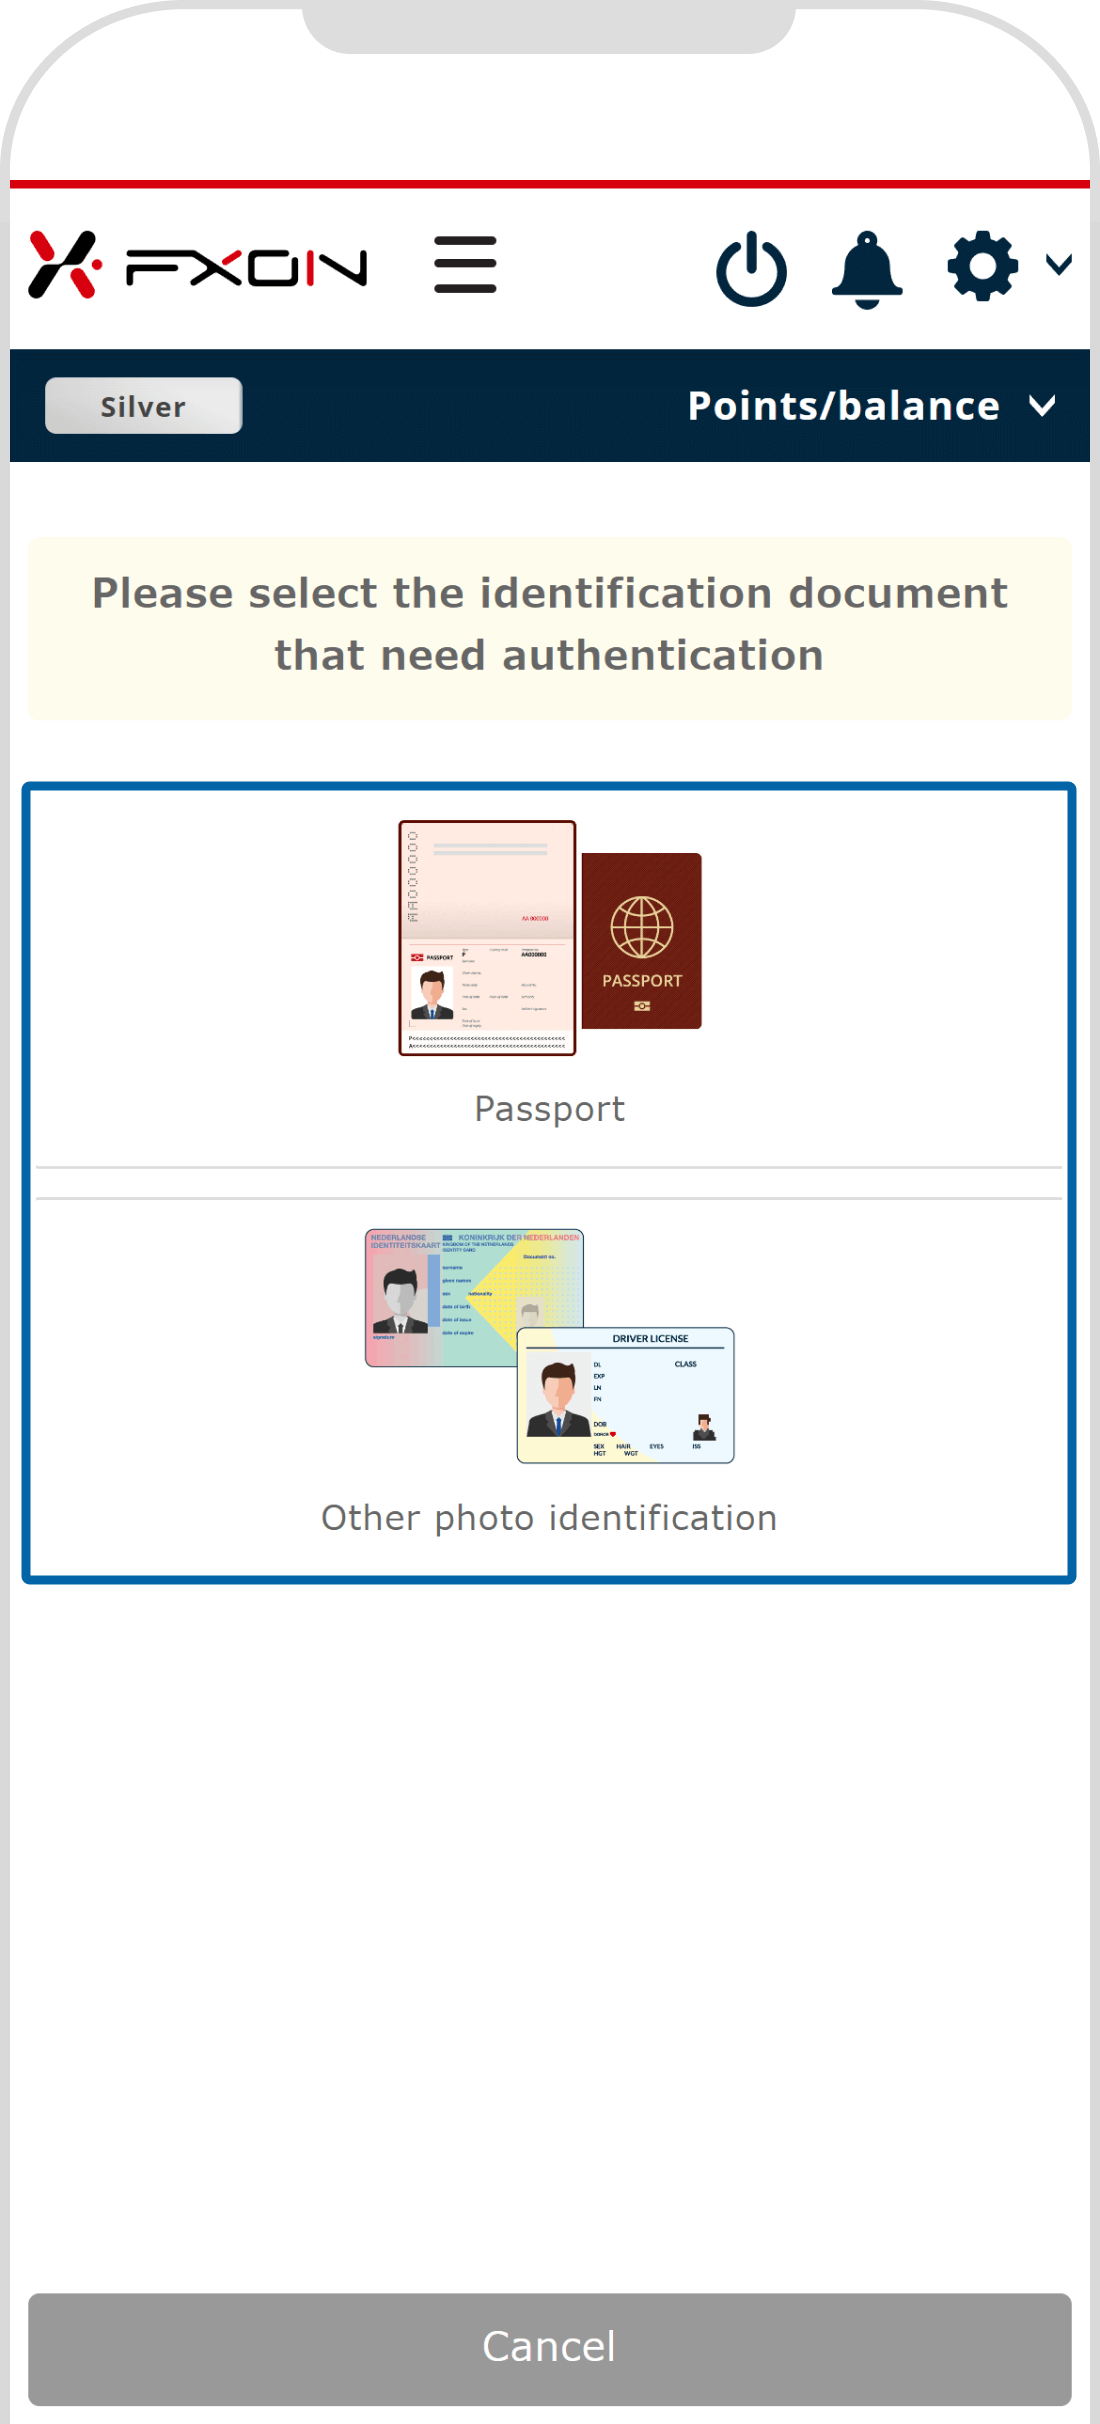
When "Please select the identification document that need verification" is displayed on your smartphone, tap the appropriate identification document.
For Japanese Nationals
For Non-Japanese Nationals
4. Document verification [Step (i)]
Hold the identification document in your hand and take a photo with your smartphone. Please wait for a moment while the server connects and the screen changes.
5. Document verification [Step (ii)]
The rear camera will activate. Align the front of the document so that all four corners fit within the frame on the screen. When the frame and camera icon turn green and the message "Please remain still" appears, tap the camera icon to take the photo. When the message "Successful" appears, the process is complete.
Next, follow the on-screen instructions to take photos of the (1) 65-degree angled side, (2) side, and (3) back of the document in the same manner.
Tip
Ensure that the text and images on the identification document are clear and in focus when taking the photos.
6. Face verification [Step (i)]
Please continue to wait for a moment while the server connects and the screen changes.
7. Face verification [Step (ii)]
Next, the front camera will activate, and you will take a photo of your face. Align your face within the frame on the screen and remain still. When the frame and camera icon turn green and the message "Please remain still" appears, tap the camera icon to take the photo. When the message "Successful" appears, the process is complete.
Next, take photos of the (1) left side and (2) right side of your face at a 30-degree angle.
Tip
Ensure you are in a well-lit environment to allow accurate facial recognition. Avoid backlighting and ensure your face is in focus when taking the photos.
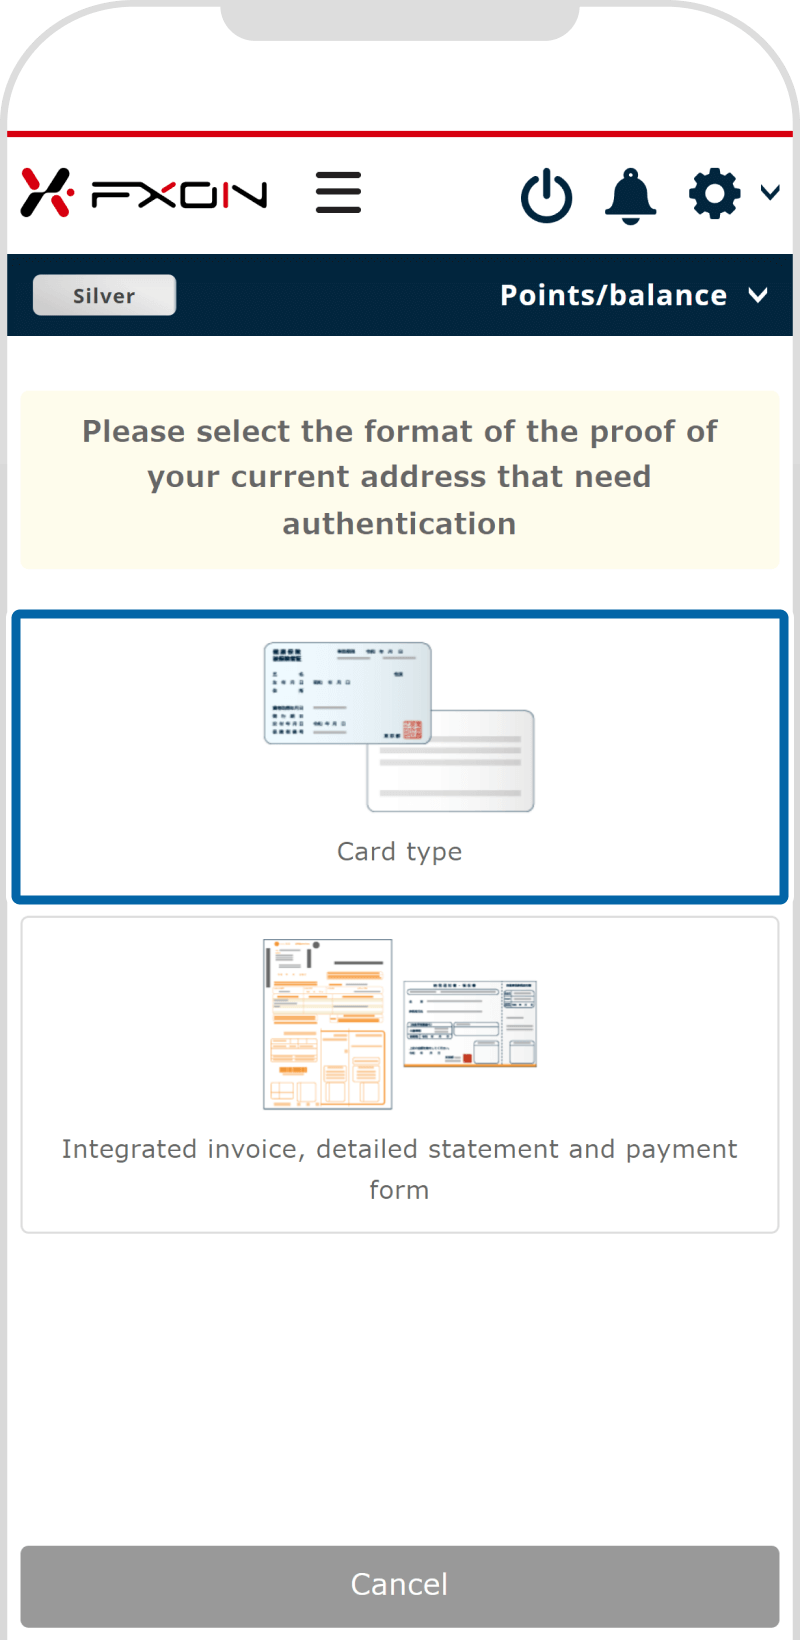
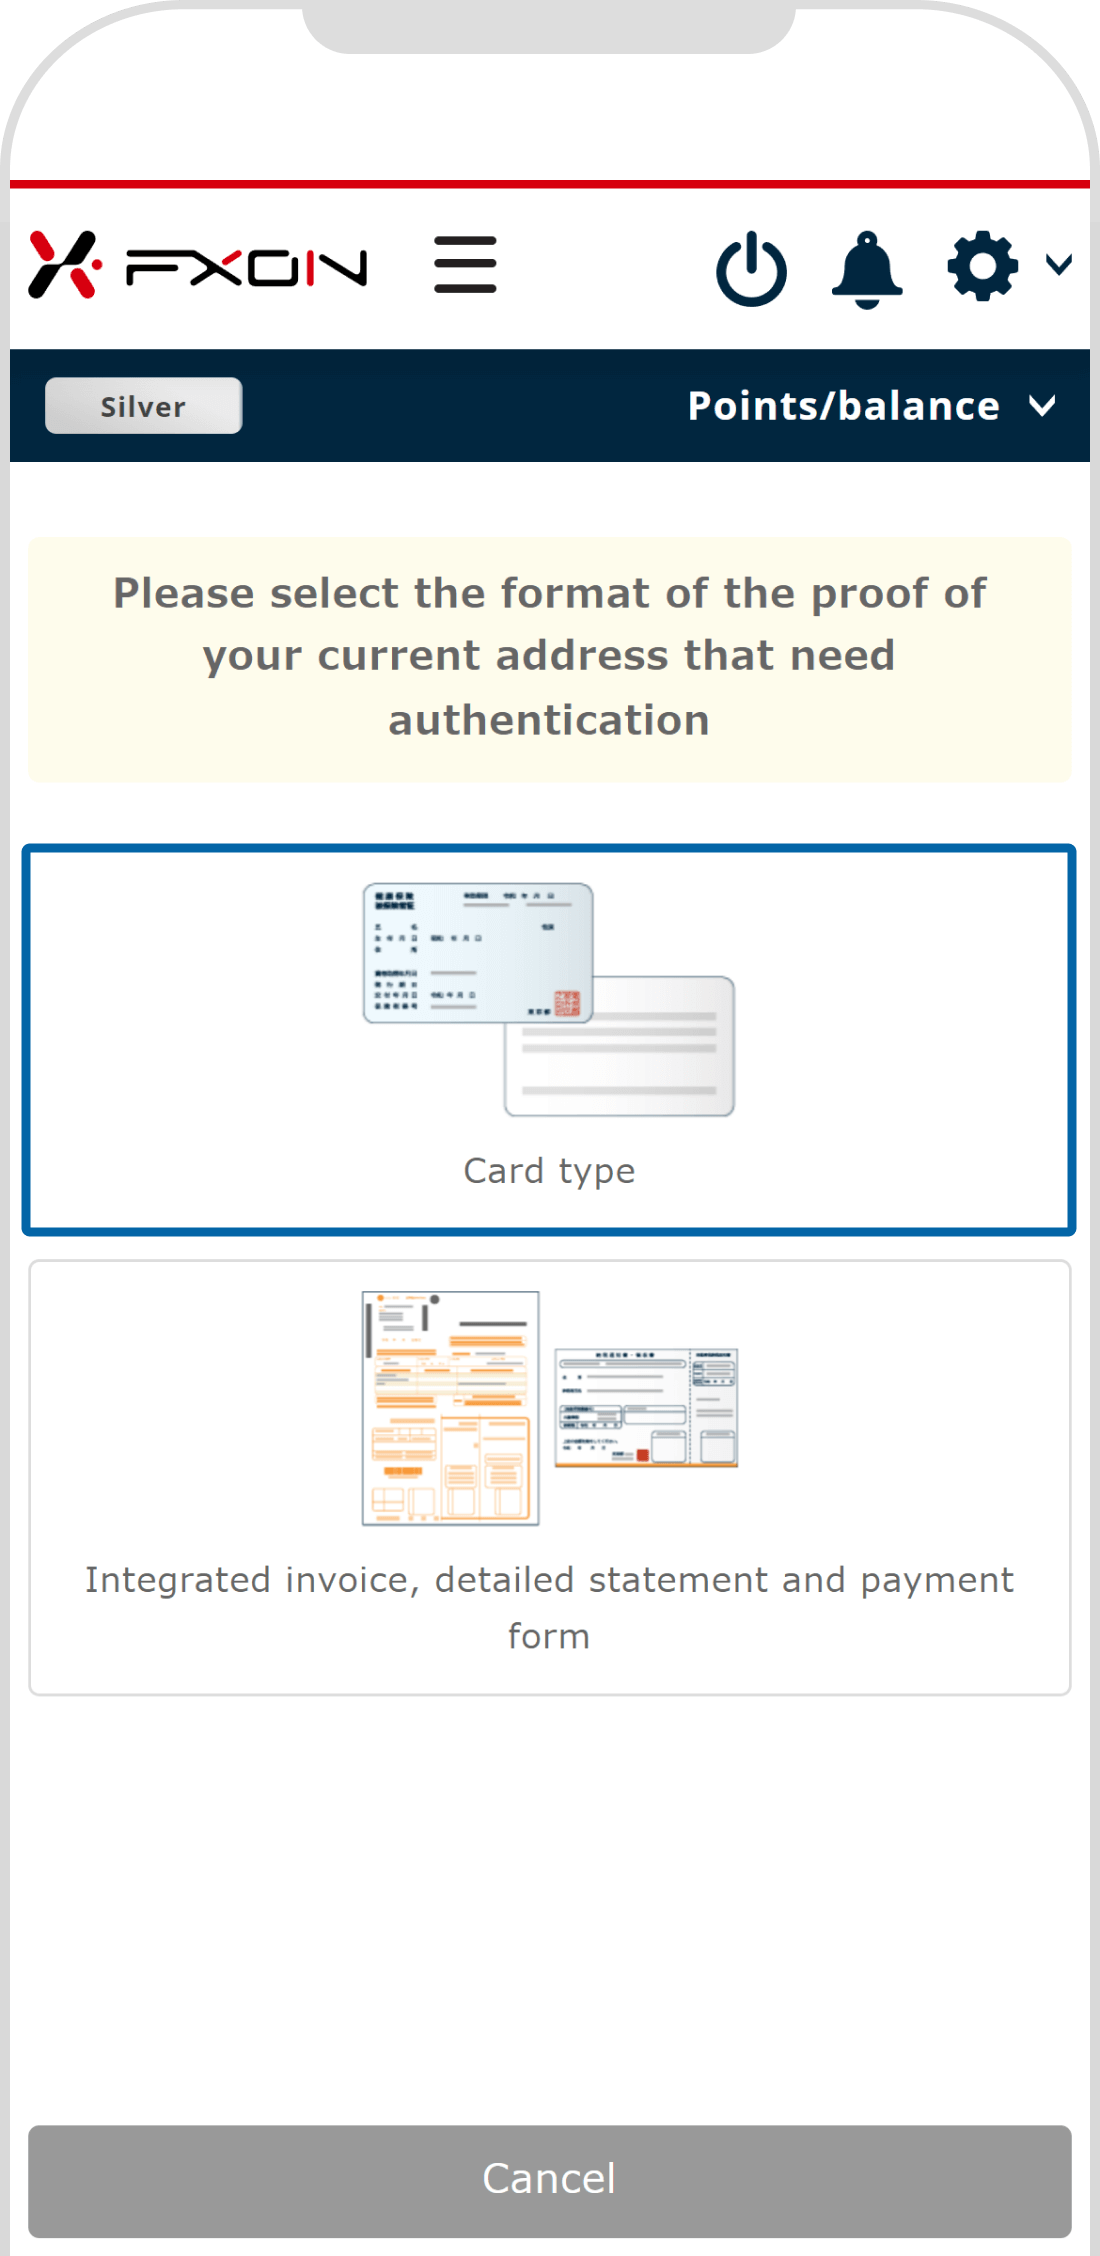
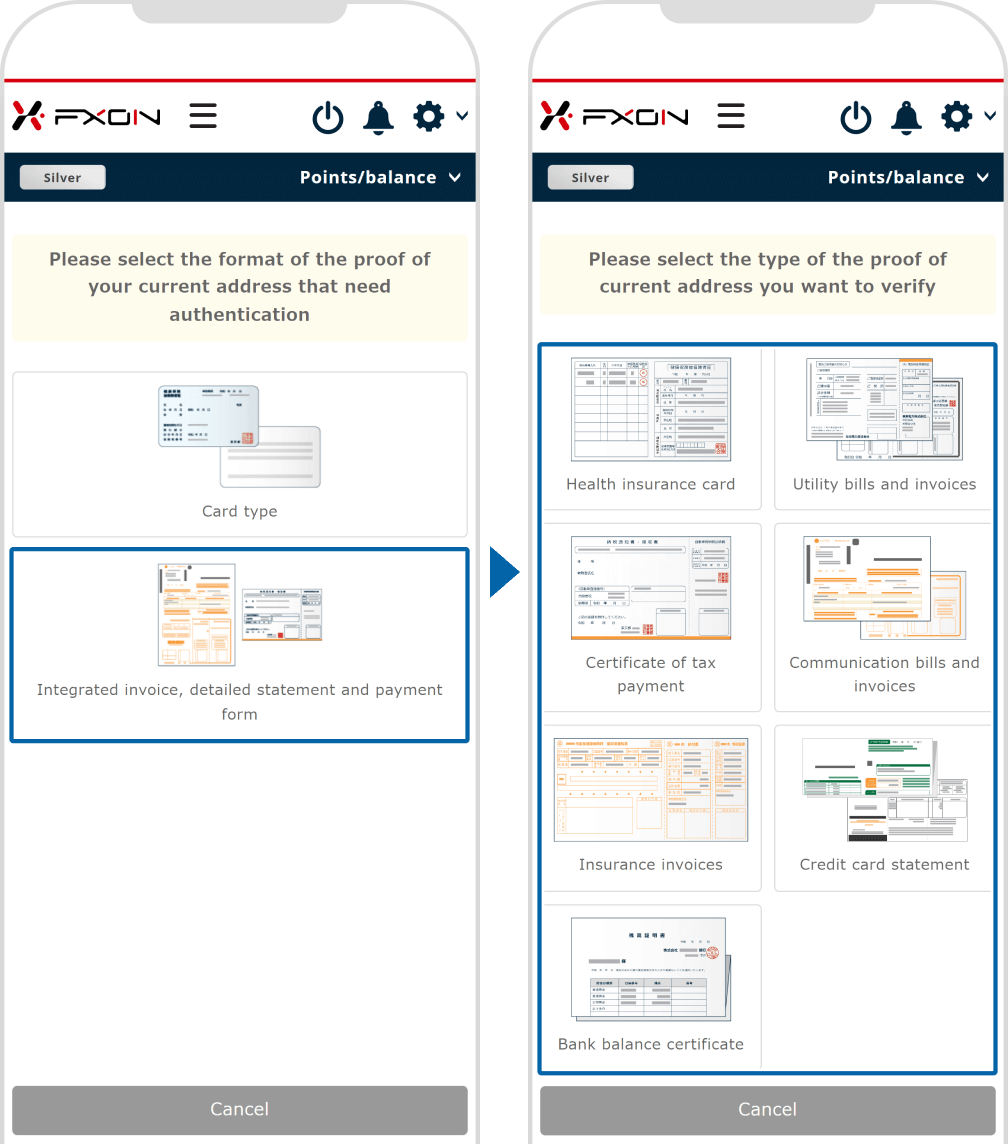
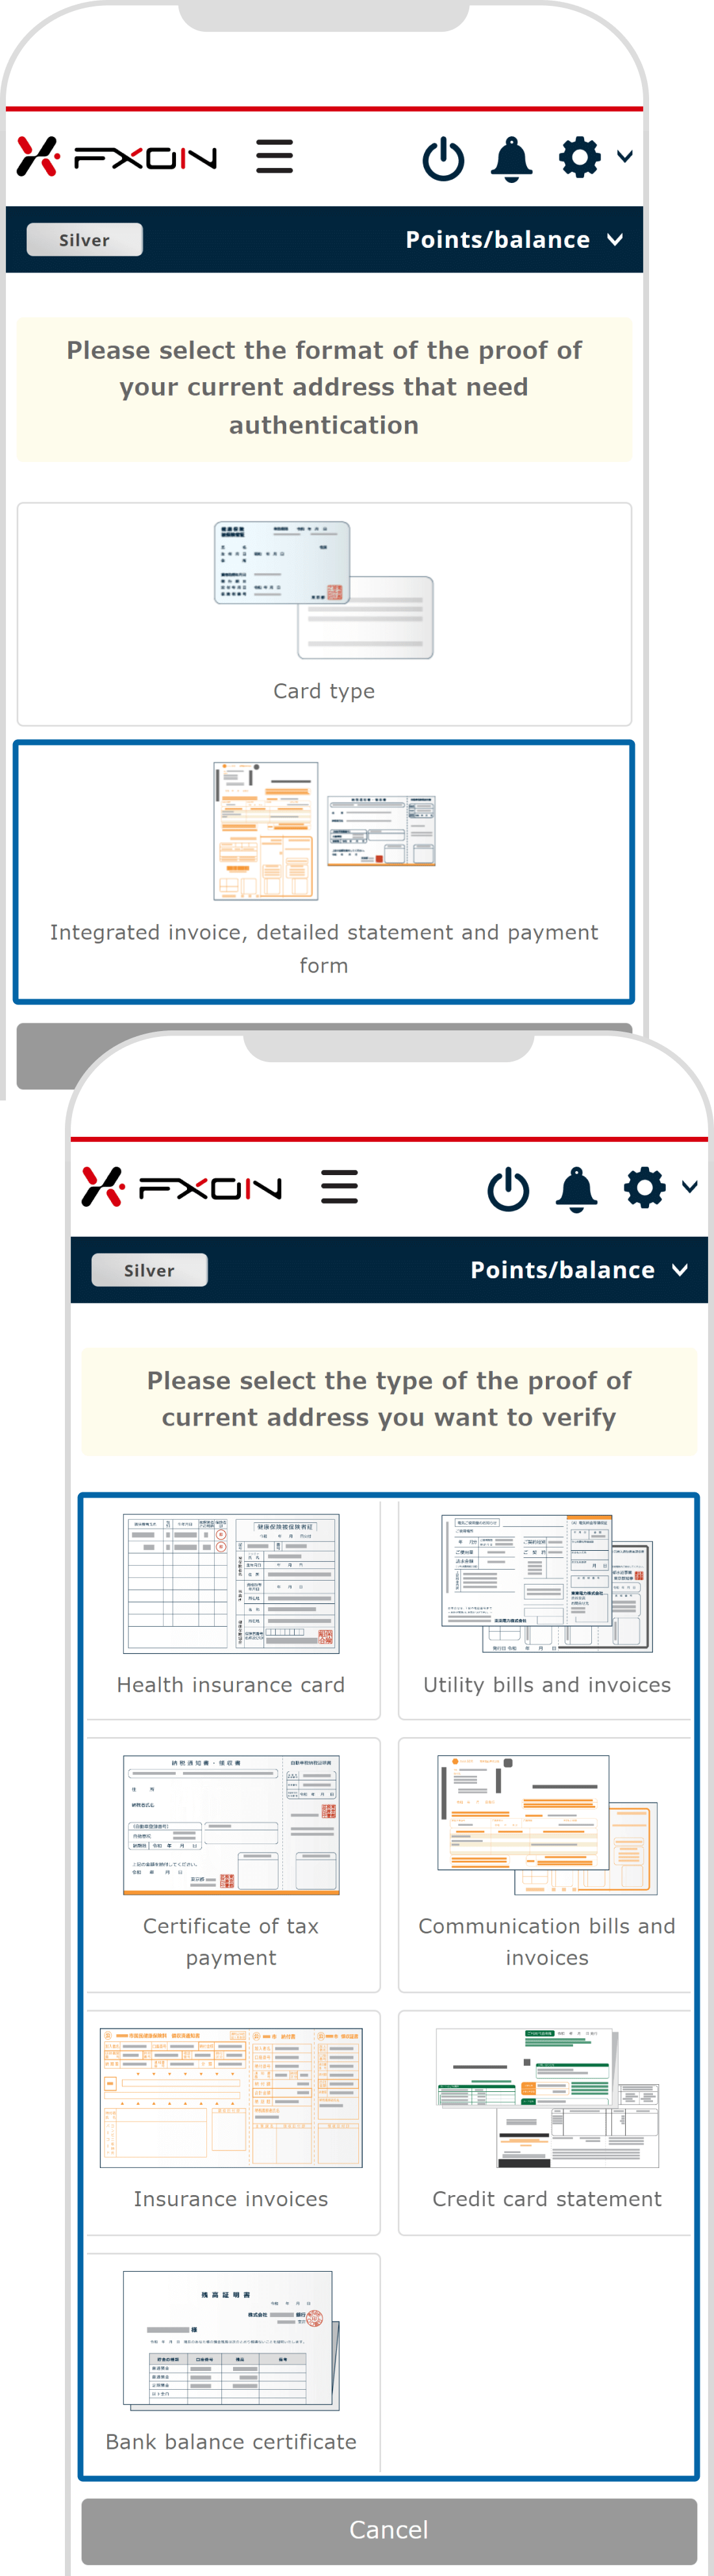
8. Proof of address selection (card)
When "Please select the identification document that need verification" is displayed on your smartphone, tap "Card type" if you are choosing a card type document such as a health insurance card.
If you are selecting a "Bill/Statement/Payment Slip type", proceed to Step 11. Select Proof of Current Address 【A4 document type】
Hold the card type proof of current address in your hand and take a photo with your smartphone. Please wait for a moment while the server connects and the screen changes.
10. Card-type PoA verification [Step (ii)]
The rear camera will activate. Align the front of the document so that all four corners fit within the frame on the screen and remain still. When the frame and camera icon turn green and the message "Please remain still" appears, tap the camera icon to take the photo. When the message "Successful" appears, the process is complete.
Next, follow the on-screen instructions to take a photo of the back of the document in the same manner.
11. Proof of address selection (A4)
When "please select type of the proof of current address you want to verify" is displayed on your smartphone, tap "Bill/Statement/Payment Slip Type" if you are choosing an A4 document type such as a bill.
12. A4 size PoA verification [Step (i)]
Hold the A4 document type proof of current address in your hand and take a photo with your smartphone. Please wait for a moment while the server connects and the screen changes.
13. A4 size PoA verification [Step (ii)]
The rear camera will activate. Align the front of the document so that all four corners fit within the frame on the screen and remain still. When the frame and camera icon turn green and the message "Please remain still" appears, tap the camera icon to take the photo. When the message "Successful" appears, the process is complete.
Next, follow the on-screen instructions to take photos of the (1) name and address, (2) issuer, and (3) issue date of the document in the same manner.
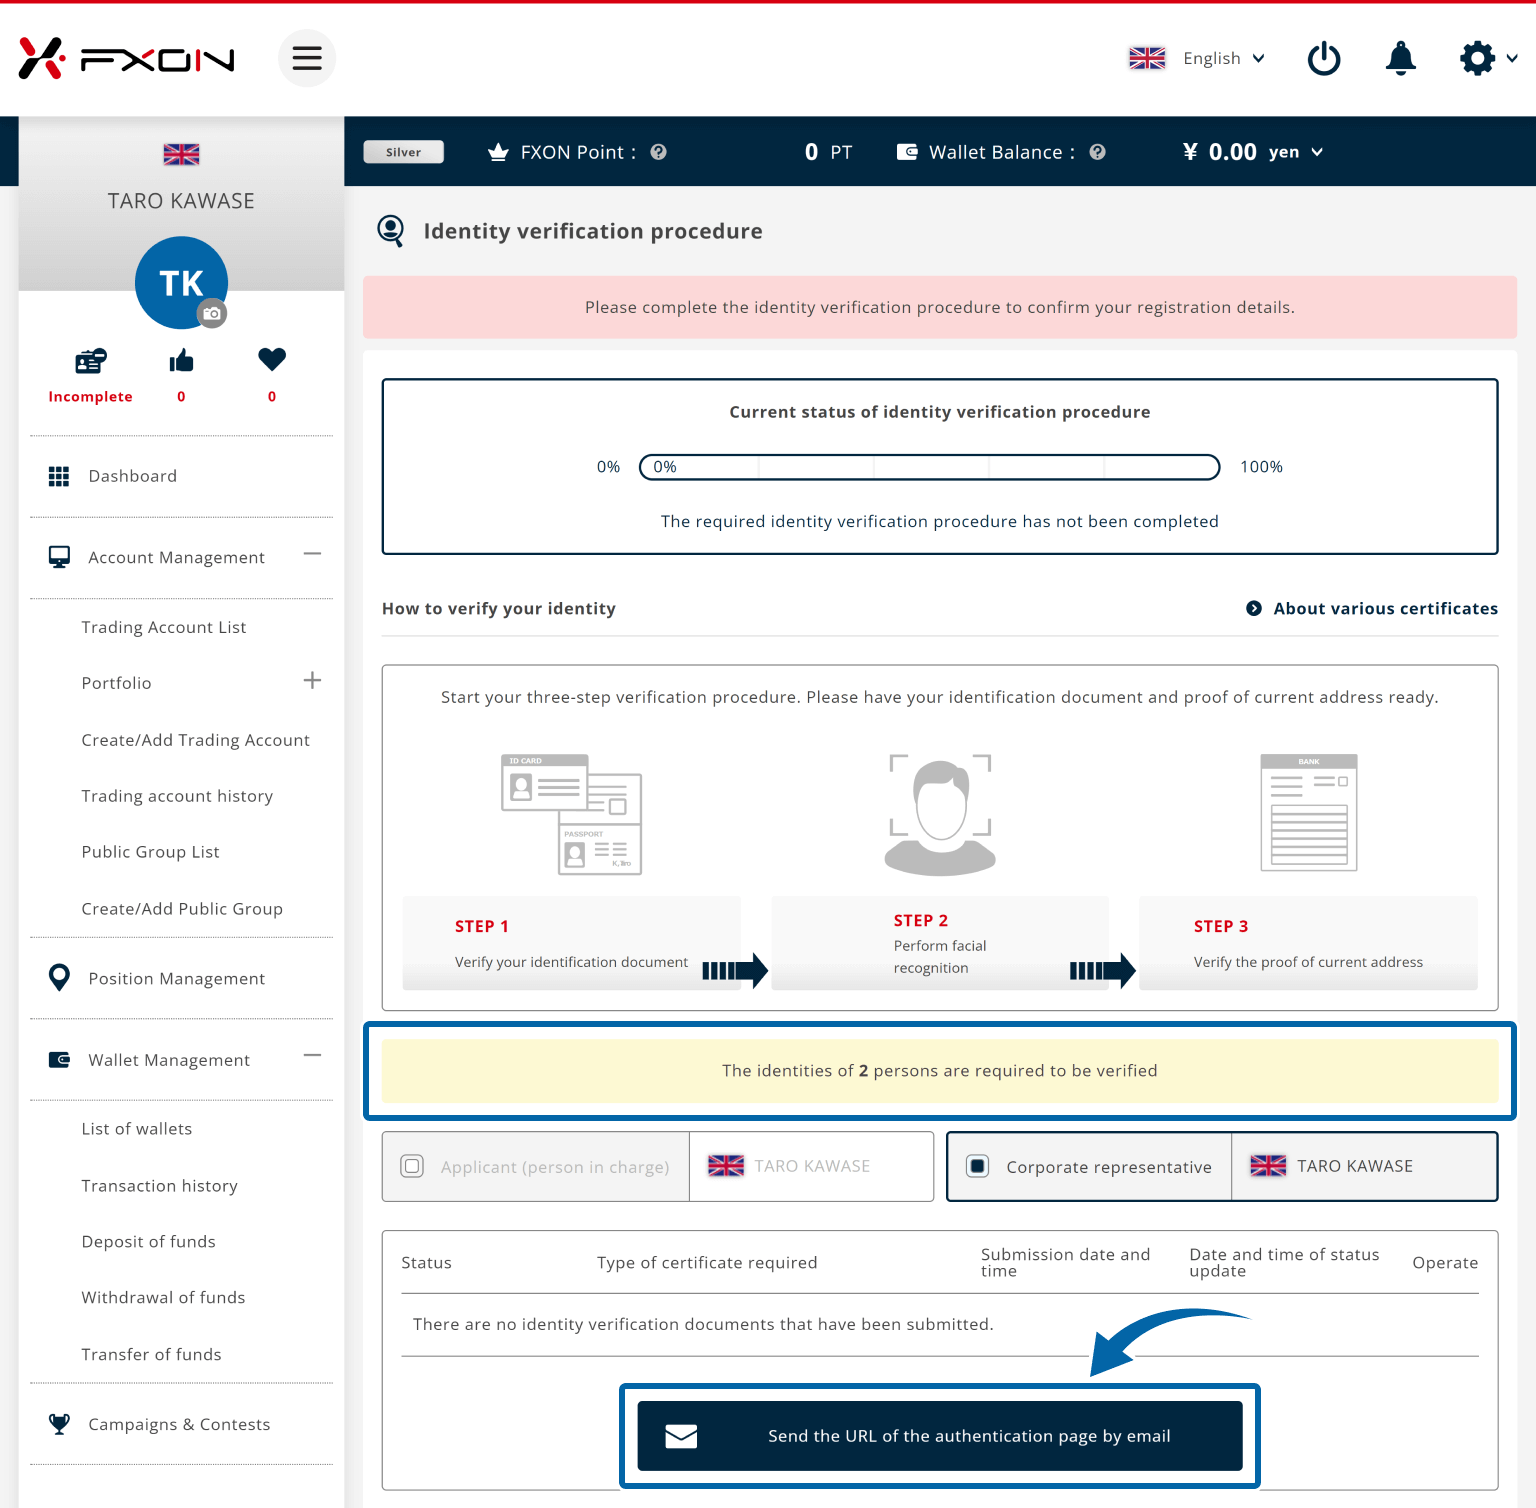
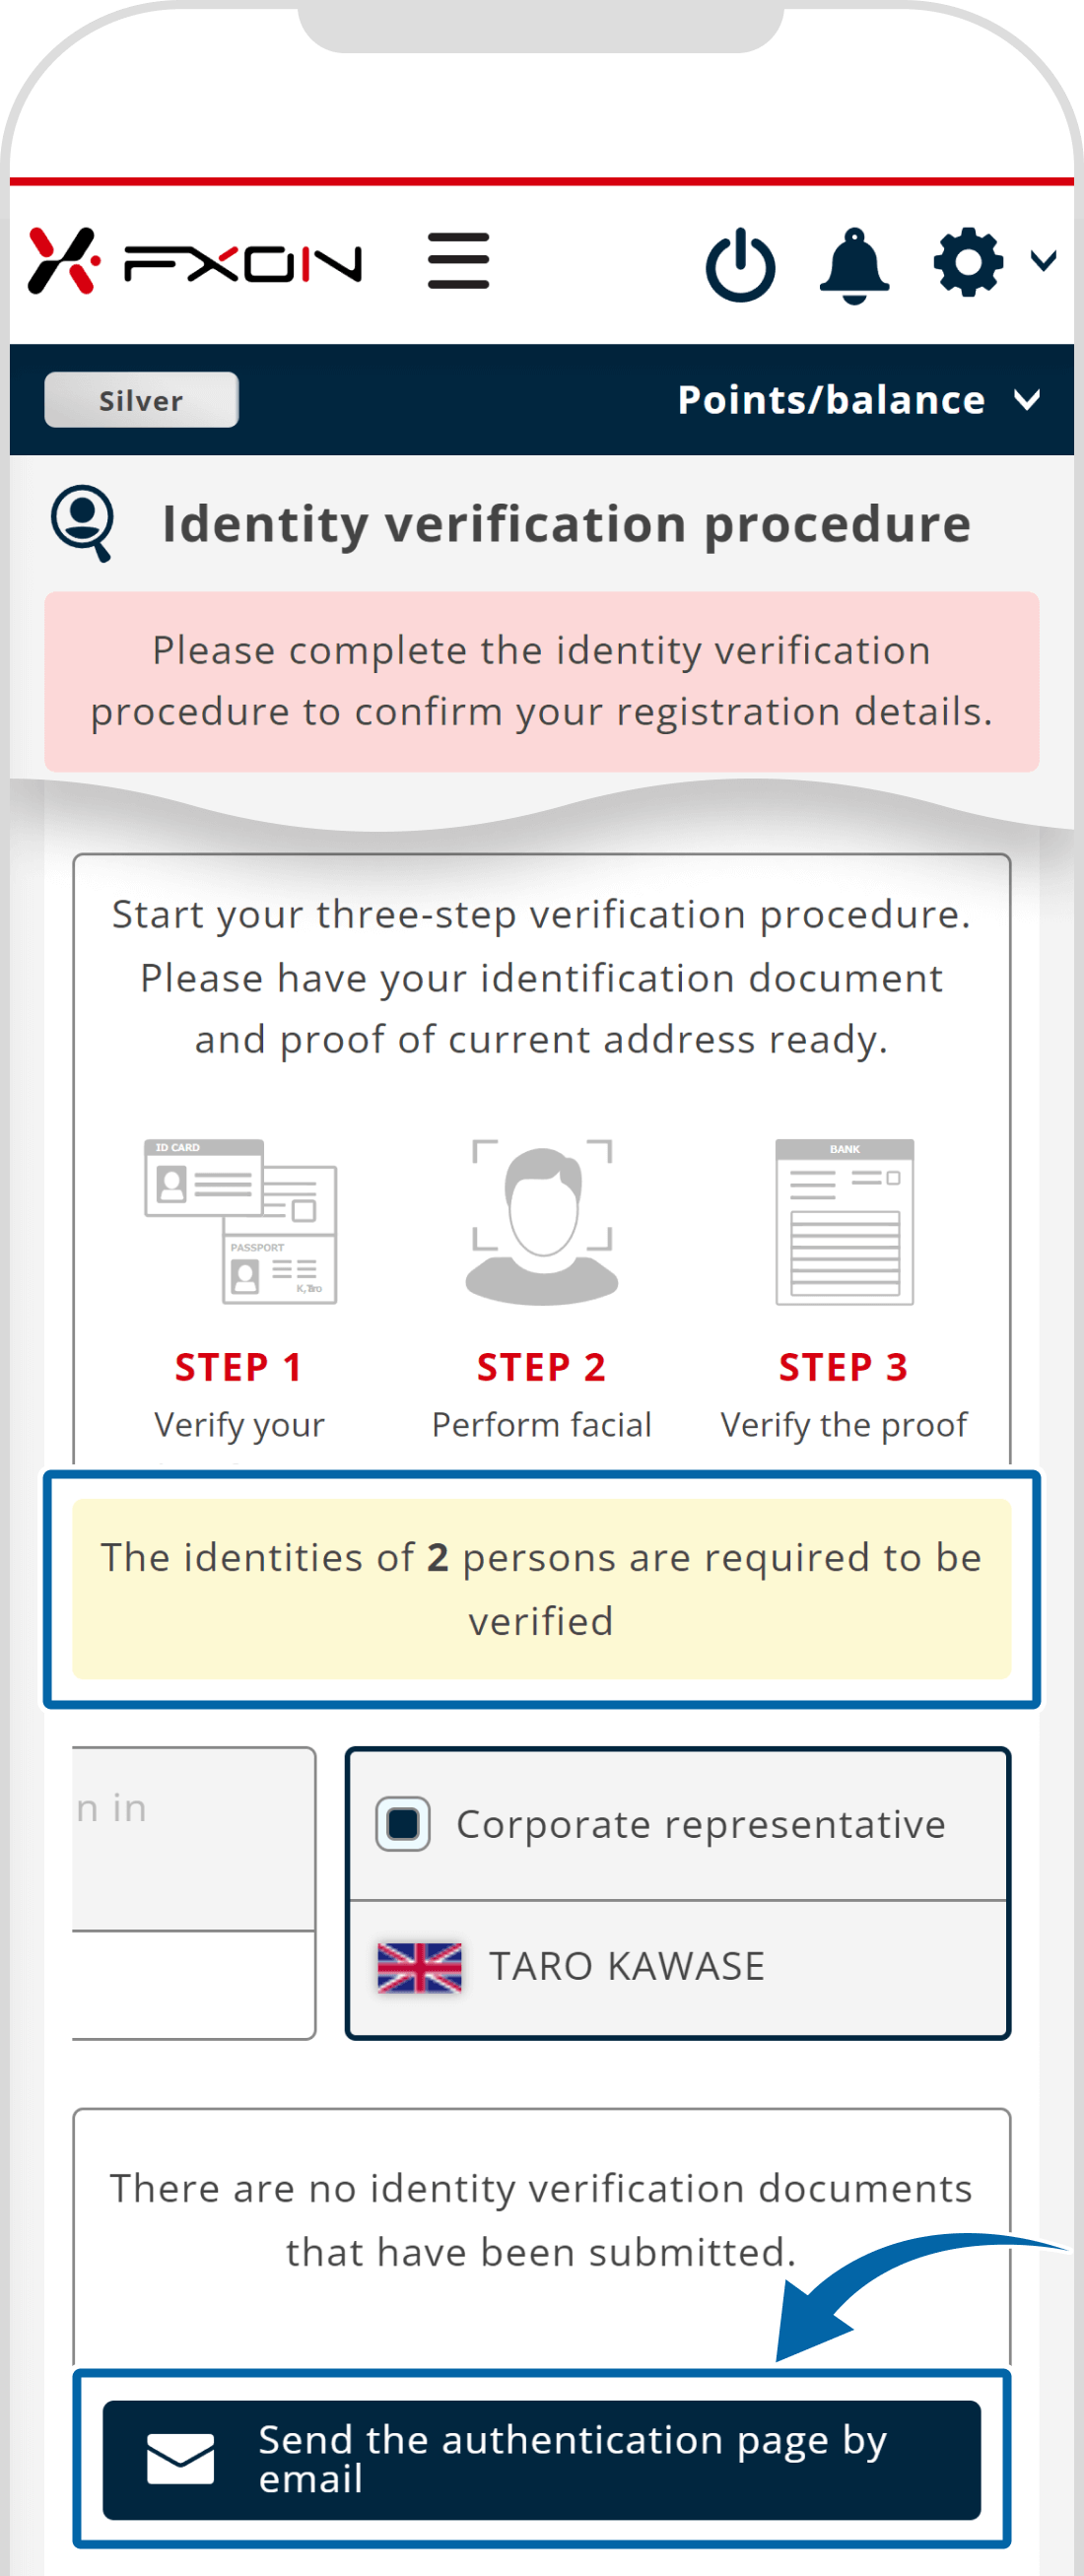
14. If identity verification is required for two individuals (applicant and corporate representative)
If both the applicant and the corporate representative are registered, identity verification is required for both individuals. The verification page for the corporate representative will be sent via email.
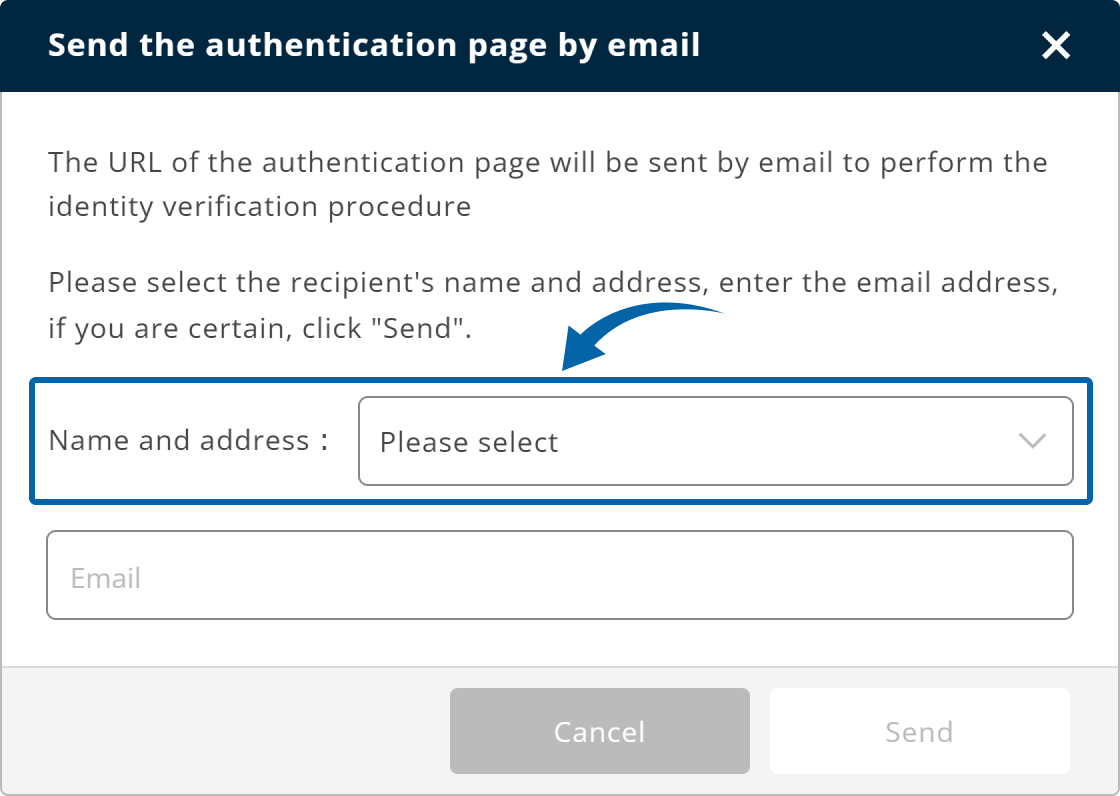
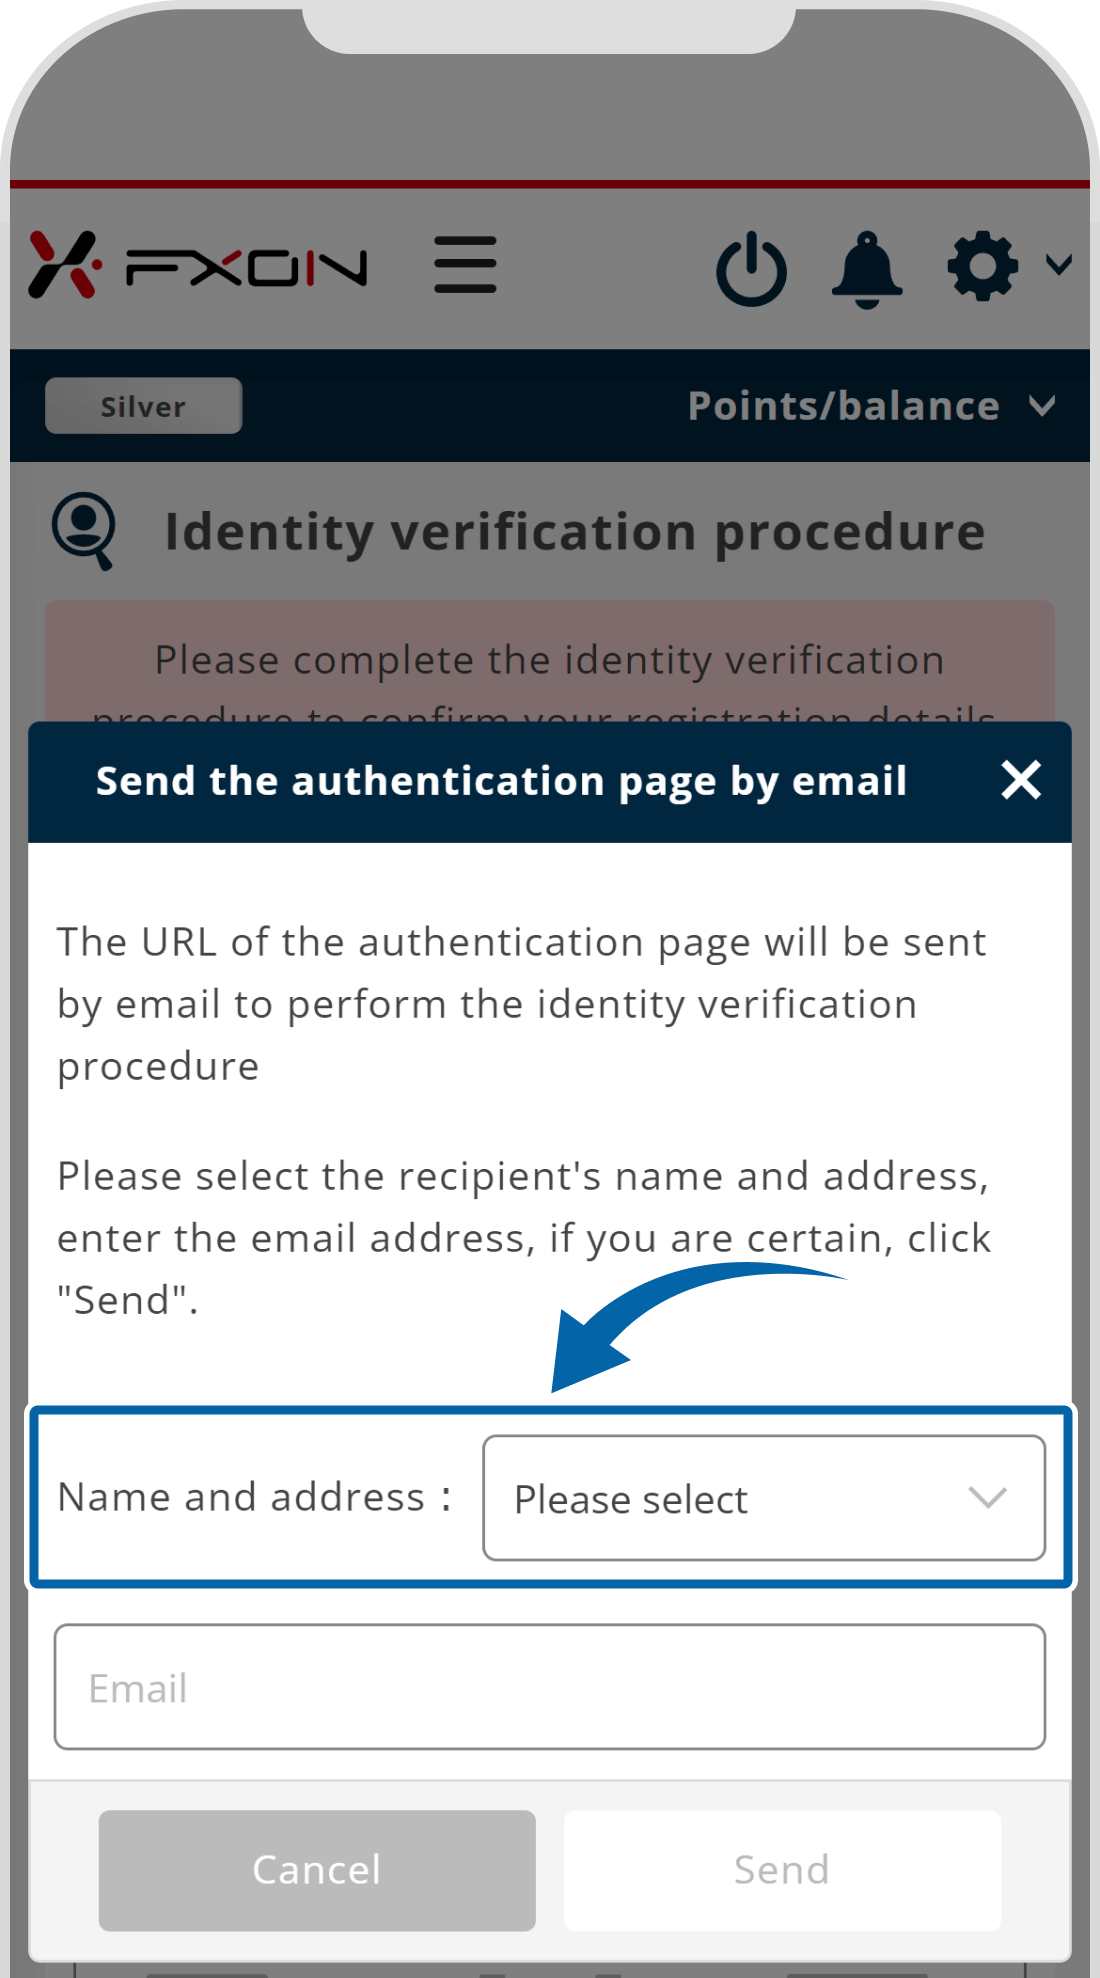
Click "Send the URL of the verification page by email" and select the desired recipient. The identity verification process is the same as above, so please refer to steps 2 through 13.
If both the applicant and the corporate representative are registered, identity verification is required for both individuals. The verification page for the corporate representative will be sent via email.
Tap "Send the verification page by email" and select the desired recipient. The identity verification process is the same as above, so please refer to steps 2 through 13.
Note
The URL will become invalid 48 hours after the email is sent, so please complete the procedure within the validity period.
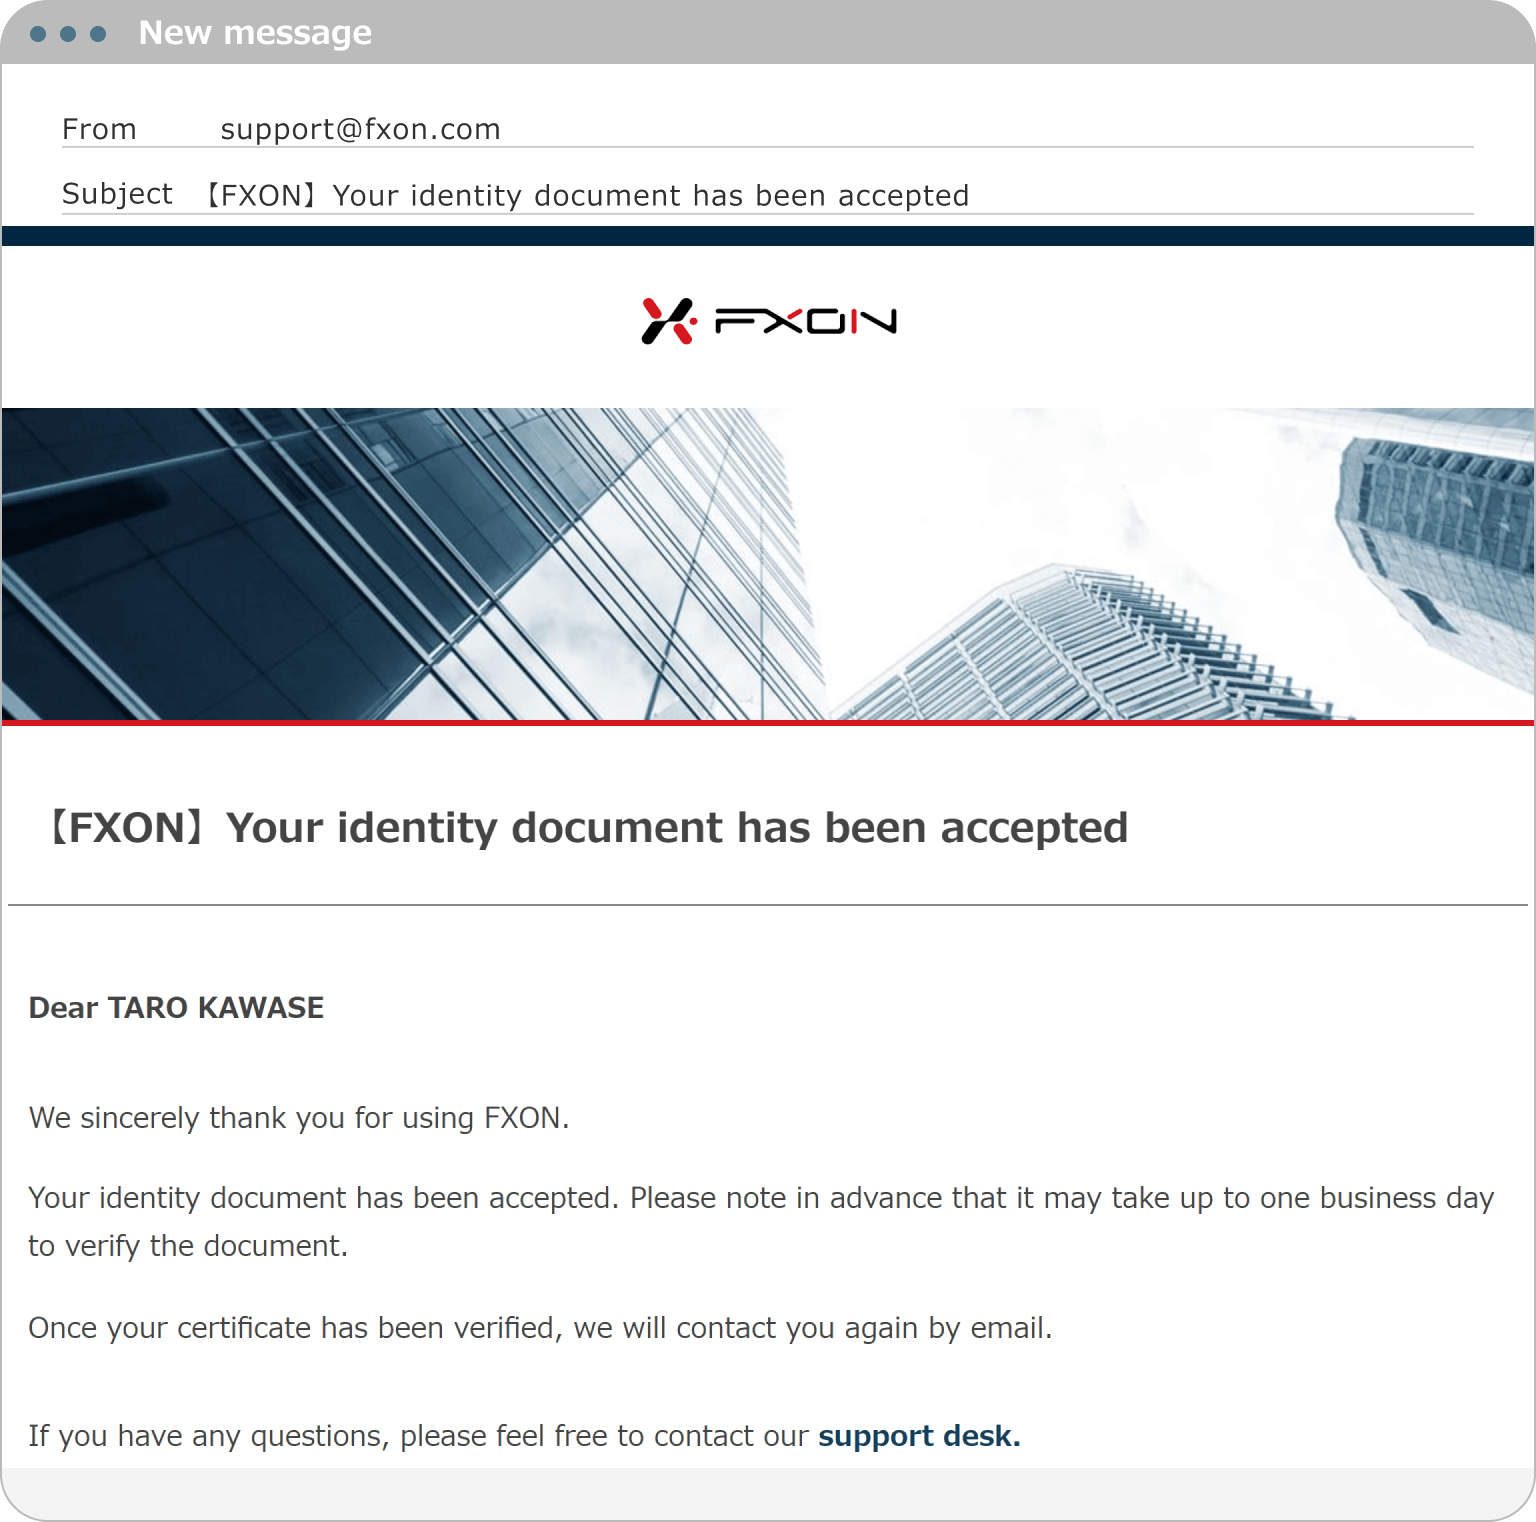
15. Email confirmation of receipt of identity verification documents
Once the identity verification process is complete, an email confirming the receipt of the verification documents will be sent to your registered email address.
Please check your email.
Email Subject: 【FXON】 Your identity document has been accepted
16. Submission of corporate verification documents
After completing the identity verification process, please submit the following three corporate verification documents. All documents must be within their validity period.
Official documents to verify company information
Documents that verify corporate shareholders
Corporate current address certificate
Note
Currently, document uploads cannot be made through the customer page. Please send the documents via email to "[email protected]" from your registered email address, including the name of your account manager. Use the subject line "【Corporate name】Identity verification documents".
17. Email regarding account activation
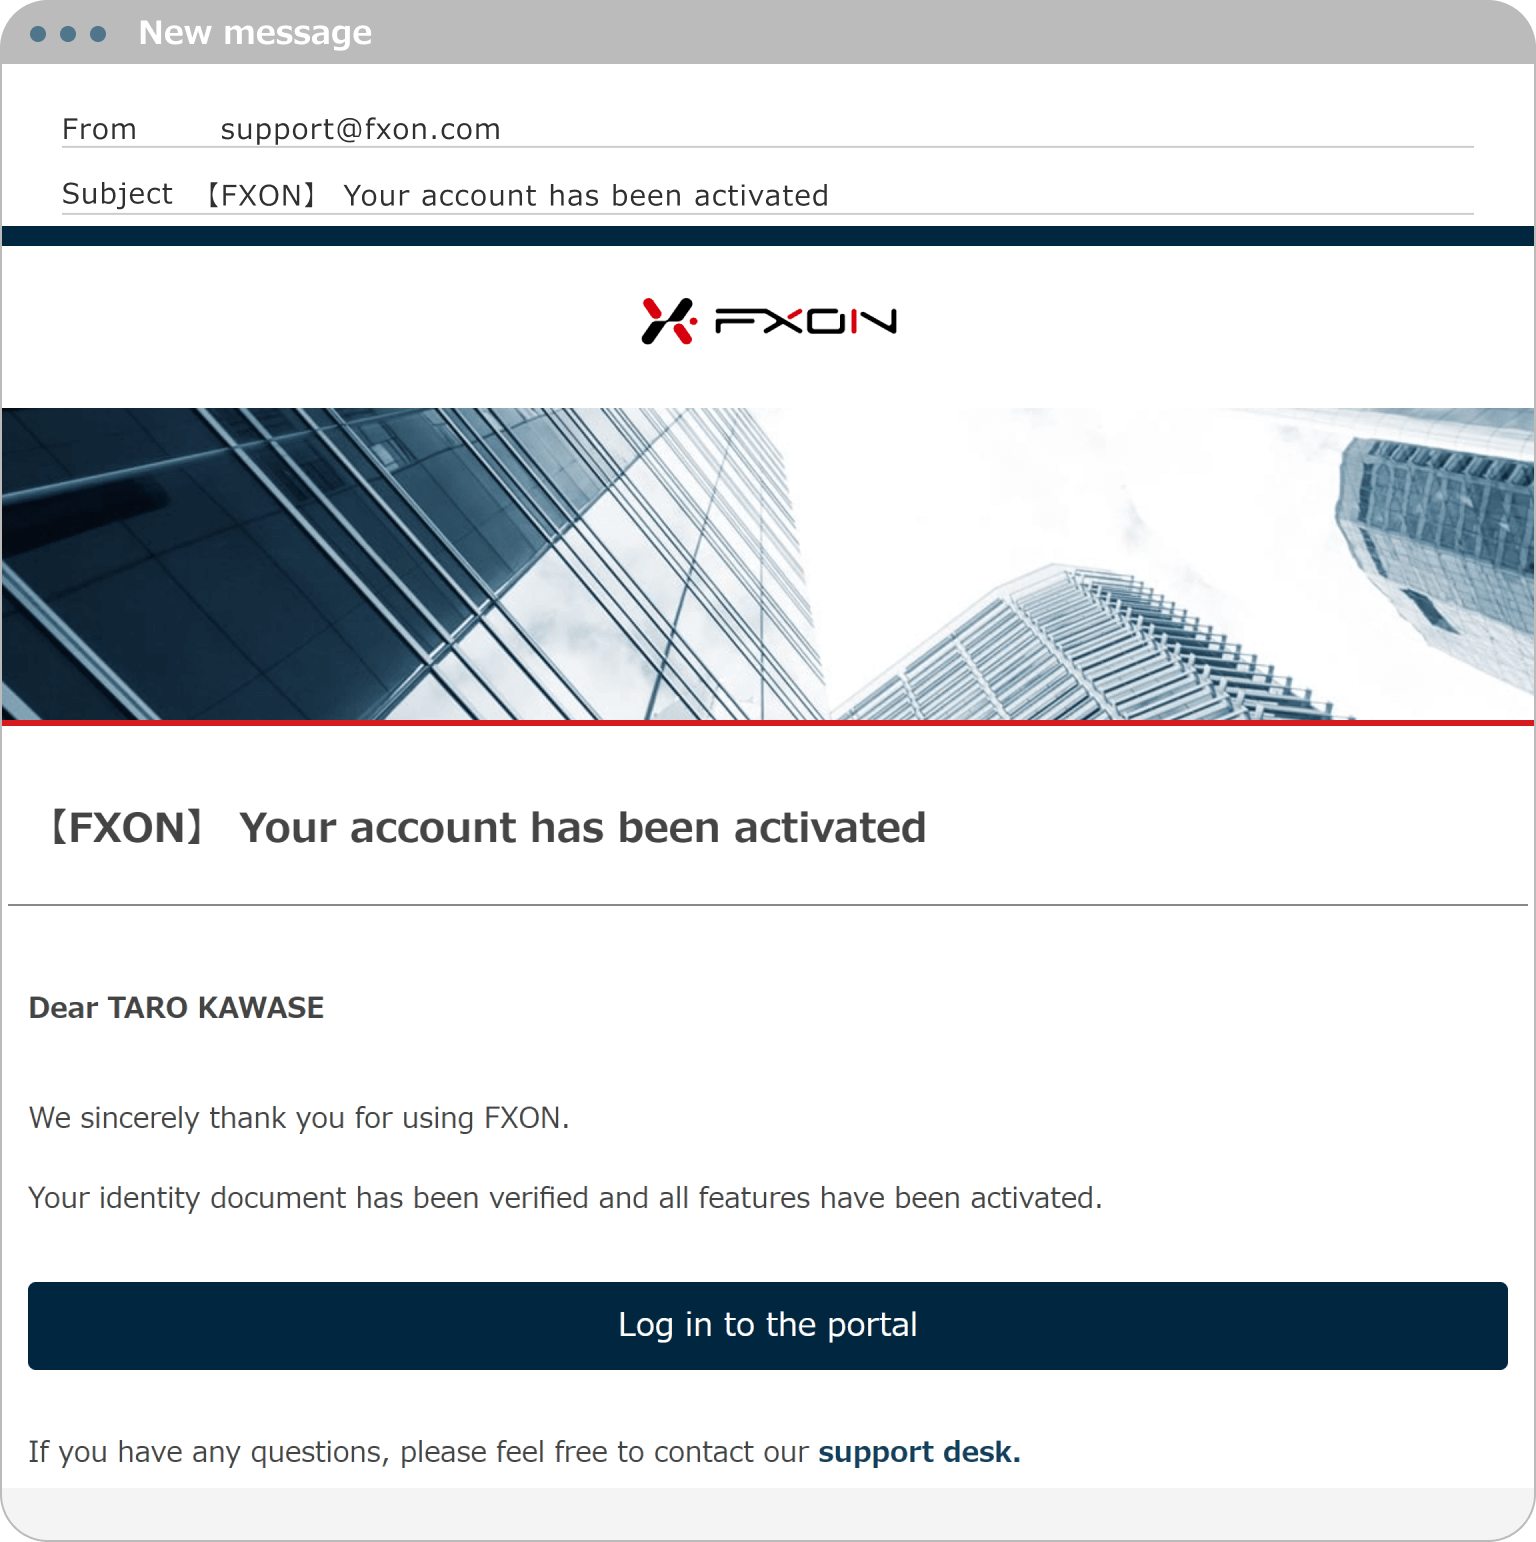
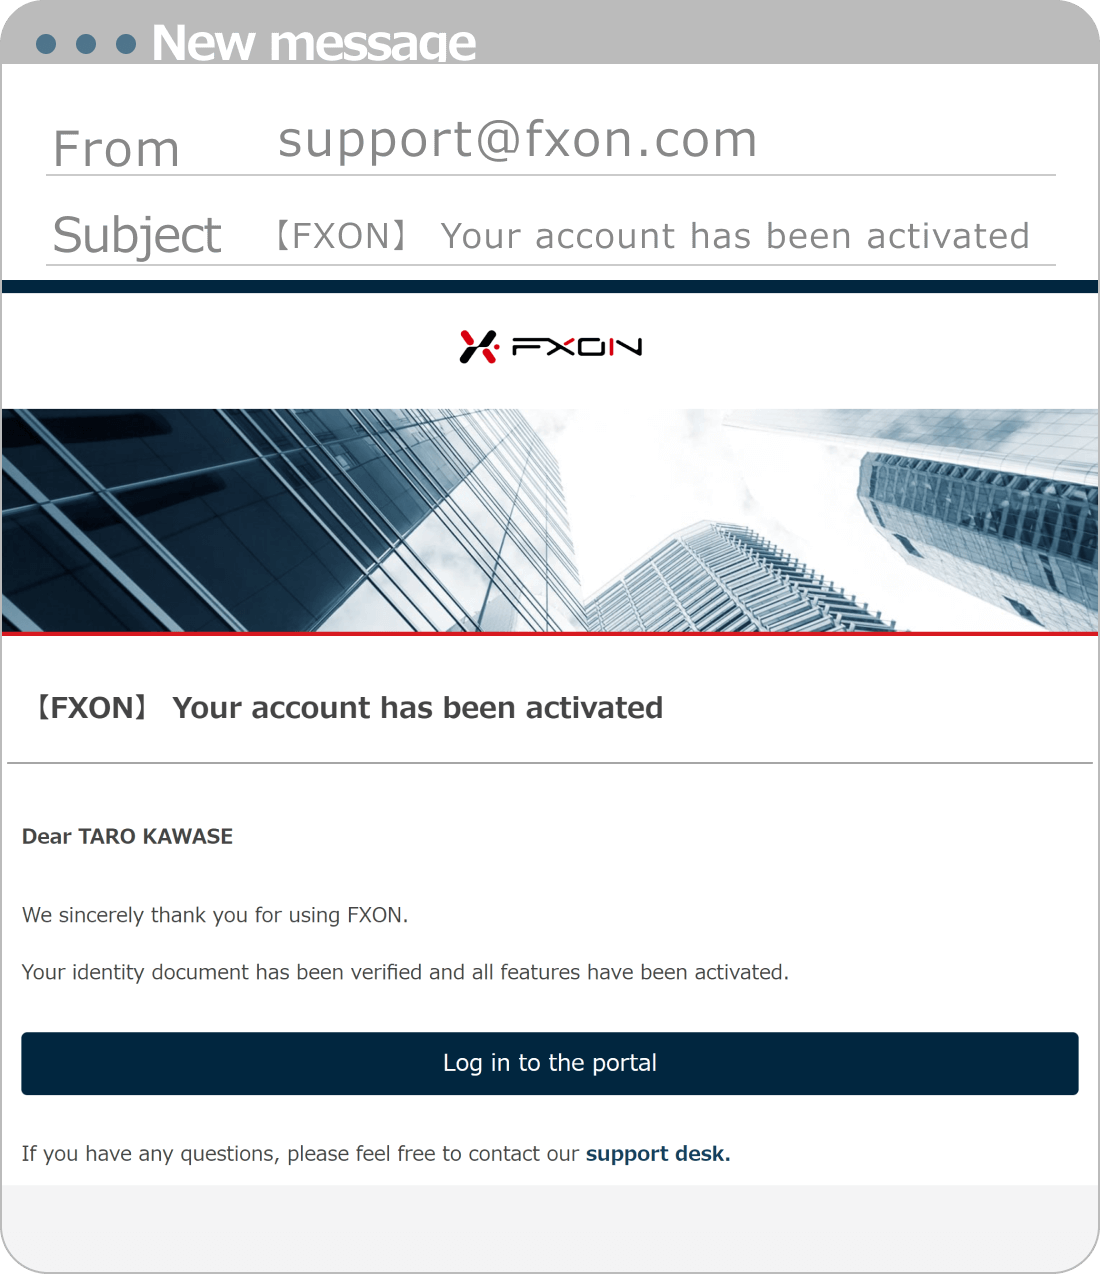
Once all verification documents have been approved by FXON, an email regarding the activation of your account will be sent to your registered email address. Please check your email. If there are any issues with the documents, you will be notified of the deficiencies via email.
Email Subject: 【FXON】Your account has been activated
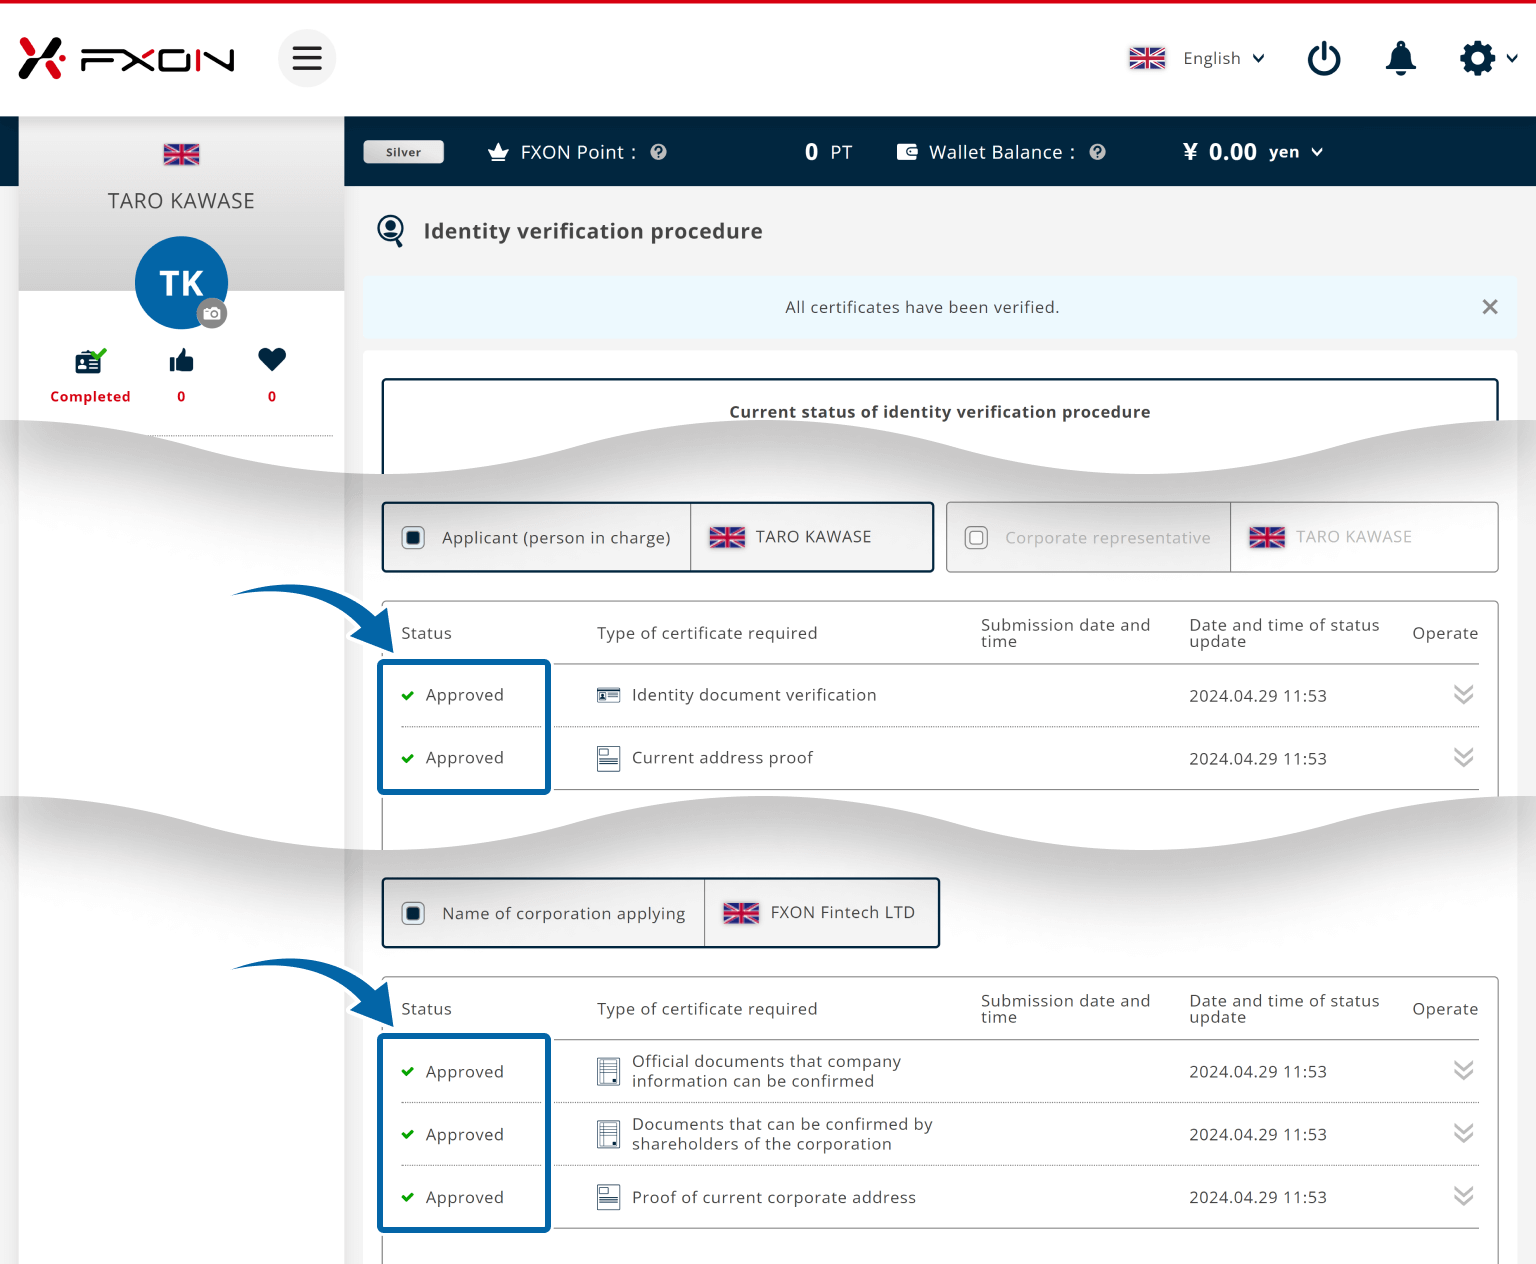
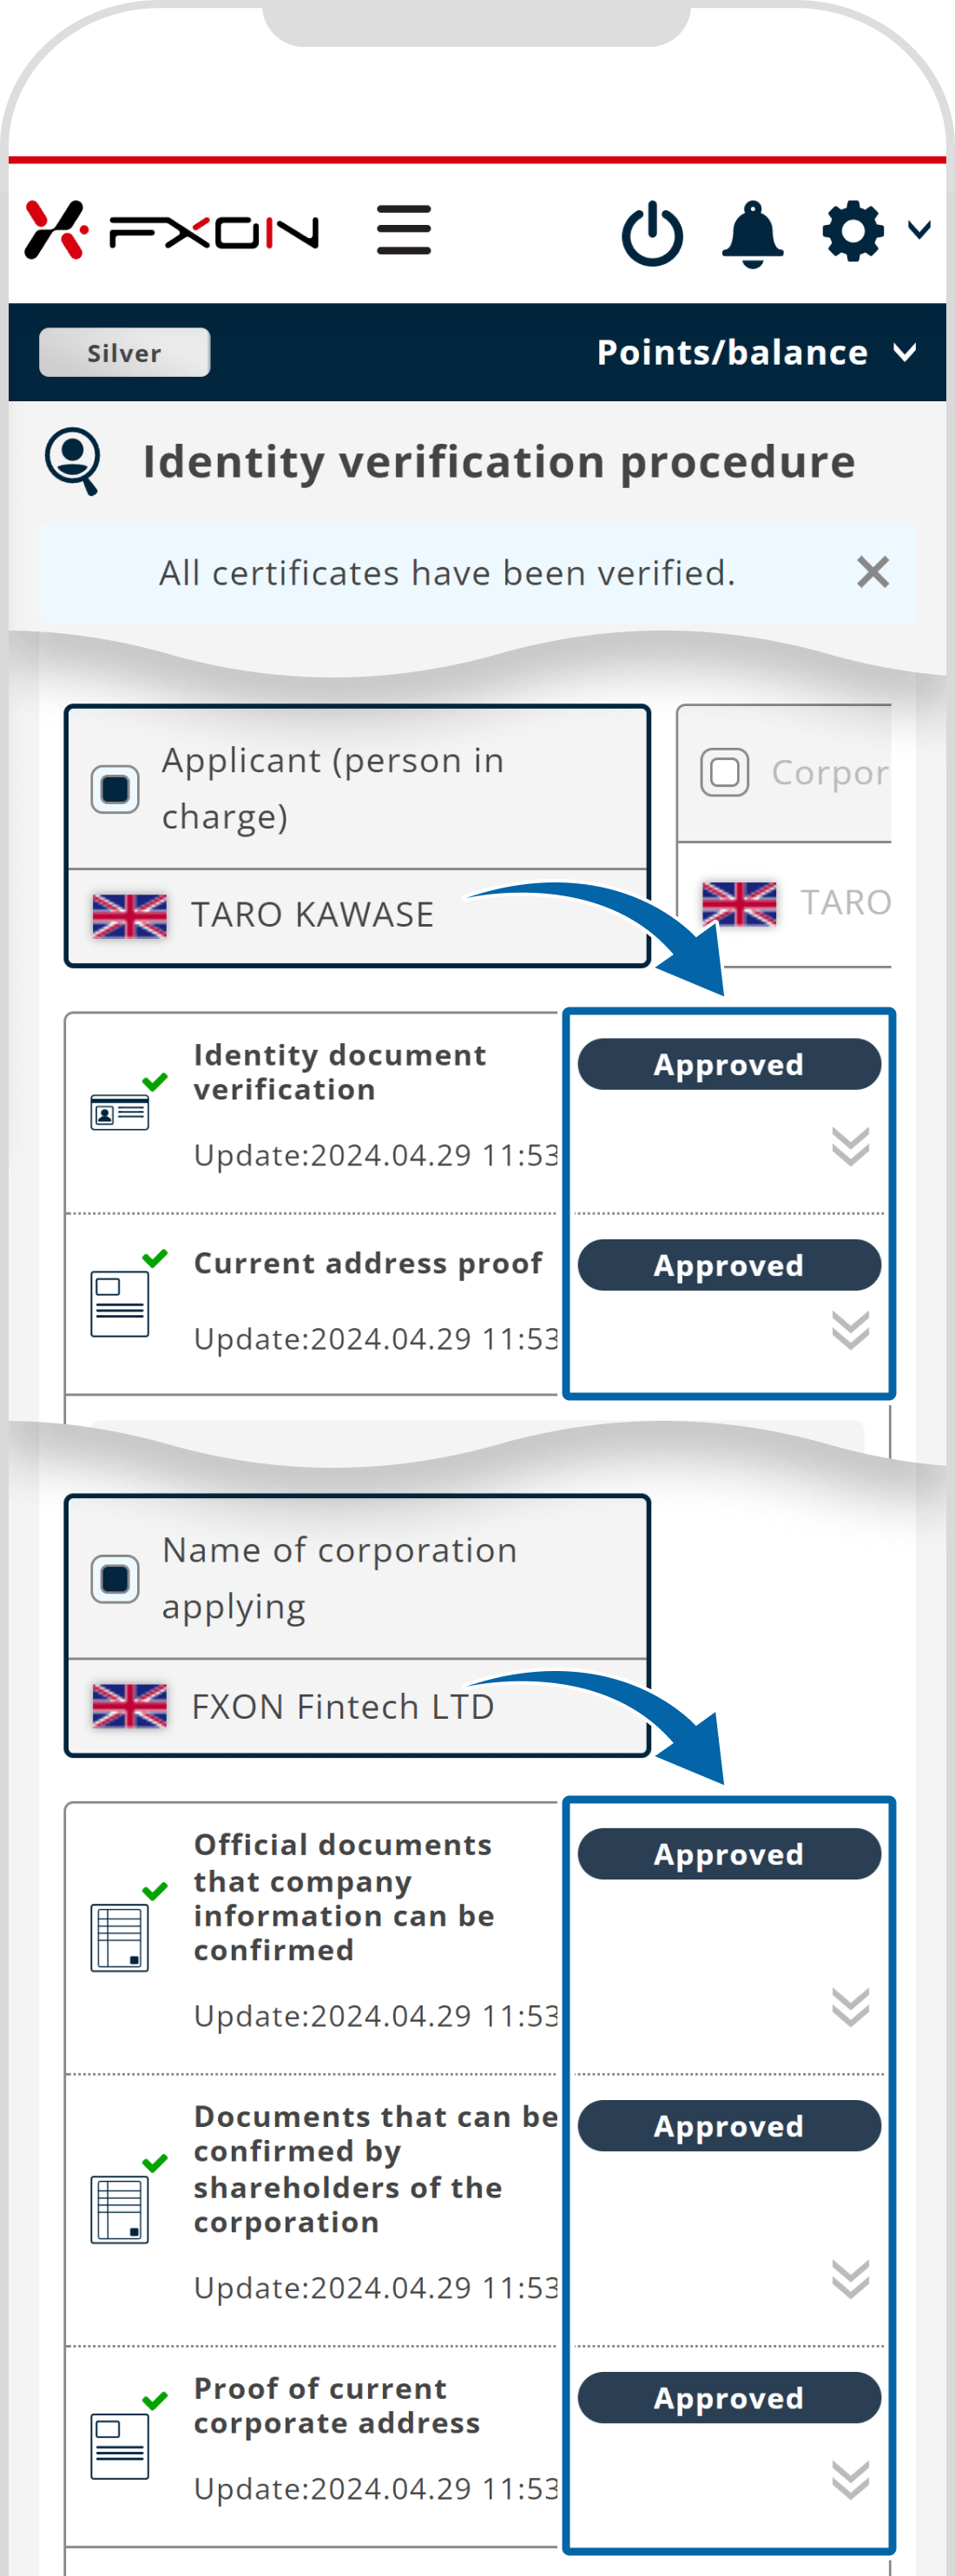
18. Check the status of the identity verification procedure screen
After FXON has completed the approval of the verification documents, please confirm that the status of both the "Identity verification procedure" and "Corporate verification procedure" shows "Approved"
Was this article helpful?
That’s Great!
Thank you for your feedback
Sorry! We couldn't be helpful
Thank you for your feedback
Feedback sent
We appreciate your effort and will try to fix the article

![Document verification [Step (i)]](https://fxon.com/common/images/help-center/2024061802_04pc_en.png)
![Document verification [Step (i)]](https://fxon.com/common/images/help-center/2024061802_04sp_en.png)
![Document verification [Step (ii)]](https://fxon.com/common/images/help-center/2024061802_05_1pc_en.png)
![Document verification [Step (ii)]](https://fxon.com/common/images/help-center/2024061802_05_1sp_en.png)
![Document verification [Step (ii)]](https://fxon.com/common/images/help-center/2024061802_05_2pc_en.png)
![Document verification [Step (ii)]](https://fxon.com/common/images/help-center/2024061802_05_2sp_en.png)
![Face verification [Step (i)]](https://fxon.com/common/images/help-center/2024061802_06pc_en.png)
![Face verification [Step (i)]](https://fxon.com/common/images/help-center/2024061802_06sp_en.png)
![Face verification [Step (ii)]](https://fxon.com/common/images/help-center/2024061802_07_1pc_en.png)
![Face verification [Step (ii)]](https://fxon.com/common/images/help-center/2024061802_07_1sp_en.png)
![Face verification [Step (ii)]](https://fxon.com/common/images/help-center/2024061802_07_2pc_en.png)
![Face verification [Step (ii)]](https://fxon.com/common/images/help-center/2024061802_07_2sp_en.png)
![Card-type PoA verification [Step (i)]](https://fxon.com/common/images/help-center/2024061802_09pc_en.png)
![Card-type PoA verification [Step (i)]](https://fxon.com/common/images/help-center/2024061802_09sp_en.png)
![Card-type PoA verification [Step (ii)]](https://fxon.com/common/images/help-center/2024061802_10_1pc_en.png)
![Card-type PoA verification [Step (ii)]](https://fxon.com/common/images/help-center/2024061802_10_1sp_en.png)
![Card-type PoA verification [Step (ii)]](https://fxon.com/common/images/help-center/2024061802_10_2pc_en.png)
![Card-type PoA verification [Step (ii)]](https://fxon.com/common/images/help-center/2024061802_10_2sp_en.png)
![A4 size PoA verification [Step (i)]](https://fxon.com/common/images/help-center/2024061802_12pc_en.png)
![A4 size PoA verification [Step (i)]](https://fxon.com/common/images/help-center/2024061802_12sp_en.png)
![A4 size PoA verification [Step (ii)]](https://fxon.com/common/images/help-center/2024061802_13_1pc_en.png)
![A4 size PoA verification [Step (ii)]](https://fxon.com/common/images/help-center/2024061802_13_1sp_en.png)
![A4 size PoA verification [Step (ii)]](https://fxon.com/common/images/help-center/2024061802_13_2pc_en.png)
![A4 size PoA verification [Step (ii)]](https://fxon.com/common/images/help-center/2024061802_13_2sp_en.png)