
Start with FXON
How to sign up to FXON as corporate account (New Registration)
FXON Registration
Start with FXON
This article was :
Published in 2024.05.14
Updated in 2025.09.19
To start trading with FXON's real account, you will need to set up your profile and submit the required documents after signing up. For corporate accounts, you will need to register information about your company, the representative, and the person in charge of transactions.
Sole proprietors can also open a corporate account.
On the FXON sign-up screen, enter (1) your country of residence and (2) email address, then click (3) "Next step".
On the FXON sign-up screen, enter (1) your country of residence and (2) email address, then tap (3) "Next step".
Even if you already have a personal account, you can open a corporate account. However, please note that you cannot use the same email address as your personal account.
The 6-digit verification code will be sent to your registered e-mail address.
The validity period of the verification code is 1 hour. If you do not receive the verification code, please check your email settings and click the 'Resend' button to try resending the code. If the issue persists, please contact the support desk.
For troubleshooting when you do not receive the verification code, please refer to the information below.
The account registration screen will appear. Enter (1) registration category (company), (2) first name of the person in charge of the transaction, (3) last name, (4) nickname, and click (5) "Next step".
The account registration screen will appear. Enter (1) registration category (company), (2) first name of the person in charge of the transaction, (3) last name, (4) nickname, and tap (5) "Next step".
Enter (1) your registered phone number and (2) your password. After reviewing (3) Terms and Conditions and (4) Privacy Policy, check the boxes if you agree to them, and then click (5) "Next step".
Enter (1) your registered phone number and (2) your password. After reviewing (3) Terms and Conditions and (4) Privacy Policy, check the boxes if you agree to them, and then tap (5) "Next step".
The registration information you entered will be displayed. After confirming that the information is correct, click "Register".
The registration information you entered will be displayed. After confirming that the information is correct, tap "Register".
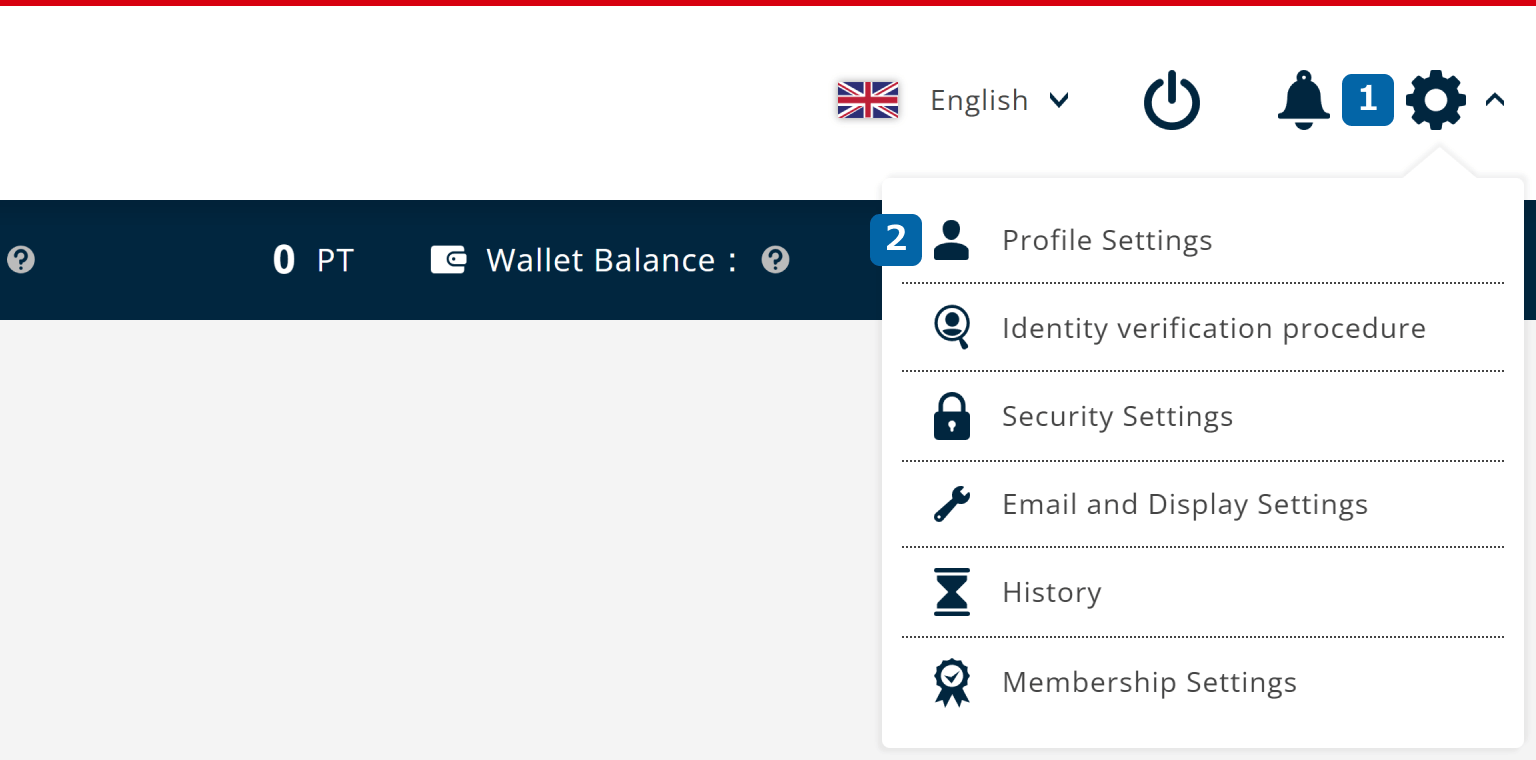
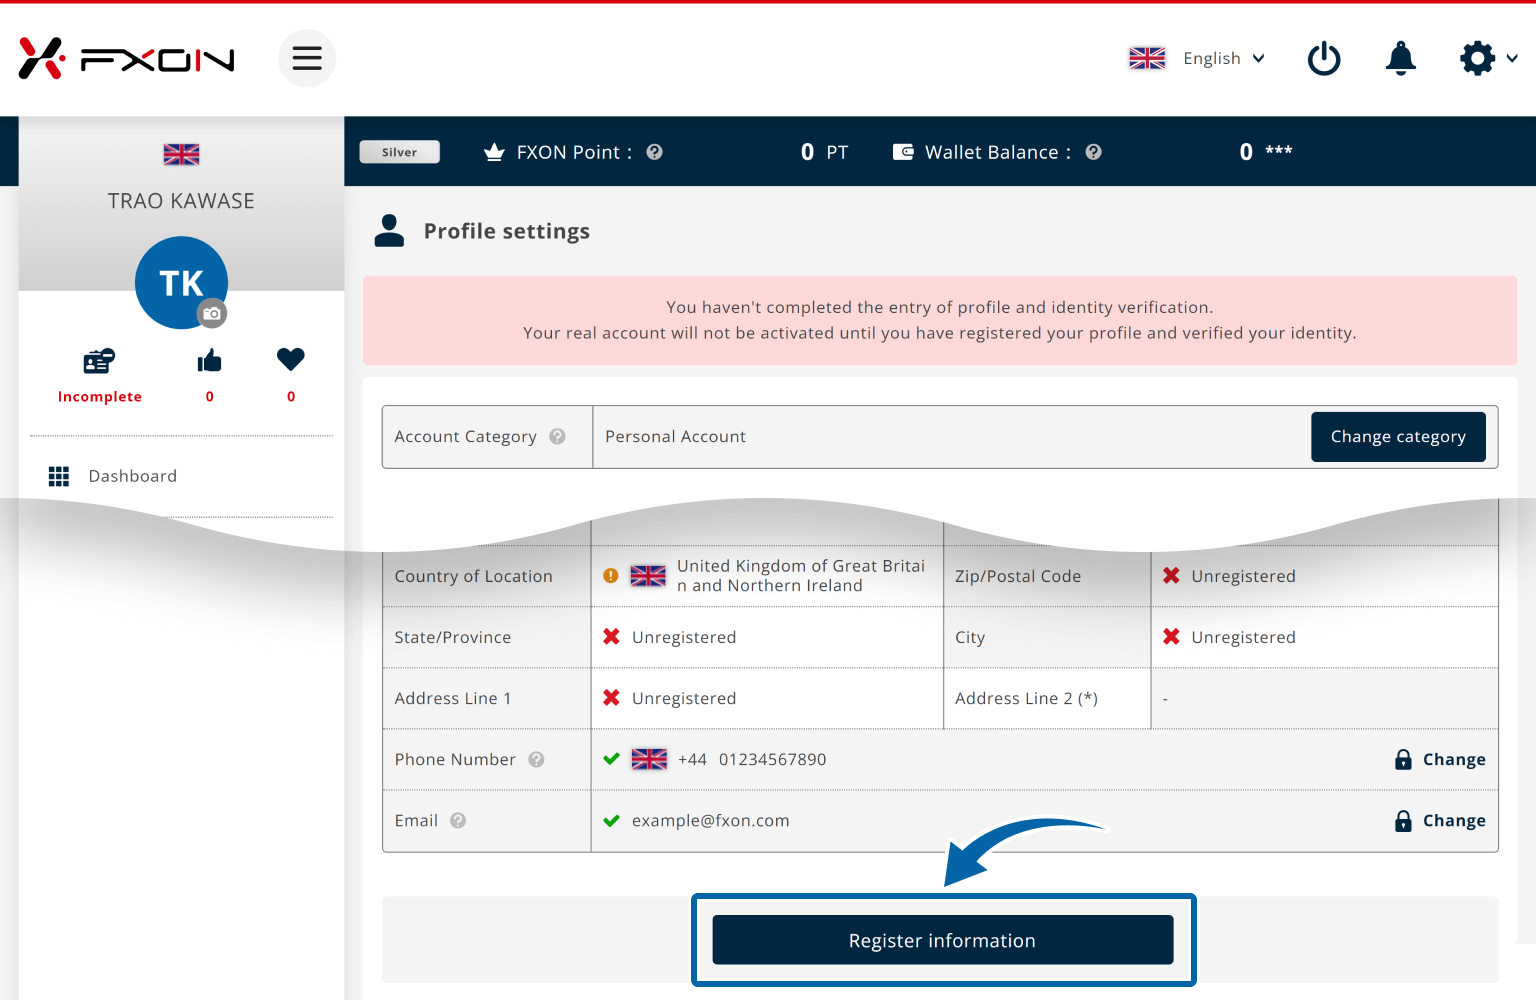
After logging in to the FXON Portal, click "Settings icon" > "Profile Settings". Please make sure that the account category is correct (corporate) and click "Register information".
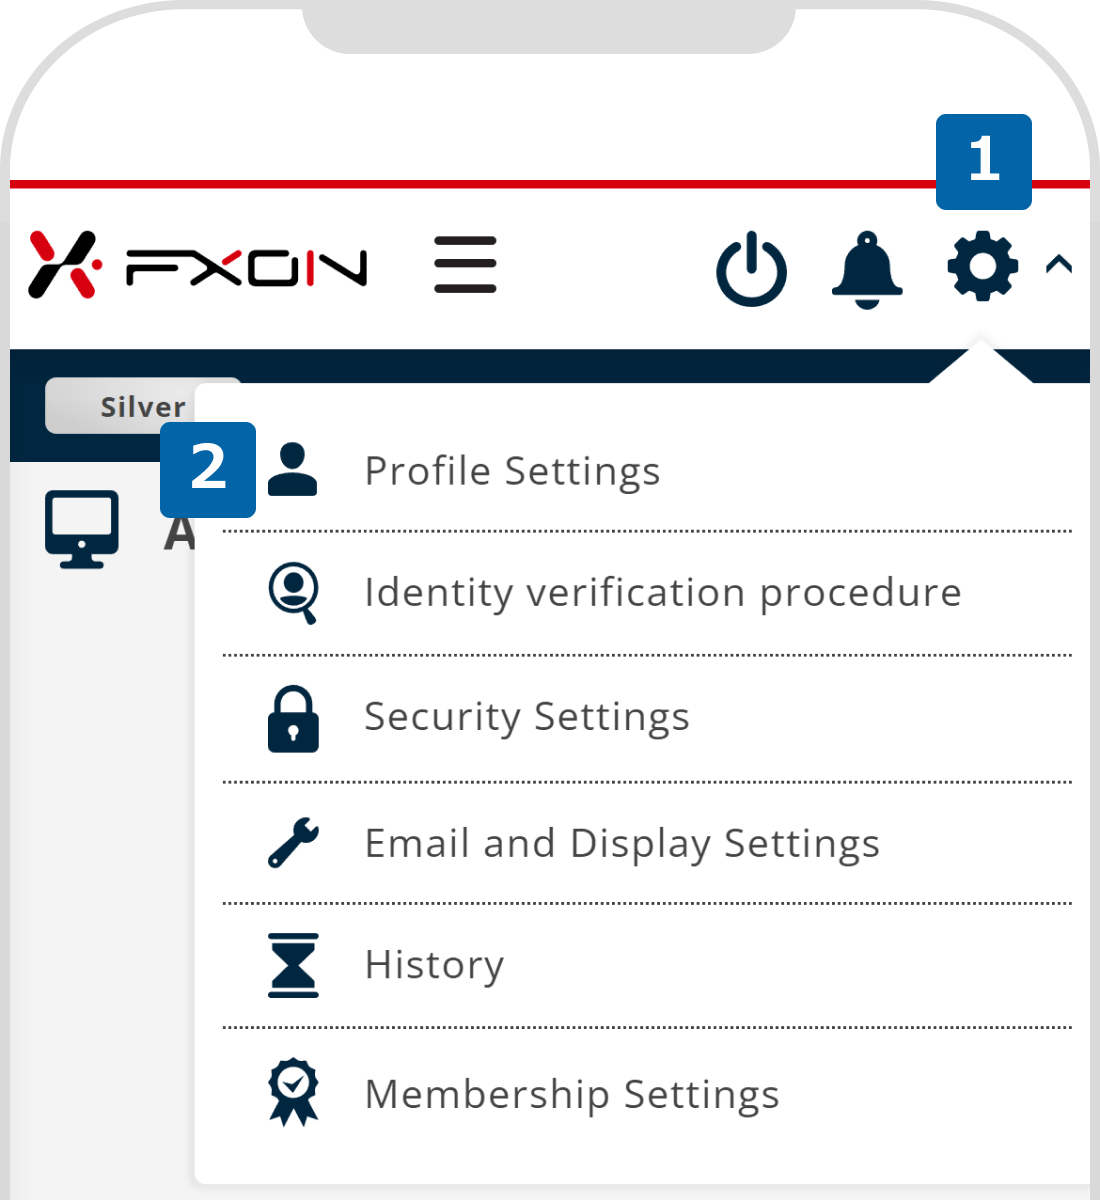
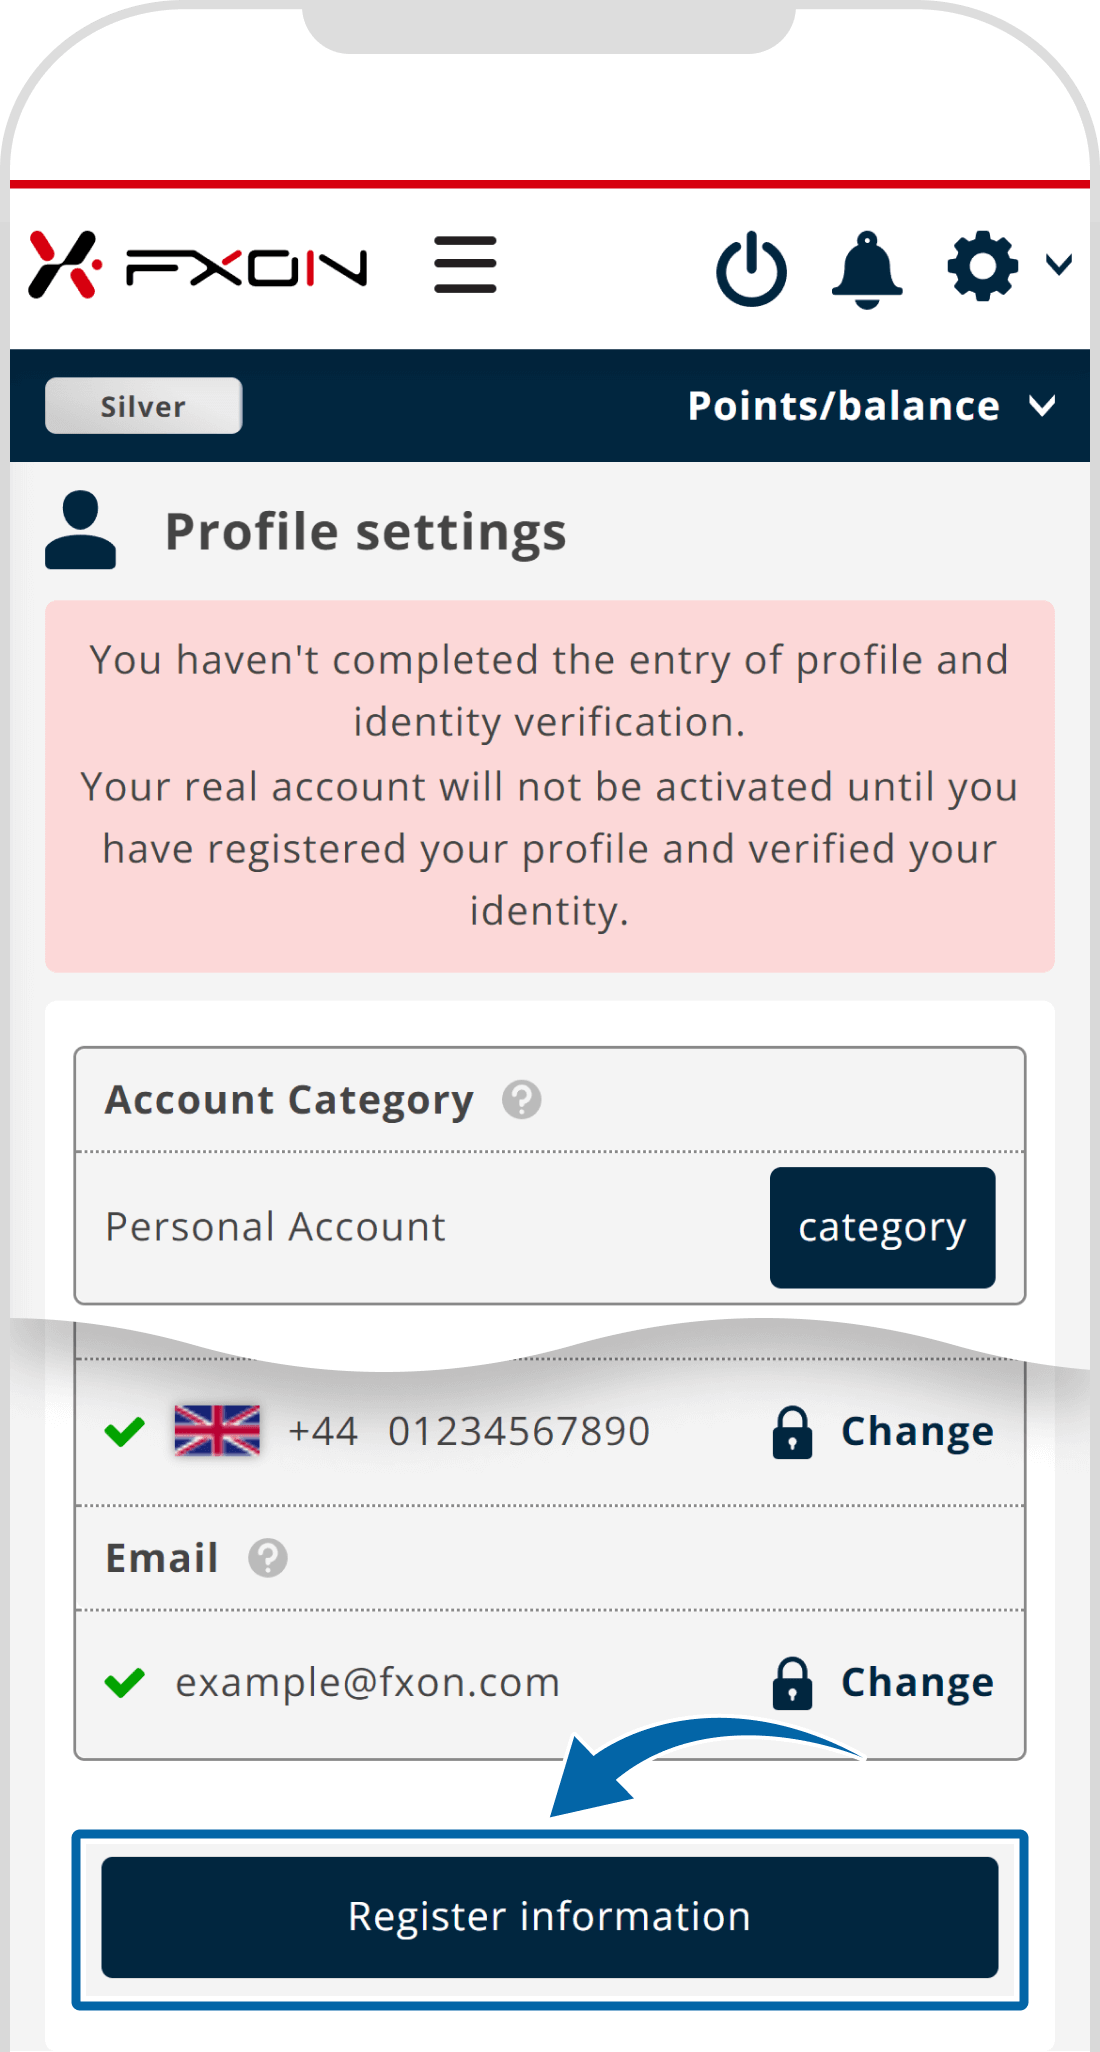
After logging in to the FXON Portal, tap "Settings icon" > "Profile Settings". Please make sure that the account category is correct (corporate) and tap "Register information".

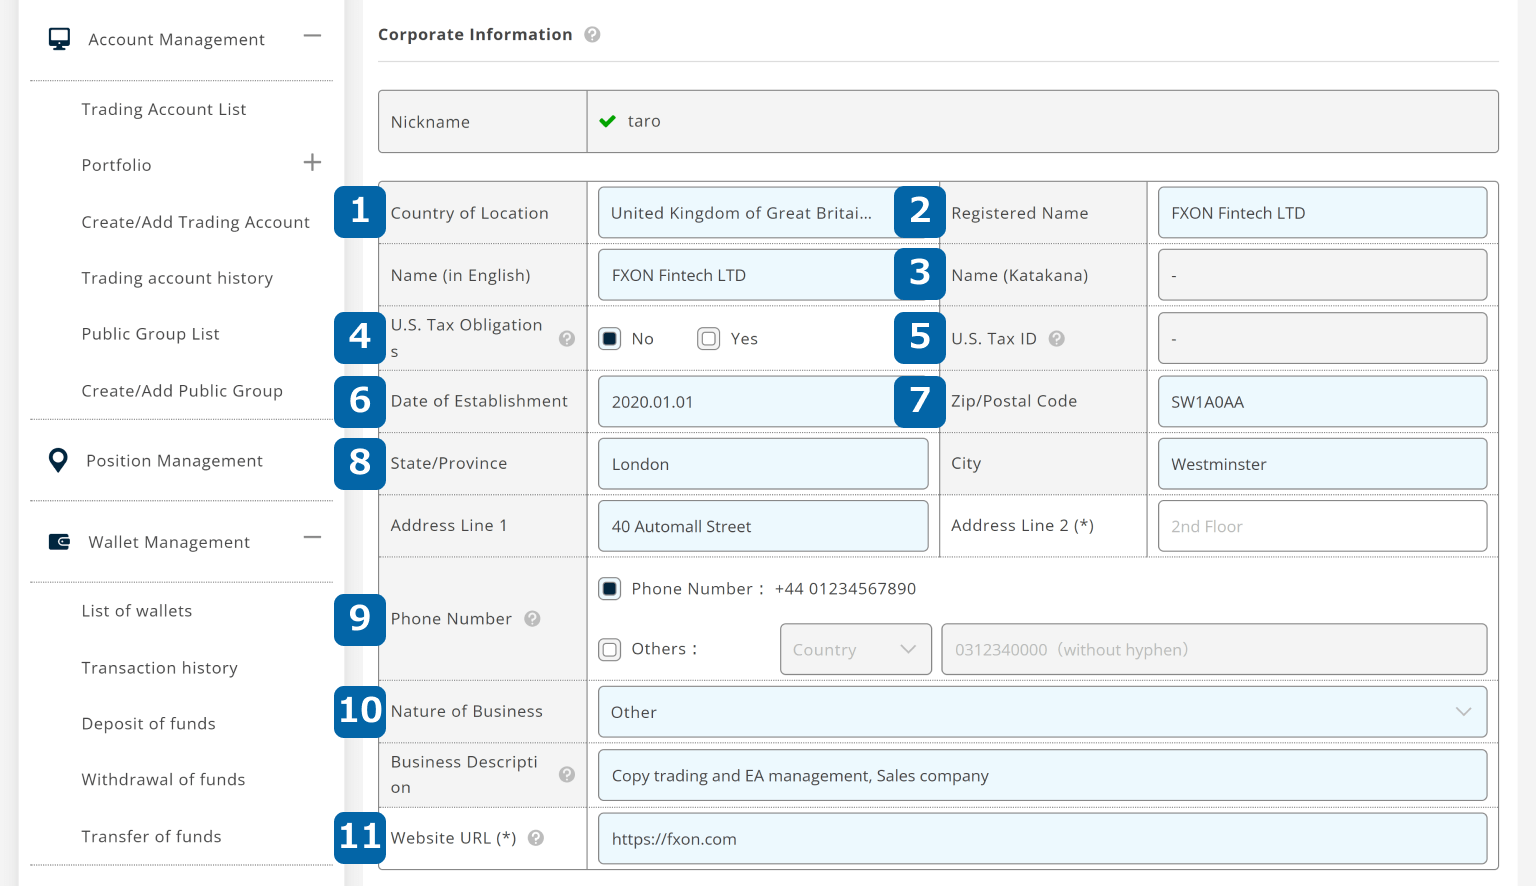
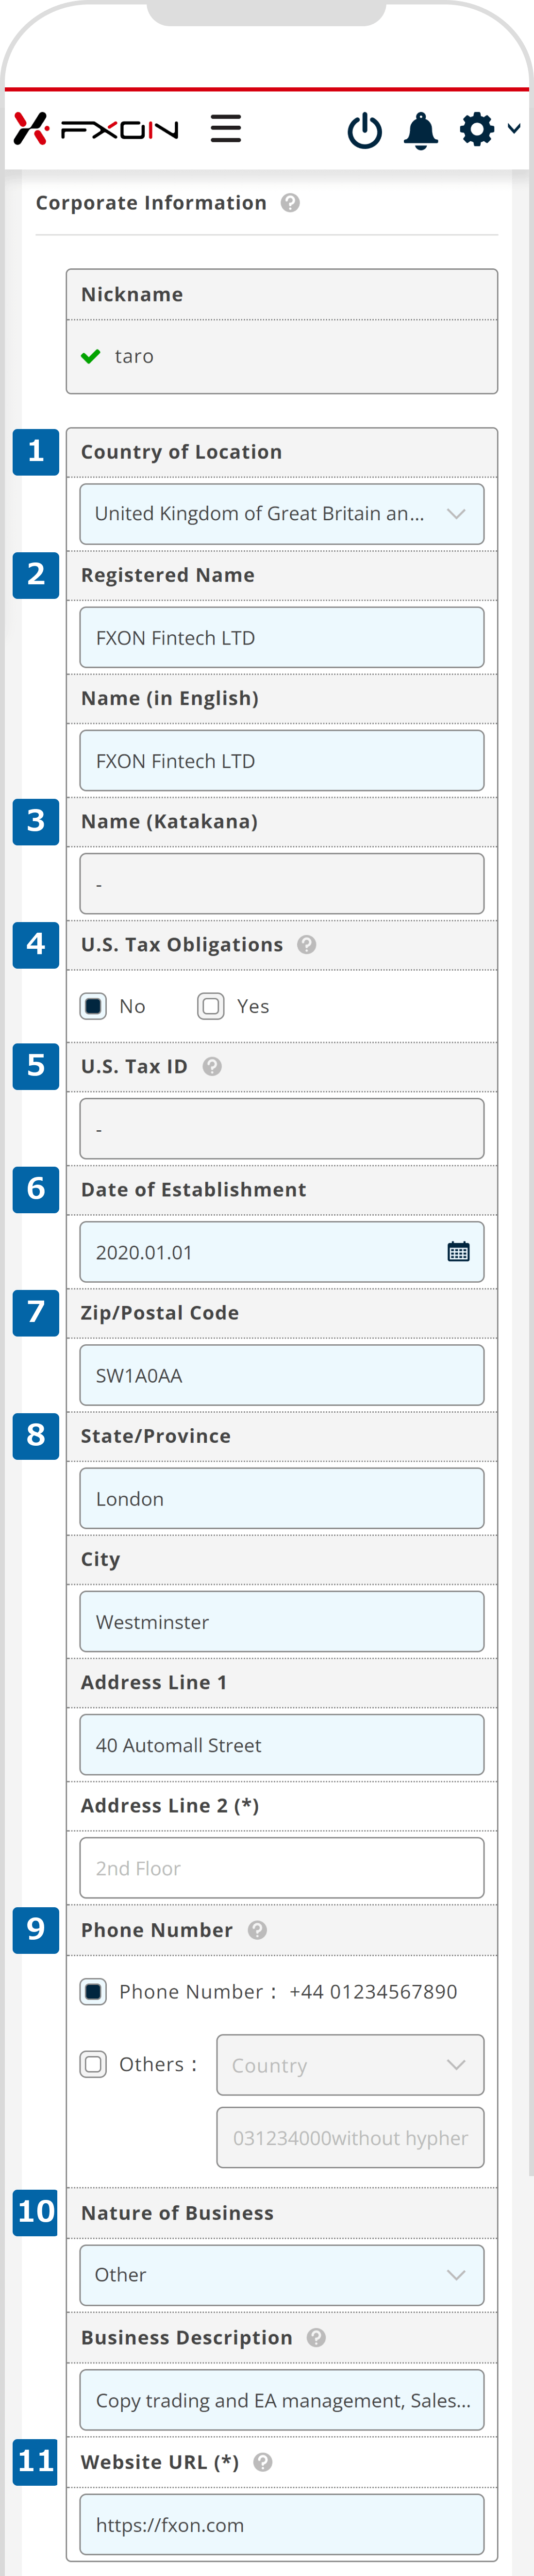
Please fill out the corporate and investor information.
Enter your (1) country of location, (2) name in English, (3) name in Katakana if (1) is Japan, (4) US tax obligation, (5) TIN if (4) is Yes, (6) date of establishment, (7) zip/postal code, (8) address, (9) phone number, (10) nature of business (if others, add description), and (11) website URL if you have it.
If you wish to set a corporate phone number different from the verified one registered at sign-up, check the "Others" checkbox and enter the country code and phone number.
For more information on US tax obligations, please refer to the following page.
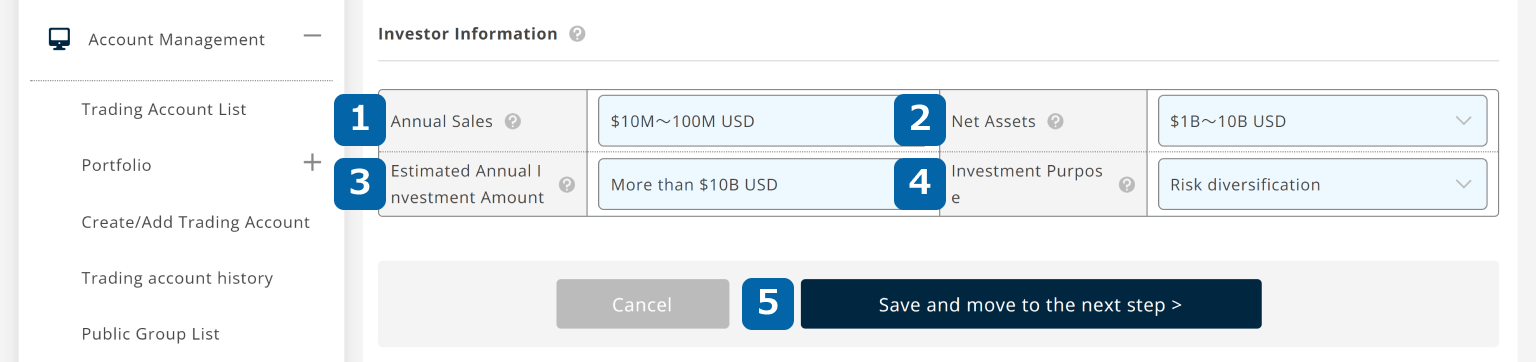
Fill out the investor information. Choose your company's (1) annual sales, (2) net assets, (3) estimated annual investment amount, and (4) investment purpose. After filling it out, click (5) "Save and move to the next step".
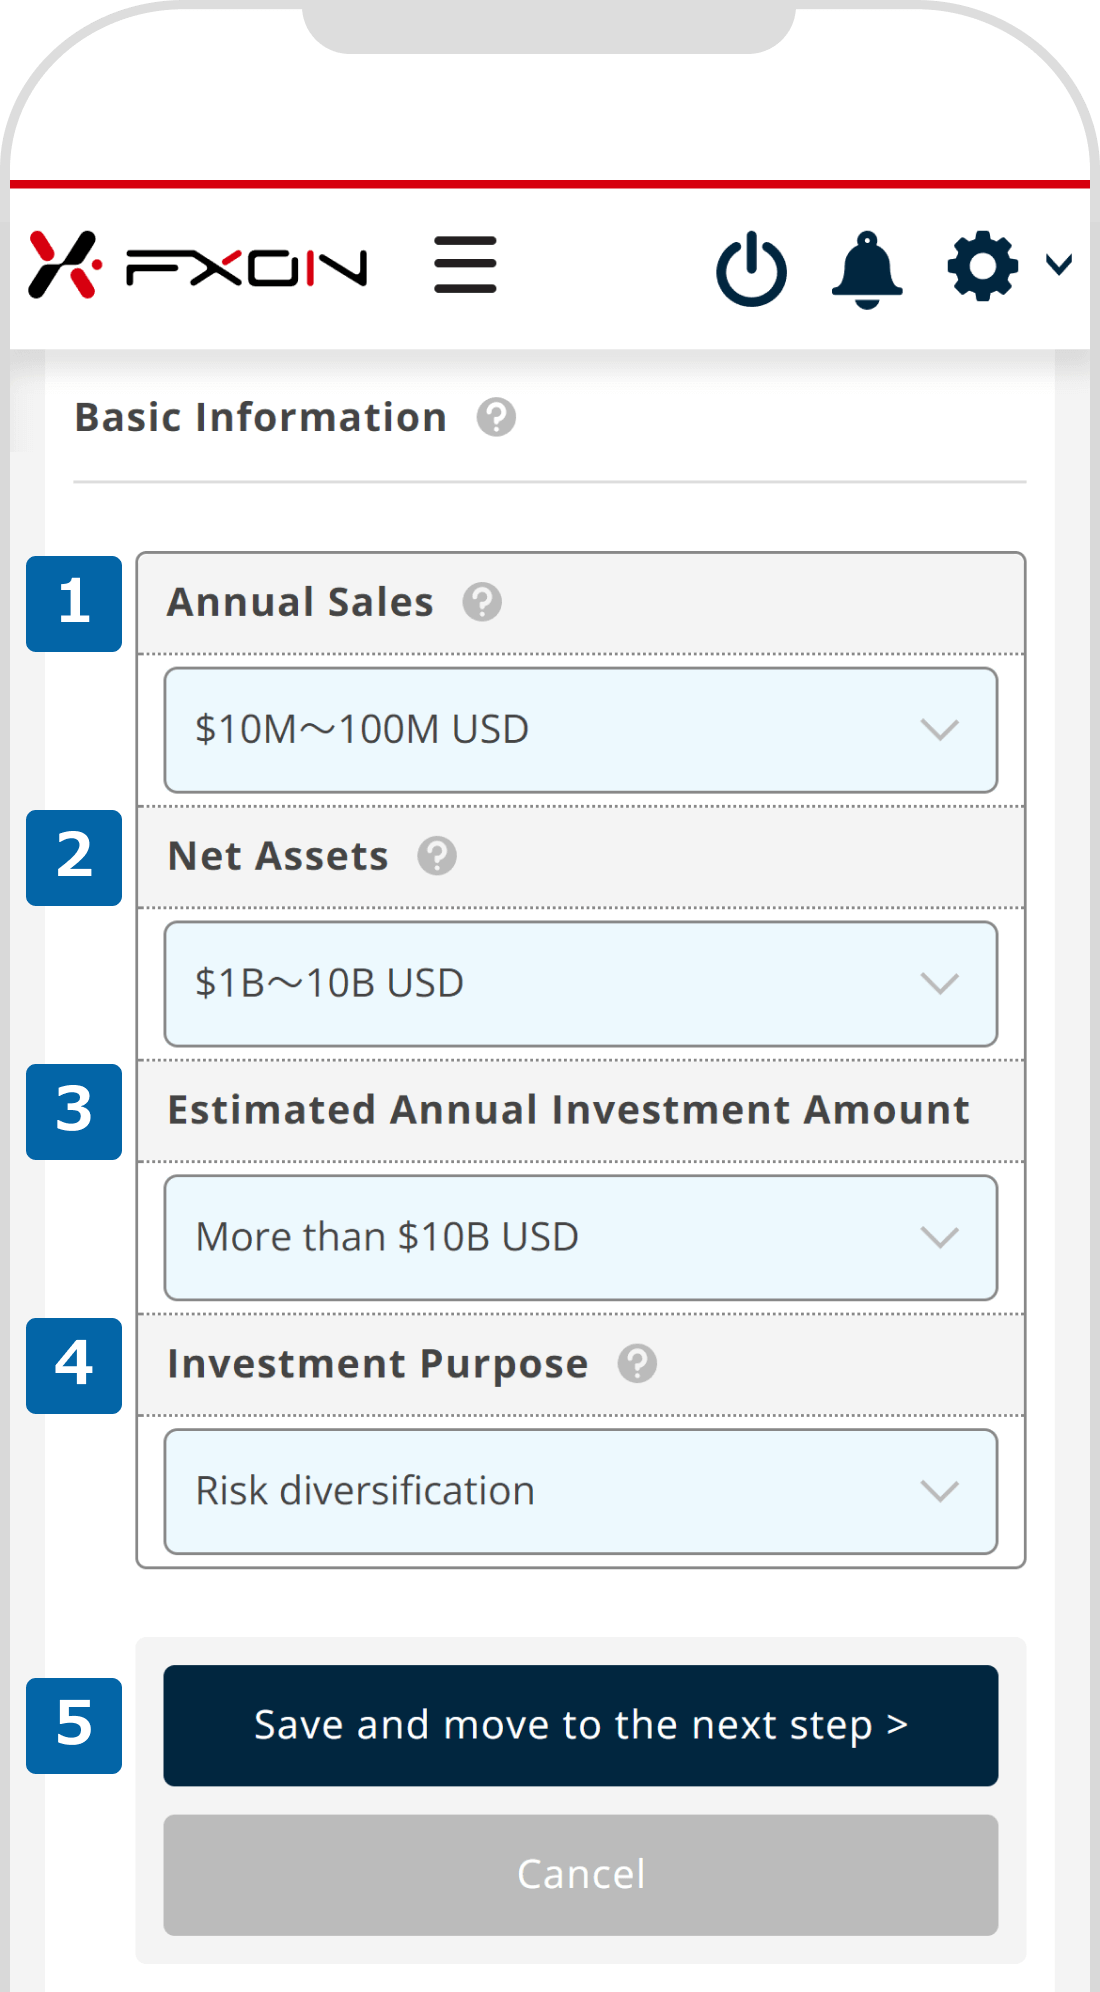
Fill out the investor information. Choose your company's (1) annual sales, (2) net assets, (3) estimated annual investment amount, and (4) investment purpose. After filling it out, tap (5) "Save and move to the next step".
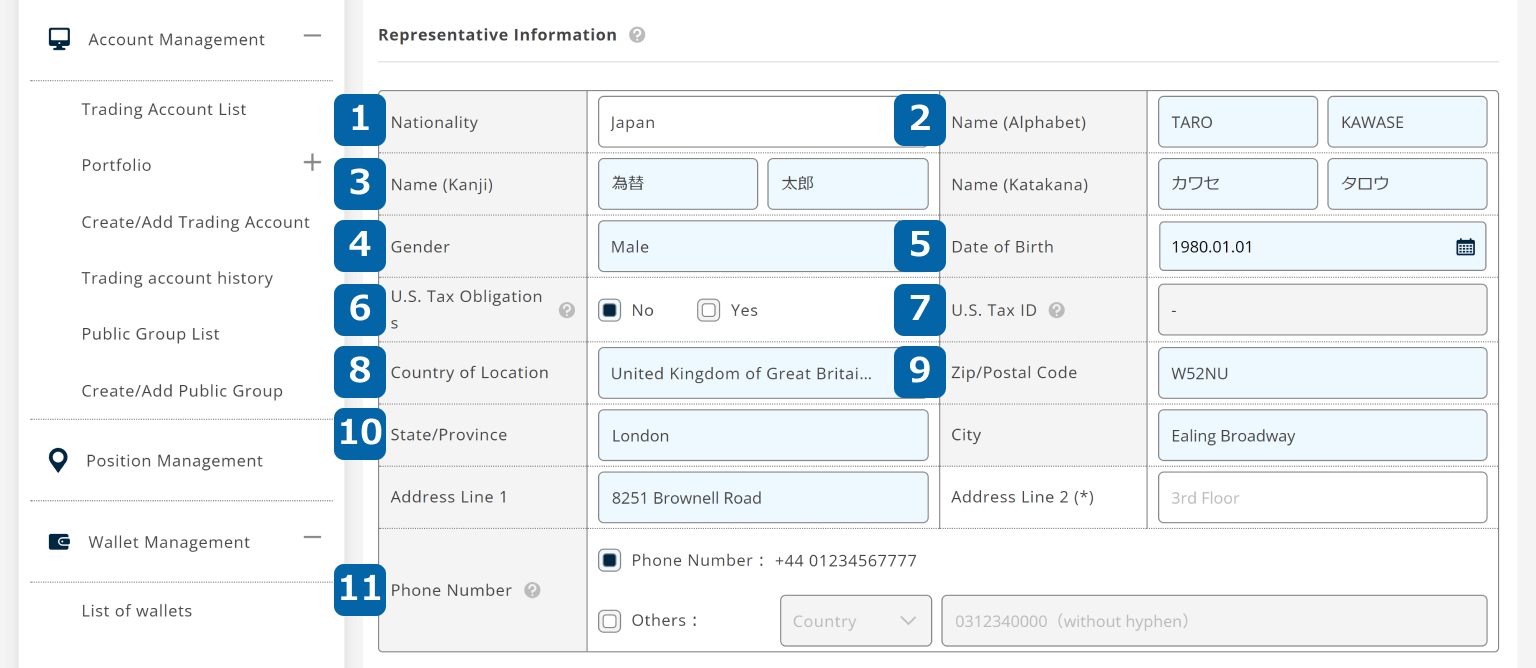
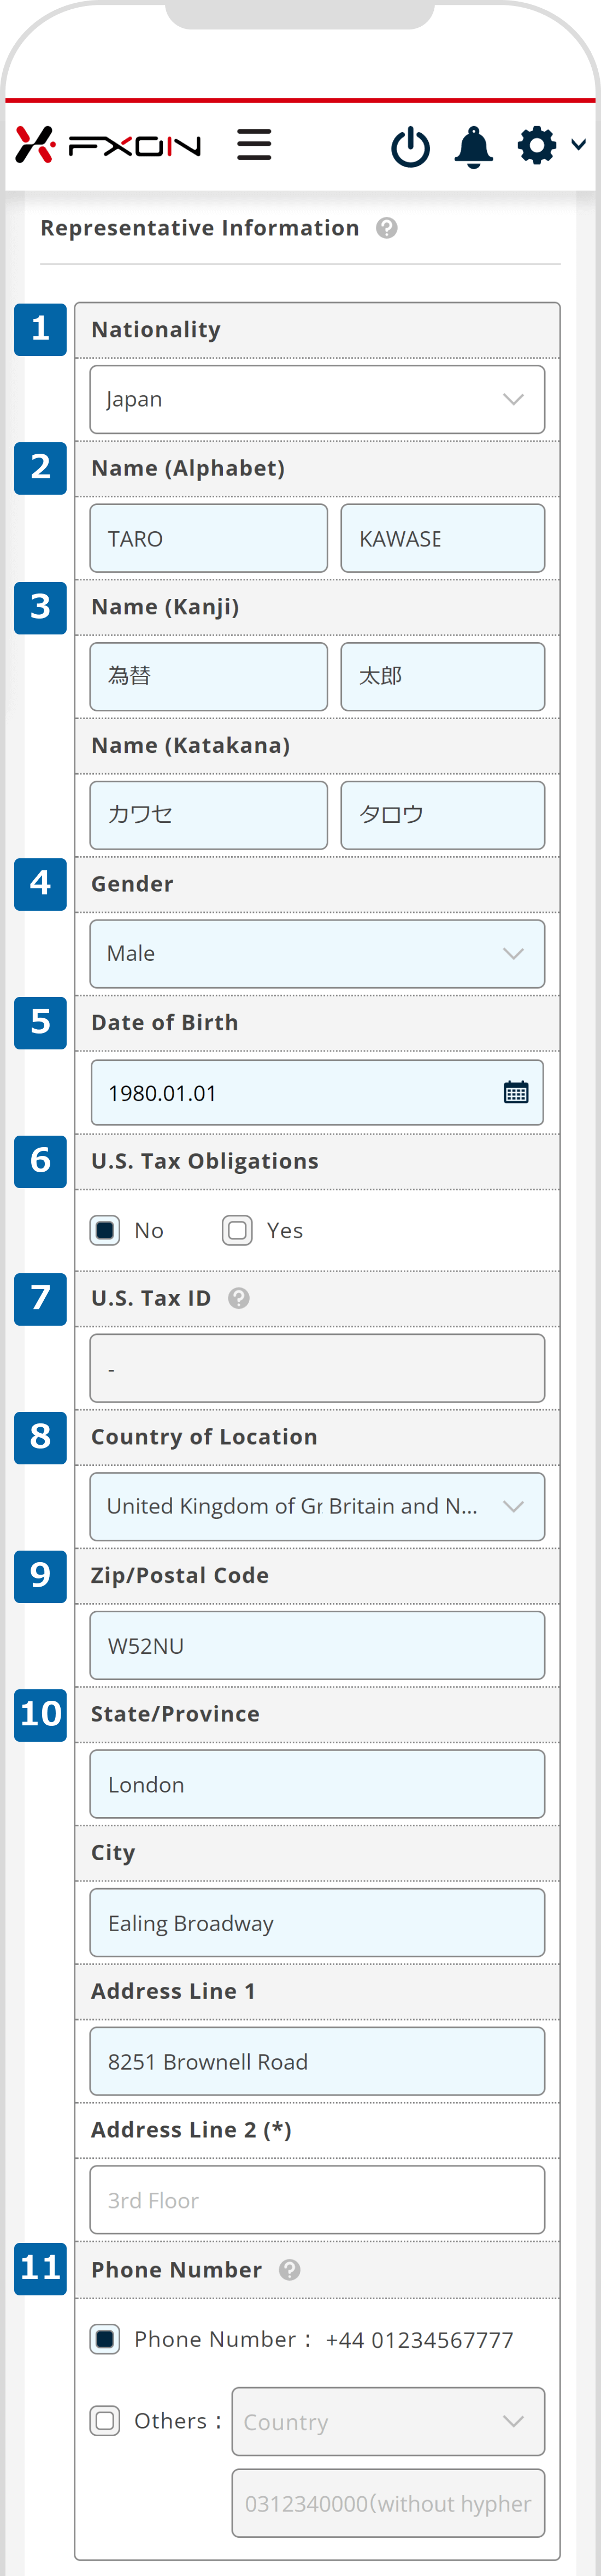
Please fill out the information of the representative and the person in charge of the transaction.
Enter their (1) nationality, (2) name in English, (3) name in Kanji and Katakana (if they are Japanese), (4) gender, (5) date of birth, (6) US tax obligation,(7) TIN if (6) is Yes, (8) country of location, (9) zip/postal code, and (10) address, (11) phone number.
If you wish to set a phone number different from the verified one registered at sign-up, check the "Others" checkbox and enter the country code and phone number.

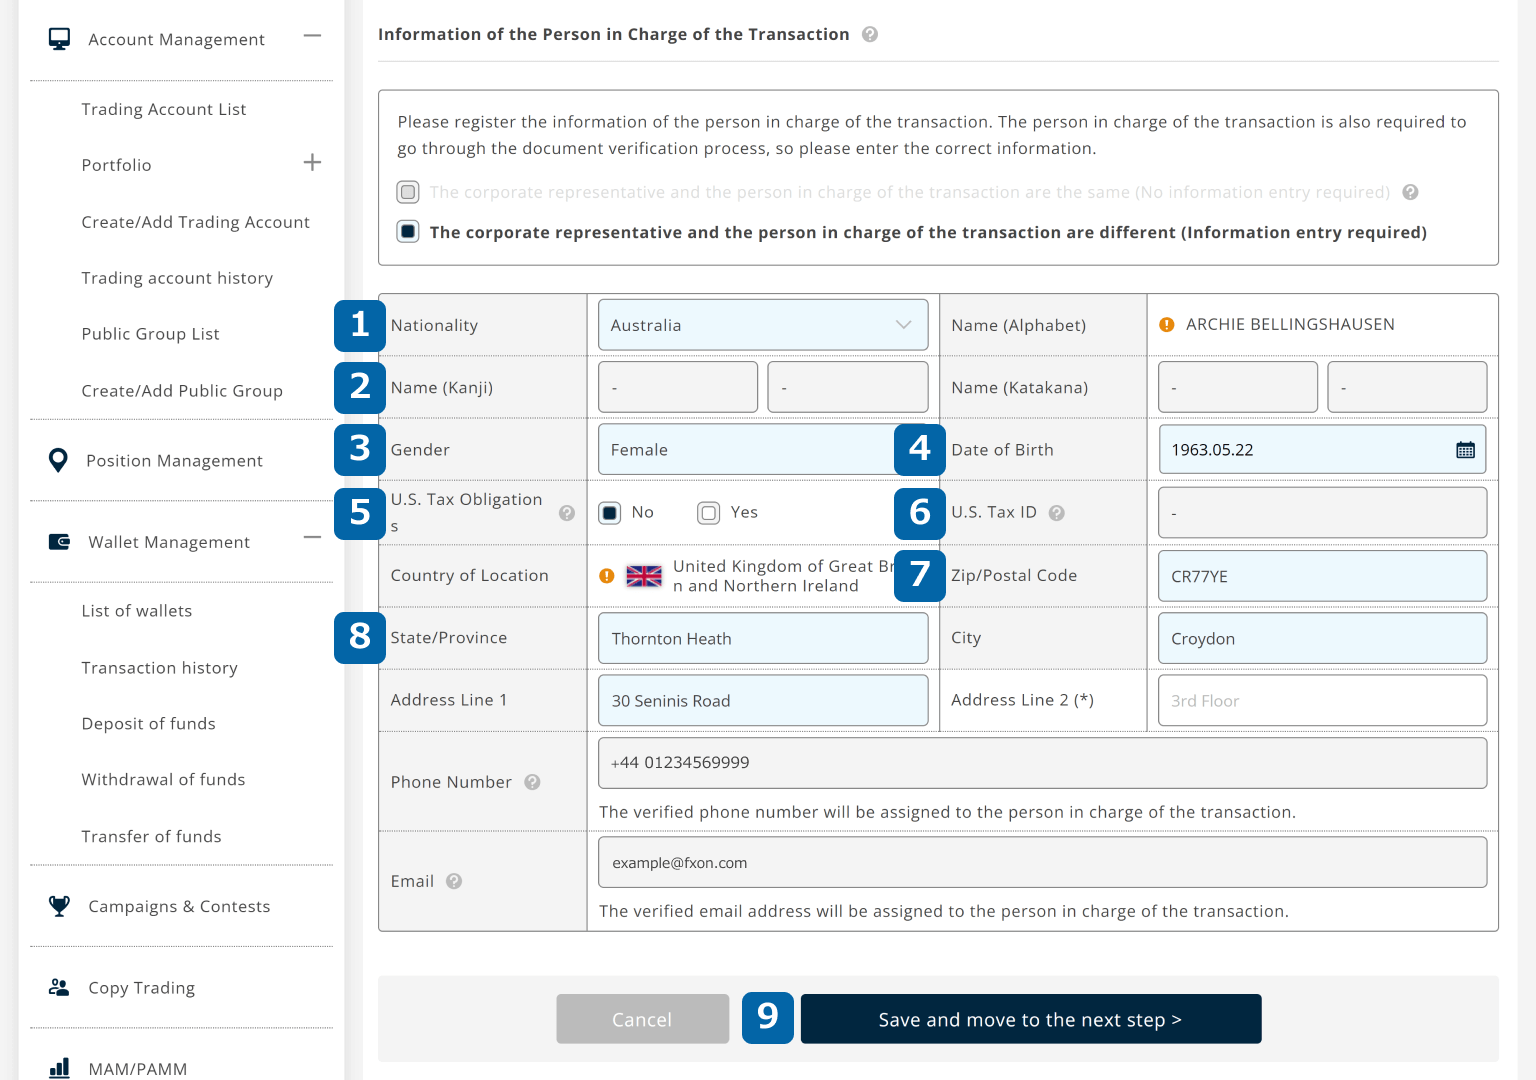
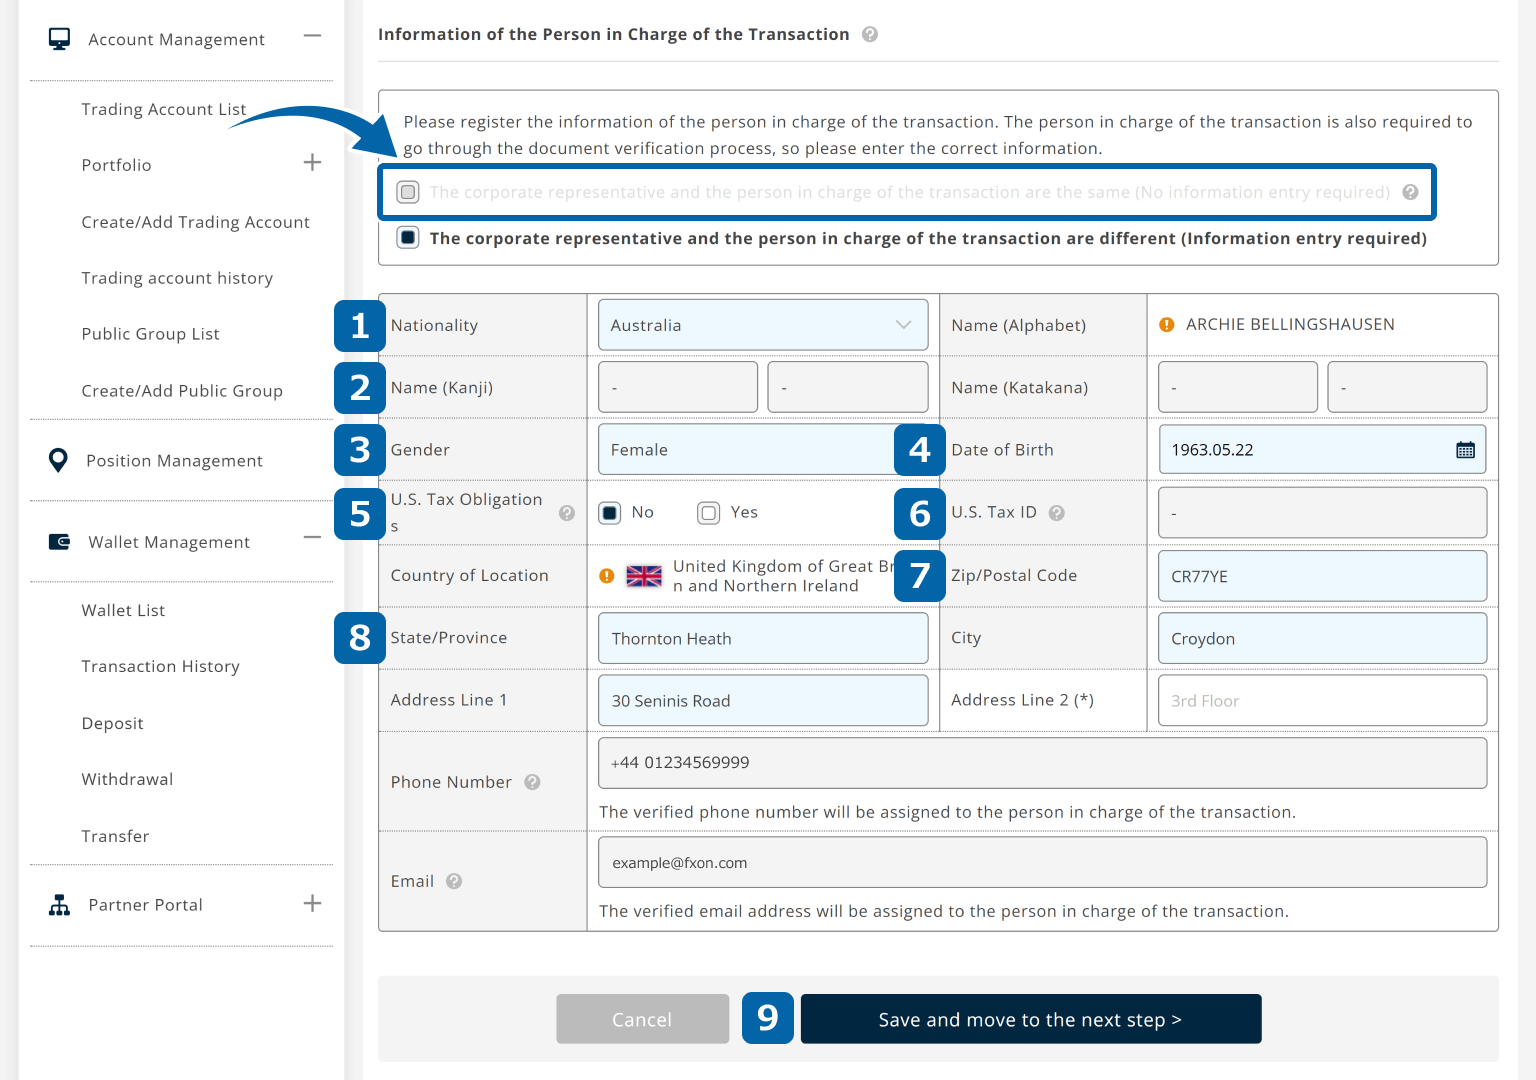
Fill out the information of the person in charge of the transaction.
If it's the same as the representative, choose "The corporate representative and the person in charge of the transaction are the same (No information entry required)".
If it's different, enter their (1) nationality, (2) name in Kanji and Katakana if they are Japanese, (3) gender, (4) date of birth, (5) US tax obligation, (6) TIN if (5) is Yes, (7) zip/postal code, and (8) address.
After filling out, click (9) "Save and move to the next step" to proceed.
After filling out, tap (9) "Save and move to the next step" to proceed.

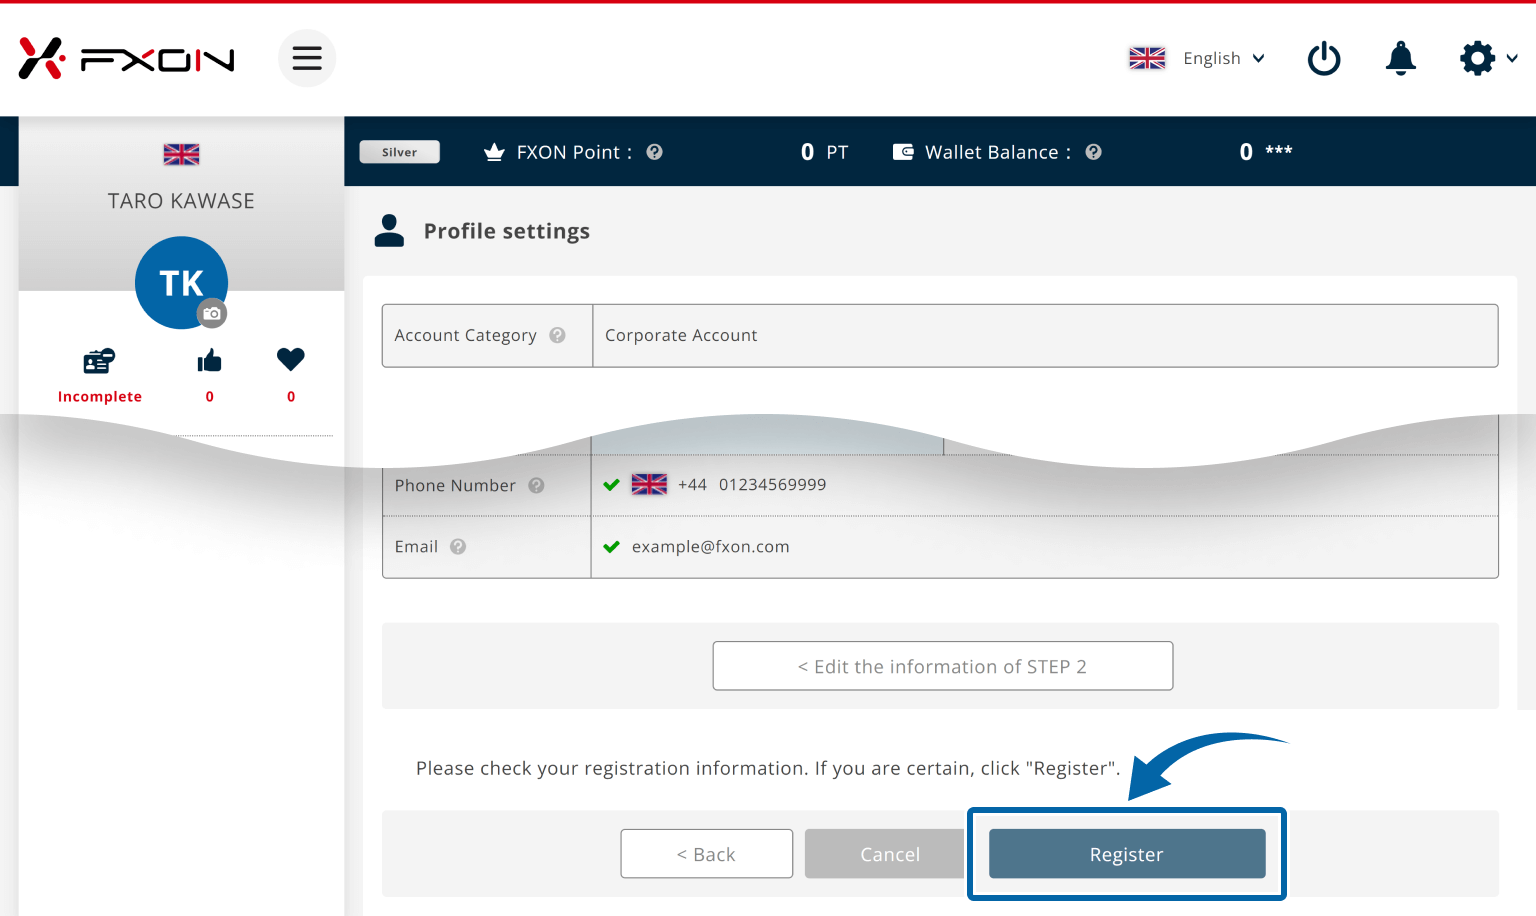
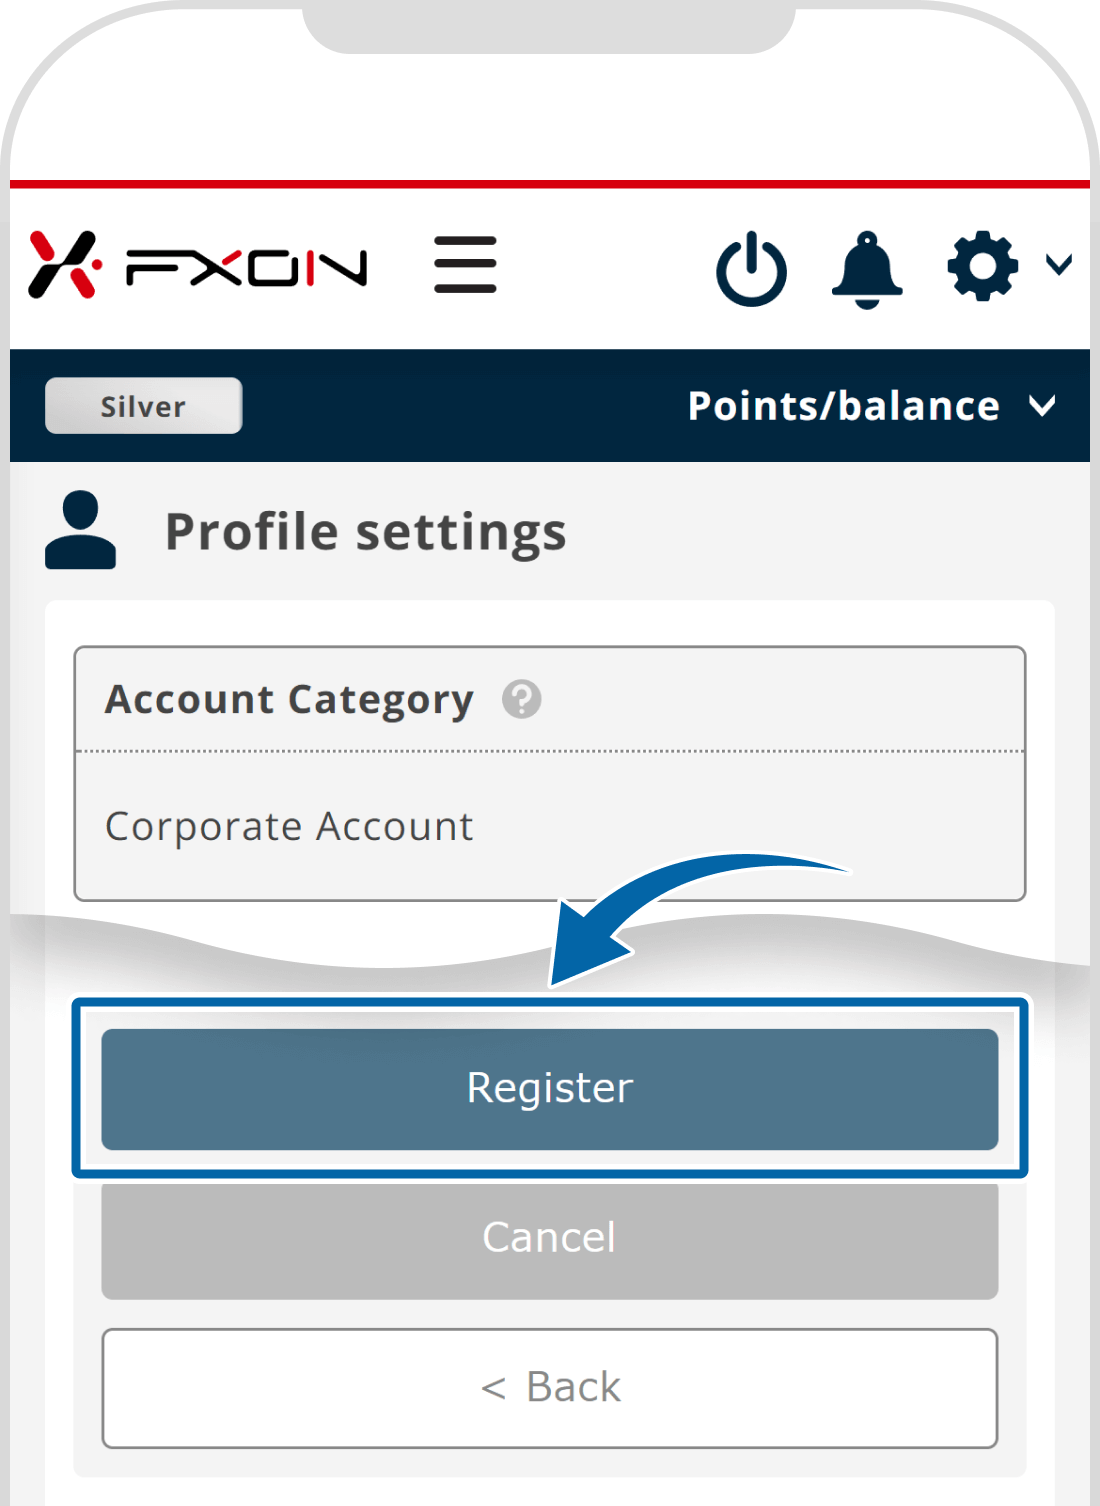
Make sure that everything is correct and click "Register".
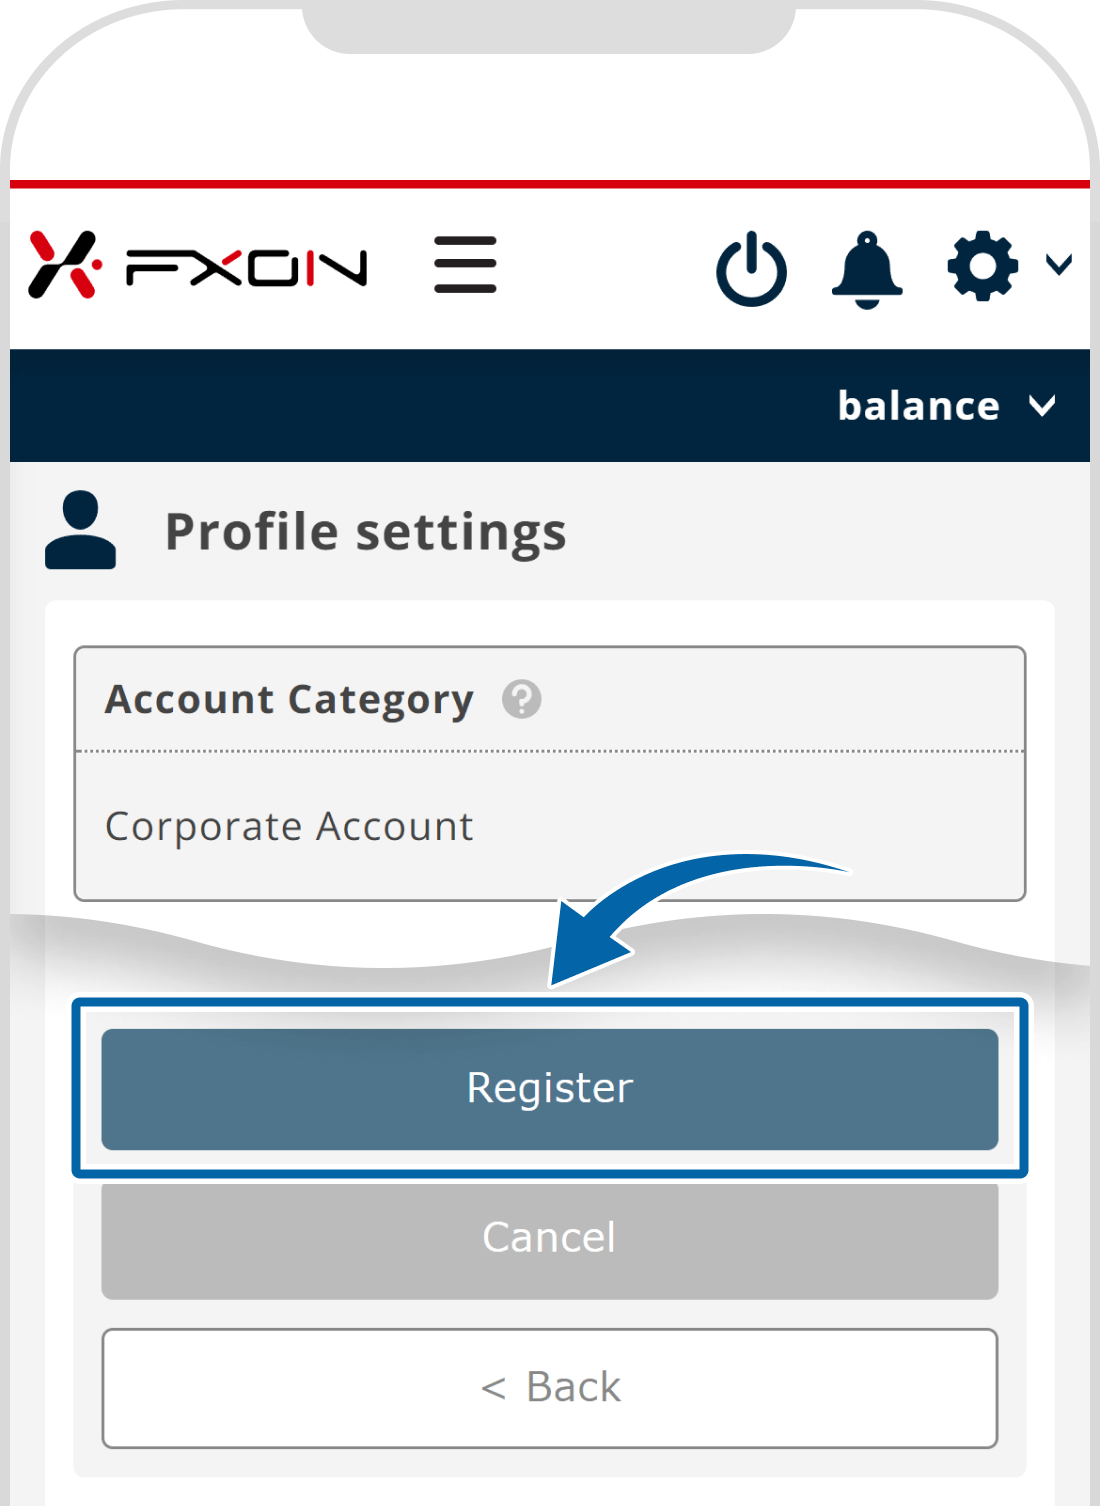
Make sure that everything is correct and tap "Register".
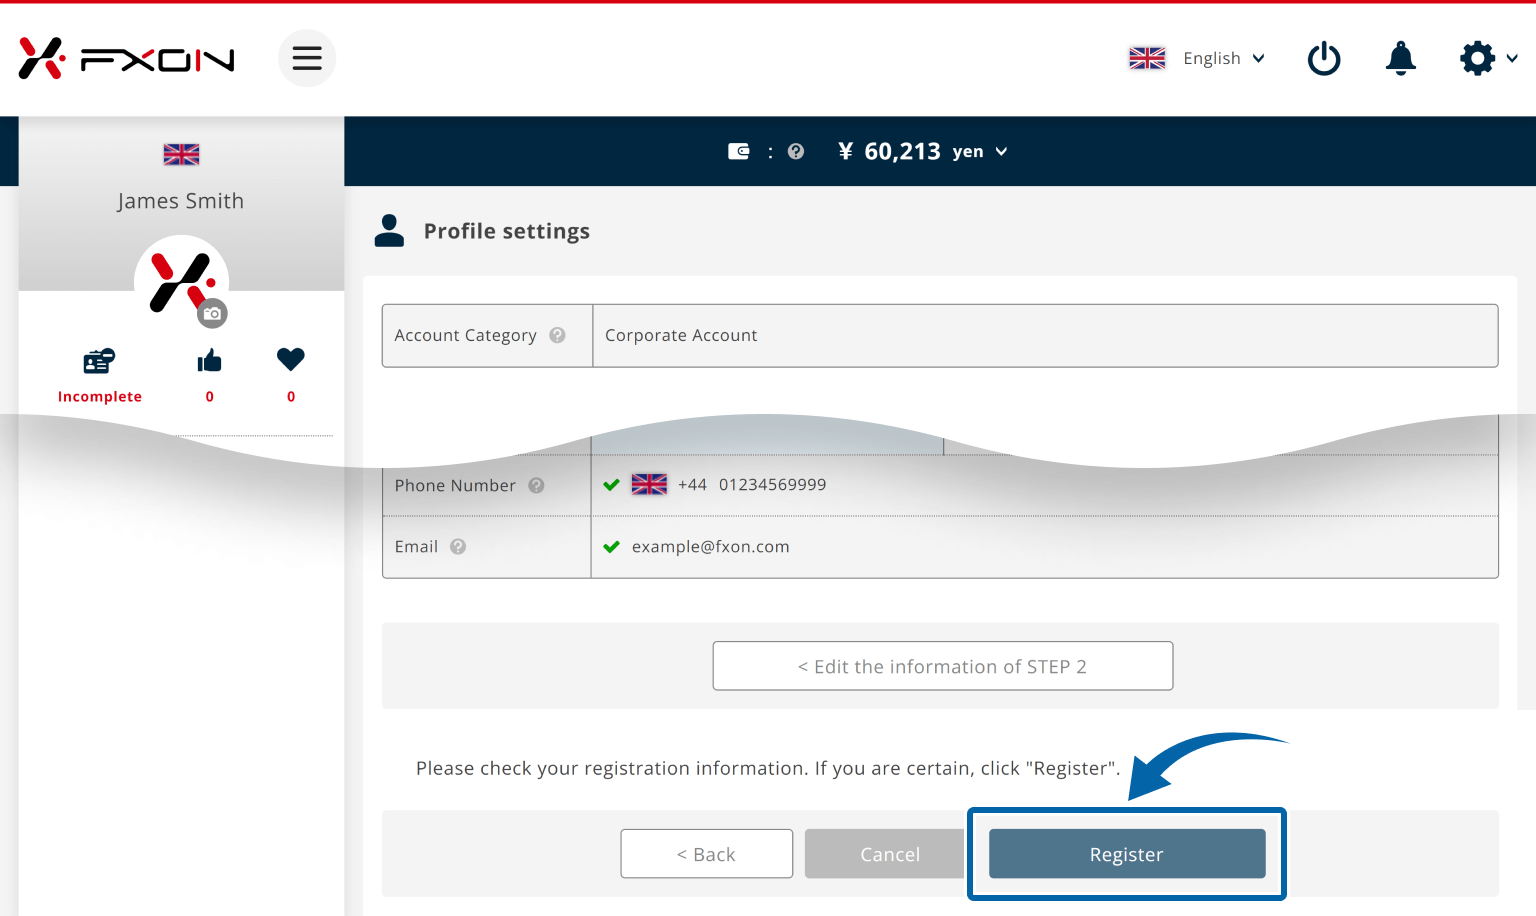
If you want to edit the information you entered, click the "Edit the information of STEP 1" or "Edit the information of STEP 2" button to edit the page for each step.
If you want to edit the information you entered, tap the "Edit the information of STEP 1" or "Edit the information of STEP 2" button to edit the page for each step.
If there are any errors or blanks in the input information, the "Register" button will not be displayed. Please check that required fields have not been selected or filled in, and that there are no errors in the input check in the red frame.
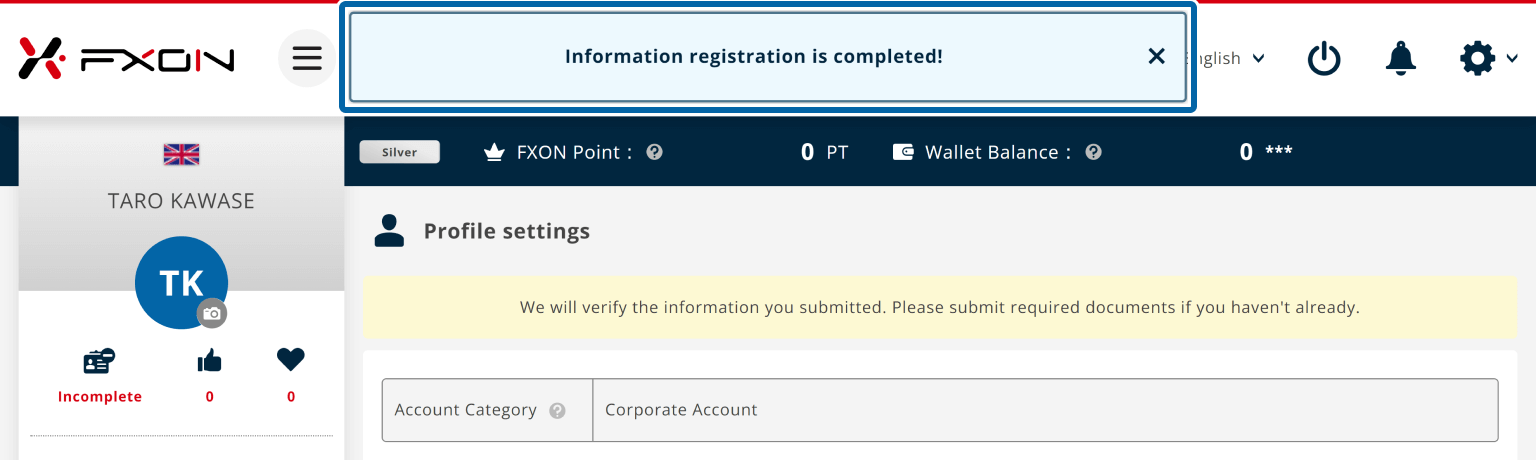
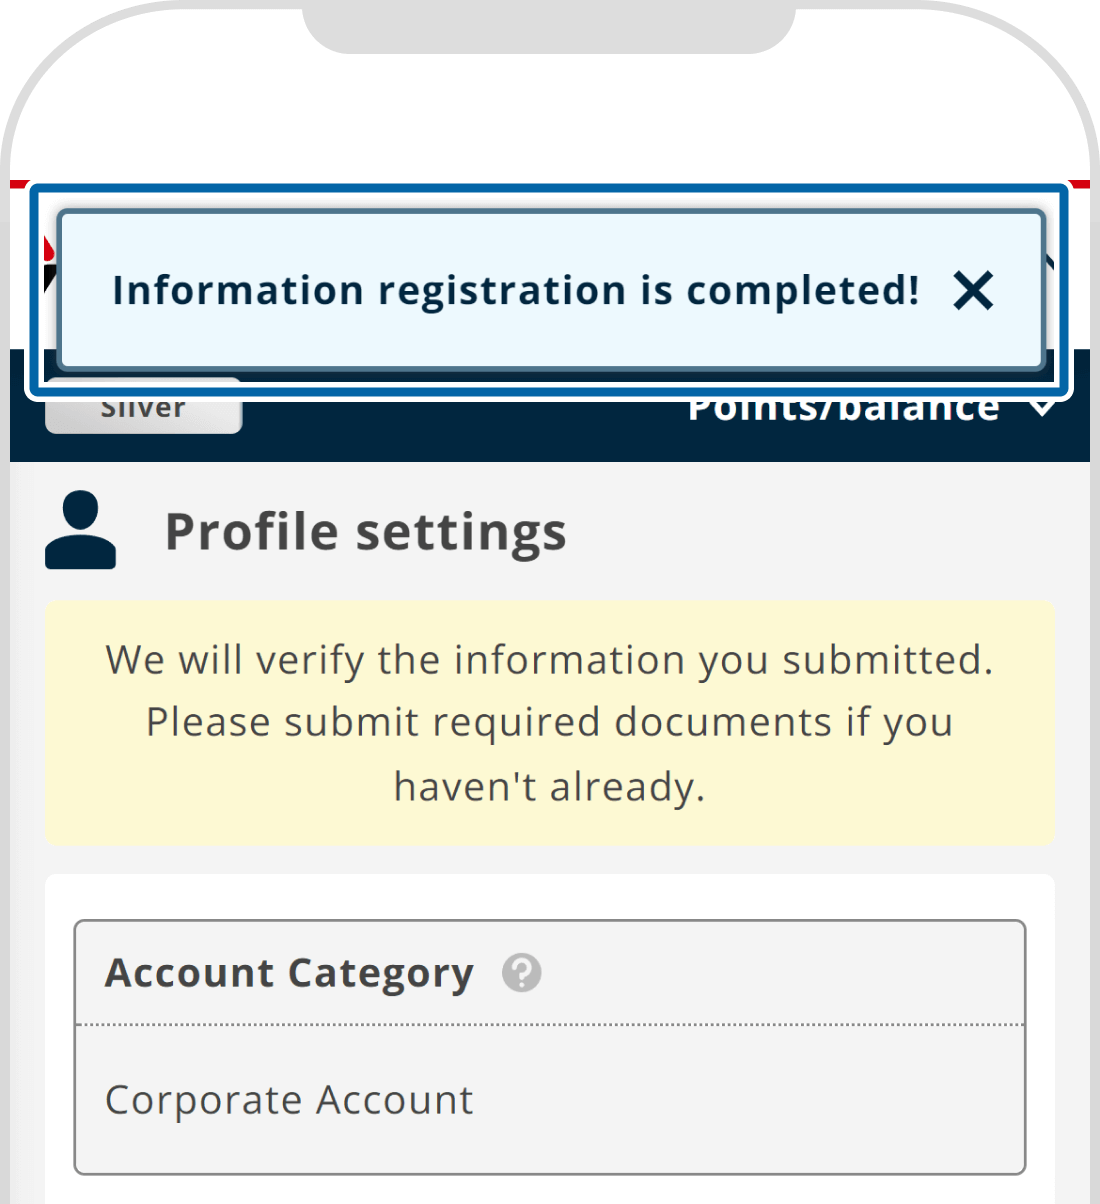
Once your profile has been registered, you will see the message "Information registration is completed!".
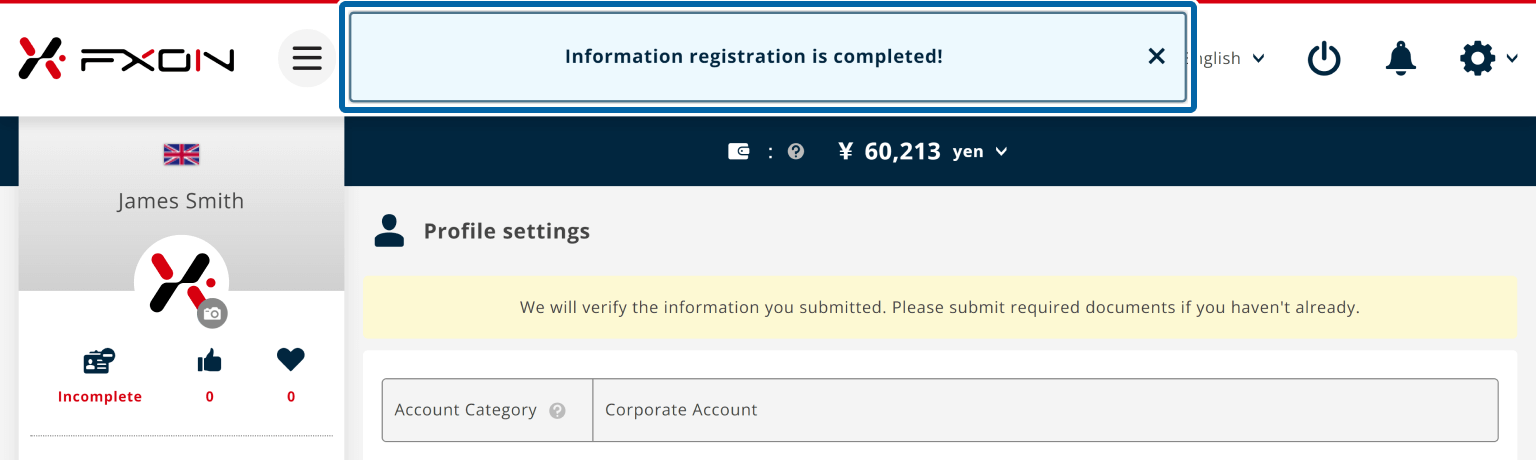

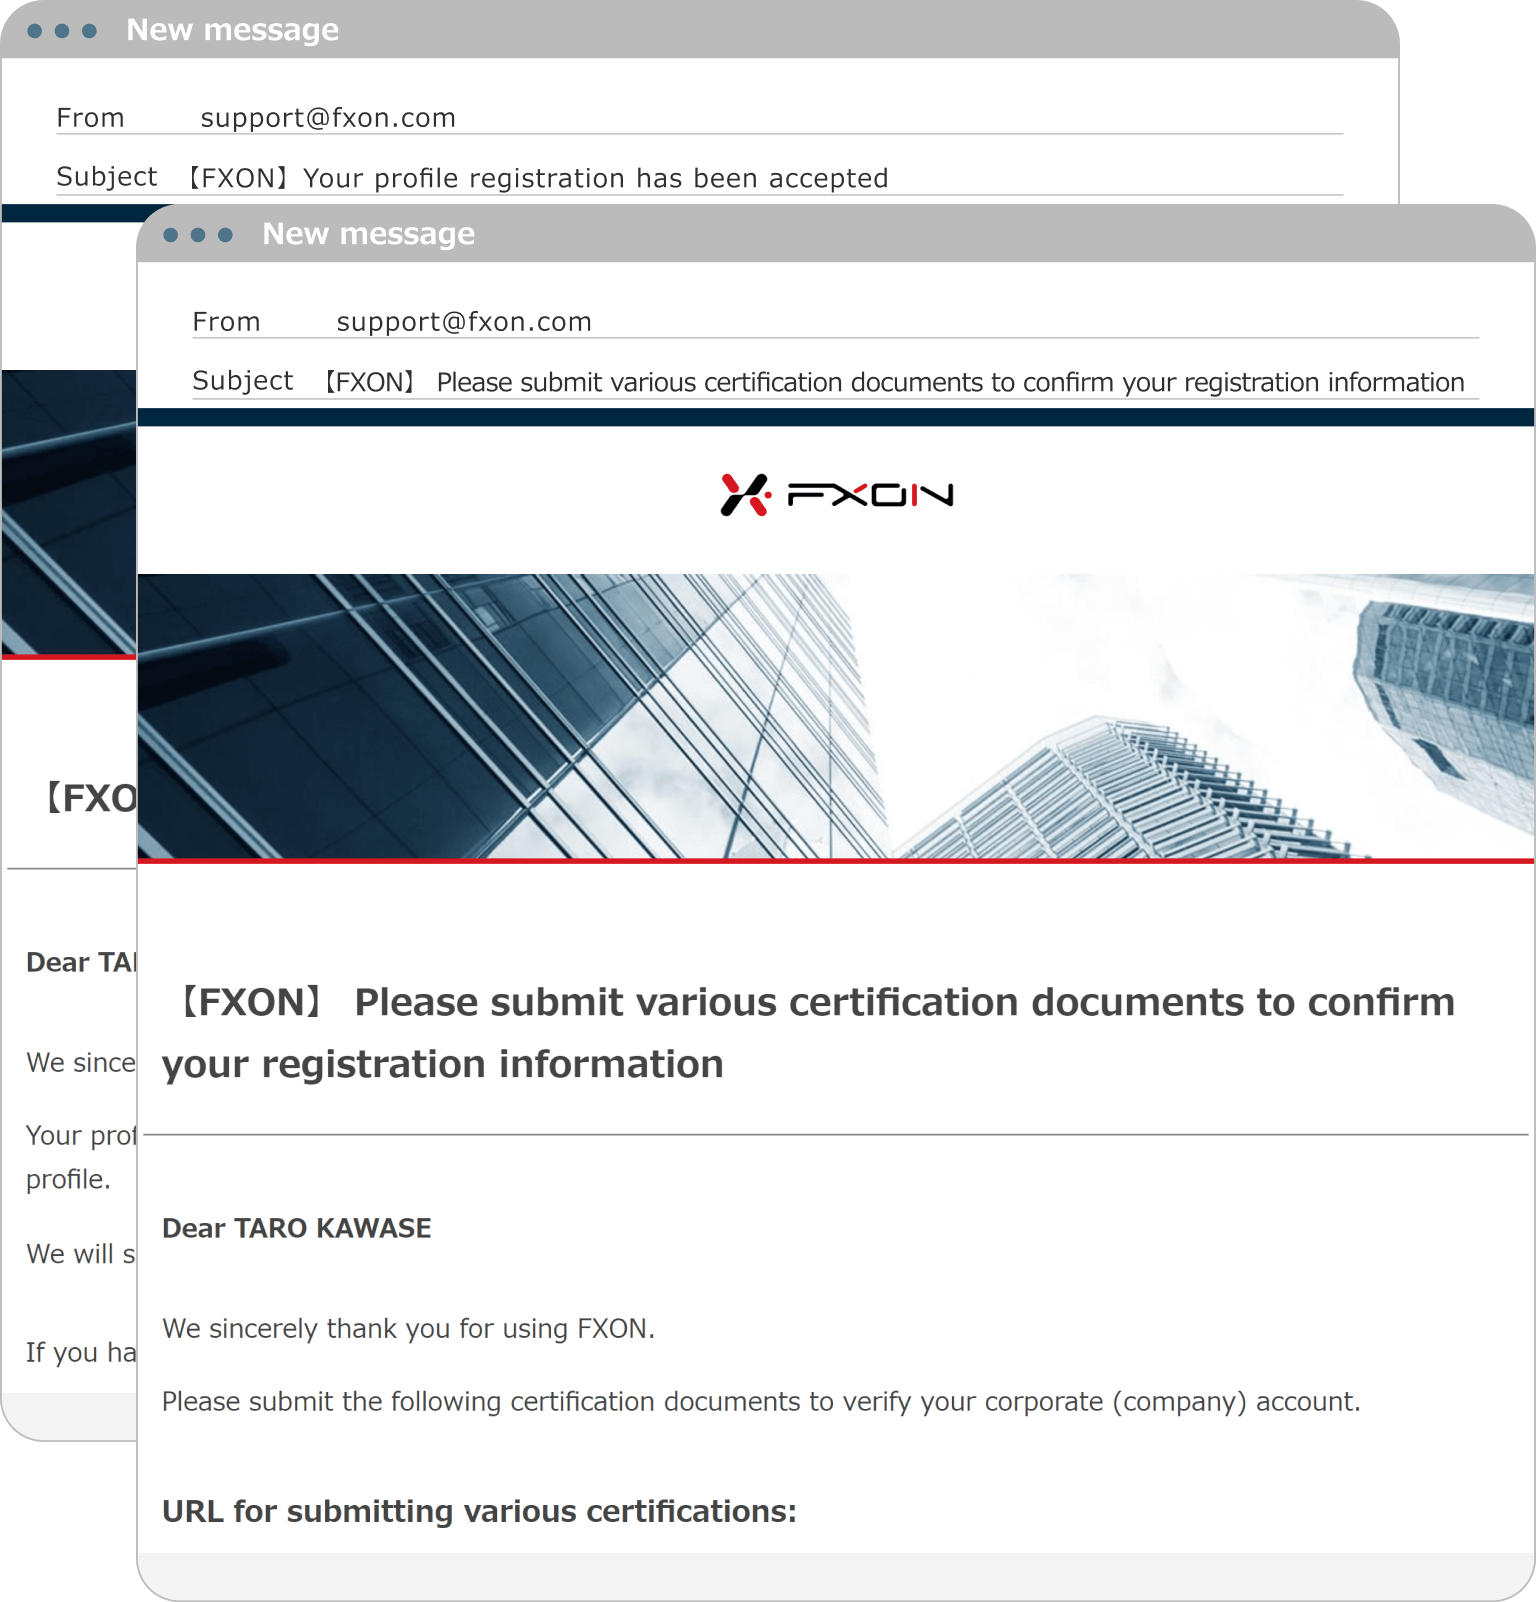
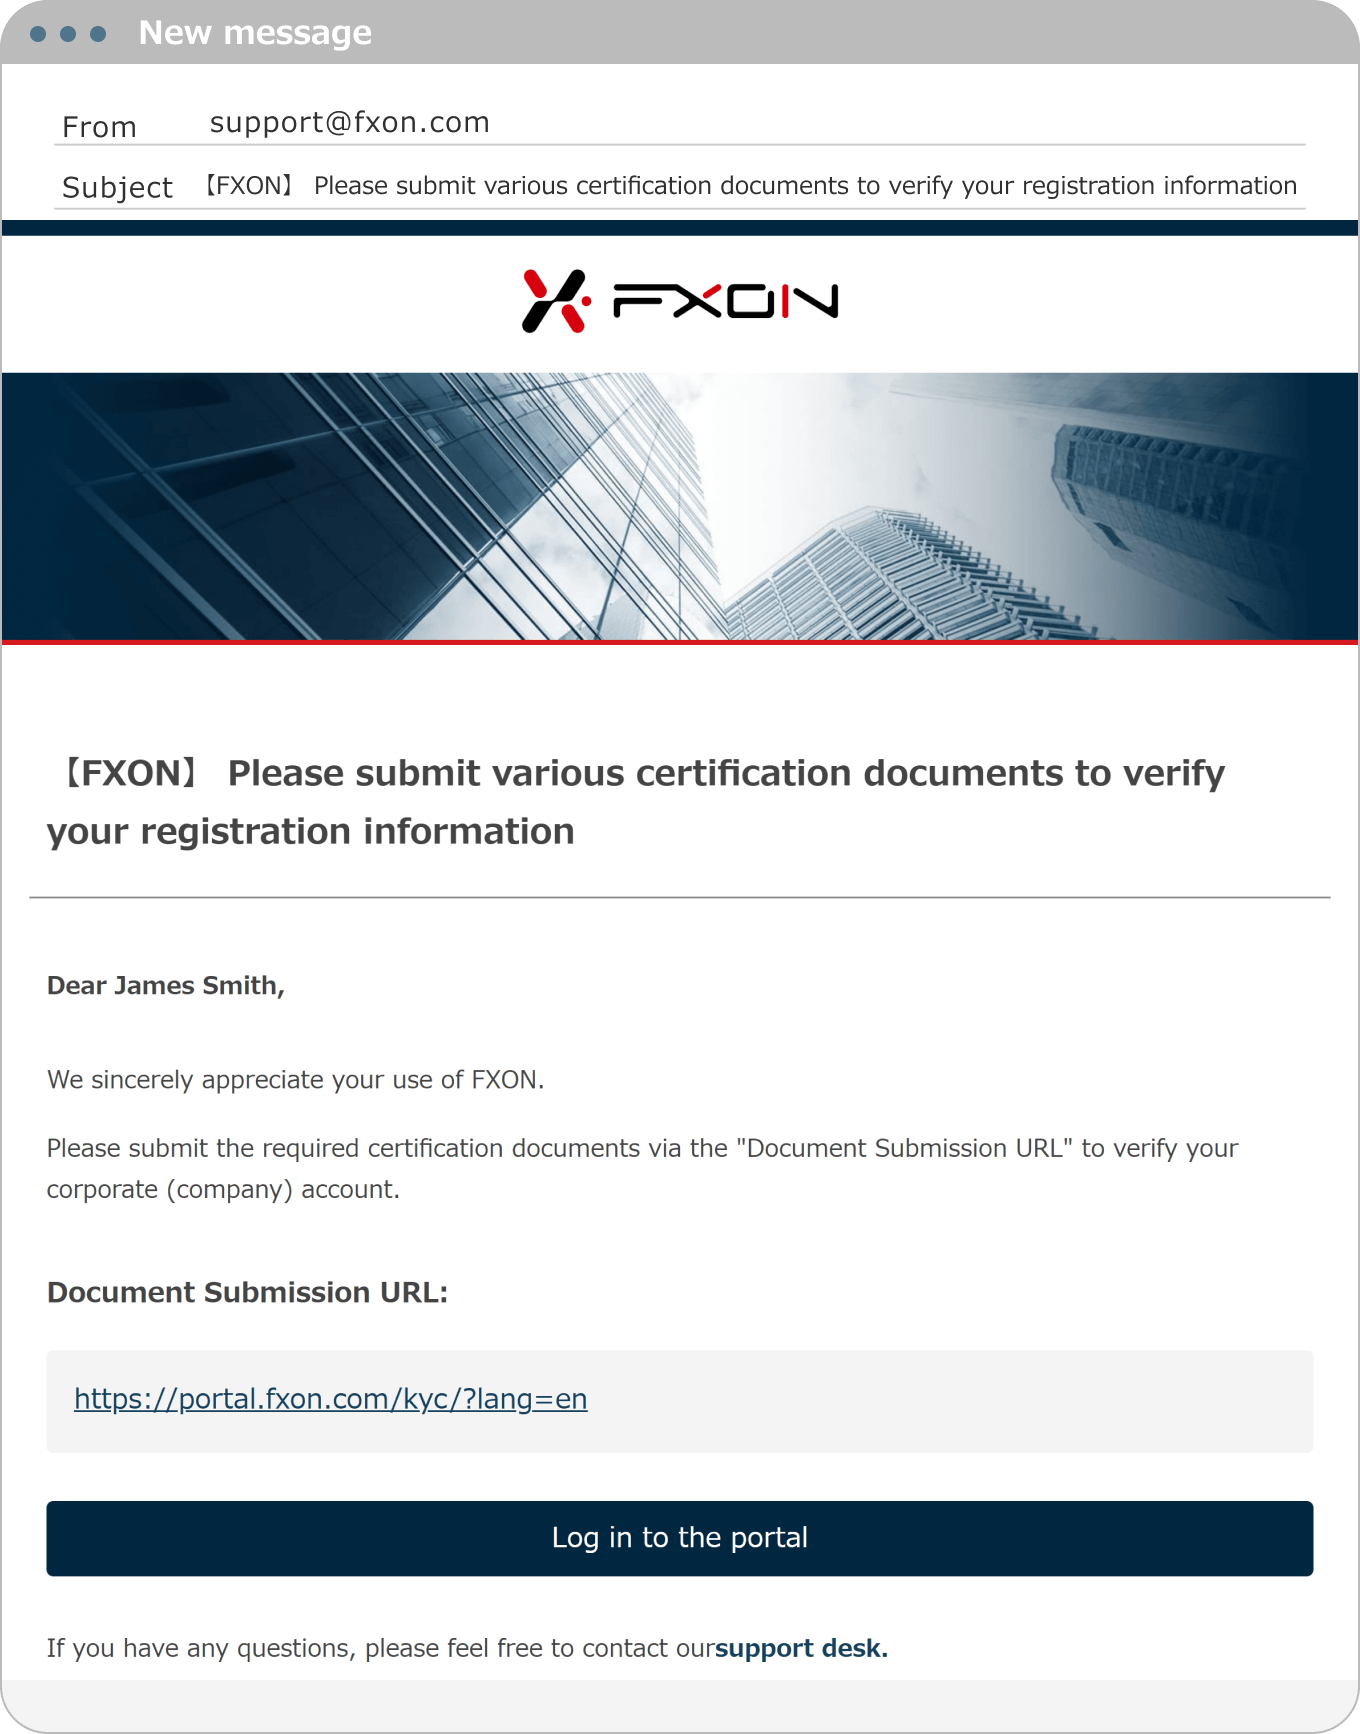
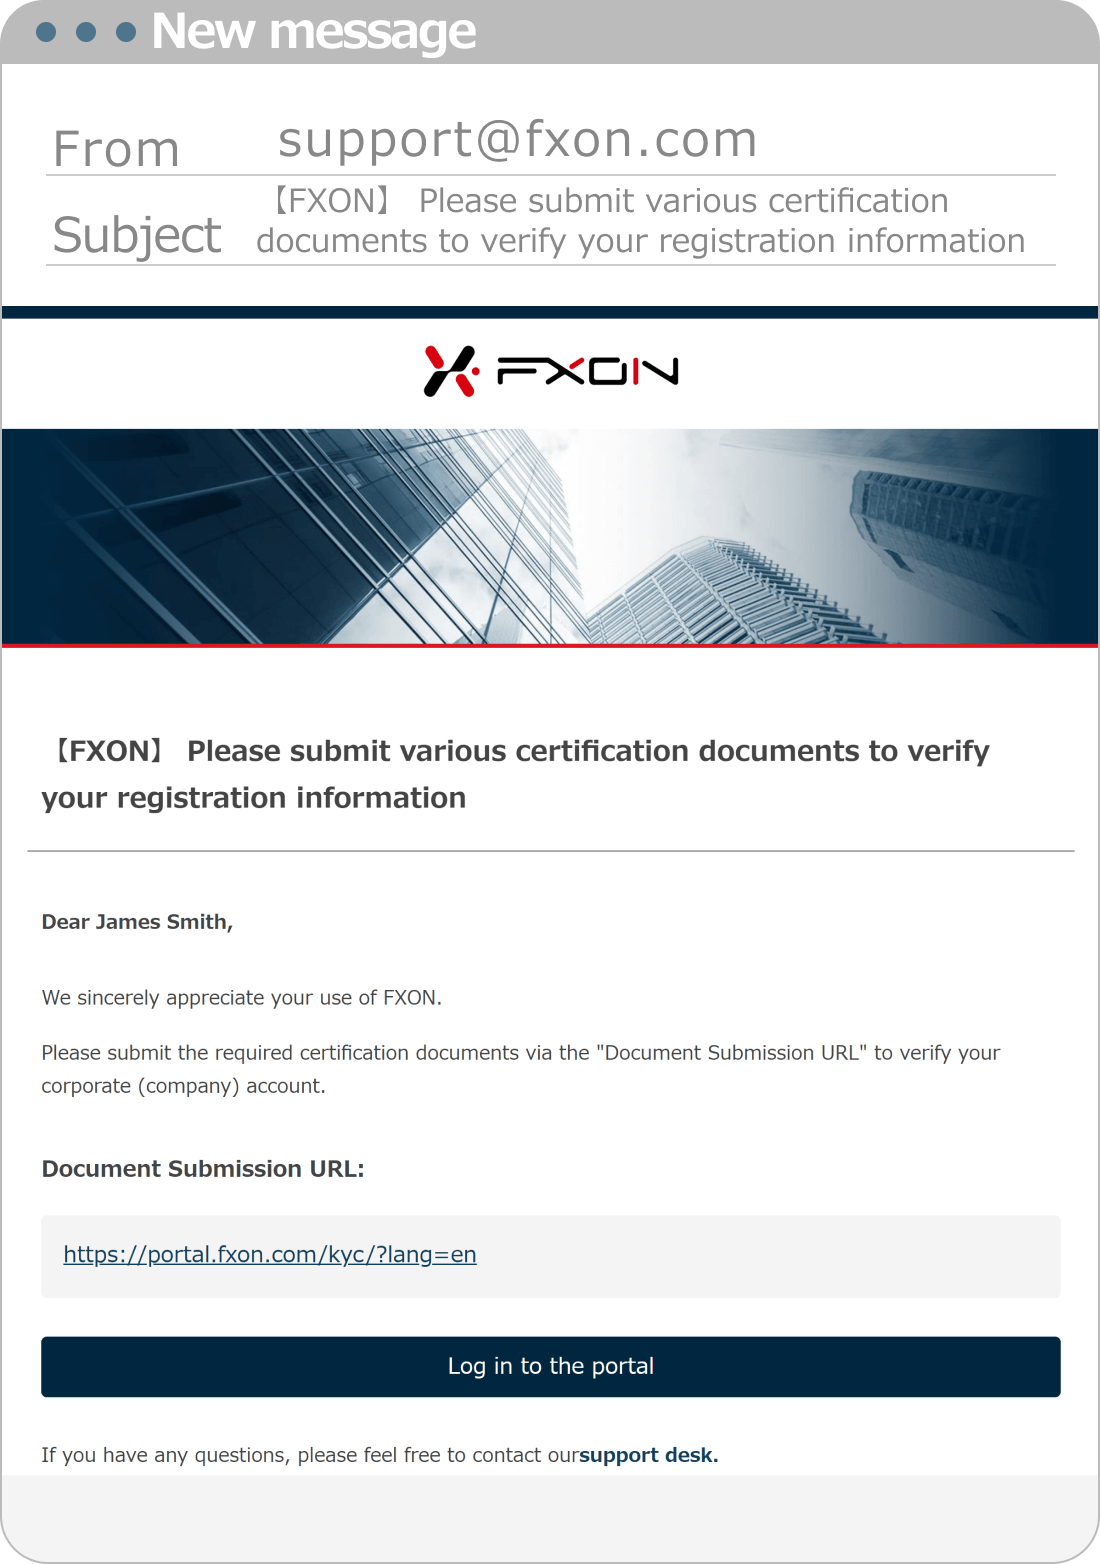
The following email will be sent to your registered email address.
An email with instructions for submitting the required documents will be sent to your registered email address. Please check the email and submit the necessary documents for opening a corporate account.
Was this article helpful?
That’s Great!
Thank you for your feedback
Sorry! We couldn't be helpful
Thank you for your feedback
Feedback sent
We appreciate your effort and will try to fix the article
0 out of 0 people found this article helpful.
2024.05.14
How to sign up for an FXON account (New Registration)
2024.05.14
How do I set up my profile?
2024.05.14
How long does it take to sign up?
2024.05.13
Is it free to sign up?
2024.05.14
How to sign up to FXON as corporate account (New Registration)